Learning how to choose a camera starts with a simple truth: the best camera is the one matched to what you actually photograph, not the one with the longest spec sheet. Beginners often shop by megapixels or by whatever a friend recommends, then discover six months later that the camera is too bulky to carry, too complicated to enjoy, or missing the one feature their favourite subject demands. This guide walks you through the decision in the same order experienced photographers make it: subject first, then camera type, then sensor and lenses, and only at the end the body itself.
By the end you will know how to read the handful of specifications that genuinely change your pictures, how to ignore the ones that mostly exist for marketing, and how to split your budget between body, lens and accessories so the kit you buy still serves you two years from now. Whether you shoot family birthdays, travel landscapes, your kids’ football matches or videos for a growing channel, the framework below adapts to all of it. Take notes as you go, because each step narrows the field until only two or three sensible candidates remain.
Disclosure: As an Amazon Associate, kajuandouglas.com earns from qualifying purchases. Links to Amazon on this page are affiliate links; they cost you nothing extra. Listing details such as price and availability change often, so check the current Amazon listing before you buy.
How to Choose a Camera: The Short Answer
Decide what you will photograph most, pick the camera type that suits that subject (compact, mirrorless, DSLR or action camera), choose a sensor size you can afford lenses for, and spend at least as much thought on the lens as on the body. Handle the camera before buying if you can, because ergonomics decide whether you carry it or leave it at home. Everything else in this guide expands those four decisions with the detail you need to make them confidently.
In this guide
What You Need
You do not need to buy anything to follow this guide, but a short honest inventory makes every later step easier. Gather the following before you start comparing models:
- A written list of your three most common subjects (for example: kids indoors, travel, birds) ranked by how often you shoot them
- Your current phone photos or old camera files, to check which focal lengths and lighting conditions you shoot in most
- A realistic total budget that includes a lens, a memory card, a spare battery and a bag — not just the body
- Access to a camera shop or a friend’s camera so you can hold candidate models and test the grip and menu system
- A note of any lenses or accessories you already own, since an existing lens collection can lock in your brand choice
How to Choose a Camera Step by Step
Work through these steps in order. Each one eliminates a large share of the market, which is exactly what you want: choosing gets easier, not harder, as you go.
Step 1: Define your main subjects honestly
Write down what you will photograph in a typical month, not what you dream of photographing once a year. A camera that excels at portraits — shallow depth of field, eye autofocus, good skin tones — is a different tool from one built for birds in flight, which needs fast burst shooting and long telephoto lenses. If video matters, say so now: hybrid shooters need a microphone input, a screen that flips toward you and reliable video autofocus, features that still-photo-focused bodies sometimes lack. Your subject list becomes the filter for every later step, so be specific: ‘low-light concerts’ and ‘bright beach holidays’ push you toward very different cameras.
Step 2: Pick the camera type that fits your life
Compacts and premium point-and-shoots are pocketable and simple, ideal when you want better quality than a phone without carrying a bag. Mirrorless cameras with interchangeable lenses are the mainstream choice today: compact bodies, electronic viewfinders that preview your exposure, and deep lens catalogues. DSLRs remain good value used, with optical viewfinders some photographers prefer and excellent battery life, though manufacturers now invest in mirrorless. Action cameras are rugged, waterproof specialists for sports and travel footage. Match the type to how you carry and shoot, because a camera left at home takes no pictures at all. Our guide to the best cameras for beginners shows how the types compare at entry level.
Step 3: Choose a sensor size you can grow with
Sensor size drives low-light quality, depth of field and system cost. Full-frame sensors gather the most light and give the shallowest depth of field, but bodies and lenses are bigger and pricier. APS-C sensors, found in most mid-range mirrorless cameras, balance quality, size and lens cost beautifully for most people. Micro Four Thirds goes smaller again, with compact lenses that travellers love. One-inch sensors in premium compacts are a clear step up from phones. There is no wrong answer, only mismatched ones: choose the largest sensor whose lenses you are genuinely willing to buy and carry. The camera sensor sizes explained guide goes deeper if you want the physics.
Step 4: Judge the lens system, not just the body
Bodies are replaced every few years; lenses stay with you for a decade. Before falling for a body, check that its mount offers the lenses your subjects need at prices you accept: a fast prime for portraits, a versatile zoom for travel, a telephoto for wildlife. Look at the second-hand market too — a healthy used market lowers your long-term costs dramatically. Also weigh lens size: a superb but heavy zoom you never carry is worse than a modest one in your bag. If you plan to shoot video, check which lenses focus quietly and smoothly, because noisy focus motors end up on your audio track.
Step 5: Check the handling and the screen in person
Specifications cannot tell you whether a grip fits your hand, whether you can reach the dials with gloves on, or whether the menu system makes sense to you in ten seconds. Visit a shop, hold the finalists, take test shots, and change settings with your eye at the viewfinder. Check the screen: a fully articulating screen matters for vloggers and low-angle shooters, while a simple tilting screen is faster for stills. Confirm the viewfinder is comfortable if you wear glasses. Cameras are personal tools, and the one that feels right gets used — that matters more than a small spec advantage.
Step 6: Verify the everyday practicalities
Finally, check the unglamorous details that decide daily satisfaction. Battery life varies enormously: mirrorless cameras shooting through electronic viewfinders drain batteries faster than DSLRs, so budget for a spare. Confirm the memory card type and whether the camera has one slot or two — dual slots matter for paid work. Check weather sealing if you shoot outdoors in rain, USB charging if you travel light, and Wi-Fi transfer if you post from your phone. Read the fine print on video limits too, since some cameras cap clip length or overheat in high resolutions, a topic covered in how to fix camera overheating when filming.
The Specifications That Actually Matter
Strip away the marketing and five specifications shape your results. Autofocus performance — especially subject and eye detection — decides how many moving-subject shots come home sharp. Sensor size and lens aperture together set low-light quality and background blur; megapixels beyond the low twenties matter mainly for large prints and heavy cropping. Burst rate and buffer depth matter for sports and wildlife. Video resolution and frame rates matter only if you shoot video. And stabilisation, in-body or in-lens, buys you sharper handheld shots at slow shutter speeds.
Just as important is what to ignore. Huge digital zoom numbers, scene-mode counts and exotic picture effects add nothing you cannot do better in editing. Very high megapixel counts on tiny sensors can even hurt low-light performance. If two cameras differ mainly in features you cannot connect to your subject list from Step 1, choose the cheaper one and put the savings toward a better lens — the classic advice exists because it keeps proving true. For a structured shortlist by budget, see our camera buying guide.
Budgeting: Body, Lens and the Hidden Third
A workable split for a first interchangeable-lens kit is roughly half the budget on the body, a third on the first lens or two, and the rest on the accessories that make the kit usable: a fast memory card, a spare battery, a protective filter, a bag that fits, and basic cleaning supplies. Skipping the accessory third is the most common budgeting error — a flagship body with a nearly dead battery and a slow card is a frustrating tool. Also reserve something for learning: a good photography book or course improves your pictures more than the next body tier does.
Buying used is the other great leveller. Camera bodies depreciate quickly while lenses hold value, so a one-generation-older body in good condition plus a better lens usually beats a brand-new entry body with a basic kit zoom. Buy used from reputable dealers who grade condition honestly and offer a short warranty, check the shutter count on DSLRs and mirrorless bodies, and inspect the sensor and mount contacts before the return window closes.
Gear for This Guide
These well-rounded interchangeable-lens cameras illustrate the categories above — a beginner-friendly Canon kit, a video-leaning Sony, an ultra-simple entry Canon and a value Panasonic hybrid. Compare their mounts and lens catalogues as you work through the steps:

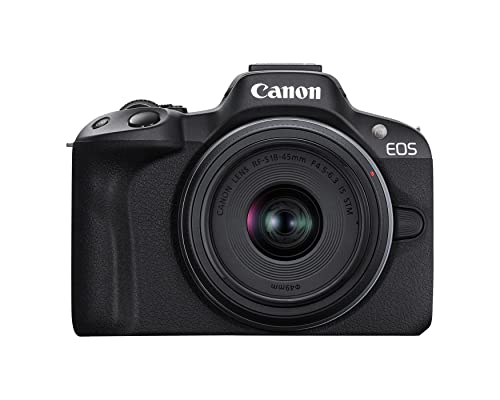
Canon EOS R50 Mirrorless Camera with RF-S 18-45mm Lens Kit — Check price on Amazon. A solid, widely available option that fits this guide; confirm the exact kit contents and lens mount on the listing before ordering.

Sony Alpha ZV-E10 APS-C Mirrorless Vlog Camera Kit — Check price on Amazon. A solid, widely available option that fits this guide; confirm the exact kit contents and lens mount on the listing before ordering.
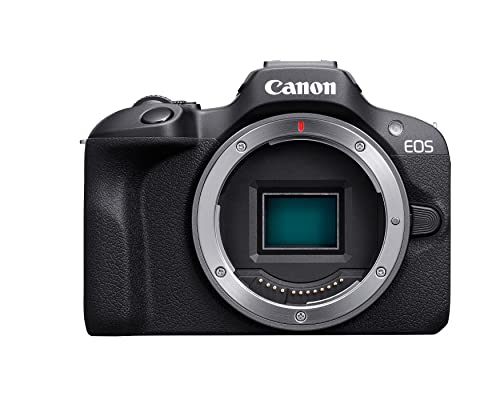
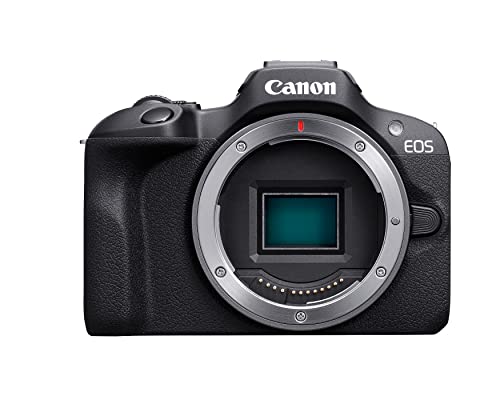
Canon EOS R100 Mirrorless Camera — Check price on Amazon. A solid, widely available option that fits this guide; confirm the exact kit contents and lens mount on the listing before ordering.

Panasonic LUMIX G7 4K Mirrorless Camera with 14-42mm Lens — Check price on Amazon. A solid, widely available option that fits this guide; confirm the exact kit contents and lens mount on the listing before ordering.
Common Mistakes
The classic mistake is buying for the photographer you wish you were instead of the one you are. A large full-frame kit bought for a once-a-year safari spends eleven months in a cupboard, while a smaller camera would have gone everywhere. Be honest about carry habits: if you dislike bags, choose a compact or a small mirrorless body with a pancake lens. A related error is chasing a friend’s brand without checking whether that system’s lenses suit your subjects and budget — brand loyalty should follow your needs, not precede them.
Another frequent error is spending the entire budget on the body and pairing it with the cheapest kit zoom, then blaming the camera for soft, dull images. The lens forms the image; the body records it. Finally, avoid buying on launch day. Prices settle within months, firmware updates fix early bugs, and real-world reviews reveal quirks that spec sheets hide. Patience is a genuine feature of a good purchase.
Pro Tips
Rent before you commit if a local rental shop or a friend can lend a finalist for a weekend. Two days of real shooting answers ergonomic and menu questions no review can. When you test, shoot your actual subjects in your actual light — a camera that delights at noon in a park may frustrate at a dim family dinner, and that dinner is where most family cameras earn their keep.
Keep a simple upgrade path in mind. Standardise on one lens mount, buy lenses that also fit the next body tier up, and keep boxes and receipts for resale. Photography rewards consistency: the longer you stay with one system, the more its controls become muscle memory, and the better your pictures get — regardless of which system it is. When you are ready to shortlist models, our best cameras for photography roundup is a good next stop.
A Worked Example: Three Buyers, Three Right Answers
Abstract advice lands better with faces on it. Consider a parent photographing two children, mostly indoors and at weekend sport. Her subjects move, her light is often poor, and her budget is mid-range. The framework points her to an APS-C mirrorless body with strong eye and animal detection, the kit zoom for sport, and — bought within the year — a fast prime for indoor portraits. A full-frame body would have consumed the prime’s budget and gained her little, because her keeper rate was being decided by autofocus, not sensor size.
Now a landscape photographer who hikes: weight is a specification, not a preference. He chooses Micro Four Thirds or APS-C, a wide zoom and a standard zoom, and a tripod he will actually carry — a system half the weight of the full-frame alternative, whose image quality in daylight at base ISO matches what he prints. Third, a hybrid creator filming interviews and products: she prioritises a flip screen, microphone input, proven recording limits and 10-bit colour over stills burst rates, and lands on a video-leaning mirrorless body her stills-only friends would not have shortlisted. Three buyers, three different ‘best cameras’ — each correct, because each started from subjects rather than specifications.
How to Choose a Camera When You Cannot Decide
If two finalists survive every step and analysis stalls, use tie-breakers in this order. First, the lens you will buy next: price it in both systems; the cheaper path usually wins because you will walk it for years. Second, the used market near you: the system with deeper local second-hand supply costs less to own. Third, the viewfinder and grip test on a tired day — ergonomics compound over thousands of frames. Fourth, small operational joys: USB charging on trips, a silent shutter for your theatre-going, weather sealing for your climate. Specifications rarely separate finalists; ownership details always do.
And set a decision deadline. Camera research has diminishing returns after the framework is applied, because the remaining differences are smaller than the differences between photographers. The photographs you take while deliberating are lost permanently, while the marginal specification you might gain is worth, at most, a handful of frames a year. Choose the camera that fits your subjects, your hands and your budget, buy it from a seller with a fair returns policy, and spend the next month learning it deeply — depth with one camera beats breadth across three shortlists, every time.
Matching the Camera to How You Actually Shoot Week to Week
The step-by-step process earlier in this guide starts with your main subjects, and that is the right place to begin, but subjects alone do not tell the whole story. Two people can both say they photograph family life and end up needing quite different cameras, because the rhythm of their shooting is different. One shoots almost every day in short bursts around the house, in mixed indoor light, and wants the camera within arm’s reach on a shelf. The other shoots mainly on weekend trips and holidays, carries the camera for hours at a time, and edits a large batch of images on a Sunday evening. The first photographer benefits most from fast start-up, reliable eye autofocus in dim rooms, and a body small enough that it never feels like an event to pick it up. The second benefits from battery endurance, a comfortable grip for long walks, weather resistance for unpredictable days, and a screen that stays readable in bright sun. When you test cameras in a shop, try to recreate your real rhythm rather than your ideal one. Hold the camera the way you would on a tired afternoon, not the way you would in a studio portrait session.
Think also about where your photographs end up. If almost everything is viewed on phones and shared with family, you do not need the largest files or the most demanding lenses, and you will gain more from a camera that transfers images to your phone quickly and painlessly. If you print large for walls, exhibit work, or crop heavily from wildlife frames, file quality and lens sharpness move up the priority list. Neither answer is more serious than the other. Problems start when someone buys for an audience they do not actually have, paying in size, weight and complexity for headroom they never use, while neglecting the everyday features they would have enjoyed daily.
Light matters more than the spec sheet suggests
Most beginners underestimate how much of their photography happens in poor light. Kitchens in the evening, school halls, restaurants, winter afternoons and shaded woodland are all far darker than they feel to your eyes, because human vision adapts so smoothly. A camera that handles dim conditions gracefully, with clean high-ISO files and autofocus that still locks on when the room feels moody, will produce more keepers than a camera with a longer feature list that struggles after sunset. When comparing models, look at sample images taken indoors at the sensitivities you would realistically use, not only at bright daylight samples. Pay attention to skin tones under mixed household lighting, because that is the test most family photographers actually face.
Flash is the other half of the light question, and it is often ignored until it is needed. Some compact and entry mirrorless bodies include a small built-in flash that is genuinely useful for fill light and casual indoor snapshots, while many enthusiast bodies expect you to add an external unit later. Neither approach is wrong, but you should know which camp your shortlisted camera falls into before you buy. If you know you will photograph evening gatherings straight away, a body that works well with a simple bounce flash, and a hot shoe that supports the main flash systems, saves frustration later.
Sound, discretion and the social side of a camera
A camera is also a social object. A large body with a loud shutter changes how people behave in front of it, which matters for candid family photography, weddings, street work and any setting where you want subjects to forget the camera is there. Fully electronic shutters can be silent, which is wonderful for ceremonies and sleeping babies, although they can introduce rolling-shutter distortion with fast movement and banding under some artificial lights. Mechanical and electronic first-curtain modes are the everyday compromise most photographers settle on. If discretion matters to you, test the shutter sound in the shop and ask how the silent mode behaves. It is a small detail on a comparison table and a large detail in real rooms.
Understanding Lenses as a Five-Year Decision
Buyers naturally focus on the body because it is the expensive box with the model name on it, yet experienced photographers will tell you that you are really choosing a lens system for the next several years. Bodies are replaced far more often than good lenses. A lens you buy today can still be serving you on a future body long after the original camera has been sold, provided you stay within the same mount. That is why the earlier advice to judge the lens system deserves extra weight. Look at the whole native lens catalogue for the mount you are considering, not just the kit lens in the box. Check whether there is an affordable bright prime for portraits, a versatile travel zoom that is not too heavy, and, if your interests lean that way, a telephoto option you could realistically add later. You do not need to buy them now. You need to know they exist at weights and tiers you can live with.
Third-party lenses complicate the picture in a helpful way. On some mounts, independent makers offer excellent alternatives that fill gaps in the native range, particularly bright standard zooms and compact primes. On other mounts, the native maker still dominates and third-party choice is thinner, especially for autofocus lenses. If you have a favourite type of lens in mind, verify that something like it exists for your chosen system before committing. Also consider filter size. Lenses that share a filter thread let you carry one set of polarising or neutral-density filters instead of several, which keeps a travel kit simpler and lighter.
Why the kit lens decision deserves a second look
The standard advice is either to buy the kit lens because it is inexpensive when bundled, or to skip it and buy a better zoom immediately. The honest answer depends on whether you already know your preferred focal lengths. Beginners usually do not, and for them the humble kit zoom is a useful learning instrument: after a few months, your photo library will show you whether you live at the wide end, cluster around the middle, or constantly wish for more reach. That evidence is worth more than any forum argument. Buy the kit, shoot widely, then let your own metadata guide your first serious lens purchase. Photographers who already know they shoot portraits, or wildlife, or architecture can reasonably skip ahead, because their focal-length habits are already formed.
One more lens point is easy to miss: minimum focus distance. If you enjoy photographing food, plants, crafts, products for online selling, or details on walks, a lens that focuses close can be more valuable than a nominally sharper lens that forces you to stand back and crop. Several modern standard zooms offer surprisingly capable close-up performance at their wide end. Check that specification if close work appeals to you, and test it in the shop with a coin or a watch face.
A Practical In-Shop and At-Home Testing Routine
Specifications cannot tell you whether a camera’s menus will irritate you every day, so build a short, repeatable test you can apply to every model on your shortlist. In the shop, start from the camera being switched off. Time how long it takes to raise it, switch on, focus on a face across the room and take a picture. Then change the ISO, move the focus point, and adjust exposure compensation without looking at a manual. Note which tasks needed a menu dive. Fit the largest lens you might plausibly buy and hold the combination for two full minutes; weight that feels fine for twenty seconds can become a negotiation after an hour’s walk. If the shop allows it, take the same photograph of the same shelf or window display with each candidate, using similar settings, and view the results side by side later at full size on your own screen rather than judging on the camera’s rear display.
At home, if you buy from a seller with a sensible returns window, treat the first week as an extended test rather than a honeymoon. Photograph your hardest normal subject, not your easiest. That might be a child moving indoors, a black dog in shade, a white dress in sun, or a band in a dim venue. Review the files honestly. Check how many frames are focused where you intended, how the colours look with minimal editing, and whether the camera’s automatic white balance copes with your household lighting. A camera that passes your hardest ordinary test will rarely disappoint you on easier days.
Questions to ask about support, not just features
- How easy is it to find spare batteries, chargers and straps for this system in your country, both new and used?
- Does the maker offer a cleaning and checking service, and is there an authorised repair centre you could realistically post the camera to?
- How long has the mount been in production, and are new lenses still being released for it regularly?
- Can the camera charge over USB while travelling, and does it still work normally while plugged into a power bank?
- Are firmware updates still arriving for this model, and do they add features or only fix faults?
None of these questions appears on the front of the box, yet they shape ownership more than a fractional difference in sensor performance. A slightly less fashionable system with plentiful accessories, active lens development and accessible servicing is often the wiser long-term home for your money.
Choosing for Video, Stills, or a Genuine Hybrid Life
Many buyers describe themselves as wanting a camera for photos and video, but the balance matters. A stills-first photographer who records occasional family clips needs very different things from a creator who films long interviews, lessons or events every week. For serious video, look beyond headline resolution. Check how long the camera can record in the modes you will actually use, whether it overheats in a warm room, whether the screen can face you for self-recording, and whether there are microphone and headphone sockets so you can both capture and monitor sound properly. Rolling shutter behaviour, autofocus smoothness during recording, and the availability of a flat or log profile for grading all matter more to a working video shooter than an extra stills burst mode ever will.
Conversely, stills specialists should not pay a premium for video features they will never open. If your interest is landscape, portrait or documentary photography, prioritise viewfinder quality, dynamic range at base sensitivity, lens choice and handling with gloves or tripods. Hybrid shooters sit in the middle and should be honest about the split. If eighty percent of your output will be stills, buy a stills-leaning camera with competent video rather than a video-leaning body that compromises the stills ergonomics you will use daily. The reverse is equally true for committed filmmakers.
The phone question, answered more carefully
The existing sections already address whether a dedicated camera is worth it alongside a good phone, and the short answer stands. The longer answer is that the two devices excel at different parts of the photographic process. Phones are unbeatable for immediacy, computational night modes, and sharing within seconds. Dedicated cameras are stronger when you want deliberate control, optical reach, consistent results across a long session, and files that tolerate serious editing. Many photographers end up using both without any sense of contradiction: the phone for the everyday record, the camera for occasions, projects and subjects they care about most. Framing the purchase that way, as adding a specialist tool rather than replacing your phone, usually leads to a calmer and better-judged decision.
Making the Final Decision Without Regret
When two or three cameras remain and the comparison tables have stopped helping, switch to a different kind of evidence. Rent or borrow your leading candidate for a weekend if that option exists locally, or buy from a seller whose returns policy lets you test properly at home. Spend that time shooting your real life, not test charts. Afterwards, write down three things: what the camera made easy, what it made annoying, and what you found yourself working around. Workarounds are the most revealing category, because you will repeat them for years. A camera you have to work around every session is the wrong camera, however impressive its laboratory numbers.
Finally, set a stopping rule before you buy accessories. Start with the body, one versatile lens, a card, a spare battery and a bag, then shoot for a month before adding anything else. Let actual gaps announce themselves. The tripod, flash, extra prime or longer zoom you buy after a month of evidence will be the right one, at the right tier, for the photography you genuinely do. That patience, more than any single specification, is what separates a kit that gathers dust from a kit that becomes part of your life.
Second-Hand Buying, Done Carefully
A large share of photographers buy at least part of their kit used, and for good reason: lenses in particular hold their capability for decades, and a previous-generation body often delivers most of the current model’s real-world performance. Used buying does, however, change what you need to check. For a body, ask about the shutter count if the seller can show it, inspect the sensor with a test shot against a plain wall at a narrow aperture, and work every dial, button and door through its full travel. Check the mount for looseness, the hot shoe for damage, and the battery door and card door for cracked hinges, because those small parts decide whether a bargain stays a bargain. For a lens, shine a torch through the glass from both ends and look for haze, fungus threads, and scratches on internal elements, then test autofocus and the aperture blades by stopping down while watching the front of the lens.
Buy used from a dealer with a warranty and a returns window when you can, even if the headline saving is smaller than a private sale. The warranty is not pessimism; it is pricing in the reality that you cannot fully test a camera in a car park. If you buy privately, meet somewhere public, bring your own card and battery where the system allows, and take test photographs you can review at full size before money changes hands. Photographers who follow that routine rarely have horror stories, because most faults announce themselves to anyone who looks methodically.
Trade-ins, bundles and the true cost of switching systems
Switching systems is the most expensive decision in photography, so it deserves cold arithmetic. Your lenses, flashes, batteries and even memory cards may not follow you to a new mount, and adapters, while excellent for many manual and autofocus lenses, add cost and sometimes compromise the handling you were switching to obtain. Before switching, list what you own, what each item would realistically sell for, and what its replacement in the new system would cost at the tier you actually need. Then ask what specific photographs the new system would let you take that the old one genuinely cannot. If the answer is a clear, repeated need, such as reliable eye autofocus for paid portrait work or silent shooting for ceremonies, the switch may be entirely justified. If the answer is a general feeling that the grass is greener, keep your system and spend the same money on a lens or a trip, both of which improve photographs more reliably.
Ergonomics for Real Hands, Gloves and Glasses
Handling advice usually stops at grip comfort, but a few specific groups should test more deliberately. Glasses wearers should check the viewfinder with their glasses on: eye relief varies between models, and a finder you cannot see fully without pressing your glasses against the eyepiece will annoy you on every outing. Look for a finder with generous eye relief and an adjustable diopter range that covers your prescription if you prefer shooting without glasses. Photographers who work in cold climates should test the main controls while wearing their usual gloves. Some cameras remain usable with thin gloves thanks to large dials and a well-shaped shutter button; others become exercises in frustration. Left-handed photographers, and anyone with limited grip strength or joint pain, should pay attention to weight distribution rather than weight alone, and consider a body with a lighter standard zoom, a wrist strap option, and controls that do not demand strong pinch grips, such as battery doors and lens release buttons.
None of this appears in review scores, and all of it decides whether a camera gets carried. The best camera for you is the one that disappears into your routine, and routine is built from these unglamorous details far more than from laboratory charts.
Memory Cards, Batteries and the Ownership Details That Decide Daily Satisfaction
Two cameras with identical image quality can feel completely different to own because of their everyday logistics. Memory card format is one such detail. Some bodies use widely available cards that every camera shop stocks, while others rely on faster, tougher card types that cost more and may need a dedicated reader. Neither is a reason to reject a camera, but you should price the full working set, two cards and a reader if needed, into your comparison rather than discovering it at the till. Card speed also matters if you shoot bursts or high-resolution video, because a slow card turns a fast camera into a camera that pauses to clear its buffer at the worst moment. Buy cards from reputable sellers, since counterfeit cards are common and fail in ways that lose photographs.
Battery systems differ just as much. Some cameras sip power and last a long weekend; others, especially compact mirrorless bodies driving bright electronic finders, expect a spare battery as standard equipment. Check whether the battery is shared with other models in the range, which makes spares and chargers easier to find for years, and whether the camera can run from USB power for long video sessions or time-lapse work. Chargers matter too: a body supplied without a separate charger, relying on in-camera USB charging, is fine for travellers and mildly annoying for anyone who wants one battery charging while another is in use. These are small line items individually, but together they form the texture of ownership, and ownership is measured in years.
Finally, consider software. Every system expects you to move photographs to a phone or computer somehow, and the quality of that app or transfer process varies enormously. A camera whose wireless transfer is painless gets used for everyday moments; one whose app fails regularly trains its owner to leave it at home. Read recent user experiences of the companion app for any system you are seriously considering, because that unglamorous piece of software may decide how much you enjoy the camera more than any lens in the catalogue.
A Note on Trying Cameras Through Your Local Camera Community
One underused resource sits between reading reviews and spending money: other photographers nearby. Camera clubs, photography walks and local retailer demo days all put real cameras into your hands in real light, usually with owners nearby who can tell you what living with that system is actually like, including the annoyances no review mentions. If you attend one, arrive with two or three specific questions rather than a general hope of clarity, and handle the cameras that answer those questions. Borrowing a member’s older body for an afternoon, with permission and care, has settled more buying decisions than any comparison chart, because an afternoon of your own photographs is evidence about your hands, your subjects and your patience, and no one else’s evidence can substitute for it.
Related Guides
- best cameras for beginners under 300
- best cameras for photography under 1000
- best cameras for travel
- best cameras for vlogging
- best cameras for youtube
Frequently Asked Questions
Is mirrorless better than DSLR for a beginner?
For most beginners today, yes. Mirrorless cameras show your exposure in the viewfinder before you shoot, offer excellent eye-detection autofocus, and are where manufacturers release new models and lenses. DSLRs still make sense used, where they are inexpensive and their battery life is superb, and some photographers simply prefer an optical viewfinder. Either can teach you photography; the skills transfer completely between them.
How many megapixels do I actually need?
For social media, family prints and enlargements up to roughly A3 size, anything from about 20 to 26 megapixels is more than enough, and that covers most modern cameras. Higher counts help if you crop heavily, shoot wildlife at a distance, or print very large. Remember that high resolution also demands better technique and larger files, so more is not automatically better for a learner.
Should I buy a camera kit with a lens included?
Usually yes for a first camera. Kit zooms are inexpensive when bundled, cover the most-used focal lengths, and let you learn which focal lengths you favour before buying dedicated lenses. The exception is when you already know your subject — a portrait shooter may go straight to a body plus a fast prime lens. Either way, check exactly which lens the kit includes, because bundles vary.
Which brand should I choose: Canon, Sony, Nikon or Fujifilm?
All four make excellent cameras, and image quality differences at the same sensor size are small. Choose by lens catalogue, handling and price: hold the bodies, check that the lenses you want exist in that mount at prices you accept, and look at the used market near you. Once you invest in lenses, switching brands becomes expensive, so this decision deserves the in-person test from Step 5.
Is a camera still worth buying when phones are so good?
For casual snapshots, a modern phone is genuinely fine. A dedicated camera pulls ahead when you want optical zoom, shallow depth of field, reliable autofocus on moving subjects, strong low-light results, interchangeable lenses or long video recordings without interruptions. If those match your subject list, a camera earns its bag space; if not, save your money and upgrade your phone photography skills instead.
What accessories should I buy on day one?
A fast memory card from a reputable brand, a spare battery, a simple protective filter for the lens, a bag that actually fits the kit, and a microfibre cloth with a rocket blower for dust. That is enough. Resist bundles of dozens of cheap accessories; most go unused. Add a tripod, filters or a flash later, when a specific kind of photograph demands them.