Learning how to protect a camera is really about managing five enemies: impacts, water, dust, theft and time. Cameras are tougher than they look — most survive years of travel in a decent bag — but the accidents that kill them are drearily predictable: a strap that slips off a shoulder, a wave at the beach, a bag set down in a puddle, a car window smashed for a visible camera. Each risk has a cheap, boring countermeasure, and this guide collects them in the order they matter.
None of this requires paranoia or a fortune in accessories. It requires habits: how you carry, where you set the camera down, what you do when weather turns, and how you store the kit at home. Build those habits in your first months of ownership and they become invisible — which is exactly when protection works best, because you stop thinking about it while it keeps working. For the storage side in depth, see also how to store a camera.
Disclosure: As an Amazon Associate, kajuandouglas.com earns from qualifying purchases. Links to Amazon on this page are affiliate links; they cost you nothing extra. Listing details such as price and availability change often, so check the current Amazon listing before you buy.
How to Protect a Camera: The Short Answer
Use a wrist or neck strap every single time, carry the camera in a padded bag sized to the kit, keep a UV or clear filter on each lens as sacrificial glass, stay ahead of weather with a rain cover and silica gel, and never leave the camera visible in a car. Add insurance or a rider for expensive kits, and record serial numbers today, before you need them.
In this guide
What You Need
Protection starts with a short shopping and admin list — most items are inexpensive and last for years:
- A comfortable strap you will actually wear (neck, sling or wrist) plus a backup attachment check
- A padded camera bag or insert sized to your body and lenses, with a rain cover or waterproof shell
- A quality UV or clear protective filter for each lens you own, matched to its filter thread size
- Silica gel packets for your bag and home storage, replaced or recharged regularly
- A rain sleeve or simple plastic cover for wet-weather shooting
- Photos of your gear and serial numbers stored in the cloud, and receipts kept together
How to Protect a Camera Step by Step
Treat these as standing habits rather than one-off tasks; only the last step is a single afternoon’s work.
Step 1: Make the strap non-negotiable
Attach a strap and use it every time the camera leaves the bag — around your neck, cross-body as a sling, or around your wrist for small cameras. Most drops happen in the first ten seconds of handling, when a camera passes between bag, hand and eye. Inspect strap lugs and split rings monthly; a worn ring is a drop waiting for a date. If your camera has two strap points, a sling that connects to both or to the tripod socket with a safety tether spreads the risk. The rule is absolute because the physics are: a camera in free fall onto concrete rarely survives, and straps cost almost nothing.
Step 2: Choose a bag that matches your real kit
A protective bag does three jobs: padding against knocks, organisation that stops lenses grinding together, and weather resistance. Size it to the kit you actually carry — an oversized bag lets gear tumble, an undersized one leaves a lens at home or crushed into a pocket. Look for thick dividers you can reconfigure, a reinforced base for setting down on wet ground, and zips that close fully against dust. Backpacks suit travel and hiking; shoulder bags suit city shooting where you change lenses often. Our best bags for cameras and best backpacks for cameras roundups compare current options by carrying style.
Step 3: Fit sacrificial filters and always use lens hoods
A good UV or clear filter on the front element absorbs the scratches, knocks and sea-spray that would otherwise mark the lens’s own glass — replacing a filter is trivial, recoating an element is not. Buy decent multi-coated filters; bargain filters flare and soften images. Pair the filter with the lens hood, which is impact protection as much as glare control: a hood is a crumple zone that keeps the front of the lens off walls, tables and door frames. Keep caps on in the bag, hoods on out of it.
Step 4: Manage water before it manages you
Check whether your body and lens carry weather sealing — and remember sealing means resistant, not waterproof; gaskets slow water, they do not stop immersion. In rain, use a rain sleeve or an improvised cover with a hole for the viewfinder, keep a microfibre cloth in a dry pocket, and wipe the camera down before stowing it so moisture does not sit in seams. After beach shoots, blow sand off before wiping and never change lenses in blowing sand. If a non-sealed camera gets properly wet, power it off, remove the battery and card, and let it dry slowly with silica gel before testing it.
Step 5: Outsmart dust, heat and cold
Dust protection is mostly lens-change discipline: mount down, back to the wind, caps ready. Heat is the quieter killer — a camera left on a car dashboard or in direct sun can suffer battery damage, screen issues and, for video shooters, immediate overheating shutdowns like those in how to fix camera overheating when filming. In cold weather, batteries drain fast, so carry spares in an inside pocket; when returning indoors, seal the camera in a plastic bag first so condensation forms on the bag, not inside the lens.
Step 6: Protect against theft and loss
Blend in: an unbranded bag that does not shout ‘camera’ is worth more than a lock in most cities. Never leave gear visible in a parked car — not for five minutes, not covered by a jacket; thieves watch car parks. In cafes, loop the strap around a chair leg or your own leg. At home, store the kit out of sight from windows. For travel, split cards and backup drives between bags, and keep the day’s irreplaceable shots backed up to a second device each night, because a stolen camera with a backed-up card is an insurance claim, not a lost holiday.
Step 7: Document and insure the kit
Photograph every item, record serial numbers from bodies and lenses, and save receipts in one cloud folder today. This takes twenty minutes and transforms any police report or insurance claim from hopeless to routine. Check whether your home insurance covers gear away from home and what its single-item limit is; dedicated camera insurance or a scheduled rider makes sense once a kit’s value would hurt to replace. Register products with manufacturers too — it speeds warranty service and occasionally surfaces recall notices.
Protection While Travelling
Air travel rules are simple: cameras and lithium batteries go in cabin baggage, never checked — baggage holds are cold, rough and occasionally rifled, and airlines exclude valuables from liability anyway. Use your padded bag as your personal item, keep the camera on your person through security queues, and carry-on restrictions permitting, bring more batteries than you need because foreign replacements for uncommon models can be hard to find. In hotels, use the safe for the kit you are not carrying, and take only the lens you need for the day’s shooting.
At your destination, local awareness beats gadgets: ask hotel staff which streets to avoid with visible gear, hire local guides for sensitive areas, and keep the camera under a jacket or in the bag between shots in crowded markets. None of this should shrink your trip — photographers travel everywhere with valuable kits. It simply prices the risk honestly and pays the small premiums that keep the kit, and the photos, coming home with you.
Long-Term Protection: Time and Neglect
Time attacks cameras through humidity, which grows fungus inside lenses, through batteries left to swell in stored bodies, and through rubber grips that perish in hot cupboards. Counter all three with storage discipline: a dry place with silica gel, batteries removed for long storage and kept at partial charge, and an occasional exercise of shutters and focus rings so lubricants stay distributed. Fungus deserves special respect because it spreads between lenses stored together; if you ever spot web-like threads inside a lens, isolate it and read how to fix a camera lens with fungus promptly.
Gear for This Guide
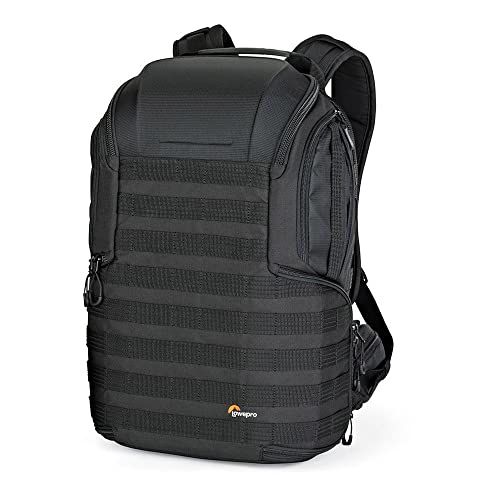
A serious padded backpack is the single most protective purchase most photographers make, and a fixed-lens camera like the X100V shows the alternative strategy — a small kit you keep on your person is a kit that rarely gets dropped, soaked or stolen:

Lowepro ProTactic 450 AW II Camera Backpack — Check price on Amazon. A solid, widely available option that fits this guide; confirm the exact kit contents and lens mount on the listing before ordering.

Fujifilm X100V Digital Camera — Check price on Amazon. A solid, widely available option that fits this guide; confirm the exact kit contents and lens mount on the listing before ordering.
Common Mistakes
The most expensive mistake is the visible camera in the car; the second is the strap that exists but lives in the bag because it is uncomfortable. Fix both by buying a strap you like and treating the car as public space. Another common error is over-trusting weather sealing: sealing survives drizzle and splashes, but photographers who treat it as waterproof eventually flood a body in a downpour or a wave, and water damage is usually excluded from warranties.
Finally, avoid the false economy of the cheapest filters and bags. A bargain filter can crack into the element it was meant to protect and adds flare to every frame until then; a flimsy bag’s failed zip is a drop with extra steps. Protection gear is bought once and used for a decade — buy the good version.
Pro Tips
Adopt the two-second rule: before the camera leaves your hands, two seconds of thought — strap on, surface stable, away from edges and drinks. Most drops are really placements: cameras set on car roofs, café table edges and sloped rocks. A flat, low, central surface every time eliminates a whole category of loss.
Keep a small ‘rescue kit’ in your bag: microfibre cloth, blower, silica gel packet, a plastic rain sleeve and a spare strap connector. It weighs almost nothing and covers nine of ten field problems. And photograph your insurance documents with the camera itself, so the proof of ownership travels with the memory card as well as the cloud.
Protecting a Camera You Lend, Rent or Share
Shared cameras face multiplied risk, and clear ground rules protect friendships as well as gear. Lend with the strap attached and a card of the borrower’s own; agree in advance who pays for damage, in writing if the kit is valuable; and photograph the kit’s condition together before it leaves. When you are the borrower, return the camera cleaner than you received it, with batteries charged — the etiquette is remembered longer than the photographs. Rental gear deserves the same discipline plus a settings reset afterwards, and never lend your only body during a season when you need it.
For family cameras, protection means designing for the least careful user: a wrist strap that lives on the camera, a simple case that closes fast, and the camera’s home kept in one known place rather than wherever it was last set down. Insure shared household gear under the home policy with all users noted, and keep the serial-number record in a place more than one person can find.
Insurance, Warranties and Repair Decisions
Protection economics deserve one clear-eyed pass. Manufacturer warranties cover defects, not accidents; extended accidental-damage plans vary enormously in value, and are most rational for expensive bodies in their first, highest-value years. Home-insurance riders are often the cheapest accidental cover available. Self-insuring — banking the premiums — suits inexpensive kits and careful owners, and fails exactly when a flagship body meets a harbour wall, so decide by replacement pain, not by premium size.
When damage happens, get a manufacturer’s or reputable independent quote before assuming replacement: shutter units, screens, mounts and top plates are modular repairs, often far cheaper than feared, while water damage is the usual write-off because corrosion keeps working after the quote. A repaired camera with a service record loses little value; a ‘probably fine’ water-damaged one loses trust. Protect the camera first, but protect your wallet with paperwork: receipts, serials and service history are part of the kit.
Protecting Your Camera in Specific Places Photographers Actually Go
General protection advice becomes real when you translate it into the places you shoot. At the coast, the enemies are salt spray, wind-blown sand and the moment you set the bag down on wet ground. Keep the camera inside a zipped bag whenever you are not actively shooting, change lenses only inside the bag or inside a car with your back to the wind, and treat any lens change on an open beach as a last resort rather than a routine. A clear protective filter earns its place here more than anywhere else, because wiping salt spray from a filter all afternoon is free, while wiping it from a front element all afternoon is a slow negotiation with your coating. At the end of the day, the damp-cloth wipe described in the cleaning guidance is not optional; salt left overnight works on metal parts while you sleep.
In cities, protection is mostly about attention and profile. A camera worn openly on a tourist route in a crowded market is an advertisement, while the same camera in a plain, worn-looking bag, worn cross-body with the bag in front of you in crowds, attracts almost no interest. Avoid dangling the camera from one shoulder where a snatch is easy, never leave it on a café table while you order, and loop the strap around your wrist or arm whenever it is out of the bag. In mountains and countryside the threats change again to weather, drops and cold. Keep spare batteries warm in an inside pocket because cold batteries report themselves empty long before they are, use the rain cover before the shower arrives rather than during it, and clip or strap the camera to yourself on exposed paths, where a stumble should not be able to send it over an edge.
Festivals, sports days and family events
Crowded events combine almost every hazard at once: jostling, drinks, dust, children, and your own attention being pulled toward the action instead of your kit. Work with one body and one versatile lens if you can, because every lens change in a crowd is a drop risk and a dust invitation. Keep the bag zipped and between your feet or worn, never on the ground behind you. If you are photographing your own children’s sports, agree with yourself in advance which moments you will watch without the camera; photographers who try to record everything both drop more gear and enjoy less of the day. A simple wrist strap, used religiously, prevents the classic event accident, which is not theft at all but a knock from a passing elbow.
Heat, Cold and the Physics That Damage Cameras Quietly
Extreme temperatures rarely kill a camera outright; they shorten its life in ways owners notice a year later. Heat is the more dangerous of the two. A camera left on a car dashboard or in a sealed car in summer sun can reach temperatures that soften lubricants, stress adhesives, degrade battery cells and, in the worst cases, warp plastic parts. The rule is simple: a camera should never be anywhere you would not leave a dog or a chocolate bar. If a car is your only option while you swim or shop, the boot is cooler than the cabin, a bag insulated by clothes around it is cooler still, and the camera should come with you whenever the stop is long. Batteries suffer most from heat over time, losing capacity permanently, so a battery that lived through a summer of dashboard storage may explain a mysterious drop in shots per charge the following winter.
Cold is kinder to electronics than to batteries and fingers, but it brings the condensation trap already described in this guide’s guidance on storage and travel. The camera itself will usually keep working well below the temperatures at which its battery gives up, so rotate warm spares from an inside pocket and treat a sudden empty reading as a temperature report rather than a failure. LCD screens slow down in deep cold and lubricants stiffen, making zoom and focus rings heavier; work them gently rather than forcing them. The moment that matters most is coming back indoors. Seal the cold camera in a bag before entering warm air, let it warm slowly, and resist the urge to check your photographs immediately on a fogging screen.
Sunlight through a lens is a special case
One heat hazard deserves its own warning because it surprises people: a lens focuses sunlight exactly as it focuses an image. A camera left with a fast lens pointed toward bright sun, on a table or a car seat, can concentrate enough energy to damage a shutter curtain or sensor, and mirrorless cameras with their sensors exposed when switched off are not immune to the risk in strong conditions. The habit that prevents it costs nothing: cap the lens, or turn the camera face down or away from windows when it rests. The same principle applies to photographing the sun deliberately, which should only be done with proper solar filtration, never with improvised methods, and never by looking through an optical viewfinder at an unfiltered sun.
Protecting the Photographs, Not Just the Hardware
A camera can be replaced; a card full of unrepeatable photographs cannot, so a complete protection plan treats the images as the most valuable part of the kit. The working rule used by professionals is that a photograph does not exist until it lives in at least two places. In practice that means copying cards to a computer or drive the same day you shoot anything that matters, keeping that copy and the card apart until a second copy exists elsewhere, and only then formatting the card in the camera. Dual-card cameras can write both copies simultaneously, which is worth enabling for weddings, trips and paid work even if you shoot single-card for everyday convenience. For travellers, a small portable drive or a phone-based copy each evening, with the cards stored separately from the camera bag, means a stolen bag is an insurance claim rather than a lost holiday.
Card care is part of image protection. Cards fail most often after rough handling, counterfeit purchase, or years of being formatted in computers and half a dozen devices. Buy from reputable sellers, format in the camera you will shoot with, retire cards that ever produce an error rather than forgiving them, and never fill a card completely during an important shoot, because the final frames on a failing card are the ones recovery software finds hardest to save. Label cards and rotate them so wear is shared, and keep a small hard case for full cards on a trip, stored in a different pocket or bag from the camera itself.
Metadata, ownership and quiet digital protection
Protection also has a paperless layer. Set your name in the camera’s owner or copyright field if it offers one, so every file carries its origin with it. Register serial numbers with the manufacturer where that is offered, keep purchase receipts with your insurance documents, and photograph your kit laid out once a year; that single photograph settles most insurance conversations before they begin. None of this is exciting, and all of it is the difference between a bad day and a bad month when something does go wrong.
Children, Borrowers and Shared Cameras
Many cameras live in households rather than in solo professional bags, and shared use needs its own protection culture. Children can absolutely learn photography on a real camera, and the protection that works is preparation rather than prohibition: a wrist strap fitted and used, a lens hood on, a clear filter in place, and a rule that the camera is carried with two hands and set down only on a table, never on the floor, a sofa arm or a garden wall. Start a young photographer on the most robust body and lens combination you own, in good light, in a place where a drop lands on grass rather than stone. The photographs children take of their own world are worth the managed risk, and cameras survive supervised childhoods remarkably well.
For adult borrowers, a two-minute handover protects both the camera and the friendship. Show them the strap, the lens change over a surface rather than over a pavement, and the one rule that matters most: if anything goes wrong, stop, cap everything, and call you rather than attempting a fix. Write down what was lent and when on your phone. Most lending damage is not carelessness but unfamiliarity, a mount forced slightly wrong, a battery door opened the way a different brand opens, a card removed while the camera was still writing. A short demonstration eliminates almost all of it, which is why hire companies, who lend cameras for a living, spend their effort on handovers rather than on thicker cases.
Insurance in Practice: Reading the Policy Like a Photographer
Insurance was introduced earlier in this guide as documentation and cover, but the detail decides whether a policy pays smoothly. Check whether your household policy covers items away from home, because many standard policies protect possessions mainly at the address, with away-from-home cover as an added section with its own limits per item. A single camera and lens combination can exceed a standard single-item limit without feeling extravagant, which is the classic reason a claim disappoints. If you travel, check territorial limits and the number of days abroad covered in a year. If you earn anything from photography, even occasionally, disclose it, because undisclosed commercial use is the other classic reason claims fail, and the honest premium difference is usually modest compared with the value at stake.
Keep the evidence habit simple and current. One folder, physical or digital, holds receipts or order confirmations, serial numbers, and that annual photograph of the kit. When you buy or sell an item, update the folder the same week. After any incident, photograph damage before cleaning anything, keep broken parts, and report promptly; insurers respond well to organised owners, and repairs proceed faster when an assessor is not reconstructing your kit from memory. Protection, in the end, is as much administration as it is straps and cases.
Accidental damage, wear and the honest middle ground
Policies cover sudden accidents, not gradual wear, and knowing the boundary helps you maintain gear sensibly. A dropped camera is an accident. A zoom ring that stiffens over five dusty years is wear, and the prevention for wear is the cleaning and storage routine, not a policy. Photographers who understand that distinction spend their effort in the right places: care and maintenance for the slow risks, insurance for the sudden ones, and a small self-insurance reserve for the minor repairs, a cracked screen or a bent filter ring, that fall below any sensible excess. That three-layer approach, care, reserve, insurance, is how working photographers actually protect a kit over a career.
Drops, Knocks and the Anatomy of the Accidents That Really Happen
Ask repairers what they see and a pattern emerges that has little to do with dramatic theft. Cameras fall from tables when a strap catches on a chair or a passer-by. They slide off car seats under braking. Tripods blow over in wind nobody judged dangerous, or get knocked by a helpful guest at an event. Lenses roll, because a lens set down on its side on a slight slope is a wheel waiting for permission. Each of these has a cheap countermeasure that becomes automatic with practice. Straps go around a wrist, a neck or an anchor point whenever the camera is set down near an edge. Cameras ride in the footwell or the boot of a car, never loose on a seat. Tripods get a bag or a weight hung from the centre column outdoors, legs spread wide on uneven ground, and are never left unattended at full height in a crowd. Lenses are set down mount-down on a flat surface or returned straight to the bag. None of this requires purchases; it requires deciding that the boring accident, not the cinematic one, is your real opponent.
Children and pets deserve an honest mention in the accident list, because households produce a steady share of camera repairs. The family rules from earlier in this guide, two hands, strap on, table not floor, prevent most of it, and storing the camera out of reach between uses prevents the rest. A camera’s home position should be somewhere a toddler cannot reach, a cat cannot sleep on, and a dog’s tail cannot clear in one enthusiastic sweep. Choose that position once, deliberately, and the daily risk falls away without any ongoing vigilance.
Protecting a Camera at Work: Weddings, Venues and Paid Days
Paid work multiplies both the value at risk and the consequences of failure, so working photographers protect differently in kind, not just in degree. The first principle is redundancy: a second body is not a luxury but the actual protection, because no strap or case helps when a shutter fails during a ceremony. The second body need not match the main camera; it needs to be capable, familiar and loaded with a card and a charged battery at all times. The second principle is separation. Spare cards, batteries and the backup body travel in a different bag or stay with a different person where possible, so that a single theft or a single car break-in cannot end the working day. The third principle is that the day’s photographs get copied at the first natural pause, to a laptop or portable drive that then lives apart from the cameras. Couples and clients forgive a great deal; they do not forgive the loss of the photographs, and every professional protection habit ultimately serves that single fact.
Venues add their own rules, which are also protection. Churches, theatres and registries may restrict movement, flash and sound, and a photographer who knows the rules in advance protects both the work and their welcome next time. Tripods near exits, bags in aisles and cables across walkways are liability hazards in a literal sense, and taping, matting or rerouting a cable is camera protection too, because the commonest way a tethered camera dies is someone tripping over its lead. On location shoots, a simple risk walk at the start, noting water, trailing cables, unstable surfaces and curious animals, prevents the incidents that fill the rest of this guide.
Transport protection for working kits
Hard cases with custom foam earn their reputation in vehicles and on tour, where stacking, vibration and other people’s handling are the threats. For daily local work, a well-padded bag inside a normal car is usually sufficient, provided the bag is secured against sliding and nothing heavy rides on top of it. The detail that matters in both worlds is what happens to lenses: each in its own compartment or wrap, never loose against another lens, because glass against glass and mount against element are how quiet damage happens in transit. A kit that arrives is a kit that was packed as if the journey mattered, which it always does.
When Protection Fails: A Calm First Response
Even good habits meet bad luck, and the first hour after an incident decides much of the outcome. After a drop onto a hard surface, resist the urge to test everything frantically. Photograph the scene if insurance may be involved, pick the camera up carefully in case glass is loose, remove the battery if anything smells hot or the body is deformed, and check the lens mount and filter ring before attempting to remove a lens, because a bent mount forced open causes the second injury. If a filter has shattered, keep the camera face down so fragments fall away from the element, and remove the ring with the techniques a repairer would endorse, or leave it entirely to them. After water exposure, power off, battery out, and no heroic attempts to switch on and see; the drying guidance in this guide and a prompt service visit save more wet cameras than optimism does.
After a theft, the protection work you did in advance becomes the whole story: serial numbers for the police report, photographs and receipts for the insurer, and remote copies of the day’s photographs meaning the work itself survives even when the hardware does not. Report promptly, list everything including the small items people forget, cards, straps, adapters, because claims are settled on lists. Then replace in the order your photography needs, not in the order the catalogue tempts. A calm, documented response turns most failures into interruptions rather than endings, which is the most protection can ever honestly promise.
Protecting Cameras in Transit: Post, Planes and Borrowed Cars
Sending a camera by post or courier, for repair or sale, is protection reduced to packaging. Remove the battery and card, fit body and lens caps, wrap each item separately so nothing can rub, and immobilise everything inside a box within a box, with padding that prevents movement in every direction. A camera that can shift inside its parcel will, and couriers stack, drop and convey at speeds your careful packing must assume. Photograph the packed box and the contents before sealing, keep the tracking reference with your insurance folder, and choose a service level that includes meaningful cover for the item’s value rather than the minimal default. For repairs, include a written description of the fault and your contact details inside the box as well as on any form, because parcels and paperwork part company more often than anyone admits.
Flying with cameras is covered in the travel sections of this guide, but one borrowed-car and one train habit deserve adding. In any vehicle that is not yours, your camera bag stays with you, in the footwell by your feet or on your lap in a taxi, never in a boot that someone else may open at a stop or drive away with. On trains, the bag goes on the rack directly above your seat or between your feet, not in the end-of-carriage luggage area, and the strap looped around a fixed point while you sleep on long journeys is an old traveller’s trick that still works. Transit protection is mostly the refusal to be separated from the bag, and it costs nothing but the decision.
A five-minute pre-trip protection check
- Strap, mounts and bag zips inspected; spare strap or cord in the bag.
- Filters fitted, hoods packed, caps present for every lens and body.
- Cards copied, formatted in camera, and spares in a hard case stored separately from the camera.
- Batteries charged, terminals protected, one spare per body minimum.
- Serial list and insurance details on your phone, and the kit photographed as packed.
Run that check the night before any trip that matters and protection stops being a topic you think about on the journey itself, which is exactly where you want it: settled in advance, invisible on the day.
Related Guides
- best cameras for travel
- best cameras for hiking
- best cameras under 500
- best cameras for photography
- best small cameras for travel
Frequently Asked Questions
Do UV filters really protect a lens?
Yes, against the everyday threats: scratches from grit while wiping, knocks against door frames, sea spray and sticky fingers. The filter takes the damage and is cheap to replace. A filter cannot save a lens from a serious drop onto concrete, and poor-quality filters degrade images with flare, so buy reputable multi-coated ones. Many photographers combine a filter with the hood, which handles the impact side of protection.
Is weather sealing enough to shoot in rain?
Weather sealing handles drizzle, splashes and dusty wind well when both body and lens are sealed and the hot shoe and ports are covered. It is not rated for immersion or sustained downpours, and sealing degrades as gaskets age. For real rain, add a rain sleeve, keep the lens pointed down between shots, and dry the camera thoroughly afterwards. Treat sealing as insurance, not permission.
How can I protect my camera at the beach?
Keep it in the bag until the moment of shooting, use a UV filter and hood, and never set it on sand. Blow grit off before wiping — sand is abrasive enough to scratch coatings. Avoid changing lenses on the beach entirely if you can; if you must, do it inside the bag or your car with the mount facing down. Afterwards, wipe the body with a cloth barely dampened with fresh water to remove salt, then dry it fully.
Should I insure my camera gear?
If replacing your kit would strain your budget, or you travel or shoot professionally, insurance is usually worthwhile. Start with your home policy: many cover personal items away from home up to a limit, and you can schedule expensive items individually. Dedicated photographic policies add cover for accidental damage and use abroad. Either way, serial numbers, receipts and photos of the gear — recorded in advance — make claims dramatically smoother.
Can I fly with my camera and batteries?
Yes — and you should carry them in the cabin. Lithium batteries are required to travel in hand baggage, and cameras are too valuable and fragile for checked bags. Keep the camera in its padded bag as your personal item where possible, remove batteries if an airline asks, and tape spare battery terminals or keep spares in their cases to prevent short circuits. Security screening does not harm digital sensors or memory cards.
What is the safest way to carry a camera all day?
A cross-body sling strap or a well-fitted backpack, depending on how often you shoot. Slings keep the camera at your hip, instantly reachable and hard to snatch, while backpacks win for long walks and heavier kits. Whichever you choose, keep one hand’s worth of attention on the camera in crowds, rest it in your lap rather than on café tables, and never hang it on a chair back behind you.
Does a camera need different protection in winter than in summer?
Yes, mainly around moisture and batteries. Winter’s risk is condensation when cold gear meets warm indoor air, solved by sealing the camera in its bag before coming inside and letting it warm slowly. Batteries also fade faster in the cold, so spares live in an inside pocket. Summer’s risks are heat and sun: never leave the kit in a hot car, keep it shaded, and wipe salt and sunscreen off promptly after coastal or festival days. The strap, bag and filter habits stay the same all year; it is the temperature management that changes with the season.
Is a hard case always safer than a soft camera bag?
Not always. A hard case wins against crushing, stacking and vehicle transport, and for checked or shipped gear it is the right choice. A soft bag wins for daily carrying because it is lighter, quieter and more likely to be carried at all, and its padding handles the knocks of ordinary life perfectly well. The safest case is the one matched to the journey: hard for transport by others, soft for transport by you. Many photographers own both and move the kit between them, which is less extravagant than it sounds over years of use.
What should I do first if my camera gets wet?
Switch it off, remove the battery and the card, and do not switch it on again to check whether it survived. Wipe the exterior, open the doors, and let everything air-dry in a dry room with silica gel nearby for at least a full day. If the water was salty, or the camera was submerged, skip the home drying optimism and take it to a repairer promptly, because corrosion begins quickly and a professional rinse and inspection in the first days is what saves wet cameras. Patience in the first hour protects more value than any case you could have bought.