Knowing how to clean a camera properly keeps your images free of dust spots, protects delicate coatings, and costs almost nothing compared with a service-centre visit. Most camera dirt is mundane: fingerprints on the front element, dust on the sensor that shows up as grey blobs in blue skies, and grime in the dials from everyday handling. Each needs a different touch — what is safe on a lens barrel can scratch a sensor, and what works on the body can smear a viewfinder.
This guide takes you from the safest, driest methods to the careful wet cleaning of a sensor, in the order professionals use. Work slowly, in a clean indoor space, and stop at the step that solves your problem: most cameras only ever need the first three. If your camera is a mirrorless model and the sensor is your concern, our dedicated guide on how to clean the sensor of a mirrorless camera goes even deeper on that single task.
Disclosure: As an Amazon Associate, kajuandouglas.com earns from qualifying purchases. Links to Amazon on this page are affiliate links; they cost you nothing extra. Listing details such as price and availability change often, so check the current Amazon listing before you buy.
How to Clean a Camera: The Short Answer
Start dry: blow loose dust off with a rocket blower, brush gently, and wipe lenses with a clean microfibre cloth using light circular motions. Clean the sensor only when spots actually appear in photos, using your camera’s built-in cleaning mode first, then a blower, and only then sensor swabs matched to your sensor size. Never use canned air, household cleaners or your breath on optics.
In this guide
What You Need
Cleaning works best with the right inexpensive tools, laid out before you start. You will need:
- A large rocket-style hand blower (never canned compressed air, whose propellant can spit residue)
- Two or three clean microfibre cloths reserved only for optics, washed without fabric softener
- A soft lens brush or a lens pen for stubborn smudges on glass
- Sensor swabs sized for your sensor (full-frame, APS-C or Micro Four Thirds) plus sensor cleaning fluid, only if you reach the wet-clean step
- A fully charged battery — many cameras refuse sensor-cleaning mode on low power
- A bright desk lamp and, for checking results, a plain wall or clear sky to photograph
How to Clean a Camera Step by Step
Clean in this order — body, lens exteriors, glass, then sensor — so dirt never migrates from a dirty area onto a clean one.
Step 1: Prepare a clean workspace and wash your hands
Choose a dust-free indoor spot away from open windows and pets, and lay a clean towel down as your work surface. Wash and dry your hands so skin oils do not transfer to glass. Remove the camera strap if it drags across the workspace, take off jewellery that might scratch the body, and keep drinks well away. Good preparation prevents the most common cleaning accident: dropping grit onto an exposed sensor or knocking the camera off a cluttered table mid-clean.
Step 2: Blow and brush the body exterior
Hold the camera with the lens mount facing down and use the rocket blower around the mount, dials, buttons and hot shoe, so loosened dust falls away instead of settling deeper. Follow with a soft brush in seams and around the mode dial. Wipe the body with a barely damp — not wet — microfibre cloth to lift grime, then dry it. Clean the rear screen and viewfinder eyepiece with a dry section of the cloth; eyepieces collect mascara, sunscreen and skin oil faster than any other part.
Step 3: Clean the lens glass correctly
Blow the front element first so you never grind loose grit across the coating. Breathe-free technique matters: use the blower, then a lens brush in light strokes from centre to edge. For fingerprints, use a fresh microfibre area with tiny circular motions and almost no pressure; a drop of lens fluid on the cloth — never directly on the glass — handles greasy smears. Repeat for the rear element, which matters even more for image quality, and cap the lens immediately. If a lens shows internal haze or spots that wiping cannot reach, that is a different problem; see how to fix a camera lens with fungus.
Step 4: Test whether the sensor actually needs cleaning
Do not clean a sensor on a schedule; clean it when evidence demands it. Set a small aperture such as f/16, focus manually to infinity, and photograph a plain bright wall or clear sky. View the image zoomed in: soft grey blobs that stay in the same place between frames are sensor dust. Spots visible only at small apertures are normal for many cameras and may never affect real photos at f/2.8 or f/4. This test takes two minutes and prevents unnecessary contact with the most delicate part of your camera.
Step 5: Use the built-in cleaning mode and the blower
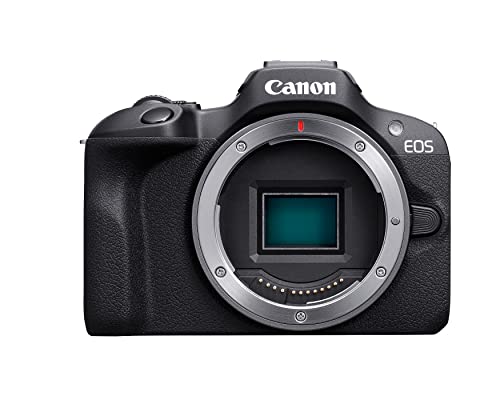
Most cameras shake the sensor ultrasonically to shed dust — run that cycle two or three times from the setup menu. If spots remain, enter manual cleaning mode so the mirror locks up (on a DSLR) or the shutter opens (on mirrorless), hold the camera mount-down, and squeeze the rocket blower several times without letting its tip enter the chamber. Never touch the sensor with the blower nozzle. Retake the test shot from Step 4; in the majority of cases the spots are gone and you stop here.
Step 6: Wet-clean with sensor swabs only if spots persist
Stubborn spots are usually pollen or oil that air cannot move. Use a swab made for your exact sensor size, add the small number of fluid drops the maker specifies, and draw the swab across the sensor once in each direction with light, even pressure — one pass per side, then discard the swab. Work in as dust-free a room as you can, keep the camera powered as the manual directs, and re-test. If streaks appear, a fresh swab with slightly less fluid usually fixes them. If you feel at all unsure, a camera shop clean is inexpensive insurance.
Cleaning Schedules That Actually Make Sense
Tie cleaning to use rather than the calendar. Wipe the body and front element after any shoot involving sea spray, dust, rain or sunscreen-covered hands — salt and grit do cumulative damage. Check for sensor spots before important shoots such as weddings or trips, using the wall test, so you are not cloning blobs out of hundreds of frames later. Inspect seals, the mount and the battery compartment monthly if you shoot outdoors often, and replace a tired microfibre cloth the moment it stops feeling soft, because a gritty cloth causes the scratches you were trying to avoid.
Storage habits reduce cleaning needs dramatically. Cap lenses the moment they come off the camera, change lenses mount-down in sheltered spots, and keep the camera in a closed bag rather than on a shelf. A camera stored well needs its sensor cleaned rarely; a camera stored badly needs it constantly. Our guide on how to store a camera covers humidity, bags and long-term storage in detail.
What Never to Use on a Camera
Canned air tops the banned list: its propellant can spray liquid residue onto sensors and coatings, and the blast can drive dust deeper or damage a shutter. Household glass cleaners contain solvents and ammonia that can attack coatings and plastics. Paper towels, tissues and shirt tails carry abrasive fibres and trapped grit. Your breath fogs glass but adds moisture and bacteria without cleaning anything, and it encourages the wiping that follows to smear rather than lift dirt. Finally, never use a vacuum cleaner near an open mount — the suction and static are both enemies of a clean chamber.
Gear for This Guide
A protective, well-padded bag keeps a clean camera clean between shoots, and a modern body with a built-in sensor-cleaning cycle makes Step 5 effortless:

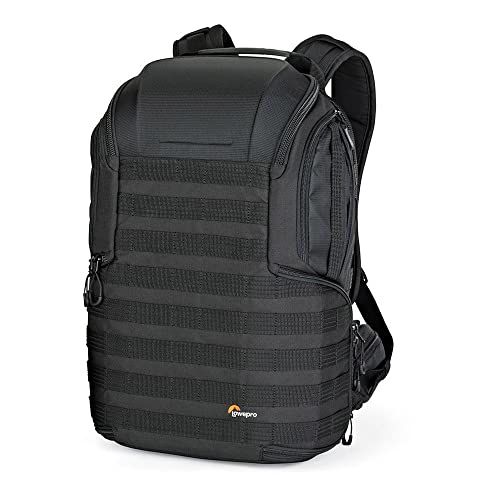
Lowepro ProTactic 450 AW II Camera Backpack — Check price on Amazon. A solid, widely available option that fits this guide; confirm the exact kit contents and lens mount on the listing before ordering.

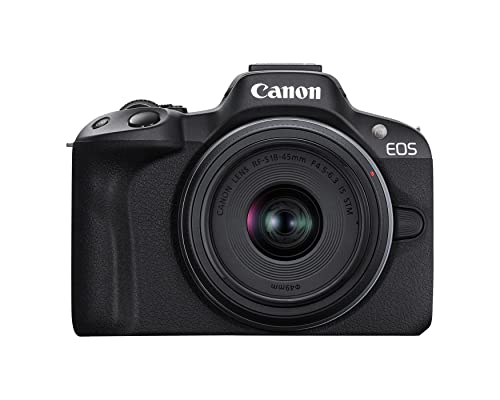
Canon EOS R50 Mirrorless Camera with RF-S 18-45mm Lens Kit — Check price on Amazon. A solid, widely available option that fits this guide; confirm the exact kit contents and lens mount on the listing before ordering.
Common Mistakes
The costliest mistake is wiping dry glass with a dirty cloth, grinding dust into the coating and leaving micro-scratches that flare in backlight forever. Always blow and brush first. The second mistake is enthusiasm: cleaning a sensor weekly ‘just in case’ multiplies your chances of a slip while solving nothing, because dust you cannot see in photos does not matter. Clean on evidence, not anxiety.
Also avoid over-wetting. Too much fluid on a lens cloth leaves streaks that look worse than the fingerprint, and too much on a sensor swab can seep to the sensor’s edges. One final error: cleaning in a dusty environment such as a garage or a beach car park, where the air re-contaminates the chamber faster than you can clean it. Move indoors, close the windows, and let the air settle for a few minutes first.
Pro Tips
Keep a blower and cloth in your camera bag permanently, not in a drawer at home — the moment you need them is at a windy viewpoint with a spotty sky. Photograph the plain-wall test image at the start of a big shooting day; it takes seconds and tells you whether to clean before the frames matter.
When you change lenses outdoors, turn your back to the wind, point the mount down, and have the replacement lens uncapped and ready before the body opens. Ten seconds of discipline here saves an hour of spot removal later. And if cleaning ever reveals damage — a scratched element, a bent mount, mould inside a lens — stop and get a professional assessment rather than experimenting further. Pair these habits with how to protect a camera for a complete care routine.
Cleaning the Parts People Forget
Four areas escape most cleaning routines and cause outsized trouble. The hot shoe collects grit and corrosion that eventually make flashes fire intermittently; brush it out and keep its cover fitted. Battery contacts — on the battery and inside the compartment — oxidise quietly; a dry cloth wipe restores reliable power contact, and any green corrosion means the battery itself should be retired. The lens mount’s electronic contacts deserve the same dry wipe when a lens starts reporting aperture errors. Finally, the camera bag itself: shake it out and vacuum its seams monthly, because a dirty bag re-dirties a clean camera within days.
Viewfinder optics deserve a sentence of their own. The eyepiece wipes clean like the screen, but dust visible inside the finder of a DSLR usually sits on the focusing screen or mirror — surfaces you should blow gently, never wipe, and never touch. On mirrorless cameras, dust specks seen in the EVF are usually on the eyepiece’s outer surface; if a careful wipe does not clear them, they are inside the finder assembly and a service visit, not a cotton bud, is the answer.
A Five-Minute Monthly Maintenance Routine
Tie camera care to a calendar habit and it stops being a project. Monthly: blow the body and mount area, wipe the screen and eyepiece, clean the front element if it carries prints, check the bag’s grit level, and run the automatic sensor-cleaning cycle. Quarterly: take the f/16 test shot and deal with whatever it shows, inspect strap connectors and bag zips, and check silica gel freshness in your storage. Annually: a full clean per this guide, a firmware check, and an honest look at filters for scratches that have begun to flare.
Keep the log absurdly simple — a note on your phone with dates and what you did. The log’s value appears at resale and at the repair counter, where ‘maintained regularly, sensor cleaned twice’ is a sentence with monetary worth. More importantly, the routine converts cleaning from a response to visible damage into prevention of it: almost every expensive camera fault involving dirt was a cheap cleaning skipped for a year.
Cleaning by Camera Type: Compacts, Mirrorless and DSLRs Behave Differently
The core sequence in this guide, blow and brush first, glass next, sensor last and only when needed, applies to every digital camera, but the details shift with the type of body you own. A fixed-lens compact has no sensor you can reach at all, which is both a limitation and a relief: you will never wet-clean it yourself, and any internal dust that appears as persistent spots is a job for a service centre. Your cleaning life with a compact is therefore all exterior work. Pay special attention to the telescoping lens barrel, which draws dust and grit inward as it retracts, and wipe the barrel sections gently before switching the camera off so you are not dragging particles across seals. The tiny front element on a compact also sits close to fingers, so fingerprints are the everyday enemy rather than dust.
Mirrorless cameras expose their sensor whenever the lens comes off, and on many models the sensor sits close to the mount with a delicate shutter curtain behind or in front of it depending on design. That accessibility makes blower cleaning effective, but it also means a careless swab angle or a blower nozzle that touches the surface can do real harm. Always hold the body with the mount facing slightly downward so loosened particles fall out rather than deeper in, and never use a blower with a narrow nozzle that could strike the sensor if your hand slips. DSLRs hide the sensor behind a mirror for most tasks, which protects it during lens changes but makes inspection indirect. Use the mirror lock-up or sensor-cleaning mode exactly as the manual describes, and never touch the mirror itself or the focusing screen above it. Both scratch if you so much as brush them with a swab, and neither can be cleaned safely with the tools in a home kit.
Weather-sealed bodies still need cleaning
Weather sealing slows water and dust ingress; it does not make a camera self-cleaning, and it can create a false sense of security. Seals and gaskets work best when the surfaces they press against are clean. Grit trapped under a lens mount gasket, around a dial, or in the battery door seam can hold a seal slightly open and abrade it over time. After dusty or coastal shoots, include the mount face, the lens’s rear gasket if it has one, and the door seals in your wipe-down. Check seals visually for cracks or flattening once or twice a year, especially on older bodies, because a perished gasket quietly removes the protection you think you have.
The Sensor in More Depth: Reading Spots and Choosing Your Response
Not every mark on a test frame is loose dust, and learning to read the test shot saves unnecessary swabbing. Loose dry dust produces soft-edged, roughly circular grey spots that grow darker and sharper as you stop down. Pollen and moisture-borne deposits tend to be stickier, slightly irregular, and resistant to the blower; they are the usual reason a wet clean becomes necessary. Oil specks, occasionally thrown from shutter mechanisms on some models, appear as small, dense dots, sometimes with a faint halo, and they smear if you drag a dry swab across them. If you see that pattern, a proper wet clean with the correct fluid, or a service visit, is the safer path. Fungal growth on a sensor filter is rare but unmistakable, with branching patterns at the edges, and it is never a home-cleaning job.
Where spots appear also tells you something. Dust that returns to the same corner within days of cleaning often lives not on the sensor but on the rear element of a lens, inside a zoom that pumps air as it extends, or in the mirror box of a DSLR where each shutter cycle redistributes it. Before reaching for swabs a second time, clean the rear elements of your lenses, blow out the mirror box or mount cavity carefully with the body facing down, and retest with a different lens. Photographers have wet-cleaned a sensor three times chasing dust that was sitting on a lens all along.
Swab technique errors that cause streaks
When a wet clean leaves the sensor worse than it started, the cause is usually one of a handful of technique errors. Using too much fluid floods the edges and dries into tide marks, while too little makes the swab drag and chatter. Reusing a swab for a second pass redeposits what the first pass lifted, which is why each swab is a single-use item, one pass in each direction at most. Pressing hard does not clean better; it flexes the swab and risks the surface, while the correct pressure is simply the weight needed to keep full contact. Working in a dusty room undoes everything, so close windows, avoid cleaning straight after vacuuming or making a bed nearby, and let the air settle. If two careful wet passes have not cleared a spot, stop. Repeated swabbing in one session multiplies risk, and a stubborn deposit is information: it may be under the filter glass or be damage rather than dirt, both of which belong to a technician.
Lens Cleaning Beyond the Front Element
Most attention goes to the front glass, yet the rear element influences contrast just as strongly and is cleaned far less often. A hazy rear element, usually from storage without caps or from being set down on dusty surfaces, produces a general loss of contrast that owners often blame on the camera. Include the rear element in your periodic inspection, cleaning it with the same blower, brush and microfibre sequence as the front. Check the electrical contacts on the mount while you are there. Contacts rarely need more than a dry wipe with a clean cloth, but on older lenses a gentle pass with a cloth barely dampened with isopropyl alcohol can cure intermittent aperture or autofocus errors caused by oxidation. Keep any fluid away from glass and seals, and let contacts dry fully before mounting the lens.
Lens hoods, caps and filters deserve cleaning in their own right. A hood interior coated in dust sheds particles onto the front element every time you fit it, and a gritty filter thread can grind when you change filters at the beach or on a windy hill. Brush hoods out, wash plastic hoods and caps in warm water with a drop of mild soap if they are genuinely grimy, and dry them completely before refitting. Filters should be cleaned with the same care as lens glass, because a smeared filter in front of a pristine element still degrades every frame, and flare from a dirty filter at night is a classic mystery that turns out to have a very simple cause.
Focus and zoom rings, barrels and buttons
Rubber focus and zoom rings collect skin oils and sunscreen, and over years the rubber can become tacky or start to whiten. Wipe rings with a cloth lightly dampened with water, and for sunscreen or oily residue use the faintest trace of mild soap solution, then wipe again with a water-only cloth so no residue remains to attract dust. Avoid solvent cleaners and avoid soaking the ring, because fluid can migrate under the rubber. Stiff or gritty zoom action after a beach or desert trip usually means sand in the barrel mechanism. Do not force it and do not flood it with air, which can drive grains deeper. Extend and retract gently a few times over a clean cloth to shed what you can, and if grittiness persists, that lens needs a service rather than more home effort.
Cleaning After Difficult Environments
Different environments leave different contamination, and a tailored response beats a generic wipe. After rain, the priority is drying rather than cleaning. Remove the lens, open every door and port cover, take out the battery and card, and let the whole kit air-dry in a ventilated room with silica gel nearby. Wipe droplets rather than letting them evaporate into mineral marks on glass, and pay attention to the hot shoe and mount, where water lingers. Only once everything is dry should you do a normal glass clean, because wiping a wet, gritty lens is how coatings get scratched.
After dusty events such as motorsport, festivals, building work or desert travel, work in stages and change your cloths. A first cloth will pick up abrasive particles and should be retired from glass duty immediately; use it for the body and grip areas, then switch to a fresh cloth for anything optical. Blow out the bag as well, because a camera cleaned carefully and returned to a dusty bag is dirty again by morning. Cold environments create a different hazard on your return indoors: condensation forms on and inside cold gear brought into warm, humid air. The prevention is to seal the camera in a bag with some silica gel before coming inside, and let it warm slowly inside that bag so moisture condenses on the bag rather than the lens. Cleaning fogged glass in that moment achieves little; patience achieves everything.
Smoke, sunscreen and insect repellent
Bonfires, barbecues and smoking areas coat front elements with an oily film that a dry cloth merely smears. That film needs the damp-cloth method from the main steps, sometimes repeated, followed by a dry polish with a second cloth. Sunscreen on grips and barrels should be removed the same day, because some formulations stain rubber and soften certain plastics over time. Insect repellents containing strong solvents are the most damaging common chemical a camera meets; keep sprayed hands away from the body until they are dry, apply repellent away from your kit, and wipe any contact immediately with a water-dampened cloth.
Building a Cleaning Kit That Lives Where You Need It
The best cleaning kit is the one that is present. Split yours into two layers. The field layer, small enough for a jacket pocket or a corner of any bag, holds a blower in miniature or full size depending on space, a lens pen or small brush, and two microfibre cloths in separate sealed bags so one stays clean if the other is used on a body or a spill. The home layer holds your sensor swabs in the correct size for your sensor, cleaning fluid, spare cloths, a head torch or bright lamp for inspections, and your notes on when the sensor was last wet-cleaned. Restock consumables when you open the last packet, not when you run out mid-clean before an important shoot.
Replace microfibre cloths more often than feels necessary. Cloths trap grit, and washing helps only if you wash them separately without fabric softener, which coats fibres and causes smearing. Many photographers treat cloths as semi-disposable, demoting older ones to body and bag duty and keeping only fresh cloths for glass. Given what a lens costs, that is inexpensive insurance. Store the whole kit somewhere clean and dry, never loose in the bottom of a camera bag among crumbs, cable ends and grit, which defeats the entire exercise.
Cleaning Viewfinders, Screens and the Small Optics People Neglect
The eyepiece of an electronic or optical viewfinder gathers eyelash oils, dust and, for glasses wearers, fine scratches from contact, and a smeared eyepiece makes the whole camera feel tired even when the lens is spotless. Clean it as you would a small lens: blower first, then a cotton bud or the corner of a microfibre cloth, very lightly dampened if oils resist. Many eyepieces slide off or unscrew for replacement, and a scratched eyecup is an inexpensive part to renew rather than a fault to live with. The rear screen benefits from the same gentle approach. Modern screens often carry oleophobic coatings that harsh solvents strip away, leaving a surface that smears more easily forever after, so water-dampened cloths only, and never press hard to chase a mark. If your screen has picked up fine scratches from zips and bag hardware, a good screen protector fitted after a thorough clean both hides minor marks and prevents the next ones.
The small windows and sensors around the body are easy to forget and quick to cause confusion when dirty. The autofocus assist lamp, the ambient light sensor that controls screen brightness, and on some cameras the eye sensor that switches between screen and viewfinder all sit behind tiny windows that collect pocket lint and sunscreen. An eye sensor coated in grime is the usual culprit when a camera seems to switch its display erratically. A dry cotton bud restores order in seconds. Flash contacts on the hot shoe and the lens mount contacts have already been mentioned, but the same principle applies to the contacts inside the battery compartment on cameras that have them: a dry wipe, nothing abrasive, and never any fluid pooled where it can wick inside.
Cleaning inside the bag counts as camera cleaning
Your camera spends most of its life inside a bag, so the bag’s cleanliness sets a floor under everything else. Empty bags completely every few months, shake them out outdoors, vacuum the seams and pockets with a crevice tool, and wipe hard-shell cases with a damp cloth. Dividers trap grit in their hook-and-loop edges, and that grit migrates onto lenses during every journey. If a bag has carried a leaking bottle, sand from a beach season, or a muddy event, wash removable dividers according to the maker’s instructions and let everything dry fully before reloading, because a damp bag is also a fungus incubator. While the bag is empty, inspect straps and attachment points. A frayed strap lug or a cracked quick-release plate found during cleaning is a disaster prevented for free.
When Cleaning Reveals a Problem Instead of Fixing One
Occasionally a careful clean uncovers something that is not dirt at all, and recognising the difference saves both money and anxiety. A spot that never moves, never changes with aperture in the usual way, and survives a correct wet clean may be a mark on or under the sensor’s filter glass, which only a technician can assess. A bright pixel that appears in every long exposure in the same place is a hot pixel, a normal sensor behaviour that most cameras can map out through a menu function often called pixel mapping, not a cleaning issue at all. Haze that returns inside a lens within weeks of a professional clean suggests the lens is being stored in conditions that feed the problem, so revisit humidity before paying for a second clean.
Cleaning can also reveal mechanical wear worth acting on. A lens mount that rocks slightly, a battery door that no longer latches crisply, a dial with a gritty dead spot, or a zoom ring whose resistance varies around its travel are all service items that start as small annoyances and end as failures on important days. Note what you find during each deep clean in the same notebook or phone note you use for sensor-clean dates. A camera with a written history is easier to maintain, easier to sell honestly, and far easier to discuss with a repairer, who can then quote on evidence rather than guesswork.
A seasonal deep-clean calendar
- After winter: check for condensation history, inspect seals that have endured cold and central heating, clean contacts, and refresh silica gel that has worked through the dampest months.
- Before summer holidays: full glass clean, sensor test shot, bag emptying and strap inspection, so problems are found at home rather than at the start of a trip.
- After any beach, desert or festival season: the staged grit routine from this guide, with cloths retired in order and special attention to barrels, dials and door seams.
- Before winter again: battery health check, firmware review, a test of every lens you own on the body you use most, and a review of storage humidity as heating changes indoor air.
Tied to seasons rather than to guilt, cleaning becomes maintenance in the ordinary sense, like servicing a bicycle: brief, scheduled, and almost entirely about preventing the larger bill and the ruined day.
Teaching Someone Else to Clean Your Camera
If you lend gear, share a family camera, or are teaching a teenager to care for their first interchangeable-lens body, a short shared routine prevents most accidents. Agree on three rules that cover almost everything: nothing touches glass except a blower, a brush and a clean cloth, in that order; the sensor is never touched outside the specific swab procedure, and never at all by a borrower; and any grit, spill or drop gets reported immediately rather than cleaned ambitiously. Write the sensor swab size for your camera on a label inside the cleaning kit, because the most common household error is a well-meaning person using the wrong swab size from a mixed drawer. A shared camera with shared rules lasts for years. A shared camera with assumed rules teaches everyone expensive lessons in turn.
Cleaning Vintage, Film and Inherited Cameras
An inherited or second-hand film camera, or an early digital body, needs a gentler and slightly different routine from a current model. Foam light seals and mirror dampers on older cameras degrade into a sticky crumble that smears if wiped enthusiastically. If you find black residue around a film door or mirror, do not scrub; note it as a seal-replacement job, which is inexpensive for a technician and messy as a first home project. Leatherette coverings on vintage bodies can lift if soaked, so clean them with a barely damp cloth and dry immediately. Bellows on folding cameras should only ever be brushed and blown, never wiped with fluid, and should be checked for pinholes by shining a small light inside in a dark room rather than by any cleaning experiment.
Old lenses deserve the same restraint doubled. Coatings on vintage glass are softer than modern coatings, and some very old elements are uncoated entirely. Use the blower and brush stages patiently and accept that a vintage lens may keep a light cleaning mark history that a modern lens would not. Aperture and focus mechanisms that have sat unused for decades often free up with gentle, repeated exercise rather than cleaning: work the rings slowly through their full travel many times before judging them faulty. Batteries are the other vintage trap. Remove any cell you find in an inherited camera immediately and inspect the compartment for leakage corrosion, which appears as white or green crusting. Light corrosion on contacts can be cleaned carefully by a technician; heavy corrosion is a reason to have the camera assessed before investing in film and processing. A vintage camera cleaned conservatively and serviced once will usually outlast the patience of anyone who tried to restore it aggressively in an afternoon.
Keeping a Cleaning Log and Knowing Your Own Limits
A simple log transforms cleaning from a series of isolated events into maintenance you can reason about. Record the date of each sensor wet clean, what prompted it, and how many swabs it took. Record beach trips, desert trips and any spill or drop, even if the camera seemed fine. Patterns emerge quickly: a photographer who wet-cleans every month probably has a storage or lens-changing habit to fix, while one whose log shows a clean sensor for a year has a routine worth protecting. The log also protects your wallet at the service desk, because you can describe the camera’s history precisely instead of paying for diagnostic guesswork.
Knowing your limits is the final cleaning skill. If your hands are unsteady, your eyesight makes sensor inspection difficult, or the camera in question is your livelihood, there is no virtue in home sensor cleaning at all; a scheduled professional clean is simply the correct tool. The same applies to anything involving screws, shims or internal surfaces. This guide has deliberately kept every procedure on the safe side of that line, and the line itself is worth respecting out loud: clean what comes off without tools, blow what you can reach without contact, swab only the sensor surface with the correct consumables, and hand everything else to someone who opens cameras for a living.
Cleaning a Camera You Are About to Sell or Lend
Cleaning before a sale or a long loan follows the same methods with a different emphasis: honesty and evidence. Photograph the front and rear elements, the sensor test frame and the body from several angles in good light after cleaning, because those images answer buyer questions better than adjectives do. Describe any mark you could not remove rather than polishing hopefully at it; a disclosed cleaning mark on an old lens barely affects a sale, while a freshly scratched coating from one wipe too many genuinely does. For a loan, include the field cleaning kit, show the borrower the blower and cloth routine in person, and agree in advance that sensor cleaning and any spill are your jobs, not theirs. Cameras return from loans in the condition the handover prepared them for, and a five-minute demonstration is the cheapest protection in this entire guide.
Finally, remove your memory cards, reset any personal information such as Wi-Fi pairings and owner details if the camera is being sold, and include a note of the last sensor clean and any service history from your log. That small professionalism is remembered, and in local photography communities, reputations travel faster than cameras do.
Related Guides
- best cameras for photography
- best cameras for travel
- best bags for cameras
- best backpacks for cameras
- best cameras for beginners
Frequently Asked Questions
How often should I clean my camera sensor?
Only when the test shot shows spots that appear in your real photos. Many photographers clean a sensor a few times a year; dusty environments and frequent lens changes increase that. Run the camera’s automatic cleaning cycle at startup if it offers one, use the blower when spots first appear, and reserve swabs for stubborn marks. Unnecessary swabbing adds risk without adding image quality.
Can I use canned air to blow dust off my sensor?
No. Canned air can eject liquid propellant that leaves residue on the sensor, and the high-pressure blast can drive particles deeper or damage delicate shutter blades. A hand-squeezed rocket blower produces a gentle, clean airflow with no chemicals and no cost per use, which is why every repair technician recommends it instead.
What should I do about a fingerprint on my lens?
Blow loose dust off first, then use a clean microfibre cloth with very light circular motions from the centre outward. If the print is greasy, put a single drop of proper lens-cleaning fluid on the cloth — never on the glass — and repeat. Avoid pressing hard: coatings are tough against chemistry but vulnerable to abrasion from trapped grit, not from gentle wiping.
Is it safe to clean the sensor myself?
Yes, with the correct swab size, the camera in its official cleaning mode, and a steady hand — thousands of photographers do it routinely. The sensor is covered by a protective glass filter, so you are cleaning glass, not the bare chip. If your camera is under warranty and you feel nervous, or the dirt looks like damage rather than dust, let a service centre handle it instead.
How do I clean a camera after a beach shoot?
Brush and blow sand away before wiping anything, because sand is abrasive. Wipe the body with a cloth very slightly dampened with fresh water to dissolve salt, then dry thoroughly, paying attention to dials, seams and the mount. Clean the glass last with the normal lens method, check the tripod threads and hot shoe for trapped grains, and store the camera with silica gel if the air is humid.
Why do dust spots show up more in some photos than others?
Sensor dust sits slightly above the sensor itself, so its shadow is sharpest when light arrives in a narrow, parallel beam — which is what a small aperture like f/16 produces. At wide apertures the shadow blurs into invisibility. That is why the test uses f/16, and why landscape photographers, who live at small apertures, notice dust long before portrait shooters do.
Should I clean my camera before a firmware update or a service visit?
Yes to a light exterior clean in both cases. A body free of grit is easier for a technician to open without dragging particles inside, and for your own update it simply means you are handling a camera that will not shed dust onto the sensor if you change a lens afterwards. Keep it to the blower, brush and body wipe stages; a service visit is not the moment for a first experimental sensor wet clean, because you want the technician to see the camera in its honest working state.