
Learning how to mount a tv safely is mostly about the wall, not the television. A modern large screen is lighter than older sets, yet it still hangs from a bracket for years, so the fixings, the wall structure and careful levelling matter far more than speed. This guide covers choosing the mount, finding solid fixing points, setting a comfortable height and routing cables so the finished result looks clean and stays secure.
Safety comes first throughout: always fix into wall studs or solid masonry with the correct fixings for your wall type, never rely on plasterboard alone with basic plugs, use two people for lifting, and if you are unsure about the wall or the wiring behind it, stop and get professional help. Never drill where cables or pipes may run, and never open the television itself. With those cautions in place, most straightforward mounts are a careful afternoon job.
Disclosure: As an Amazon Associate, kajuandouglas.com earns from qualifying purchases. Links to Amazon on this page are affiliate links; they cost you nothing extra. Listing details such as price and availability change often, so check the current Amazon listing before you buy.
Quick answer: In short: pick a mount rated for your screen size and VESA pattern, locate studs or solid masonry and fix only into structure, set the centre of the screen near seated eye level, attach the brackets to the television on a soft surface, lift with two people, level, then route cables safely without pinching or stretching them.
What You Need
- A wall mount rated for your TV: Check the mount suits your screen size and weight and matches the VESA hole pattern on the back of your set, measured in millimetres.
- A stud finder and a pencil: Essential for timber frame and plasterboard walls, so screws land in solid studs. Use a detector that also warns about cables and pipes before drilling.
- A drill, level and socket set: With drill bits and wall fixings matched to your wall type, plus a spirit level long enough to check the bracket properly.
- A second person: Non negotiable for lifting and holding the television while it engages with the wall plate. Never attempt to hang a large screen alone.
- Cable management: In wall rated cable kits where regulations allow, trunking, or simple ties and covers, planned before the set goes up so cables are not trapped behind it.
In this guide
How to Mount a TV: Step by Step
Step 1: Confirm the wall and find solid fixings
Identify your wall type first. On stud walls, scan with a stud finder and mark both edges of at least two studs, then verify with a detector sweep for cables and pipes along your drill lines. On solid brick or block walls, plan fixings into the masonry itself, avoiding mortar joints. If the wall is plasterboard with no studs where you need them, use fixings designed and rated for that exact situation, or choose a different position. When in doubt about structure, consult a professional installer.
Step 2: Choose the height from your seats, not the ceiling
Sit in your normal viewing position and note your eye level. The centre of the screen should sit close to that height for comfortable long viewing, which is usually lower than people first guess. Mounting high above a fireplace forces an upward gaze that tires the neck and can expose the panel to heat, so treat fireplace positions with extra caution and follow the television maker guidance on heat. Mark the centre line on the wall with tape before drilling anything.
Step 3: Fit the wall plate level and secure
Hold the wall plate against your marks, check it with a spirit level in both directions, and mark the fixing holes. Drill pilot holes appropriate to your fixings, keeping the drill straight and stopping if you meet unexpected resistance or voids. Secure the plate with every fixing the maker specifies, tightening evenly, then test the plate firmly by hand. A plate that moves at this stage will only get worse with a television hanging from it, so fix any movement now.
Step 4: Attach the brackets to the television
Lay the television face down on a clean, soft surface such as a blanket on a table, never on a hard floor. Attach the vertical brackets using the screws and spacers from the mount kit that match your set VESA pattern and any curve or step in its back panel. Use the correct screw length so screws seat firmly without being forced, and check both brackets sit at the same height setting so the screen hangs level first time.
Step 5: Connect cables before lifting
Plug in the power lead, HDMI cables, antenna lead and any other connections while the television is still easy to reach, leaving gentle service loops rather than tight bends. Route cables towards the side or channel you planned, and label the HDMI ends if several devices are involved. Doing this now avoids the classic struggle of reaching blindly behind a mounted screen, and reduces the chance of a cable being pinched between the set and the wall.
Step 6: Lift, hang and level with two people
With one person each side, lift the television by its frame, engage the brackets onto the wall plate exactly as the mount instructions describe, and fit any locking screws or safety tabs. Do not let go until both sides confirm the set is fully seated. Check level on the top edge of the screen, adjust using the mount levelling feature if fitted, then connect cables to your devices, tidy them into trunking or covers, and test the picture from your seats.
How to Mount a TV: Fixed, Tilting and Full Motion Mounts Compared
A fixed mount holds the screen flat and close to the wall, which looks neatest and suits rooms where seats face the television directly. A tilting mount adds a modest downward angle, helpful when the set must sit a little higher, and it also makes rear ports easier to reach. A full motion or articulated mount swings the screen out and angles it towards different seats, which is valuable in open plan rooms, but it places far more leverage on the wall fixings and demands the most solid mounting of all.
Match the mount to the job rather than buying the most flexible option by default. Every extra movement is an extra load path through your wall fixings. Whatever type you choose, respect the rated screen size and weight, use all the specified fixing points, and recheck locking screws after the first week, because brackets settle slightly under load. A mount that feels completely rigid when you press its corners gently is the standard you are aiming for.
Cable Routing and Finishing Touches That Make It Look Professional
The difference between a tidy install and a messy one is usually cable planning. Decide before drilling whether cables will run inside the wall using a properly rated kit that complies with local regulations, surface trunking painted to match the wall, or a simple fabric cover. Never run a standard power extension lead inside a wall cavity, and never trap cables between the bracket and the wall where they can chafe. Leave enough slack to tilt or remove the set later without unplugging everything blind.
Finish by viewing the screen from every seat in daylight and darkness. Check for reflections from windows and lamps that were invisible when the set stood on furniture, and adjust tilt or lighting rather than picture settings to fix them. Finally, keep the mount instructions, spare screws and the television stand parts together in a labelled bag, so the set can be moved or serviced later without a hunt for hardware.
Common Mistakes
- Fixing into plasterboard alone: Standard plugs in plasterboard can pull out under a bracket load. Fix into studs or masonry, or use rated specialist fixings, and get advice if unsure.
- Mounting at standing eye height: A screen centred for standing viewers forces seated viewers to look up for hours. Set the centre near seated eye level and test with tape first.
- Drilling without checking for cables and pipes: Walls hide services exactly where brackets want to go. Sweep with a detector and avoid vertical and horizontal runs from sockets and switches.
- Lifting a large screen alone: One slip can injure you and destroy the panel. Always lift with two people and confirm the brackets are locked before letting go.
Pro Tips
Mock up the screen outline on the wall with painter tape and live with it for an evening before drilling; height mistakes are obvious from the sofa.
Photograph cable connections at the back of the set before hanging it, so you can identify ports later without removing the television.
Keep a small level on top of the set for a day and recheck after the first evening, since articulated mounts can settle a fraction under load.
Mounting on Different Wall Types
Timber stud walls are the most common and the most technique sensitive. Studs are spaced at regular intervals, but rarely exactly where your screen centre wants to be, so a mount plate with a wide fixing span, or a position shifted to meet the studs with the screen still centred by the bracket arms, solves the geometry. Metal stud walls, common in newer apartments, need fixings designed for them and a gentler touch, because the stud itself is thinner material. When the fixing plan starts to feel improvised, that is the signal to involve a professional.
Solid masonry is the most forgiving structure and the least forgiving of wrong drill bits and plugs. Use masonry bits, plugs matched to the bolt size and the brick or block material, and drill into the body of the brick rather than the mortar. Concrete ceilings and walls in apartments behave similarly. In every case the principle is identical: the fixing must suit the material, the full rated set of fixings must be used, and the finished plate must not move under a firm hand test before the television is lifted anywhere near it.
After the Mount: Living With a Wall Hung Television
A mounted television changes small habits. Cleaning the screen follows the same gentle method as any set, with the advantage that a tilting mount lets you reach the back for dusting ports and cables. Keep the mount locking screws checked after the first week and then at your spring cleaning, because building vibration and thermal cycles loosen hardware slowly. If you redecorate, protect the screen with a soft cover rather than removing the set for every painted wall.
Plan for the day the television is replaced. Screen sizes and VESA patterns change between models, so a mount with a generous size and pattern range, plus your saved notes on stud positions and cable routes, turns a replacement into an hour of work. Photograph the wall fixings before the set goes up the first time. Future you, standing on a ladder with a new television in the hallway, will be grateful for every measurement and photograph past you saved.
Real-World Scenarios and Examples
Abstract advice lands differently in real rooms. These scenarios apply the guidance above to the situations readers describe most often.
- The new build stud wall: Studs located and marked, plate spanning two studs, screen centred by bracket adjustment. Detector sweep first, because new builds hide cables exactly where you want to drill.
- The brick chimney breast: Masonry fixings into brick bodies, extra caution about heat if the fireplace is used, and a tilting mount to angle the picture down to the sofa.
- The rented flat: If drilling is restricted, reconsider: a stand may serve better than a mount you must repair at lease end. If mounting is allowed, stud fixings and full documentation of the install protect your deposit.
- The corner installation: An articulated mount earns its keep here, but its leverage demands the most solid fixings of all. Test the swing with the set held before trusting it, and lock the position once set.
- The very large screen: Two studs minimum, every fixing used, three people for the lift rather than two, and the tape outline test watched for a full evening before a single hole is drilled.
Gear for This Guide
A mount itself should be bought to match your exact set and wall, but these verified items show the kind of screen, soundbar and antenna that commonly complete a wall mounted setup.

TCL 55-Inch Class S5 UHD 4K LED Smart TV with Fire TV (55S551F, 2024 Model), Dolby Vision, HDR PRO+, Dolby Atmos, Alexa Built-in with Voice Remote, Apple AirPlay 2 Compatibility, Streaming Television — A large 4K set of the size most people wall mount in a living room, useful for checking VESA patterns and weights against mount ratings while you plan. Check price on Amazon.

Bose TV Speaker – Soundbar for TV with Bluetooth and HDMI-ARC Connectivity, All-in-One Compact Soundbar, Includes Remote Control, Black — A compact soundbar that fits neatly below a wall mounted screen and connects through HDMI ARC, avoiding a shelf of separate speakers. Check price on Amazon.
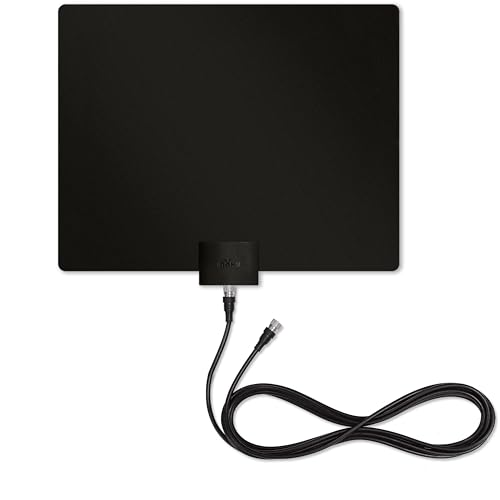
Paper Thin Leaf Indoor HDTV Antenna – Made in the USA — A flat indoor antenna that can sit discreetly near a mounted television for over the air channels without an outdoor aerial. Check price on Amazon.
Walls in Depth: What You Are Really Fixing Into
Stud, masonry, and the honest assessment
- A wall mount is only ever as strong as what it is fixed into, which is why this guide begins with the wall rather than the bracket. Timber studs behind plasterboard carry loads through screws into solid wood; masonry carries them through plugs into brick or block; plasterboard alone, despite the confidence of some fixings’ packaging, is a surface, not a structure, for a heavy television on an extending arm. Identify your wall type properly: knock and listen, use a stud finder carefully and confirm its findings, check the other side of the wall if accessible, and look at the house’s construction age and style for corroboration.
- If the assessment leaves doubt, the professional route is not an admission of defeat but the correct tool: installers assess walls daily, carry the fixings for every construction, and insure their work. The cost of an installation is small against a television, a wall, and a household’s peace of mind, and it is smallest when booked before holes are drilled rather than after. DIY mounting is satisfying and entirely achievable on cooperative walls; the skill this section teaches is recognising the uncooperative ones early.
Load, leverage, and why extending arms multiply everything
- A television’s weight is only the beginning of the physics. A fixed mount holds that weight close to the wall, where the load is mostly downward and forgiving. An extending or full-motion arm moves the same weight outward on a lever, multiplying the pulling force on the top fixings severalfold, especially when the screen is swung to one side. This is why mount ratings, wall quality, and fixing choice matter more with every centimetre of extension, and why a mount that felt rock solid with the screen flat should be re-evaluated before it is trusted fully extended with a larger replacement television in five years.
- Respect the mount’s stated maximum weight and screen size as ceilings, not targets, and remember they assume competent fixing into suitable structure. Add the soundbar’s weight if it will hang from the mount, and the enthusiasm of children and pets if they share the room. Engineering margins are not pessimism; they are what stands between a television and the floor on the one day everything aligns badly.
Height, Angle, and the Ergonomics of Watching
The centre of the screen and the line of your eyes
- Mounting height should be set from the seats, with the screen’s centre near the eye level of the seated viewers it serves most. The over-fireplace and high-wall fashions place screens where necks pay for them nightly, and no mount’s tilt fully refunds that cost. If the television must sit high, because the room’s architecture insists, choose a tilting mount, angle the screen down honestly, and consider whether the main viewing should migrate to a different wall where the television can live at a humane height. Rooms sometimes contain a better wall that habit has never considered.
- Viewing angle matters horizontally too. A screen mounted flat on a wall perpendicular to the main sofa serves the whole room politely and the main viewers poorly, while a full-motion mount can square the screen to the seats for serious viewing and return it flat for the room’s tidiness. Decide which life the television leads, mostly squared to a sofa or mostly flat as the room’s furniture, and buy the mount for that life rather than for the showroom’s promise of infinite adjustment you will perform twice.
Glare, light, and the mounted position
- A mounted television cannot be nudged on its stand to escape a reflection, so assess light at the intended position across the day before drilling. Windows opposite the screen will print themselves on it at certain hours; lamps beside the viewers will join them at night. Sometimes a modest shift along the wall, or the choice of the adjacent wall, removes a reflection problem that no screen finish could have solved. Make that assessment with the room’s curtains and lighting in their real evening state, because that is when the television earns its living.
- Also plan the sun’s direct path. A screen that takes direct sunlight daily ages unevenly and is unwatchable at that hour, and a mounted screen cannot be rotated away like a stand-mounted one. If the only wall is the sunny one, curtains or blinds become part of the mounting budget, and accepting that at planning stage is cheaper than discovering it on the first bright evening of spring.
- Fix into structure: studs or masonry. Plasterboard alone is not a structure for heavy or extending mounts.
- Extending arms multiply fixing loads. Respect mount ratings as ceilings and include soundbar weight.
- Set height from seated eye level, and be honest about high placements and their neck cost.
- Assess reflections and direct sun at the exact position, in evening light, before drilling.
Cables, Power, and the Installation’s Hidden Half
Power where the television will live
- A wall-mounted television needs power at its location, and the options deserve thought before the screen covers the wall. An existing socket behind the television’s position is ideal. A socket below, with cables channelled neatly, is the common compromise. Running an extension lead behind a wall or under carpets is neither tidy nor advisable, and in many places regulations have specific things to say about in-wall power that a qualified electrician can satisfy properly with a recessed outlet installation. Budget for the electrician if the wall demands it; the floating television with a cable dangling to a distant socket is a look nobody planned.
- Signal cables are more flexible: quality HDMI and network cables can be routed through proper in-wall rated channels or surface trunking painted to match, and wireless options cover some sources. Plan every cable’s full path while the wall is still theoretical, including its length with the mount extended, because a cable that fits with the screen flat and strangles it when swung is a fault installed on purpose. Leave service loops, gentle slack that lets the television be lifted off and reconnected without heroics, because the day you need to reach the ports always arrives.
Ventilation and the television’s back panel
- Mounted televisions still breathe. Leave the clearances the maker specifies around vents, especially above the set where heat escapes, and be wary of recessed alcoves and cabinetry that trap warm air around a large screen. A television that runs hot ages its backlight and electronics faster, and a mount that parks the screen millimetres from the wall in a sunlit alcove is an oven with a picture. If the design vision demands a recess, ventilation becomes part of the design brief, not an afterthought discovered through a shortened television life.
- Access matters too. Ports on the rear will be needed again: for a new console, a replacement cable, a streaming device. A mount that allows the screen to tilt or extend for access, or a planned reach route behind it, saves the full dismounting ceremony that otherwise greets every upgrade. Think of the mount as the television’s service position as well as its display position, and choose accordingly.
After the Mount: Settling, Checking, and Living With It
The first month of checks
- A new mount settles: fixings bed in, arms find their level, and cables relax into their runs. In the first month, check the screen’s level again, confirm the mount’s moving joints still hold position without drifting, and inspect fixings for any sign of movement or plaster cracking around them. A mount that is going to complain usually does so early and quietly, with a tilt that will not stay or a hairline crack that asks to be investigated rather than painted over.
- Teach the household how the mount moves before someone teaches themselves with force: which joints articulate, how much resistance is normal, and the rule that the screen is moved by its frame or handles, never by pushing its corners or pulling its cables. Full-motion mounts in family rooms live hard lives, and their longevity is decided by the gentleness of their daily handling more than by their steel.
When the television changes but the mount stays
- Mounts outlive televisions, and the replacement day deserves its own checks: the new set’s mounting hole pattern and weight against the mount’s ratings, its centre of gravity on an extending arm, and its port positions against your cable runs. Standards make many swaps simple, but verify rather than assume, because the cost of verification is a tape measure and the cost of assumption can be a television. If the new set is larger or heavier in a way that strains the old mount’s margins, replace the mount with it; the wall work is already understood, and the new installation inherits all your knowledge of that wall’s character.
- Keep the mount’s paperwork, spare bolts, and Allen keys with the television’s records. The future installer, who may be you in six years with no memory of this weekend, will be grateful for the documentation, and the household’s next television will go up in an hour of confidence rather than a day of archaeology.
Mounting in Rented Homes and Other People’s Walls
Permission, minimal damage, and reversible thinking
- Renters should begin with the lease and the landlord, because wall fixings are alterations in most agreements and the conversation is easier before the holes than after. Where permission is granted, choose the mount and placement that achieve the result with the fewest, smallest fixings into the soundest structure, and keep the removed paint and plaster story simple: standard fixings into studs fill and disappear more kindly than exotic anchors scattered widely. Photograph the wall before and after, and keep the fixings’ details for the day they must be made good.
- Where permission is refused, respect it and solve the problem differently: a stand whose design lifts the screen to the intended height, or furniture built for the purpose, can deliver most of the mounted look without a single hole. The floating effect is an aesthetic; the television’s picture, sound, and your deposit are the substance. Experienced renters also know that a landlord’s refusal sometimes softens when presented with a professional installation plan and a make-good commitment, so the conversation is worth having properly rather than assuming its ending.
Mounting on fireplaces, alcoves, and awkward architecture
- Older homes offer walls with opinions: chimney breasts, alcoves, lath and plaster, and stone that laughs at ordinary fixings. Each demands its own assessment, and chimney breasts add heat to the structural question when the fire is in use, because a television above a working fireplace lives in rising warmth that its maker did not intend for it. If the breast is decorative and the flue unused, the structural question remains, into masonry that may be excellent or may be a century of surprises. Test drillings in inconspicuous spots tell the truth cheaply.
- In genuinely awkward architecture, a professional installer is not a luxury but the difference between a mount and a mishap, because their trade is precisely these walls and their fixing systems. The household’s role is to know the viewing requirements, the height, the angle, the cable plan, so the professional’s structural expertise is applied to your ergonomic brief rather than to their default habits. Briefed well and fixed soundly, even a difficult wall can carry a television beautifully for decades.
Worked Mounting Scenarios: Three Rooms, Three Solutions
The living room corner that defeated the stand
- A common room defeats furniture: the only sensible viewing wall is interrupted by a fireplace, windows crowd the others, and the sofa sits diagonally to everything. A full-motion mount on the soundest section of wall solves the geometry, letting the screen live flat and tidy when idle and swing square to the sofa for viewing. The installation’s critical decisions are structural, finding the stud or masonry that can carry an extended arm’s leverage, and ergonomic, setting the height from the sofa’s real eye line rather than the room’s visual centre. Done well, the corner mount converts the room’s worst feature into its viewing solution, and the cables, planned through the mount’s arm with service loops, disappear into the arrangement.
- The lesson generalises: mounts earn their complexity when they solve a room problem, viewing angle, glare, a room’s dual life as office and cinema, and are over-engineering when they merely promise adjustments nobody performs. Buy articulation for a named problem, and the mechanism will be exercised weekly with gratitude; buy it for a brochure, and it will stiffen, unused, into an expensive fixed mount with more failure points.
The bedroom television and the ethics of the tilt
- Bedroom viewing is done reclined, from pillows, at hours when the household sleeps, and the mount should serve that posture honestly: placed on the wall facing the bed, at a height set from the reclined eye line, which is higher and further than a chair’s, with a tilt that squares the screen to the pillows. Sound matters as much as angle here: a bedroom television’s own speakers, aimed by the tilt toward the bed, often serve better than a soundbar that must shout across the room or whisper ineffectually. Cable and power planning should respect the room’s calm: no dangling leads, no standby lights glaring at pillow height if they can be tamed in settings.
- Renters and the young should note the bedroom is also where minimal-fixing solutions shine: a tall stand or a dresser at the right height can achieve the reclined geometry without a drill, and the television can be enjoyed for years while the deposit remains unthreatened. Mount when the wall and the tenure justify it; furnish when they do not, and let the viewing, which is identical, settle the question of which was wiser.
The kitchen, office, and other working screens
- Working rooms ask different things of a mount: a kitchen television must sit clear of steam and splashes, angle toward the cook’s station rather than the room’s centre, and survive being viewed in fragments at odd heights, standing, chopping, moving. An office screen used for calls and shared work must sit at camera-friendly height if it hosts a camera, square to the desk, with cables planned for the laptop that will visit it daily. In both rooms, smaller articulating mounts, firmly fixed, serve better than grand ones, and the fixing assessment should account for the rooms’ realities: kitchen walls with their tiles and hidden pipes, office partitions that may be stud walls of unusual spacing.
- In every working room, the safety margin deserves its sentence: a screen above a place where people stand, cook, and pass with pans and laptops must be fixed as if it will be knocked, because one day it will be. Check the mount’s hold after the first weeks, again after the first season, and whenever the room is rearranged. A mount is a promise the wall makes to the room, and promises, like calibrations, should be revisited on a schedule rather than on the occasion of their failure.
Tools, Fixings, and the Shopping List Done Properly
What to have in the room before the first hole
- A calm installation begins with a complete kit laid out before any drilling: the mount and its full hardware, a drill with the correct bits for your wall’s material, a stud finder and a level you trust, a tape measure and painter’s tape for marking without marking, the correct screwdriver bits and a ratchet for the lag fixings, a vacuum or a helper with one, because masonry and plaster dust travel astonishing distances, and the cables, all of them, measured for the mount’s full travel. The mid-installation expedition to buy a bit or a cable is where haste, wrong purchases, and abandoned care are born, and it is entirely preventable by this list.
- Buy fixings for your wall, not for the mount’s optimism: the hardware in the box suits some walls and is a starting point for others, and a hardware store’s wall-specific plugs and screws, chosen for your construction and the load, are cheap insurance. Keep the packaging and receipts of everything until the television has hung for a week, because mounts, like sizes, are occasionally exchanged, and the household that can exchange calmly is the one that kept its options physically intact.
Marking, drilling, and the discipline of the pilot hole
- Mark the installation completely before drilling anything: the mount’s position taped on the wall, the screen’s outline in tape at its true size, viewed from the seats at viewing hours, because tape is the cheapest simulator ever invented and it has saved more walls than any other tool in this guide. Live with the tape outline for an evening if the placement is new; rooms reveal their objections slowly, in lamplight and traffic patterns, and an evening of tape costs nothing against a decade of a screen six inches from where it should be.
- Drill pilot holes where the system calls for them, confirm each fixing’s ground as the drill reports it, stud, masonry, or the dreaded void that means your information was wrong, and stop at the first surprise rather than improvising around it. Surprises in walls are information, and the installer who pauses to re-measure after one finishes with a mount in structure; the one who presses on finishes with a story. The television will hang for years on the quality of the next twenty minutes, which is why this guide spends so many words before them.
A Final Safety Review Before You Call It Done
The checks that close the job
- An installation is finished when it has passed its own inspection, not when the tools are put away. Confirm every fixing is tight and seated, the mount’s joints move as designed and hold their positions, the screen is level and at the planned height, cables have their service loops and no tension at any point of the mount’s travel, and power and signal both behave with the screen in every position it will actually occupy. Photograph the finished installation and the wall’s fixings before the screen went up, if you had the foresight, and file them with the mount’s paperwork and the television’s records.
- Then sit in the worst seat in the room and watch something. The mount’s success is not measured at the wall but from the seats, in glare, angle, and height as the household will live them. If the worst seat is honestly served and the best seat is delighted, the job is done, and it will stay done for years, asking only the light schedule of checks this guide describes. A mount is infrastructure, and infrastructure’s highest praise is to be forgotten, which a well-chosen, well-fixed, well-checked mount reliably earns.
Related Guides
- best tvs for movies
- best tvs for sports
- best tvs for streaming
- best smart tvs for streaming
- best tvs for bedrooms
- qled vs uled tv
- tv refresh rate explained
Frequently Asked Questions
How high should I mount my TV?
For seated viewing, aim for the centre of the screen at roughly seated eye level, then test the position with a tape outline on the wall for an evening before drilling. Mounting much higher forces an upward gaze that becomes uncomfortable during films and sport. If the set must go above a fireplace or tall furniture, use a tilting mount angled down towards the seats, keep the panel away from heat as the maker advises, and accept a small compromise on comfort.
Can I mount a TV on a plasterboard wall?
Yes, but only with the right approach. The bracket should fix into the timber or metal studs behind the board wherever possible, located carefully with a stud finder. If studs do not fall where you need them, use fixings specifically designed and rated for plasterboard bracket loads, follow their instructions exactly, and consider a smaller or fixed mount to reduce leverage. Never hang a television from ordinary wall plugs in plasterboard alone, and get professional advice if the wall feels weak or hollow.
What is VESA and why does it matter?
VESA is the standard pattern of four mounting holes on the back of a television, described by the horizontal and vertical spacing in millimetres, such as a square or rectangular pattern. Your mount must match that pattern and be rated for your screen size and weight. You can measure the hole spacing yourself with a tape, or find it in the television manual. Adapters exist for some mismatches, but the cleanest and safest result comes from a mount designed for your exact pattern.
Do I need a professional to mount a TV?
Many straightforward mounts on solid or stud walls are within careful DIY ability, provided you find solid fixings, use the correct hardware, check for hidden cables and pipes, and lift with two people. Choose a professional if the wall type is unclear, the screen is very large, the mount is fully articulated, or cables need to run inside the wall under electrical regulations. A professional install is far cheaper than repairing a fallen screen or a drilled pipe.
How do I hide cables for a wall mounted TV?
Options range from surface trunking that can be painted to match the wall, fabric cable covers, and in wall cable kits that are rated for the purpose and comply with local rules. Plan the route before hanging the set, leave gentle slack at both ends, and never pinch cables behind the bracket or run ordinary extension leads inside a wall cavity. Connecting every cable before lifting the television makes the whole job far easier and tidier.
Will wall mounting damage my TV or viewing angles?
A correctly rated mount fitted to the television VESA points does not damage the set. Viewing comfort depends on position: centre the screen to your main seats, keep it near seated eye level, and consider a tilting or articulated mount if seats spread wide or the set must sit higher. Also check reflections in the new position, because a wall position can catch window light that the old stand position avoided, and small tilt or lighting changes usually solve it.
Can I mount a television on a plasterboard wall?
Only if the mount is fixed into the structure behind the plasterboard, usually the timber studs, or with fixings and methods specifically engineered and rated for the load in that construction. Plasterboard alone should not carry a heavy television, especially on an extending arm. Locate the studs, use fixings appropriate to them, and if the stud positions cannot serve your placement, have an installer assess alternatives such as a mounting plate that spans studs.
How high should a wall-mounted television be?
Set the centre of the screen close to the seated eye level of the main viewers, which in most rooms is lower than people instinctively mount. Measure from your actual seats, allow for reclined postures if your seating reclines, and use a tilting mount if the position must be higher, such as above a fireplace, while accepting that very high placements cost neck comfort no tilt fully refunds.
Do I need an electrician to mount a television?
Not for the mount itself, but you may for the power. If a socket is needed behind the television or cables are to be run inside the wall, electrical regulations in many places require or strongly favour qualified work, and in-wall power extensions using ordinary extension leads are unsafe and non-compliant. Signal cables are a separate matter and can often be routed in rated channels or trunking by a competent DIYer.