Working out how to fix blurry projector image problems starts with locating the blur, because a uniformly soft picture, one blurry corner, and sharp menus over blurry films are different faults wearing the same name. Note whether the projector own menus are sharp, whether the blur covers the whole image or one area, and whether it appeared suddenly or crept in over months. Those three observations map directly onto the causes below and save you from adjusting the wrong thing.
Most blur is focus, alignment or source resolution, all fixable at home in minutes. Some is a dirty lens or an overused keystone correction quietly taxing the picture. A small residue is hardware, and the repair section covers its signatures honestly. Work in order, check with fine text rather than film scenes, and remember that a projector must be warm before its focus is judged, because focus drifts as the unit heats up during its first minutes.
Disclosure: As an Amazon Associate, kajuandouglas.com earns from qualifying purchases. Links to Amazon on this page are affiliate links; they cost you nothing extra. Listing details such as price and availability change often, so check the current Amazon listing before you buy.
Quick answer: In short: let the projector warm up, focus on fine text at the screen, clean the lens with a blower, square the projector to remove keystone, confirm the source outputs the projector native resolution, and check whether menus are sharp to separate projector faults from source faults.
Likely Causes, Most Common First
- Focus, including thermal drift: The lens is simply out of focus, or was focused cold and drifted as the projector warmed, the most common cause of a uniformly soft image.
- Misalignment and keystone correction: A projector angled to the screen focuses unevenly, softening one side or corner, and digital keystone scaling softens the whole image permanently while it is active.
- Source resolution mismatch: The source is outputting below the projector native resolution, or a streaming service has dropped to a low quality stream, so the projector faithfully displays a soft picture.
- Dirty lens or obstructed light path: Dust, fingerprints or a smeared lens scatter light and soften contrast across the image, often with a hazy quality in dark scenes.
- Screen or wall surface: Texture, ripples in a pull down screen, or a non flat wall blur the image locally, worst with short throw projectors whose steep angle exaggerates surfaces.
In this guide
How to Fix Blurry Projector Image: Step-by-Step Fixes, in Safe Order
Step 1: Use the menu test to split the problem in half
Display the projector own menu and settings text. If the menus are sharp but films look soft, the projector optics are fine and the fault is the source, its resolution or the content stream, so jump to the source step. If the menus are also soft, the problem is in focus, lens or alignment, and the next steps apply. This ten second test is the most valuable in the guide, because it prevents an hour of lens work on a streaming problem.
Step 2: Refocus properly, warm, on fine text
Let the projector run for at least ten minutes so its temperature and focus settle. Display fine text, such as a settings page or a document, stand at the screen, and adjust the focus ring slowly through the sharp point in both directions to find its centre. Check the centre and all four corners. If the whole image sharpens evenly, you are done; note that focusing a cold projector perfectly is a common trap, because the image softens again as it warms.
Step 3: Clean the lens the safe way
With the projector cool and off, blow the lens with a hand blower to remove dust. If a fingerprint or haze is visible under a torch at an angle, use a clean microfiber lens cloth with the lightest touch, centre outwards, as the dedicated lens cleaning guide on this site describes in full. Never wipe a dusty lens dry and never use household cleaners. A hazy image with lifted blacks that sharpens after this step was a lens problem, and fitting the cap afterwards prevents its return.
Step 4: Square the projector and remove keystone
If one side or corner stays soft while the centre is sharp, the projector is angled to the screen, so parts of the image sit at different distances and cannot all be in focus together. Centre and level the unit, square it using the test pattern until the image is a true rectangle, and set keystone correction to zero, repositioning physically instead. Then refocus. Uneven focus is an alignment report, not a lens defect, and this step is its cure in almost every case.
Step 5: Set the source to the projector native resolution
On each source, set the output explicitly to the projector native resolution rather than automatic, and confirm any upscaling in the chain is happening in one place only. For streaming, check the service quality setting and your network speed, because a stream that has dropped to a low resolution looks exactly like a focus fault on a big screen. Test with a high quality local source, such as a disc or a downloaded file, to prove what the projector can do when fed properly.
Step 6: Inspect the screen or wall surface
Stand to the side and look across the screen in raking light for ripples, waves or texture, especially with pull down screens and short throw setups. A wavy screen blurs and distorts locally no matter how perfect the focus. Tensioned or fixed frame screens solve this permanently; on a wall, a smoother section or a painted screen area may help. If the blur moves when the image is shifted to a different part of the surface, the surface, not the projector, owns the problem.
When to Get Professional Repair or Replace It
Book professional service if the image stays soft after focus, cleaning, alignment and a proven native resolution source, if you see fixed soft spots that survive lens cleaning, which suggests dust inside the light path, or if focus will not hold during a single film, which suggests a mechanical lens fault. Never open the projector to chase internal dust or lens issues: the light path is not user serviceable and opening the unit is unsafe and voids the warranty. Show the technician your menu test result; it tells them immediately which half of the system you have already cleared.
How to Prevent It Happening Again
Focus only after the projector has warmed up for ten minutes, and recheck after the first film in a new installation.
Keep keystone at zero in permanent setups and fix geometry by position, so digital scaling never taxes the picture.
Fit the lens cap whenever the cooled projector is off, and give the lens a blower check monthly in dusty rooms.
Set every source output explicitly to the projector native resolution, and keep streaming quality settings on their highest stable option.
Blur Patterns and What Each One Is Telling You
Read the blur like a report. Uniform softness that focus improves but never perfects is usually a resolution mismatch or a lens at the edge of its quality, revealed by text. Softness that pulses or changes with content is a stream adapting its quality to your network. A sharp centre with soft edges on a square setup is lens character, worst at the zoom extremes, and partly curable by moving the projector so the zoom works mid range. A sharp top and soft bottom is a tilted unit or a screen that is not vertical, and it yields to geometry, not focus.
Colour fringing on text edges, a rainbow shadow on one side, points away from focus entirely: it is the optics or the panel alignment rendering colours slightly apart, exaggerated by keystone and digital corrections. Return all digital corrections to zero and retest before judging it, because correction artefacts imitate optical faults convincingly. The habit underneath all of this is to change one variable and retest with the same text image, so each observation means something. Blur diagnosed by pattern is fixed in minutes; blur attacked at random consumes evenings.
Focus Craft: Getting the Last Ten Percent
Final focus is a craft with three refinements. First, focus on the content you actually watch: a text page for presentations, a detailed film still for cinema, because the sharpest point for fine black text and for film grain can differ by a hair. Second, use the middle of the zoom range where the lens is at its best, if your placement allows it, rather than the extremes where corner performance falls away. Third, mark the focus ring position with a tiny piece of tape once it is perfect, so any disturbance, a cleaning, a moved unit, a curious hand, can be restored to the mark in seconds.
Accept the honest limit when you reach it. A projector displaying a standard definition source on a huge screen will never look sharp, because the information is not there; a budget lens will never match a flagship lens into the corners. The goal of this guide is the sharpest image your system can produce, verified by the menu test and a native resolution feed, and the confidence that any softness remaining belongs to the source material itself, which is the point where troubleshooting rightly ends and viewing begins.
Real-World Scenarios and Examples
Abstract advice lands differently in real rooms. These scenarios apply the guidance above to the situations readers describe most often.
- The soft streaming film: Menus crisp, film hazy, quality dipping with network load. A wired connection or a quality setting locked high restores the picture the projector always had.
- The one soft corner: Geometry, not glass. Square the unit, zero the keystone, refocus warm, and the corner joins the rest of the image.
- The cold focus trap: Focused perfectly at switch on, soft by the second act. Refocus after ten warm minutes and the second act is as sharp as the first.
- The presentation panic: Text unreadable at the back of the room. Native resolution set explicitly on the laptop, keystone zeroed, focus on the smallest slide text.
- The new screen disappointment: A rippled pull down screen blurs in bands. The surface owns it; a tensioned or fixed screen is the permanent cure.
Gear for This Guide
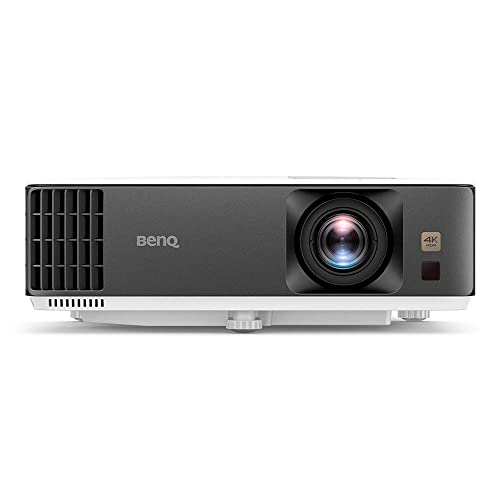
Diagnosis is free, but these verified examples show the class of projector where a genuinely sharp native image makes each test in this guide easy to judge.
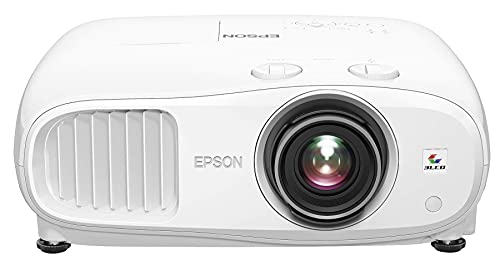
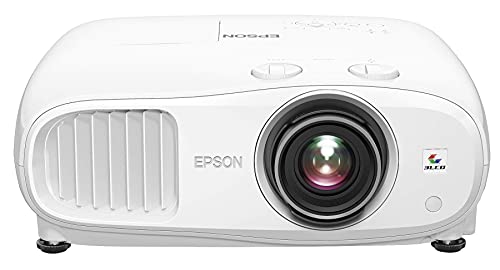
Epson Home Cinema 3800 4K PRO-UHD 3-Chip 3LCD Projector with HDR Technology — A 4K PRO-UHD model whose sharpness makes focus and alignment errors easy to judge, illustrating why the menu test matters on high resolution units. Check price on Amazon.
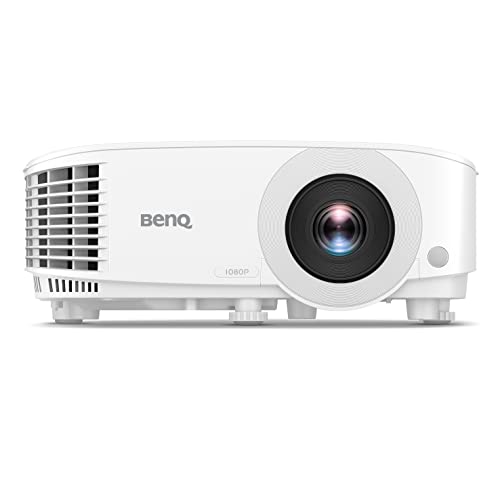
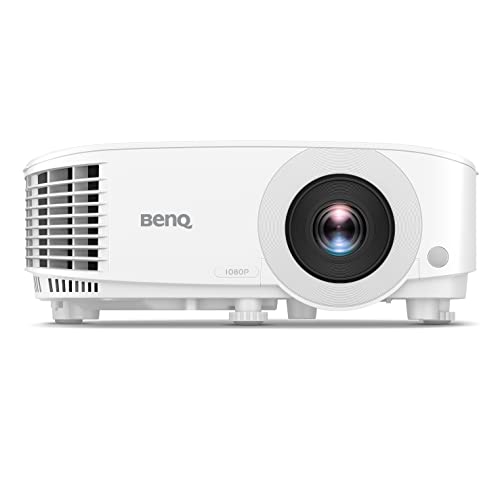
BenQ TH575 1080p 3800 Lumens Home Entertainment Projector 16ms Low Latency — A bright home entertainment model in the class where source resolution mismatches are the most common hidden cause of a soft picture. Check price on Amazon.
Separating the Four Kinds of Blur
Blur is a symptom with several unrelated causes, and each cause has a different cure. Before adjusting anything, decide which kind you are seeing, because the tests below separate them in a couple of minutes and prevent the classic error of refocusing endlessly against a problem that lives in the source.
Uniform softness everywhere
If the whole image is equally soft, including the projector’s own menu, focus and optics are the suspects: the focus ring, a dirty lens, or a projector still warming up. If the whole image is soft but the projector’s menu is crisp, the optics are innocent — the softness is in the signal, meaning resolution mismatch, scaling, or a low-quality source. That single observation, menu versus content, is the most valuable test in this entire guide, because it splits the problem space in half instantly.
One area soft, the rest sharp
A single soft corner or edge points to geometry: the lens plane is not parallel to the screen, the screen is not flat, or lens shift is at an extreme. Work through alignment and screen flatness before touching focus, and remember that pull-down screens curl at the edges exactly where this symptom appears. If the soft area moves when you swap the image content but stays fixed relative to the screen, it is physical; if it moves with the content, it is in the source material itself — some streaming content is simply softer in the corners by production or compression.
Text fringed or doubled
Colour fringes on text edges suggest panel or mirror alignment issues on multi-panel designs, excessive sharpness processing creating halos, or a keystone correction resampling the image unevenly. Doubled or ghosted edges on moving text point elsewhere: to motion processing, or to a cable or format problem degrading the signal. Turn picture processing off in stages — sharpness first, then keystone, then motion features — and watch the text after each change; the stage that removes the fringe names the culprit.
Sharp in the centre of the action, soft in motion
If still scenes look fine but movement smears, suspect the source’s frame rate and the projector’s motion handling rather than focus. Low-frame-rate content judders, cheap motion interpolation smears, and a source outputting a frame rate the projector converts badly can soften everything that moves. Test with a high-quality still image and a menu: if both are sharp, your optics are done being suspects, and the work moves to source settings.
The Focus Procedure That Actually Works
Warm first, focus second
Lenses shift focus slightly as they warm, so focus a projector that has been running at least ten to fifteen minutes, displaying content at the brightness you will watch. Focusing a cold projector perfectly guarantees a slightly soft film later. If your projector lives on a ceiling mount, this warm-up habit matters even more, because refocusing mid-film from a ladder is nobody’s idea of an evening.
Use the right target and the right seat
Focus on the finest detail available: small text, a test pattern’s line pairs, or the pixel structure itself on a plain mid-tone area. Judge from where the adjustment is visible — close to the screen while a helper watches from the seat, or use binoculars or a phone camera’s zoom from the seat if you are alone with a ceiling mount. Turn the ring slowly past the sharpest point in both directions so you can find the centre of the sharp zone rather than its edge; lenses have a small plateau of acceptable focus, and the middle of that plateau tolerates warm-up drift best.
Focus across the frame, not just the centre
After centre focus, check all four corners. If one corner refuses to sharpen while the centre holds, stop focusing — that is the geometry problem described above, and more ring-turning only spreads the softness around. Correct the projector’s squareness to the screen, flatten the screen, or reduce extreme lens shift, then refocus the centre and check again. Two iterations of geometry-then-focus usually converge; five iterations of focus alone never do.
Source and Signal Causes of Softness
Resolution mismatch and scaling
A projector looks its sharpest fed exactly its native resolution. Feed it less and it scales up, softening everything; feed it more and it scales down, which is usually cleaner but still not native. Check the source’s output resolution in its settings rather than trusting it to have negotiated correctly, disable any overscan or underscan compensation, and on a computer confirm the operating system is treating the projector as its own display at native resolution rather than mirroring a differently-sized laptop screen — mirroring forces one of the two displays to scale, and it is usually the projector that suffers.
Keystone and digital corrections
Every digital correction — keystone, corner fit, digital zoom or shrink — resamples the image and costs sharpness, most visibly on text. If your image is soft and any correction reads non-zero, the highest-value fix is physical: reposition or re-level the projector so the corrections can be zeroed, then refocus. Owners are often surprised how much apparent lens quality returns when the resampling stops; the lens was fine all along, and the processor was quietly blurring its work.
Streaming quality and compression
A soft picture on one app and a sharp one on another is the service, not the setup. Streaming platforms vary bitrate with connection conditions, and a picture can soften for minutes at a time on a congested network. Test with a local, known-sharp source — a disc, a downloaded file, the projector’s own test pattern — before adjusting any hardware. If local content is sharp, improve the network path to the streaming device, prefer wired connections, and check the app’s quality setting is not locked to a data-saving mode.
Lens Care and the Limits of Cleaning
Cleaning without causing damage
Dust and fingerprints on the front element scatter light and wash out contrast in a way that reads as softness. Clean correctly: a blower first to remove grit, then a clean lens cloth with the lightest touch, working from the centre outward. Never use household glass cleaner, tissues or a shirt — coatings are delicate and scratches are forever. Internal dust is not a home job; if blobs persist after the front element is clean and the image is focused, that is a service conversation, not a screwdriver invitation.
Condensation and environment
A projector brought from a cold car into a warm room, or used in a humid space, can fog its optics internally and look milky-soft until it acclimatises. The cure is patience: leave it in the room, powered off, until temperatures equalise, then run it — the gentle internal heat clears residual moisture. Smoking rooms and kitchens deposit films on optics and filters over time; if the projector lives in either, expect more frequent gentle cleaning and filter care, and treat gradually softening contrast as an environment problem before an equipment one.
Knowing when softness is the lens’s honest limit
Budget lenses, extreme zoom settings and heavy lens shift all trade some sharpness for price or flexibility, and no procedure recovers what the optics never had. The honest test: at native resolution, keystone at zero, warm and focused on a pattern, read the finest text the projector can resolve and compare centre to corners. If that performance is even and merely modest, the projector is healthy and your expectations need the adjustment — sit slightly further back, enlarge text where you control it, and enjoy films, which forgive far more than spreadsheets do.
Blur That Comes From the Screen and the Room
Not all softness is born in the projector. The surface the image lands on and the air and light of the room itself can blur a picture whose optics are perfect, and these causes are routinely misdiagnosed as lens faults.
Screen texture and material
A heavily textured wall scatters each pixel into its plaster’s bumps, and no focus adjustment sharpens an image projected onto a rough surface — the texture is the resolution limit. Painted walls sit on a scale: a smooth, dedicated projection paint performs respectably, while ordinary textured emulsion quietly caps sharpness. Proper screen materials exist on the same scale, with fine, smooth surfaces preserving the most detail and aggressive ambient-light-rejecting structures trading a little fine detail for their contrast heroics. If text never quite resolves anywhere on your wall, test on the smoothest surface you can find — a sheet of smooth card taped up will do — and let the comparison accuse the wall.
Screen flatness and movement
A screen that is not flat puts different areas at different distances from the lens, and since a lens focuses at one distance, the rest are soft by geometry. Pull-down screens curl at the edges and ripple with room air; fixed screens can bow if their frames are unevenly tensioned; and a screen that moves — in a draught, from a door’s pressure change — visibly breathes in and out of focus during a film. Stand to the side and sight along the screen’s surface to see its flatness honestly, tension or weight it as its design allows, and treat a chronic ripple as a screen problem to solve, not a focus problem to chase nightly.
Room light and perceived sharpness
Ambient light washing the screen lowers contrast, and the eye reads low contrast as softness even when the optics resolve perfectly — edges need contrast to look like edges. A picture that seems blurry at dusk and crisp at midnight is usually reporting the room, not the lens. Before condemning hardware, repeat your sharpness judgement in the lighting you calibrated for, and consider that the fix may be a curtain, a lamp moved, or a screen that rejects the room’s light, none of which involves the projector at all.
Digital Softness: Processing That Blurs While Helping
Noise reduction and detail enhancement
Noise reduction smooths grain — and with it, fine detail — because to the algorithm they look similar. Streaming sources and projectors both apply it, sometimes stacked, and the waxy, soft result is often blamed on resolution. Work through the chain and reduce noise reduction to the minimum each device offers, then judge: film grain returning is not a defect but the picture’s actual texture, and faces that stop looking moulded are the reward. Detail-enhancement and sharpness controls deserve the same suspicion in reverse: wound up, they draw bright halos around edges that read as false sharpness at a distance and as fringing up close, and the honest setting is usually just above off.
Motion processing and its smear
Frame interpolation creates intermediate frames to smooth motion, and on complex movement it guesses wrong, smearing details and warping edges — a softness that appears only in motion and vanishes on pause, which is your diagnostic: if the paused frame is sharp and the moving one is not, beyond the natural blur of the content itself, processing is a suspect. Most film lovers disable interpolation entirely; sports viewers sometimes keep a low setting. Either way, make it a choice you have tested on your content, not a default you inherited.
The keystone reminder, quantified
Because it is the most common digital cause, it bears repeating with emphasis: any non-zero keystone or corner correction means the projector is discarding and resampling pixels, and the cost lands hardest on the finest detail — small text, facial texture, film grain. If your projector shows correction values and your image disappoints, the experiment costs five minutes: square the projector physically to the screen by mount or placement, zero the corrections, refocus warm, and compare the same paused scene. Owners regularly describe the difference as a new lens. It is not a new lens; it is the old one, finally allowed to show its work unedited.
A Worked Diagnosis: From Blurry to Sharp in One Session
Consider a typical case assembled from the commonest causes: a ceiling projector, two years installed, whose owner reports the picture “has gone soft lately”. The session runs in this guide’s order. First, the menu test: the projector’s own menus are soft too, so the problem is in the projector, screen or room — not the source. Second, the pattern: centre focus is achievable but the top-left corner stays soft, which is geometry, not focus. Third, the measurements: the diagonals disagree slightly, and the projector, nudged when its lamp was changed months ago, sits a fraction yawed; the mount is adjusted until the diagonals match. Fourth, the lens: a film of dust, cleaned correctly with blower and cloth. Fifth, the settings audit: a small keystone value left over from the lamp-change day is zeroed now that the mount is true, and noise reduction is lowered. Sixth, warm refocus on fine text. The result is the sharpness the owner remembered from installation — recovered without a single part, because every cause was small, physical and cumulative. Most real blur is exactly this: not a failure, but an accumulation, and the methodical session is the cure.
Keeping Sharpness: Habits for the Long Term
- Refocus seasonally, warm, on text — mounts settle and lenses drift slightly with the house itself.
- Re-zero corrections after any move, lamp change or mount disturbance, and fix geometry physically instead.
- Clean the lens gently on the same schedule as filters; dust is softness arriving slowly.
- Feed native resolution and audit source settings after updates, which reset them silently.
- Watch the screen for curl and ripple as it ages, especially pull-down models in sunny rooms.
- Judge sharpness on local content in your calibrated lighting before blaming hardware for a streaming dip.
Sharpness is a system property — lens, geometry, screen, signal and light voting together — and blur is simply the system reporting its weakest voter. Work the voters in order, with the menu test as your compass, and you will find that the projector you were about to replace was usually innocent, waiting for ten methodical minutes to prove it.
Blur in Specific Content: Games, Text and Sport
Games look soft
Games add their own softness levers: internal render resolution below the display’s native, aggressive upscaling, and in-game sharpening and anti-aliasing choices that trade clarity for smoothness. If films and menus are sharp while games are soft, the projector is innocent — work the game’s settings: render scale at or near native, upscaling on its quality mode, and any softening post-processing (motion blur, depth of field, film grain effects, chromatic aberration) switched off one at a time. Competitive players disable most of these on principle; the test is whether you can read the interface at your seat, which is the game’s own sharpness exam.
Text and desktops look soft
Text is the least forgiving content and the most diagnostic. Beyond the geometry and native-resolution checks, computers add scaling settings that render the desktop at one resolution and scale it to another — ensure the operating system’s display scale and the output resolution agree with the projector’s native panel, and on dual-display setups beware mirroring a differently sized screen, which forces a scale somewhere. If text is sharp in the centre and fringed at the edges on a multi-panel projector, the panel alignment adjustment in the menus exists for exactly this, and small corrections there are legitimate maintenance, not defeat.
Sport looks soft in motion
Sport’s softness is usually the broadcast and the motion, not the focus: interlaced or low-bitrate feeds, fast pans across fine grass detail that compression smears, and motion processing making its guesses. Pause the action: if the still frame is respectably sharp, your setup is fine and the feed is the ceiling. Improve what is yours to improve — the best quality feed available, a wired network for the streaming device, motion processing tested on and off with a real match — and then let the broadcast be what it is.
When Blur Is the Excuse, Not the Problem
A closing honesty: sometimes a picture called blurry is actually a picture that has become familiar. Owners adapt to a setup’s sharpness, then see a brighter, newer display elsewhere and return home dissatisfied with an image that has not changed at all. The method in this guide protects you from that misdiagnosis too — the menu test, the pattern, the diagonals, the local known-sharp source — because measurements do not have nostalgia. If every test passes and the numbers match installation day, the projector is not blurry; your reference has moved, and the honest options are to recalibrate your expectations or to plan an upgrade with open eyes rather than to chase a fault that the evidence cannot find. Either way, you will have decided by measurement, and that is the habit this entire guide exists to install.
Focus Aids and Techniques for Ceiling-Mounted Projectors
Focusing a projector you cannot reach, on a screen you cannot approach, defeats many owners into accepting softness. The techniques that solve it are simple and worth collecting. A helper at the screen with a phone call open to you at the ladder beats any solo method; alone, a pair of binoculars or a phone camera’s zoom from the seat lets you judge fine text while your other hand works the ring or the remote’s motorised focus. Focus on the projector’s own test pattern or on a paused frame of small text, in the room’s viewing light rather than work light, because contrast affects your judgement of sharpness. Make movements smaller than you think necessary — at ceiling distances, a degree of ring rotation is a visible change — and overshoot deliberately in both directions to find the plateau’s centre. Then leave it: the urge to improve a focused image by one more touch is the commonest way ceiling owners unfocus their projectors.
Ageing Projectors and the Slow Softening
A projector that softens across years, with geometry and focus verified, is reporting its optics’ life: lamp-age colour and brightness shifts that lower perceived contrast, dust that has migrated inside despite filters, and in hard-used machines, heat’s slow effect on lens elements and panels. The serviceable portion — a professional internal clean — can recover a surprising amount and is worth pricing before replacement is considered, especially on a machine whose mechanics remain sound. But hold the diagnosis honestly: run this guide’s full sequence first, because most “ageing” projectors brought to workshops are suffering the accumulation of small, free causes — a drifted mount, a filmed lens, a forgotten keystone value — and the workshop’s first act is the same methodical session you can perform at home. Age is a diagnosis of exclusion, and exclusion is a method, and you now own the method.
Blur and the Human Eye: Adapting, Comparing and Judging Fairly
One variable in every sharpness judgement never appears in any manual: the viewer. Eyes adapt to a setup’s sharpness within minutes, which is why a picture can look soft at a film’s start and fine by its middle — and why comparisons made hours apart are worthless. Judge sharpness in the first minutes, against a reference you trust: the projector’s own menu, a known test image, a scene you have seen on a display you respect. Vision itself varies across the day and across the audience; the seat from which text is legible for one viewer challenges another, and a setup tuned to the household’s most demanding eyes serves everyone. This is not a counsel of despair about measurement — the diagonals and the menu test remain objective — but a reminder that sharpness is finally a perception, delivered by a system, to a person. Optimise the system by measurement, then confirm it by perception, in that order, and you will have done everything that can honestly be done — which, as this guide has shown at every step, is usually considerably more than enough.
Blur in Photographs, Art and Detail-Critical Viewing
Some viewers ask more of sharpness than films do: photographers reviewing work large, artists studying reference, anyone reading fine detail for pleasure or profession. For these uses the standards in this guide tighten rather than change. Work at native resolution end to end, with the source’s scaling disabled and the image sized so its pixels map honestly. Judge the setup on the finest real detail you own — a detailed photograph’s textures, not a synthetic pattern alone — and accept the viewing-distance discipline that large projection imposes: a screen big enough to immerse will always soften under close inspection, because its pixels are physically larger, and the correct response is the seat, not the focus ring. If your work genuinely requires close, critical inspection, the honest conclusion may be that a large high-resolution monitor serves that one task better, with the projector keeping the roles it is peerless at. Knowing which display owns which job is not a failure of the projector; it is the mark of a setup designed by someone who tested, measured and assigned honestly.
Related Guides
- best projectors under 1000 for home theater
- best projectors for movies under 300
- best projectors for gaming and movies under 200
- best portable projectors for outdoor movies
- best projectors for phones
- how to choose a projector
- how to set up a projector
Frequently Asked Questions
Why is my projector blurry in one corner only?
Because that corner is at a different distance from the lens than the rest of the image, which happens when the projector is angled or tilted relative to the screen. One focus setting cannot sharpen two distances at once. Square the projector to the screen using a test pattern until the image is a true rectangle, set keystone to zero, level the unit, and refocus on fine text checking all corners. If a corner stays soft on a provably square setup, inspect the screen flatness in that area before suspecting the lens.
Why does my projector go out of focus after a while?
Thermal drift is the usual reason. As the projector warms during its first minutes, lens elements and housing expand microscopically and the focus point shifts, so a lens focused perfectly when cold softens as it reaches working temperature. The fix is procedural: let the unit run for ten minutes before final focus, and in a new installation recheck after the first full film. If focus continues to wander throughout a film long after warm up, or the ring feels loose, that suggests a mechanical issue worth professional attention.
Can keystone correction make my image blurry?
Yes. Keystone correction rescales the image digitally and unevenly to fake a rectangle, discarding resolution and softening detail, most visibly on text and fine patterns, across the whole picture for as long as it is active. It is a useful rescue for temporary setups and a permanent tax in an installed room. The cure is to reposition the projector physically, centred, level and square, use lens shift if available, return keystone to zero, and refocus. Owners are often surprised how much sharpness was being spent on the correction.
My projector menus are sharp but movies look blurry. What is wrong?
The projector is innocent; the source is feeding it a soft picture. Check the source output resolution and set it explicitly to the projector native resolution. For streaming, check the service quality setting, the subscription tier and your network speed, because streams step down resolution under pressure and a big screen exposes it mercilessly. Prove the point with a high quality local source such as a disc. When the menus are sharp, never touch the lens or focus; the fault is upstream of the projector every time.
How do I know if my lens needs cleaning?
Inspect it with a torch at an angle while the projector is off and cool. Dust specks, a fingerprint or a general film are visible immediately on the coating. In the picture, a dirty lens shows as overall haze, lifted blacks and softness that focus cannot sharpen, sometimes with soft spots in fixed positions. Clean with a hand blower first, and a microfiber lens cloth only for marks that survive, following the lens cleaning guide. If fixed spots survive a clean external lens, the dust is internal and needs professional service.
What resolution should I set my source to for the sharpest picture?
Set it to the projector native resolution, the figure in the specification for what the imaging system actually produces, rather than the maximum the source offers or a vague automatic setting. Feeding a higher resolution than native adds a downscale; feeding lower adds an upscale; both soften compared with an exact match handled well. Let one device in the chain do any necessary scaling, ideally the projector or a quality source, not several in series. The menu test plus a native feed is the sharpest combination your system can produce.
Why is my projector blurry after I changed the lamp?
Most likely the projector was nudged during the swap, disturbing its alignment, or a correction setting was applied to compensate and left in place. Re-run the alignment sequence — square the projector, zero any keystone, refocus once warm — and the sharpness the new lamp should have brought usually appears.
Can a screen make a projector look blurry?
Yes. A textured wall caps the detail the image can show, and a rippled or curled screen puts parts of the image at different focus distances. Test on a smooth, flat surface: if the image sharpens there, the projector was never the problem and the surface deserves the upgrade budget.
Is it normal to refocus my projector often?
Occasionally, yes — warm-up drift and small mount movements make a seasonal refocus normal maintenance. Needing to refocus every session is not normal; it points to a mount that creeps, a screen that moves, or a focus ring with play, each of which has a mechanical fix.