Knowing how to set up a projector in the right order saves the frustration that puts many first projectors back in their boxes. The secret is sequence: position and geometry first, focus and image settings second, sources and sound third, and only then the fine tuning that makes films look their best. Each stage depends on the one before, and skipping ahead is how keystone corrections and stretched images sneak in and quietly cost picture quality.
This walkthrough assumes a typical living room or dedicated room setup on a table, shelf or ceiling mount, projecting onto a screen or a suitable wall. Work in the light you will watch in where you can, keep the projector manual nearby for its throw figures, and resist judging picture quality until the image is square, focused and showing real content rather than menus.
Disclosure: As an Amazon Associate, kajuandouglas.com earns from qualifying purchases. Links to Amazon on this page are affiliate links; they cost you nothing extra. Listing details such as price and availability change often, so check the current Amazon listing before you buy.
Quick answer: In short: place the projector square to the screen at the distance its throw ratio demands, level it, use zoom and lens shift rather than keystone to fit the image, focus on fine text, connect sources and sound, then set the accurate picture mode and check with a film scene and a sports clip.
What You Need
- A tape measure and the throw figures: Your projector manual or the maker online calculator gives the distance range for your image size; measure the room before moving furniture.
- A stable position: A ceiling mount, a level shelf or a solid table. Wobble in the support becomes movement in the image, so stability matters.
- HDMI cables of the right length: Long enough to reach sources without tension or sharp bends, rated for the resolution and refresh you will send.
- Your sources and sound system: Streamer, console, disc player and the soundbar or speakers, all present before you start, so connections are made once, in order.
In this guide
How to Set Up a Projector: Step by Step
Step 1: Position the projector square to the screen
Place the projector so its lens faces the centre of the screen area directly, at the distance the throw calculation gave you for your image size. Square matters more than anything: a projector angled sideways or tilted to reach the screen forces keystone correction later. Level the unit using its adjustable feet or mount, and confirm the projected rectangle, once you test it, has equal top and bottom widths. Take the extra minutes here; geometry fixed physically is free, while geometry fixed digitally costs sharpness.
Step 2: Power on and fit the image with zoom and shift
Switch on and display a menu or test pattern. Use the optical zoom to size the image to the screen, and lens shift, if your model offers it, to move the image up, down or sideways without tilting the projector. Fill the screen exactly, with the image edges just meeting the screen border. If your model has no lens shift, adjust the physical position and height of the projector itself rather than reaching for the keystone control, which should stay at zero in a permanent setup.
Step 3: Focus carefully on fine detail
Display content with fine text or a detailed pattern, stand close to the screen, and turn the focus ring slowly until the finest detail is crisp across the whole image, checking centre and corners. On models with motorised focus, use the remote in small steps. Let a lamp projector warm up for several minutes before final focus, because heat can shift focus slightly, and recheck after half an hour of viewing the first evening to catch any drift.
Step 4: Connect sources and set their output correctly
Connect each source with its HDMI cable, then set every source to output the resolution and format that matches your projector native capability, rather than leaving everything on automatic guesswork. Label cables at both ends while you can see them. Test each source with real content, not just its home screen, because menus can look fine while a film exposes a resolution or HDR mismatch between the source settings and what the projector expects.
Step 5: Set up sound so dialogue comes from the screen
Route audio to your soundbar or speakers using HDMI ARC, optical or the analogue output your projector provides, and position the speakers at the screen end of the room, centred on the image. Run any automatic speaker setup your system offers, then play a dialogue heavy scene and confirm voices sound anchored to the picture and clear at your normal volume. Projector built in speakers are a backup for casual use, not the plan for film nights.
Step 6: Choose picture settings and verify with real content
Select the accurate picture mode, often called Cinema, Movie or Reference, set brightness and contrast with a dark scene and a bright scene, and turn off unnecessary processing such as aggressive noise reduction and frame interpolation for films. Watch ten minutes of a familiar film and a few minutes of sport. Check skin tones, shadow detail in night scenes and motion in pans. Small adjustments made against real content, in your room light, finish the setup far better than copying settings from another room.
How to Set Up a Projector for the First Time Without Keystone Regrets
Keystone correction straightens a trapezoid image digitally by scaling part of the picture, which throws away resolution and softens the image, worst on text and fine detail. It exists for temporary setups, a projector borrowed for one evening on a kitchen table, where approximate geometry is acceptable. In a permanent installation it is an admission that the projector is in the wrong place. The correct fixes are physical: centre the projector on the screen, level it, use zoom for size and lens shift for position, and raise or lower the mount or shelf to set image height.
Ceiling mounting deserves the same discipline plus safety. Fix the mount only into a joist or solid ceiling structure with rated hardware, never into plasterboard alone, use two people for lifting, keep cables supported so their weight never hangs from the projector ports, and check for hidden cables and pipes before drilling, exactly as you would for a wall mounted television. A mount that feels completely rigid, with all locking screws fitted, is the standard; any wobble is magnified into image movement on screen.
Day One Checks That Prevent Week Two Problems
Run three checks on the first evening. First, the uniformity check: display a plain mid grey or white image and look for uneven brightness, colour tints in corners or dust blobs, which appear as soft out of focus spots and are easier to address with a seller early. Second, the geometry check from every seat: confirm the image looks rectangular and text looks sharp from the side seats, not just the centre. Third, the heat and noise check: projectors exhaust warm air and run fans, so confirm ventilation space around the unit matches the manual and that fan noise in the quiet picture mode is acceptable from your seats.
Finally, record your setup. Note the throw distance, zoom position, picture settings and source settings in the manual or a notes app, and photograph the cable connections. When something is disturbed months later, by cleaning, a new console or a curious guest, those notes turn an evening of rediscovery into a five minute restoration. Good setups are documented setups, and the small effort pays back every time the system changes.
Common Mistakes
- Reaching for keystone instead of repositioning: Digital correction costs resolution and sharpness. Centre, level and shift the projector physically; keep keystone at zero in permanent setups.
- Judging the picture from menus: Menus hide resolution and HDR mismatches. Verify every source with a real film scene and a sports clip before declaring the setup done.
- Leaving sources on automatic output: Automatic settings guess wrong with projectors more than televisions. Set each source output explicitly to match the projector native capability.
- Ignoring fan noise and ventilation: A projector starved of airflow runs its fan faster and louder. Leave the manual clearances and test quiet mode noise from your seats.
Pro Tips
Set up in the evening in your real viewing light; a geometry and brightness setup done at noon will mislead you at film time.
Put a small spirit level on the projector during positioning; a level unit produces a rectangular image with far less adjustment.
After the first full film, recheck focus and image fit once everything is warm; small thermal shifts settle after the first sessions.
Setup Variations: Ceiling, Shelf, Table and Ultra Short Throw
The sequence in this guide adapts to position rather than changing. A ceiling setup front loads the measurement: throw, offset and mount drop are calculated and verified from a stand before installation, and alignment happens once, precisely, because revisiting it means a platform. A rear shelf setup is the forgiving middle ground, adjustable in minutes and serviceable without tools, provided the shelf is rigid and the projector height matches the lens offset the screen demands. Treat shelf wobble as an alignment fault, because it is one.
Table setups trade permanence for flexibility and must accept a short version of the routine each time: square, level, size, focus, in that order, which becomes two minutes of habit with practice. Ultra short throw is its own discipline: the unit sits on a fixed, stable surface that must never be bumped, the screen must be flat, and alignment is measured in millimetres. Owners who mark the unit position with discreet tape save themselves the only frustrating part of an otherwise effortless system.
Calibrating the Room Around the Setup
A projector setup is finished only when the room agrees with it. Check the image with the room in its real viewing state: curtains as they will be, lamps as they will be, and the screen washed by whatever light remains. A setup judged in a darkened room at noon can disappoint at eight in the evening when a hallway light spills under the door. Light control at the margins, a door seal, a repositioned lamp, a darker wall colour behind the screen, routinely buys more picture quality than any setting inside the projector menus.
Sound completes the room. Run a dialogue scene and a music sequence from every seat, not just the centre, because projector rooms are often longer than television rooms and the back seats live in a different acoustic. Speaker position tweaks of a few inches, and the soundbar or receiver room correction run honestly with its microphone at head height, finish the setup in the only sense that matters: a room where a film can simply be watched, start to finish, without anyone thinking about equipment.
Real-World Scenarios and Examples
Abstract advice lands differently in real rooms. These scenarios apply the guidance above to the situations readers describe most often.
- The first Friday film night: Projector on a stand, wall as screen, friends arriving. Square, size, focus, one film scene check, and the discipline to stop adjusting once the film starts.
- The permanent ceiling install: Measured twice, test projected once, mounted once. Alignment locked, cables supported, settings recorded; the setup disappears for years.
- The rented room compromise: Rear shelf, no drilling, screen on a stand. The full routine applies with furniture instead of mounts, and nothing about the compromise costs picture quality.
- The classroom by day, cinema by night: Two stored setting sets: bright and punchy for daytime text, accurate and dimmer for evening films. The projector remembers what the room cannot.
- The ultra short throw living room: Unit marked on its cabinet, fixed screen flat, family briefed not to move either. Alignment measured in millimetres and then left entirely alone.
Gear for This Guide
These verified examples cover the common setup shapes: a portable tabletop unit, a short throw position, and a flexible portable design.

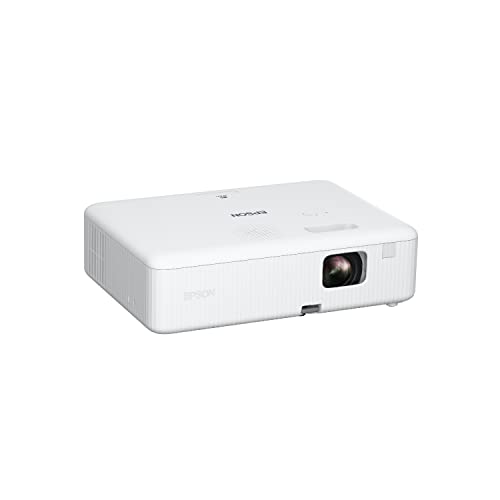
Epson EpiqVision Flex CO-W01 Portable Projector 3-Chip 3LCD Technology — A portable 3LCD projector with a built in speaker that suits a first tabletop setup while you learn placement, throw and focus. Check price on Amazon.

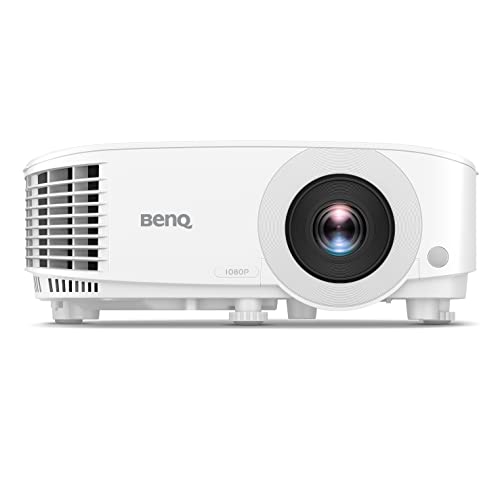
BenQ TH671ST 3000 Lumens 1080p Short Throw Home Entertainment Projector — A short throw model that demonstrates how a close position changes setup: less cable, less shadow interruption, and careful squaring to the screen. Check price on Amazon.

BenQ GV11 LED Portable Ceiling Projector with 135˚ Rotating Angle Projection — A compact portable projector with a rotating lens design that shows the flexible end of setup, for rooms where the projector cannot live in one fixed place. Check price on Amazon.
Alignment Before Settings: The Geometry Hour
Projector setup succeeds or fails on geometry before a single menu is opened. The projector’s lens must be centred on the screen, at the height and distance its throw ratio demands, and square to the surface — and square matters more than any other single thing, because a projector even slightly angled produces a trapezoid that digital correction then fixes at the cost of sharpness and resolution. Take the time with a tape measure and a spirit of patience: centre the lens on the screen’s horizontal midpoint, set the distance for your intended image size, and level the unit. Every minute spent here returns itself in picture quality that no setting can imitate later.
Focus, zoom, and the temptation of keystone
With geometry right, use zoom to size the image precisely to the screen, then focus at the centre and check the corners. Focus is best judged on text or a detailed test pattern from your normal seating position, with a helper adjusting while you watch, because focusing from beside the projector judges sharpness at a distance nobody views from. Treat keystone correction as the last resort it is: it exists for genuinely impossible placements, and using it to excuse a crooked mount taxes every film you will ever watch on the setup. Lens shift, if your projector offers it, is the correct tool for fine vertical and horizontal adjustment, moving the image optically without degrading it.
Picture Settings: A Sensible Order of Operations
Begin with the picture mode closest to accurate — modes named cinema, film, or reference are the usual starting points — because the vivid and dynamic modes exist to win showroom comparisons under bright lights, not to serve films in your room. Then set brightness and contrast using real content or a test pattern: brightness governs shadow detail, and the goal is seeing dark detail without greying the blacks; contrast governs highlights, and the goal is bright detail without bleaching faces. Colour usually needs only a gentle touch from a good starting mode. Sharpness should sit low; high sharpness adds artificial edges that look like detail and are actually noise, a fact that surprises people who equate the control with clarity.
Day, night, and the two-preset habit
If your room serves both bright daytime viewing and dark evening films, configure two presets honestly for each condition rather than one compromise that serves neither. Daytime wants brightness and a touch more colour saturation to fight ambient light; night wants the accurate mode with brightness judged in darkness. Switching presets becomes a remote-control habit within a week. Revisit the night settings after a few films rather than endlessly on setup day, because your eyes need reference scenes they know — a favourite film’s dark sequence is a better calibration tool than any pattern, once the basics are sane.
Sound Setup: Giving the Image a Voice
Route sound deliberately. If you use a soundbar or receiver, connect sources in the arrangement that keeps audio and video in step, and test lip-sync on dialogue-heavy content early, adjusting the audio delay setting if voices and lips disagree — a small mismatch, once noticed, cannot be un-noticed. Decide how the projector’s own audio outputs will serve you, whether that is a simple cable to a soundbar, a wireless connection accepting a little latency for casual viewing, or a full receiver handling everything with the projector as a pure display. Keep the built-in speaker as the fallback it is, useful for setup testing and children’s daytime viewing, and set expectations accordingly.
Sources, streaming, and control sanity
Connect your sources one at a time and label the inputs in the projector’s menu if it allows, so the household can find the console or the player without a manual. If you add a streaming stick, power it from a wall adapter rather than the projector’s USB port if it proves unreliable there, and place it where its remote signal reaches. Aim for a one-remote life where possible through HDMI control features, accepting that these features occasionally behave temperamentally across brands; when they do, a simple universal remote or a clear written card for the household beats daily frustration. Setup includes the humans: a system only its installer can operate is a system half finished.
Cables, Power, and the Finishing Details
Run cables with the same care as the alignment: an HDMI cable of adequate rating for your longest run, tested before it is hidden in walls or trunking, because discovering a marginal cable after installation is a special misery. Longer runs and higher resolutions stress cables most; test at your highest-quality source. Manage power so the projector can be switched sensibly and protected from surges like any valuable electronics. If the projector is ceiling mounted, confirm the mount’s security and leave the lens cap habit behind — mounted projectors stay cleaner uncovered in a living space than repeatedly capped ones, and a soft brush handles dust.
The first-week refinement pass
Live with the setup for a week, then do one refinement pass with fresh eyes: a slight focus touch, a preset adjustment for the film that looked washed out, a lip-sync nudge, a cable tidied. Keep a note of your final settings somewhere safe, because a reset, a curious guest, or a firmware update can scatter them, and rebuilding from a note takes minutes. Resist perpetual tweaking after that pass. A projector setup is finished when you stop noticing the system and start noticing films — and reaching that point is the entire purpose of the hours this guide describes.
Setup Mistakes That Haunt Installations
- Mounting first and measuring later, then living with keystone correction forever.
- Judging picture settings under different light from real viewing hours.
- Hiding untested cables inside walls or sealed trunking.
- Skipping the sound plan and discovering dialogue through a tiny speaker on film night.
- Maxing sharpness and calling the artificial edges detail.
- Never writing the settings down, so every reset starts from zero.
Room Preparation: Light Control and Surface Decisions
Before the projector’s settings can succeed, the room must cooperate. Walk it at your real viewing hours and hunt light leaks: the gap under the door, the streetlight through a sheer curtain, the standby glow of other equipment reflecting off the screen. Small fixes — a heavier curtain, a door seal, repositioning a lamp — return more image quality per minute than any menu adjustment, because projected blacks are only ever as dark as the room lets them be. If the projection surface is a wall, judge it honestly in daylight: texture telegraphs through bright scenes, and a colour cast in the paint tints every film. A smooth, neutral wall serves well; a doubtful one argues for a screen or a coat of appropriate paint, decided before calibration rather than after disappointment.
Seating and sightlines: the forgotten half of setup
Setup includes chairs. Confirm that every seat sees the whole screen without turning, that heads in the front row do not intrude into the beam or the back row’s view, and that the centre seat — the calibration seat — sits where the sound and image were balanced. If the projector is table-mounted, check that the table is stable against the nudges of real life, because a projector knocked two degrees off has to be re-aligned, and tables in living rooms get nudged. Mark a well-aligned table projector’s position discreetly with tape beneath its feet; the mark converts every future disturbance from a setup session into a ten-second restoration.
Calibrating With Real Content: Scenes That Tell the Truth
Test patterns set the basics, but familiar scenes deliver the verdicts. Keep a personal calibration reel: a dark scene you know well, where shadow detail should separate — coats against a night street, hair against a dark interior; a bright outdoor scene, where skies should gradient smoothly without banding and faces should keep their colour under sun; a dialogue scene, for lip-sync and voice clarity; and a fast sports or action sequence, for motion handling. Run this reel after any significant change — new source, new screen, moved furniture — and judge by whether the scenes look like themselves. This method’s virtue is that it tests the system you actually watch, in the room you actually watch it in, against memories you actually trust.
Colour temperature and the warm-versus-cool argument
New owners often find the accurate picture modes yellow compared with the vivid modes they are used to, because screens in shops and phones are tuned cool and blue. Give the warmer, accurate setting several days before judging it; eyes adapt, and what first looked yellow resolves into natural skin and honest firelight, while the cool setting begins to look like a hospital corridor. This adaptation period is the most skipped step in home calibration and the cause of many projectors being returned to vivid modes that flatter nothing except first impressions. If after a fair week the accurate mode still displeases you, adjust gently toward your taste — it is your cinema — but make the adjustment from the accurate base, in small steps, with your calibration reel as witness.
Multi-Source Setup: Consoles, Players, and Computers
Each source deserves a minute of individual attention because each misbehaves characteristically. Consoles may need the projector’s low-latency mode enabled on their input, and their own output resolution and HDR settings matched to what the projector truly accepts. Computers need their refresh and scaling checked, since a laptop’s default mirrored output can compromise both its own screen and the projector’s. Disc players and streamers need their output set to pass the cleanest signal rather than an upscaled approximation. Where the projector allows per-input picture memories, save the tuned settings per source; where it does not, tune for your primary source and accept small compromises elsewhere. Label the inputs in the menu with real names — the household will thank you every single time.
HDR setup without the headache
High dynamic range content asks the projector to map a very wide brightness range into its narrower one, and the projector’s tone-mapping choices decide whether HDR looks glorious or merely dim. If HDR films look washed or dark compared with their standard versions, the causes are usually the projector being fed an HDR signal it handles modestly, a source set to force HDR onto everything, or brightness judged under room light the content never anticipated. The pragmatic setup is to enable HDR for the sources and content that benefit, in the darkened room, and to let standard content play in a well-tuned standard mode without apology. A superb standard-dynamic-range image beats a struggling HDR one, and your calibration reel, in both formats, will tell you which your system honestly delivers.
Documentation and the Household Handover
Finish the setup by making it survivable by other people. Write the one-page household guide: which remote, which input for which source, which preset for day and for night, and the one troubleshooting step — check the source is on and the right input is chosen — that resolves nearly every reported emergency. Photograph the final projector position and the mount’s adjustment points. Save a note of every changed setting with its value. Store the projector’s manual and your notes together, digitally, where the household can find them. This handover is not bureaucracy; it is the difference between a system the household owns and a system one person rents out with instructions, and it decides whether the setup survives its first month intact.
The seasonal recheck
Rooms change with seasons — evening light arrives earlier or later, furniture migrates, a new lamp appears — and projectors drift microscopically in focus and alignment as houses live. A brief recheck each season, running the calibration reel and touching focus if needed, keeps the system at its best with minutes of effort. Treat it as you would changing a clock: small, scheduled, and beneath notice until the day it is skipped and everything is subtly wrong. A setup is not an event but a light habit of maintenance, and the households that keep the habit are the ones still delighted with their projector in year five.
Troubleshooting the Setup: When the Image Disappoints
When a finished setup looks wrong, the disappointment has a short list of usual authors, and they should be interrogated in order before any setting is touched. First, the room: is light reaching the screen that was not there during calibration — a door ajar, a curtain gap, a new lamp — because projected contrast dies by ambient light before it dies by any menu. Second, the source: is the player or streamer actually sending the resolution and format you believe it is, since many setups quietly run at a lower resolution for months behind a mis-set output. Third, the mode: has the projector drifted into a vivid or eco picture mode through an input change or a guest’s curiosity, undoing your tuned preset? Fourth, the geometry: has the mount been knocked, the table moved, the focus ring brushed during dusting? Only after those four acquit themselves do the picture settings themselves deserve suspicion. This order matters because the commonest setup failures are environmental and accidental, and recalibrating a projector to compensate for an open curtain bakes a lie into every subsequent film.
Keeping a setup journal
Professionals who install projectors keep notes; households should steal the habit in miniature. One page suffices: the final picture settings per input, the mount’s position measurements, the cable types and lengths, the date of any lamp or filter service on models that need it, and a line for each change made thereafter with its reason. When something degrades months later, the journal converts guesswork into comparison — you can see what changed, when, and what the good values were. Keep it with the household documents or photographed in the same album as the setup pictures. A projector setup maintained this way does not decay into mystery; it ages in the open, correctable at every step.
The Social Setup: Making Movie Night Work for Everyone
The final layer of setup is social, and it decides whether the projector becomes the household’s joy or one person’s shrine. Agree the house rules while enthusiasm is high: how dark the room goes for films versus matches, who holds the remote authority during a screening, how late the volume may honestly go in a house with sleepers or neighbours. Set the volume limit in the system if your equipment offers one, so the rule is the machine’s rather than a nightly negotiation. Create the simple presets — film, sport, daytime, gaming — and label them in words the whole household uses, because a system that only its installer can drive will be driven rarely and resented quietly. Then inaugurate it properly: a film everyone wants, watched all the way through without a single adjustment, because the first complete, untweaked screening is the moment a setup stops being a project and becomes the room’s new tradition.
The Setup, Remembered a Year Later
A year after a good setup, nobody remembers the tape measure, the calibration reel, or the evening spent nudging a mount by degrees. What remains is the room’s quiet reliability: the film starts, the image is right, the sound is present, the household operates the system without a manual or a summons. That invisibility is the setup’s true product, and it was purchased with a few disciplined hours — geometry before settings, sources tested one by one, notes written down, a recheck kept. If you are standing at the beginning of those hours now, take heart from the year’s distance: they are finite, they are ordered, and they are the last hours this projector will ever ask of you at this intensity. Set it up once, set it up honestly, and then let the projector do what all that patience was for — disappear, nightly, into the dark, leaving only the film behind.
Setup for Special Content: Sport, Gaming, and the Big Occasion
Certain content deserves its own setup decisions, made in advance rather than discovered mid-event. For sport with a room full of guests, the priorities invert the film defaults: brightness and colour punch over inky blacks, a picture mode that handles fast motion cleanly, sound that favours commentary clarity over cinematic rumble, and seating arranged for conversation as much as for sightlines. Configure that preset before the guests arrive and test it with a recorded match, because a room full of friends is the worst calibration laboratory ever devised. For gaming, the low-latency mode on the correct input, the console’s output matched to the projector’s honest capabilities, and a controller test on your fastest game settle the matter in minutes — but settle it on a quiet evening, not in front of an audience waiting to play. For the big occasion — the premiere, the final, the family film night that anchors a holiday — run the full calibration reel the day before, check the spare batteries in the remotes, and confirm the streaming service is signed in and updated, because occasion-day failures are never optical; they are always a login, a flat battery, or an update nobody ran.
The guest test
Before any of those occasions, hand the remote to someone who did not perform the setup and ask them to start a film. Watch silently. Every hesitation they show you is a defect in the setup — an unlabelled input, a preset with a cryptic name, a sound system that needs a second remote’s secret handshake — and each one is fixable in minutes with a label, a renamed preset, or a line added to the household guide. The guest test is the cheapest usability laboratory in home technology, and a setup that passes it has achieved the only definition of finished that matters: it works for people who were not in the room when it was built.
Keeping the Setup Young: A Maintenance Calendar
- Each season: run the calibration reel, touch focus if needed, dust the lens with air only.
- Twice a year: clean or check the filters as the manual directs, and inspect cables and mount fixings.
- Once a year: review the settings journal, re-run the guest test, and update the household guide.
- On any change — new source, new furniture, new screen: re-run the relevant section of this guide, not the whole of it.
- Always: write down what you changed, so the next change starts from knowledge rather than archaeology.
A setup kept on that calendar does not age; it matures. The projector’s tenth year looks like its first, the household’s confidence compounds, and the hours spent at the beginning reveal themselves for what they always were — not a cost of owning a projector, but the purchase price of a decade of evenings that simply work.
The Setup as a Story You Will Tell Once
Every household with a projector has a setup story, usually told once, with feeling, at the first film night: the mount that went up twice, the cable that was an inch too short, the image that leaned until someone thought to measure from the screen instead of the wall. Let yours be a good story rather than a cautionary tale by borrowing, in advance, the ending all the good ones share — the moment the room went dark, the rectangle sat true, the first scene played, and the system vanished into the film. Everything in this guide is choreography for that moment: geometry before settings, sources one at a time, sound given its due, notes written while memory is fresh, and a guest test before the guests. Do the choreography and the story writes itself, briefly and happily, the way setup stories should — as a prologue nobody remembers, to years of evenings everybody does.
Related Guides
- best projectors for bedroom
- best projectors for small rooms
- best projectors for outdoor movies
- best projectors under 300
- best projectors for presentations
- how to align a projector
- laser vs lamp projector
Frequently Asked Questions
How far from the screen should my projector be?
The distance is set by your image size and the projector throw ratio, which the maker publishes and provides an online calculator for. Enter your screen width and the calculator returns the distance range, including how much flexibility the zoom gives you. Measure your room against that range before choosing a position or mount. If your room distance falls outside the range for your screen size, change the screen size or choose a different throw class of projector, rather than planning to fix it with keystone correction.
Why does my projector image look like a trapezoid?
Because the projector is not square to the screen: it is angled sideways, tilted, or off centre, so one side of the image travels further and grows larger. The correct fix is physical. Centre the projector on the screen, level it, point it straight, and use zoom and lens shift to place the image. Keystone correction will square the shape digitally, but at the cost of resolution and sharpness, so treat it as a temporary measure for portable setups, not a permanent installation tool.
How do I focus a projector properly?
Display content with fine text or detailed patterns, stand close to the screen, and adjust the focus ring slowly until the finest detail is sharp, checking the centre and the corners of the image. Let a lamp model warm up for several minutes first, because focus can drift slightly with heat, and recheck after half an hour on the first evening. If one corner stays soft while others are sharp, the projector is probably not square to the screen, so correct its position rather than chasing focus.
What picture mode should I use after setup?
Start with the mode called Cinema, Movie, Film or Reference, which is normally the most accurate the projector offers, with sensible colour and minimal processing. Set brightness so shadow detail is just visible in a dark scene, and contrast so bright scenes hold detail. Turn off aggressive noise reduction and frame interpolation for films. Then verify with familiar content in your room light: a dark film scene, a bright outdoor scene and a talking head for skin tones, adjusting in small steps.
Can I set up a projector without a screen?
Yes. A smooth, matte white wall works well enough to complete setup and enjoy films, and it lets you confirm your ideal image size by living with it. Keep the wall area clear, note that texture and off white paint cost some brightness and accuracy, and expect a dedicated screen to improve uniformity and perceived contrast later. All the setup steps, squaring, zoom, focus and source settings, are identical whether the surface is a wall or a screen, so nothing is wasted when you upgrade the surface.
Why is my projector so loud, and can setup help?
Fan noise rises when the projector works hard: high brightness modes, restricted ventilation and warm rooms all push fan speed up. Setup helps by giving the unit the full ventilation clearances in its manual, using the standard or eco brightness mode for dark room viewing where full brightness is unnecessary, and positioning the projector as far from seats as the throw allows. Ceiling mounts often help because the unit sits above and behind listeners. Persistent loudness in eco mode in a cool, clear space is worth a support call.
Why does my picture look washed out even though the projector is new?
Work the short list before touching the picture controls. First, the room: ambient light reaching the screen is the commonest author of washed-out images, and no setting outruns a curtain gap. Second, the picture mode: showroom and vivid modes, and eco modes engaged by default, can both flatten an image that the accurate cinema-style mode would restore in one change. Third, the source: confirm it is actually sending the resolution and format you expect, because a player quietly outputting a lesser signal produces exactly this disappointment. Fourth, the brightness and contrast pair, set with a dark scene you know well. In most rooms the answer is among those four, and it is rarely the projector.
Should I use keystone correction to fix my crooked image?
Only when geometry has genuinely defeated you, because keystone correction is a digital repair that costs resolution and sharpness across every image you will ever show. The correct fixes are physical: level and square the projector with its mount’s adjustments, use lens shift if your model offers it, and reposition rather than correct wherever the room allows. Reserve keystone for the truly impossible placement — a rented room, a temporary setup — where a slightly softened image beats no image. Owners who use it to excuse a crooked permanent mount pay its tax on every film for years to fix a problem that one patient afternoon with the mount would have ended.
How do I fix voices that do not match the picture?
Lip-sync errors come from the sound and video taking paths of different lengths — typically video processed by the projector while audio travels separately to a soundbar or receiver. Most receivers, soundbars, and many projectors offer an audio delay setting for exactly this; adjust it in small steps while watching dialogue-heavy content, ideally a single face speaking in close-up, until the words and lips agree. If the error varies by source, set the delay on the path of the worst offender and check whether your equipment offers per-input adjustment. Once matched, write the value in your setup journal, because a reset or a new source will scatter it, and re-deriving it from memory is nobody’s idea of a film night.