Learning how to fix a broken backpack zipper starts with diagnosis, because zipper failure is four different problems wearing one complaint. Sometimes the slider has loosened and no longer presses the teeth together — the zipper closes behind the pull and splits open again. Sometimes teeth are dirty, bent, or missing. Sometimes the slider has jumped its track or lost a pull tab. And sometimes the fabric tape beside the teeth has torn, which is the one diagnosis that changes the answer from kitchen-table repair to a workshop conversation.
The encouraging news: the most common failure — the tired, loosened slider — is also the most fixable, with pliers, patience, and about ten minutes. Work through the diagnosis first, then the matching fix, all of them home-safe and reversible. Your laptop bag does not need a new zipper nearly as often as it needs its old slider reminded of its job.
Disclosure: As an Amazon Associate, kajuandouglas.com earns from qualifying purchases. Links to Amazon on this page are affiliate links; they cost you nothing extra. Listing details such as price and availability change often, so check the current Amazon listing before you buy.
Gear for This Guide
Verified bags whose zipper quality is the long-term fix for everything above.

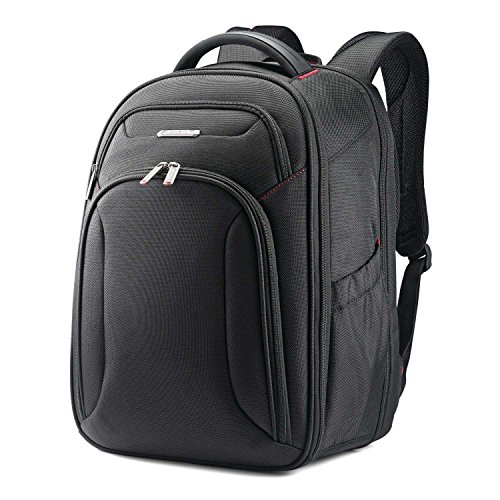
Samsonite Xenon 3.0 Laptop Backpack, 1680D Ballistic Poly, Fits 15.6” Laptop, TSA Compatible, Air Mesh Back Padding, Tablet Pocket, Smart Sleeve, Quick Stash Pocket, Durable & Lightweight – Large — A bag built around reputable zippers and reinforced anchors — the construction standard that makes this article a rare read rather than a regular ritual. Check price on Amazon.

Thule Paramount Backpack 24L, Black — Quality hardware and covered zipper paths keep grit out of the teeth — prevention, engineered in at the factory. Check price on Amazon.
In this guide
Likely Causes, Most Common First
A loosened slider — the classic
The metal slider that joins the teeth is a tiny clamp, and years of use pry its jaws microscopically open. The result is the signature failure: you zip up, and the seam splits behind the slider as if never closed. This accounts for the majority of backpack zipper deaths and is fixable at home in most cases.
Dirt, grit, and corrosion in the teeth
Backpacks live on floors, platforms, and pavements, and their zippers eat grit. Packed debris prevents teeth from meshing, and on metal zippers, corrosion roughens the action until the slider sticks, skips, or jams at the same spot every time — location consistency is the tell.
Bent or missing teeth
A snag, an overstuffed closure forced shut, or simple age can bend teeth out of line or tear one free. A single damaged tooth makes the slider stumble at that exact point; several missing teeth create a gap the slider cannot bridge, and the repair calculus changes.
The slider has derailed or the pull tab is gone
Sliders can jump off one side of the track at the end stops, especially after a yank, leaving the zipper half-attached and useless. Separately, pull tabs snap off constantly — annoying, but the least serious failure here, because the slider itself still works.
Torn zipper tape or failed stitching
The fabric tape that carries the teeth can tear away from the bag, or its stitching can let go. No slider adjustment fixes fabric failure; this is sewing territory — home sewing for the handy, a repair shop for the rest, and the honest boundary of this guide.
How to Fix a Broken Backpack Zipper: Step-by-Step Fixes
Step 1: Diagnose before you touch a tool
Run the slider slowly along the full track and watch and feel: does the seam split behind a slider that moves freely (loose slider)? Does it jam at one repeatable point (debris or a bent tooth there)? Does it refuse at the very start (derailment or a damaged bottom tooth)? Is the tape itself torn (fabric failure)? Two minutes of observation selects the correct fix below and prevents the classic error — squeezing a slider that was never the problem. Also empty the compartment fully; you cannot see teeth through a packed bag, and grit hides under load.
Step 2: Clean the track thoroughly
Whatever the diagnosis, clean first: a stiff brush or old toothbrush along both rows of teeth, then a wipe with a damp cloth, working grit out of the mesh points. For sticky or corroded metal teeth, a cotton swab with a little white vinegar cleans oxidation; follow with a dry wipe. Then lubricate lightly: rub a graphite pencil along the teeth, or apply the smallest trace of a zipper lubricant or plain petroleum jelly on a swab — restraint matters, because excess lubricant collects the next round of dirt. Test the action; a surprising number of zipper funerals end at this step, resurrected by soap and graphite.
Step 3: Squeeze the slider back to spec — gently
For the splitting-seam diagnosis: position the slider at the bottom of its track, fully open. With small pliers, squeeze the slider body very slightly — top plate toward bottom plate — first on one side of the pull attachment, then the other, in tiny increments. The goal is to narrow the jaw gap by a fraction; you are persuading, not crushing. Test after each micro-squeeze by zipping a few inches and tugging the seam apart with your fingers. The moment the seam holds, stop. Overtightening is the irreversible error here: a crushed slider binds, then breaks, converting a fix into a replacement.
Step 4: Straighten a bent tooth; assess a missing one
If the slider stumbles at one point, inspect that tooth under good light. A slightly bent tooth can often be coaxed back into line with needle-nose pliers and a gentle touch — support the tape, move the tooth, test. A tooth that is cracked, half-torn, or missing is beyond alignment: if it sits near the very end of the track where the slider rarely travels, a sewn or clamped stop above the damage can retire that section and save the zipper. Damage in mid-track, or several teeth gone, means slider heroics will not save this zipper — skip to the replacement options rather than forcing a slider over a gap until it derails too.
Step 5: Reseat a derailed slider and replace a lost pull
If the slider has come off one side at the track end, work it back on at the nearest end stop by aligning the tooth row into the slider channel at a slight angle and drawing it on — patience and wiggling, never force; then sew a few tight stitches across the tape at that end as a new stop so it cannot escape again. For a missing pull tab, the fix is pure hardware: a split ring, a cord loop, or a replacement pull from any craft store threads through the slider pull eye in seconds. Cosmetic, instant, and strangely satisfying.
Step 6: Decide: slider replacement or professional repair
If the original slider is cracked, crushed from an over-enthusiastic squeeze, or simply worn beyond adjustment, a replacement slider of the correct size — the size is usually stamped on the slider back, like a 5 or an 8 — can be fitted at the track end by removing the end stop, sliding the old one off and the new one on, and crimping a fresh stop. This is the most advanced home fix here and still well within a careful hour. Torn tape, mid-track tooth loss, or a failed main-compartment zipper on a good bag argues for a cobbler or luggage repair shop: their machines sew what home needles cannot, and a quality bag earns the fare.
Diagnostic Table: Symptom to Fix
One minute with this table replaces an hour of random plier work.
| What the zipper does | Likely cause | First fix |
|---|---|---|
| Closes, then splits open behind the slider | Loosened slider jaws | Clean, then micro-squeeze the slider |
| Sticks or jams at the same spot | Grit or one bent tooth at that point | Brush and lubricate; inspect and straighten the tooth |
| Slider will not start or hangs off one side | Derailed slider | Reseat at the end stop; sew a new stop |
| Pull tab snapped off, slider fine | Hardware fatigue | Thread a ring, cord, or replacement pull |
| Gap where teeth are missing mid-track | Tooth loss | Replacement slider will not cure it — repair shop |
| Teeth fine, fabric beside them torn | Tape or stitching failure | Sewing repair — home if skilled, shop if not |
| Everything stiff and rough along the whole track | Dirt and corrosion | Full clean and light lubrication |
When to Get Professional Repair or Replace It
Take the bag to a repair professional when the zipper tape is torn, teeth are missing mid-track, the failed zipper is the main or laptop compartment on a bag worth real money, or a slider replacement exceeds your tools or patience. Cobblers and luggage repair shops replace full zippers routinely, and on a quality backpack the cost is a fraction of replacement — with the bonus that a good shop reinforces the stress points that killed the original. If the bag is under warranty, contact the maker first: zipper failure is the most commonly honored claim in the industry, and many premium brands repair or replace without argument.
Replace the bag rather than repair when the zipper failure has company — tired straps, worn fabric, a laptop sleeve past its protective prime — because a new zipper on a dying bag is money into a sinking account. The exception is the bag you love whose bones are sound: repair it, and it will out-serve a cheap replacement by years.
Prevention: Keeping It From Happening Again
Stop forcing overstuffed zippers. The two-handed strain-close is how sliders loosen and teeth bend; if the bag needs force, the load needs editing — see our packing guide for the system that prevents the strain in the first place.
Keep tracks clean with a monthly brush-out, especially after beach, trail, or construction-dust days, and a whisper of graphite keeps action smooth without attracting grit the way wet lubricants can.
Close zippers before washing the bag or storing it, and store bags unstuffed so sliders and teeth rest unstressed.
Use the pull tab, not the fabric, and pull in line with the track rather than at an angle — side-yanking is the derailment and tooth-bending habit, and it is entirely a habit.
Zipper Anatomy: Understanding the Parts Before You Repair Them
Every fix in the main steps makes more sense once the components are named and their jobs understood, because most zipper failures are one part failing at its specific job while the rest of the system remains perfectly sound.
Teeth, coils, and tape
Backpack zips are usually coil zips — a continuous spiral of nylon stitched to fabric tape — or moulded-tooth zips with individual plastic teeth. Coil zips are flexible, forgiving of grit, and the coil can often be coaxed back into shape; moulded teeth are chunkier and stronger but a single broken tooth is a harder problem. The tape is not mere edging: it carries the coil or teeth and takes the stitching that joins the zip to the bag, so tape damage near the teeth is more serious than tape damage at its outer edge. Identifying which type you have takes five seconds and changes which fixes are realistic.
The slider: the part that actually does the work
The slider is a small metal or plastic wedge that meshes the two sides together as it travels and separates them as it returns. Its internal channel is precisely sized, and nearly all splitting failures trace back to that channel widening with wear until it can no longer press the teeth or coil together firmly. This is why the gentle squeeze in the main steps works: it restores the channel’s dimensions. It is also why the squeeze must be gentle and even — an over-squeezed slider binds and grinds, and a slider squeezed unevenly meshes one side before the other, producing a zip that closes crookedly and splits under load.
Stops, pins, and the ends of travel
Small metal or stitched stops at each end limit the slider’s travel. A missing top stop lets the slider run off the end entirely — a dramatic failure with a humble cause — while a damaged bottom pin on a separating zip prevents the slider from starting its mesh at all. When a zip fails suddenly after working yesterday, examine the stops before condemning the slider or teeth; a replacement stop crimped on with pliers is one of the cheapest and most satisfying repairs in this entire guide.
Repair Scenarios in Depth: Working Through Real Failures
Abstract steps become skill when they are applied to the failures owners actually meet. The scenarios below combine the diagnosis and fixes from the main guide into complete worked examples.
The main compartment zip that splits behind the slider
This is the classic: you zip up, and the closed section opens again behind the slider like a parting curtain. Clean the track first, because grit can mimic this fault, then test the slider squeeze on a short section before committing to the whole zip. Work on the slider in tiny increments, testing after each squeeze, since the difference between meshing and binding is a fraction of a millimetre. If the zip then holds under a firm two-handed pull on the fabric either side, the repair is real; if it splits only under heavy load, the slider is at the end of its life and replacement, as covered in the main steps, is the honest fix.
The pocket zip that sticks at one exact point
A zip that travels freely except at one stubborn spot is reporting a local problem: a bent tooth, a coil kink, a scrap of thread, or grit packed into one centimetre of track. Open the zip fully, inspect that exact spot under good light with the fabric pulled gently taut, and you will usually see the culprit. Straighten, pick out, or clean as appropriate, then run the slider past the spot slowly a dozen times. Lubricating the whole track for a one-spot problem is unnecessary and attracts future grit to healthy sections.
The two-way zip where one slider has given up
Many laptop compartments use two sliders that meet in the middle. When one fails, the temptation is to abandon the zip entirely, but the healthy slider can usually close the compartment alone from its side, buying you weeks while you arrange a proper repair. When you do replace sliders on a two-way zip, replace both if they are the same age — the second is statistically close behind the first, and the labour is barely greater. Keep the removed healthy slider as an emergency spare for the bag’s other zips if the size matches.
The zip that failed because the bag was overfilled
Sometimes the zip is the victim, not the culprit. A bag habitually packed until its zips strain puts constant separating force on every closed zip, widens sliders early, and pulls stitching at the tape. Repair the zip by all means, but also repair the habit, or the new slider will follow the old one within a season. If the load genuinely cannot shrink, that is information about the bag’s size, and the durable fix is a larger bag whose zips close without force on your heaviest day.
Tools, Spares, and Setting Up a Small Repair Kit
Zipper repair needs very little equipment, and assembling it once means future failures are ten-minute inconveniences instead of week-long annoyances.
The kit itself
- Two pairs of pliers — one flat-nosed for squeezing sliders, one needle-nosed for stops and detail work.
- A stiff toothbrush and a wooden toothpick for track cleaning without scratching.
- A graphite pencil for dry lubrication of metal and moulded teeth.
- Strong thread, a curved needle, and a thimble for tape and stitching repairs.
- Spare pull tabs or small split rings, and a note of your bag’s slider sizes.
Slider size is usually stamped on the back of the slider itself — a small number that identifies the chain size it fits. Photographing those numbers for each of your bag’s zips, once, turns a future replacement from a guessing exercise into a two-minute order. Keep the kit with your household tools rather than in the bag, since the bag is the patient, not the ambulance.
When the repair is beyond the kitchen table
Full zip replacement — removing the old chain and sewing in a new one — is the one common job that genuinely belongs to a professional with an industrial machine, because the seams pass through layered, padded fabric that domestic machines struggle to penetrate evenly. Cobblers, luggage repairers, and outdoor-gear repair services do this work routinely. Get the quote before deciding the bag’s fate: on a quality backpack, a professionally replaced main zip usually costs a fraction of a comparable new bag and returns it to full service for years, which is why the repair-versus-replace judgement in the main guide so often lands on repair.
Material-Specific Repairs: Coil, Moulded Teeth, and Metal Zips
The general fixes adapt differently to each zip type, and applying the coil technique to a moulded-tooth zip — or the reverse — wastes effort and can turn a repairable fault into a terminal one.
Coil zips: patient reshaping
A nylon coil that has been crushed flat or kinked by a trapped object can often be coaxed back with warmth and patience: work the area with your fingers, flexing the coil gently, and pass the slider through slowly and repeatedly to retrain its path. A coil that has been cut or melted, however, cannot be rejoined, and the section will always catch; if the damage sits near one end of the track, some owners shorten the zip’s travel with a new stop placed beyond the damage, sacrificing a little opening for a working bag. It is an honest bodge, clearly understood as one, and it can extend a bag’s life by years.
Moulded-tooth zips: the single-tooth problem
Individual plastic teeth crack at their base, usually from being forced over a trapped object or from cold brittleness. A tooth that is bent can sometimes be warmed and eased back; a tooth that is gone leaves a gap the slider bridges reluctantly and under load not at all. Because these zips are common on heavier-duty bags, professional chain replacement is more often worth its cost here. Inspect neighbouring teeth whenever one fails — the force that broke it usually stressed its neighbours, and a second failure a month later is the rule rather than the exception.
Metal zips on older and leather bags
Metal zips fail by corrosion and by tooth wear rounding the profiles that mesh. Green or white corrosion responds to a toothbrush and a little vinegar on a cloth, followed by thorough drying and graphite. Never oil a metal zip on a fabric bag if you can avoid it: graphite lubricates dry, while oil migrates into tape and lining and collects grit that accelerates the very wear you are treating. A metal slider, at least, tolerates the squeeze adjustment better than plastic, and takes a firmer, more confident correction.
Safety, Warranty, and Knowing Your Limits
Repair enthusiasm needs a few boundaries, both to protect the bag’s other systems and to avoid spending kitchen-table effort where a warranty or a professional would serve better.
Check the warranty before the toolbox
Many quality backpack makers cover zips under generous warranties, and some will repair or replace a bag for a failed main zip years after purchase. Check before you repair, because home modification — a replaced slider of the wrong type, cut tape, restitched seams — can complicate a claim. Photograph the failure as found, contact the maker with the bag’s model and age, and let their answer decide your route. If they decline, you have lost a day and gained certainty, and the toolbox will still be there.
Repairs to avoid
Do not use strong adhesives to glue teeth or coil back into place as a permanent fix; glue stiffens the track, spreads under pressure, and makes the eventual professional repair harder. Do not force a stuck slider with pliers used as a lever — the force that frees it usually tears tape or cracks teeth, converting a slider problem into a chain problem. And do not cut the tape to remove a slider unless you are certain how the end will be refinished, because fraying tape unravels quickly once cut and shortens the zip’s usable life even if the immediate repair succeeds.
Testing a repair before trusting it
A repaired zip earns trust gradually. Cycle it twenty times unloaded, then load the compartment normally and carry the bag around the house, then use it for one low-stakes day before the day it carries your laptop across a city in the rain. Pull tests at the repaired section, performed with firm hand pressure on the fabric either side, reveal weakness safely at home rather than dramatically at a station. This graduated trust sounds cautious; it is actually the difference between a repair and a hope.
Zipper Care for Specific Bags: Laptop Compartments and Travel Packs
Not all zips on a bag live the same life. The compartment that guards your laptop and the zips on a travel pack face particular stresses, and their care and repair deserve targeted attention.
The laptop compartment zip
This zip works twice daily at minimum, often one-handed and in a hurry, and its failure strands your most valuable cargo. Because it typically runs around a padded, structured compartment, its tape is stitched through layers that make professional replacement slower and costlier — which raises the value of prevention here above every other zip on the bag. Keep this track scrupulously clean, since it sits where crumbs and grit migrate; close it fully rather than leaving it gaping under load; and at the first sign of splitting, perform the slider check immediately, because a laptop compartment zip caught at the squeeze stage is a five-minute fix, while the same zip ignored for a month becomes a replacement.
Two-way main zips on travel packs
Travel packs add length, load, and the indignity of being sat on in airports. Their long main zips accumulate grit from floors and car boots along a much greater track, so cleaning takes longer and matters more. When packing a travel bag, distribute pressure so the zip is not the structure holding the load in — internal compression straps exist precisely to take that force — and a zip that is spared structural duty lasts multiples longer. If a travel zip fails away from home, the slider squeeze and a safety-pin closure at the failed section are respectable field repairs that will get the bag home, where the permanent fix belongs.
Water-resistant and coated zips
Coated, water-resistant zips have a polyurethane film over the tape that changes repair rules: no heat near them, no solvents, and extra gentleness with pliers, because the coating cracks if the tape is bent sharply. Their sliders are often a closer fit by design, so the squeeze adjustment needs an even lighter touch. When the coating itself begins to peel, the zip usually still functions mechanically; the peeling is a weatherproofing loss, not a mechanical one, and it can be lived with or professionally renewed depending on how much weather the bag actually meets.
A Short History of the Problem: Why Zips Fail the Way They Do
Understanding that the modern zip is a precision mechanism wearing a fabric disguise explains most of its behaviour — and most of its failures.
Precision hidden in plain sight
The meshing of a zip’s elements depends on tolerances smaller than a millimetre, maintained by a slider whose internal channel is shaped to press the two sides together at exactly the right angle and force. Everything in this guide follows from that fact: grit defeats the tolerance, wear widens the channel, a bent tooth breaks the sequence, and an overfilled bag applies a separating force the mechanism was never sized to resist indefinitely. Owners who grasp this stop yanking stuck zips — the single most destructive habit — because they understand they are forcing a precision mechanism through an obstruction rather than persuading a simple fastening to close.
Why the slider is designed to be the weak point
In a well-made zip, the slider is the cheapest and most replaceable component, and its gradual widening is, in effect, the system wearing at its intended service point. That is why the squeeze and the slider replacement succeed so often: you are renewing the part that was always going to wear first. It is also why a bag whose chain is sound should almost never be discarded for a splitting zip. The mechanism has told you exactly what it needs, and what it needs is the small metal part, not a new bag.
Keeping a Repair Log and Spares for a Bag You Love
Owners of one excellent bag, kept for years, benefit from treating its maintenance the way careful owners treat a bicycle’s: small records, small spares, small habits.
The two-minute record
Note, in your phone, the slider size stamped on each zip, the date of any repair, and what the fault was. Patterns in that tiny log are diagnostic gold: a slider that needs squeezing every few months is announcing the chain is wearing it, and a zip that fails repeatedly at the same spot is reporting a local chain fault that no slider will cure. The log converts repeat repairs from mysteries into information, and it takes less time to keep than one unnecessary repair costs.
Spares worth having
One correct-size spare slider, a few spare stops, and a handful of replacement pull tabs cover the overwhelming majority of zip emergencies for a bag’s entire life, at trivial cost and in a matchbox of space. Buy the slider when the bag is new and its size is easy to read, not when the old one has failed and its stamp is worn smooth. This is the cheapest insurance in all of bag ownership, and the day it pays out — usually a Sunday evening before a Monday journey — it feels less like insurance and more like foresight of a very satisfying kind.
Emergency Field Repairs: Getting Home With a Failed Zip
Zips rarely fail at the kitchen table. They fail at stations, in hotel rooms, and on the first morning of a trip, and the goal in the field is not elegance but a bag that holds together until you get home.
The five-minute triage
First, empty the compartment if you can, because every field fix is easier unloaded and a failed zip under load only worsens. Inspect for the simple causes before anything else: a trapped thread or a scrap of fabric in the track causes a large share of sudden failures and clears in seconds. If the slider has run off the end, look for the missing stop and improvise one — a tightly wrapped twist of tape or a safety pin through the tape beyond the last tooth will keep the slider captive until a proper stop is fitted at home.
Closing a compartment whose zip will not
A splitting zip can be closed section by section by hand, pressing the elements together with your fingers ahead of the slider, and then secured with safety pins or a strap around the bag so the hand-closed section is not asked to bear load. Pins belong through the tape, not the teeth, and a bag closed this way should be carried by its handle where possible and kept upright. It is not pretty and it is not permanent, but it protects a laptop through a journey home, which is the entire job of a field repair.
What not to do in the field
Do not attempt the pliers squeeze for the first time on a trip with no backup bag, because an over-squeezed, binding slider converts a limping zip into a stuck one far from your tools. Do not cut anything. And do not abandon a bag roadside for a failed zip that a repairer at home would fix in twenty minutes — field judgement is about preserving options, and every irreversible act in a hotel room destroys one.
Teaching the Skill: Zips as a Maintainable System
The deeper lesson of this guide is that a zip is not a disposable fastening but a maintainable mechanism, closer to a bicycle chain than to a button. Owners who absorb that idea keep bags for years that other owners discard in a season.
Habits of owners whose zips never fail
They close zips by pulling the slider straight along its track rather than at an angle, which keeps the channel wearing evenly. They keep two fingers of slack — they do not make the zip the structure that contains the load. They brush grit out when they see it rather than grinding past it, and they treat the first split as a message answered the same week. None of this is effort in any meaningful sense; it is attention, applied at the moments when attention is cheapest.
Passing the knowledge on
If the bag belongs to a child or is shared in a household, the kindest repair is a two-minute demonstration: how to spot grit, how to close without yanking, and why the bag should never be forced. Most zip damage in family bags is educational rather than mechanical in origin. A bag whose users all understand its one precision mechanism will outlast a technically superior bag used by people who treat its zips as indestructible — a fitting final proof that maintenance, more than manufacture, decides how long anything with moving parts actually lasts.
The Repair Mindset, Summarised for the Next Failure
When the next zip fails — and on a well-used bag, one eventually will — run the order this guide has built: stop and diagnose before touching a tool, clean before adjusting, adjust before replacing, and replace the smallest part that explains the fault. That order, more than any individual technique, is what separates owners who fix zips in minutes from owners who shop for bags in frustration. Keep the slider sizes noted, the little kit together, and the habit of answering the first small symptom promptly, and a broken zipper becomes what it should always have been: a minor maintenance event in the long life of a good bag, not the end of the bag itself.
One last encouragement: the first repair is the hardest, and it is mostly hard in anticipation. Owners who have squeezed one slider back to life describe the same small surprise — that the mechanism was understandable all along, and the bag they nearly discarded was twenty minutes from years more service. Let that be the note this guide ends on: diagnose calmly, work gently, and trust the order of fixes, and the next broken zip will meet a very different owner than the last one did.
Keep this guide’s diagnostic table bookmarked alongside that note of slider sizes, and the pair of them will cover nearly every zipper event your bag will ever present. Few household skills repay their learning cost as reliably, or as quietly, as this one.
Related Guides
- best laptop backpacks for travel
- best laptop backpacks for business
- best laptop backpacks for work
- best laptop backpacks for under 100
- best backpacks for camera
- what size laptop backpack do you need
- how to choose a laptop backpack
- how to clean a laptop backpack
Frequently Asked Questions
Why does my zipper keep splitting open after I close it?
Because the slider — the small metal clamp that presses the teeth together — has loosened with use until its jaws no longer mesh the teeth fully. The zipper looks closed at the slider and separates behind it under any tension. The cure is the gentle plier squeeze in step three: narrow the slider jaws in tiny increments, testing as you go, until the seam holds. It is the most common zipper failure and, happily, the most fixable one in this entire guide.
Can I fix a zipper with missing teeth?
It depends where they are missing. Damage at the very end of the track can be retired by sewing or clamping a new stop above it, sacrificing a little length for a working zipper. Missing teeth mid-track, where the slider must travel, cannot be bridged by any adjustment — the slider will stumble or derail at the gap forever. That zipper needs replacement, which a repair shop does routinely and economically on a bag worth keeping. Do not keep forcing the slider across the gap; you will add a broken slider to the bill.
What size replacement slider do I need?
Look on the back of the existing slider: most are stamped with a size number, commonly 3, 5, 8, or 10, and the replacement must match both that size and the zipper type — coil versus molded or metal teeth use different sliders. If there is no stamp, measure the closed teeth width and match it at a craft or repair supplier, or take the bag in. A wrong-size slider either will not mesh the teeth or will not stay on the track, so this is a number worth getting exactly right.
Is it worth repairing a cheap backpack zipper?
Honestly, usually not at a shop — the repair can approach the bag price. The home fixes in this guide, though, cost nothing but minutes: clean it, squeeze the slider, reseat it. Try those first on any bag. If a cheap bag needs parts or sewing, replacement is the rational spend — and the replacement is your chance to buy the zipper quality that makes this article unnecessary, using the build checks in our choosing guide.
How do I stop a zipper from sticking in cold or wet weather?
Stiffness in the cold is usually thickened grime and tired lubrication rather than temperature itself. Clean the track, then use a dry lubricant — graphite from a pencil is the classic — which does not thicken or wash out the way oils do. After wet days, dry the bag with zippers open so teeth and tape dry fully; corrosion starts in bags put away damp. A covered zipper design on your next bag keeps weather off the track in the first place.
My zipper pull broke off. Is the zipper ruined?
Not at all — the pull is just a handle; the slider underneath is the machine. Thread anything sturdy through the slider pull eye: a small split ring, a loop of paracord, a paperclip in an emergency, or a proper replacement pull sold in packs at craft stores. Choose something you can grip with gloves if it is a winter bag. Two minutes, no tools, and many owners end up preferring the chunkier replacement to the original.
Can I replace just the slider without removing the zip?
Usually, yes, and it is the most worthwhile repair most owners will ever do. On many backpack zips the slider can be worked off at an end where the stop can be removed, or through a small gap in the teeth near the end of the track, and a new slider of the correct stamped size threaded on in its place. Replace the stop afterwards so the new slider cannot escape. If neither end gives access, that is the point at which a repair shop earns its fee.
Why did my zip fail right after I washed the bag?
Washing usually reveals rather than causes the failure: water and agitation clear out the grit that was, paradoxically, helping a worn slider grip, and they can finish off stitching or a corroded slider that was already near the end. Dry the zip fully, clean and inspect the track, and try the slider squeeze before assuming the worst. Then treat the timing as useful information — a zip that fails after a wash was going to fail soon anyway, and at home is the kindest place for it to happen.
How long should a quality backpack zip last?
With ordinary care, the chain of a quality zip should outlast the bag’s fabric and padding, and the slider — its designed wear point — should give years of daily service before it widens enough to need the squeeze or replacement. A zip failing within the first year of normal, unforced use is a warranty conversation, not a maintenance expectation. Longevity collapses mainly under grit, overfilling, and angled yanking, all three of which are within the owner’s control.