Disclosure: As an Amazon Associate, kajuandouglas.com earns from qualifying purchases. Links to Amazon on this page are affiliate links; they cost you nothing extra. Listing details such as price and availability change often, so check the current Amazon listing before you buy.
Knowing how to clean a soundbar keeps it sounding and looking like it did on day one — and soundbars gather more abuse than most electronics, living directly under TVs in the dustiest airflow in the room, within reach of drinks, snacks and curious fingers. The fabric or grille across the front traps dust visibly; the top collects it invisibly; and the buttons and ports along the back edge accumulate the grime of every adjustment made during a film.
The work is gentle and quick: dry dusting for most of it, a barely damp cloth for marks, a vacuum with a brush attachment for the grille, and strict restraint around the drivers behind the fabric and the up-firing drivers on top of Atmos models. This guide covers the bar, its remote, the subwoofer and rear speakers, and lists the products and habits to avoid — because with soundbars, as with speakers, more damage is done by enthusiastic cleaning than by dust.
How to clean a soundbar: The Short Answer
Power off first. Dust the bar with a dry microfibre cloth, vacuum the front grille gently with a soft brush attachment, wipe marks with a barely damp cloth, and clean top-firing drivers only with a dry brush or distant air. Never spray liquid at the bar, never soak the fabric, and never press on the grille over the drivers.
In this guide
What You Need
- Two soft microfibre cloths
- A vacuum with a soft brush attachment
- A soft brush for crevices and driver areas
- Cotton buds for buttons, seams and ports
- A lint roller for fabric fronts (ideal for pet hair)
- Compressed air (optional, used from a distance)
Step by Step
Step 1: Power down and let it cool
Switch the soundbar off and unplug it — or at minimum power it down fully — before cleaning. You will be wiping across buttons and around ports, and a live bar will change inputs, blast volume and generally participate unhelpfully. Unplugging also protects the electronics from any accidental moisture. If the bar has been playing loudly, give it a few minutes; amplifiers and their vents are warm, and dusting a warm, vented surface just moves dust into the airflow.
Step 2: Dry-dust every surface first
Work top to bottom with a dry microfibre cloth: the top panel (where most dust settles), the ends, and the front. Use the soft brush along seams, around buttons and logos, and into the edges where the grille meets the cabinet. For Atmos models, dust the top-firing driver grilles with the brush only, with the lightest touch — those drivers sit behind thin mesh that dents if pressed. This dry pass removes most of what a normal clean needs to remove; do not reach for liquids before completing it.
Step 3: Vacuum the front grille gently
Run the vacuum’s soft brush attachment across the fabric or perforated front on low suction, moving slowly in one direction. This lifts dust that cloths push around, and it is the single most effective step for a bar that looks grey across the front. A lint roller follows up beautifully for pet hair and fibres. Keep suction modest and the brush moving; parking a strong vacuum on one spot can pull fabric and stress the grille over the drivers beneath.
Step 4: Wipe marks with a barely damp cloth
For fingerprints, drink splashes and sticky spots on the cabinet and top panel, use a microfibre cloth dampened with water and wrung nearly dry, then dry the area immediately with the second cloth. Work on the mark, not the whole bar, and keep moisture away from the grille fabric, seams, ports and vents. A trace of mild soap on the cloth handles greasy marks; follow with a clean damp wipe so no residue remains to attract more dust. Never spray anything directly at the bar.
Step 5: Detail buttons, ports and the remote
Cotton buds — dry, or very slightly damp for stubborn grime — clean around the top or side buttons, the seams of the end caps, and the edges of the HDMI and power sockets at the back. Blow dust out of vents with short puffs of air from a distance. Then clean the remote, the filthiest object in most living rooms: wipe it with a barely damp cloth, use a bud between the buttons, and if it is truly grim, remove the batteries and clean the compartment contacts dry. A clean remote also presses more positively, which people mistake for new batteries.
Step 6: Clean the subwoofer and rear speakers
The wireless subwoofer and any rear speakers clean exactly like small speakers: dry dust, barely damp wipe for the cabinet, brush for the driver surround area with no pressure, and a vacuum with brush for fabric fronts. Check the subwoofer’s port and the area around its driver for the dust bunnies that floor-level cabinets collect. While you are there, confirm the power cables are seated and the pairing indicators are healthy — cleaning day is also connection-check day, and it prevents the ‘no bass’ mystery later.
Step 7: Reassemble, reconnect and do a sound check
Let everything dry fully, reconnect power, and play a familiar scene at normal volume. Listen for anything new — a buzz usually means something is resting against the bar or a grille edge is vibrating, not that cleaning harmed the drivers. Dust the TV stand and the area under the bar while the system plays; returning a clean bar to a dusty shelf halves the time until the next clean. Note the date if you like: most bars need this routine every month or two, kitchens and pet households more often.
As you work through this guide, keep the bigger picture in mind. Our roundup of best soundbars for tv under 300 shows how the main options compare, and the companion piece on how to clean a speaker covers the neighbouring decision in the same detail.
How to Clean a Soundbar With Fabric, Metal or Touch Controls
Fabric-fronted bars are the most common and the most delicate: vacuum and lint-roll them, never soak them, and treat stains by dabbing with a barely damp cloth rather than scrubbing, which pushes dirt deeper into the weave. Metal and perforated plastic grilles tolerate a slightly firmer hand and a damp wipe. Touch-control tops — common on premium bars — should be cleaned with the bar powered down, or you will spend the clean fighting the controls, and wiped dry so the sensors read touches accurately afterwards.
Glossy and piano-black bars show every fingerprint and every cleaning swirl, so use a clean, plush section of microfibre and light, straight strokes. Matte bars hide sins but hold dust in their texture; the soft brush earns its keep there. LED displays and light strips behind fabric clean with the grille method — dry and gentle — and any cloudiness is usually dust on the fabric itself rather than a failing display, which the vacuum pass will confirm or clear.
Keeping It Clean Longer
Position and habit beat effort. A bar kept out of the direct line of kitchen grease and wood-stove air stays clean far longer; a lidded drink policy near the TV stand prevents the worst sticky incidents; and a soft brush kept in the TV unit turns dusting into a weekly thirty-second habit instead of a quarterly project. Dust the top of the bar whenever you dust the TV screen — they collect the same fallout, and the pairing makes the routine stick.
If the bar lives in a room being decorated or renovated, cover it or remove it: plaster and sanding dust are abrasive, conductive in bulk and drawn to electronics by static and airflow. The same applies to the subwoofer in a workshop-adjacent space. A bar that survives building work under a cotton sheet needs only the gentle routine above; one that sat uncovered through a sanding session may need professional attention to its ports and controls.
Gear for This Guide

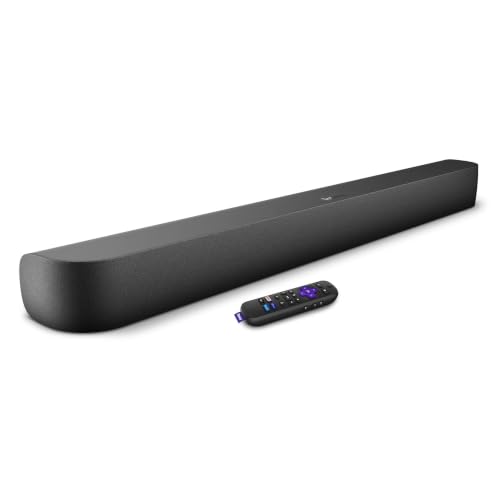
Roku Streambar SE
A compact soundbar with built-in 4K Roku streaming, aimed at smaller TVs and bedrooms. It upgrades both the picture apps and the sound in a single step for older televisions. Check price on Amazon.

Bose TV Speaker Soundbar
A compact, deliberately simple soundbar with HDMI ARC, optical and Bluetooth, plus a dialogue mode for clearer speech. It is aimed at people who want better TV sound without apps, Wi-Fi setup or a separate subwoofer. Check price on Amazon.

Sonos Beam (Gen 2) Soundbar
A compact Atmos-capable soundbar for smaller TVs and rooms, with Wi-Fi, voice control and the option to add Sonos surrounds and a sub later. Its size suits desks, bedrooms and apartments where a wide bar will not fit. Check price on Amazon.
Common Mistakes
Spraying cleaner or water directly onto the bar
Liquid runs through grille fabric onto drivers and into seams and ports. Spray belongs on the cloth at most — and water on a cloth is all a soundbar ever needs.
Pressing on the grille to ‘get at’ the dust
The drivers sit millimetres behind that fabric or mesh, and dome tweeters dent permanently. Vacuum and brush from the surface; never push through it.
Soaking or scrubbing a fabric front
Water and scrubbing drive dirt into the weave and can loosen the fabric’s bond. Dab, vacuum and lint-roll instead — patience cleans fabric better than force.
Using a steam cleaner or strong solvents
Steam forces moisture into every seam and vent; solvents attack finishes, fabrics and driver surrounds. Neither has any place near a soundbar, whatever a general cleaning guide suggests.
Pro Tips
- Dust the bar whenever you dust the TV screen — same fallout, same cloth.
- A lint roller is the fastest fabric-front cleaner in a pet household.
- Clean the remote too; it is the grimiest part of the system.
- Cover the bar during decorating — plaster dust is its worst enemy.
Going Deeper: Context That Helps
Accessibility features deserve more attention than they get. Many bars offer dialogue modes with several levels of voice boost, some TVs can send audio to both a bar and hearing aids or headphones at once, and Bluetooth output on some models lets one listener use headphones while others use the bar. For households where one person struggles with TV sound, these features change daily life more than surround formats do. Check the manual’s accessibility section before buying if this matters to you — the information is rarely on the box but often present in the product.
Placement rules for soundbars are simple but strict. The bar belongs at ear height when seated, or as close as the TV stand allows, centred on the screen, with its front edge near the front of the stand so sound does not reflect off the stand’s surface. Never put a bar inside a closed cabinet: the doors and shelves block and colour the sound, and heat builds up. Up-firing Atmos bars additionally need a clear path to a flat ceiling — beams, ceiling fans and very high or vaulted ceilings all weaken the height effect, though the bar will still sound good as a normal surround bar.
When a soundbar system grows, it grows in a predictable order. First the bar, then — if bass feels light — a subwoofer; then, if surround effects feel front-bound, rear speakers; the rears add more immersion per step than any processing upgrade. Systems that allow these additions let you spread the cost and learn what your room actually needs. The alternative, a complete package with sub and rears in one box, costs less overall and guarantees the parts match. Neither route is wrong; the mistake is buying a sealed all-in-one bar while expecting to add rears to it later, because most cannot.
Whatever the product, the cheapest upgrade is usually time spent with the manual and the settings menu. Manufacturers bury genuinely useful options — EQ presets, dialogue modes, level trims, firmware updates — several layers deep, and most owners never find them. An hour spent exploring settings with familiar content playing will teach you more about your system than a week of reading reviews, and it costs nothing. Keep notes of what you changed so you can undo anything that makes things worse, and change one thing at a time so you know which adjustment caused which result.
Returns windows are part of the buying process for audio gear, and you should use them deliberately. Sound is personal and room-dependent, so a product that reviews well can still disappoint in your space. Buy from sellers with clear return policies, keep packaging until you are sure, and test with your own content at your own volumes in the first days — not the night before the window closes. A structured test, with the same three songs or scenes each time, reveals differences that casual listening misses and turns a vague feeling into a decision you can act on.
Hearing safety deserves a mention in any audio guide. Comfortable TV and music listening sits well below the levels that risk hearing damage, but portable speakers at parties, and headphones especially, can creep upward in noisy environments as you compete with background sound. If you have to shout to be heard over your own system, it is too loud for long sessions. Many devices offer volume limiting — worth enabling for children — and taking listening breaks during long sessions protects both your ears and your enjoyment, because tired ears judge sound poorly.
A soundbar’s biggest advantage is also its limitation: everything lives in one wide box under the TV. That makes setup simple and dialogue clear for most viewers, but the left and right channels are only as far apart as the bar is wide, so true stereo separation is narrower than two separate speakers can give. Virtual surround processing tries to widen the picture with psychoacoustic tricks, and on many films it works surprisingly well from a single seat. Understanding this trade-off helps you choose: if you mostly watch dialogue-heavy TV from one sofa, a bar is ideal; if you listen to music critically across a wide room, separate speakers still lead.
HDMI eARC is the connection that matters most on a modern soundbar. It carries full-quality audio from the TV — including Dolby Atmos from streaming apps and consoles — down a single cable, and it lets the TV remote control the bar’s volume. Optical connections are reliable but limited to older surround formats and cannot carry Atmos from most sources. When a soundbar misbehaves — no sound, wrong format, lip-sync drift — the cable and the TV’s audio output settings are responsible far more often than the bar itself, so always check the TV’s menu for eARC, passthrough and PCM settings before assuming the bar is faulty.
Dialogue clarity is the reason most people buy a soundbar, and it depends on the centre channel and on processing, not raw power. Film mixes bury speech under music and effects, and TV speakers point that sound at the wall or the floor. A bar with a dedicated centre channel, or a dialogue enhancement mode that lifts the vocal frequency range, fixes the nightly ‘what did they say?’ problem better than simply turning the volume up. If you watch late at night, look for a night mode that compresses loud effects while keeping speech level — your household will thank you more than for any surround effect.
A wireless subwoofer changes what a soundbar can do more than any other single feature. The bar handles voices and effects; the subwoofer, placed near a wall or corner, reproduces the low rumble of films and the body of music. Because low bass is hard to localise, the sub can live beside the sofa or next to the TV stand, wherever a power socket is convenient — it only needs power, since the audio link is wireless. If a bar sounds thin, first check that the subwoofer is paired, powered and not turned down in the settings before concluding the bar itself is weak.
Frequently Asked Questions
Can I vacuum my soundbar?
Yes — a vacuum with a soft brush attachment on low suction is the best tool for the front grille, lifting dust that cloths only redistribute. Keep the brush moving, use modest suction, and never apply a bare vacuum nozzle or strong suction directly over driver areas, especially the top-firing drivers on Atmos models. For cabinets and tops, a dry microfibre cloth is safer and just as effective. Together, brush-vacuum for the front and cloth for the rest is the complete method.
How do I remove sticky drink residue from a soundbar?
Power off first. Blot the spill with a dry cloth — do not rub, which spreads it — then work the residue with a cloth dampened with water and a trace of mild soap, followed by a clean damp wipe and a dry one. Keep liquid on the cabinet surfaces only, away from the grille, seams and ports. If liquid entered a port or vent, leave the bar off and let it dry for at least a day. Sticky buttons usually recover once the residue around them is cleaned away with a cotton bud.
The fabric on my soundbar looks grey. Can it be restored?
Usually, yes: the greyness is almost always dust lodged in the weave, and a slow vacuum pass with a brush attachment, followed by a lint roller, restores the original colour in most cases. For ingrained dust, repeat the vacuum pass rather than escalating to water. If a specific stain remains, dab it with a barely damp cloth and let it air-dry. Fabric that stays discoloured after patient dry cleaning may have faded from sunlight — a cosmetic issue that cleaning cannot reverse.
How often should I clean a soundbar?
A light dry dust every few weeks and the full routine every one to two months suits most homes. Kitchens nearby, open windows, pets and wood burners all shorten the interval, because grease and fine ash combine with dust into a film that dry cloths cannot shift later. The top panel tells you the truth: when it shows a visible dust layer within a fortnight, your interval is monthly. Regular gentle cleaning always beats occasional aggressive cleaning, for the bar’s finish and its drivers alike.
Can I use compressed air on a soundbar?
Yes, carefully: short puffs from at least 20 centimetres away, aimed at vents, seams and port edges, with the bar powered off. Never blast air point-blank into the grille or at top-firing drivers, because the pressure can stress cones and domes, and never tip the can so it sprays propellant liquid. Used with restraint, air clears the crevices that cloths cannot reach; used carelessly, it drives dust deeper into the unit. The soft brush remains the safer default for driver areas.
My soundbar’s buttons are sticky and unresponsive after cleaning. What happened?
Most likely moisture or cleaner residue reached the button seams, or the bar was cleaned while powered and its touch controls need a reset. Power the bar down, wipe the control area with a dry cloth, and let it dry fully — an hour or more — before powering up. Sticky mechanical buttons usually free up once residue around them is cleaned with a dry cotton bud. If a touch panel still misreads after drying, a power-cycle (unplug for a minute) recalibrates it in most cases.
Understanding What Dirt Does to Sound Before You Remove It
Dust on a soundbar is not merely cosmetic. A grille is an acoustically transparent window, and as dust, cooking grease and household film accumulate in its weave or perforations, that window slowly clouds. The effect is gradual enough to escape notice: high frequencies soften first, dialogue loses its edge, and owners often compensate by turning the volume up or engaging enhancement modes, treating a cleaning problem as an electronics problem. Restoring a clean grille can return a surprising amount of clarity, which is why a careful clean belongs in any conversation about a bar that sounds duller than it used to.
Different grilles, different patience required
Fabric grilles trap particles within their fibres and reward patience: repeated gentle passes with a dry cloth, a soft brush and a low-suction vacuum lift material out without driving it deeper. Pressing hard, scrubbing or soaking compresses the fibres and pushes grime further in, the opposite of the goal. Perforated metal and plastic grilles are more forgiving and can take a slightly firmer wipe, but their holes still shelter dust that only a brush or vacuum nozzle coaxes out, and liquid allowed to pool in the perforations can find its way to the drivers behind.
Touch-control surfaces and glossy top panels show fingerprints rather than dust, and their enemy is abrasion. Every wipe with a rough cloth adds microscopic scratches that eventually cloud the finish permanently. Keep one genuinely soft, clean cloth for these surfaces alone, and treat any gritty particle on a glossy panel as a reason to lift it away with a brush first rather than dragging it across the shine under a cloth.
A Seasonal Deep Clean, Step by Step in Spirit
Beyond the regular light clean described in the main steps, a seasonal deep clean once or twice a year keeps a hard-working bar honest, especially in homes with open-plan kitchens, wood stoves, candles or pets. Work in daylight if you can; a low sun or a lamp angled across the grille reveals dust that flat overhead light hides. Allow unhurried time, because rushing a deep clean is how cloths get wetter, pressure gets heavier and connectors get knocked.
Behind, beneath and the forgotten surfaces
The top surface collects what gravity delivers, but the underside and rear panel collect what nobody sees: dust mats around vents, cobwebs bridging cable runs, and a surprising felt of fibres around the subwoofer’s port and driver surround. With the power off and the bar cool, a soft brush and gentle vacuum pass over vents and rear panels keeps cooling paths clear. Never push a nozzle or brush into a port or vent opening; you are clearing surfaces, not excavating, and drivers and internal parts sit closer behind those openings than intuition suggests.
Cables deserve inspection during the deep clean. Dust itself is harmless on a cable, but the process of wiping runs your eyes along connectors that may have loosened, insulation that furniture may be pinching, and a subwoofer power lead that a pet may have investigated. Re-seat any connector that moves too easily, reroute anything under strain, and let the clean double as the annual safety and sanity check of the whole installation.
The remote control, cleaned properly
The remote is usually the dirtiest object in the system, handled during meals and passed between everyone in the house. Remove its batteries, then wipe all surfaces with a cloth very slightly dampened with water, working around buttons rather than flooding them. A wooden toothpick or a soft brush clears the seam where the two halves of the casing meet, which is where grime collects most. Let it dry fully before the batteries return, and if a button already sticks, resist opening the casing; repeated careful surface cleaning and use usually frees it, and a opened remote rarely closes as well again.
Homes With Particular Enemies: Kitchens, Smoke, Pets and Children
Context decides how often and how carefully you clean. A bar in an open-plan kitchen-diner lives in airborne cooking fat, which settles as a sticky film that binds dust into a coating dry dusting cannot shift. Such a bar needs the barely damp stage of cleaning more often, and benefits from the extractor fan being used during cooking as a genuine sound-quality measure, not merely a culinary one. Distance from the hob is the other quiet protector; a bar across the room ages far more slowly than one on a unit beside the stove.
Pets, children and honest prevention
Pet hair migrates into grilles and subwoofer ports with determination. A lint roller over a fabric grille, used gently and without pressing, lifts hair that a cloth smears around, and a weekly thirty-second pass prevents the monthly excavation. Position, where possible, is prevention too: a subwoofer tucked where a cat has decided to sleep will need its driver surround checked for hair and the occasional claw investigation, and a simple relocation often ends the conflict to everyone’s benefit.
Children contribute fingerprints, sticky residues and the occasional drink placed on top of the bar as if it were a shelf. Establish the household rule early — nothing sits on the bar, ever — because coasters and reminders fail against the one forgotten glass of juice. When sticky accidents happen, patience wins: repeated gentle passes with a barely damp cloth soften and lift sugar residues, while hot water, solvents and scouring all risk the finish or the electronics for the sake of saving two minutes.
Candle soot, wood stoves and smoking households
Fine soot is the most insidious coating of all, settling as a grey film that dry cloths smear rather than lift. Work with a cloth that is barely damp from the start on hard surfaces, rinse it frequently so you are not redistributing the film, and expect fabric grilles in such homes to grey gradually despite good care. That greying is largely cosmetic; chase cleanliness, not original showroom colour, and never resort to bleach, strong detergents or soaking, which will damage the fabric and its acoustic transparency alike.
What Never to Do, Explained Rather Than Merely Forbidden
Each common prohibition exists because someone learned it expensively. Liquids sprayed directly onto a bar run by gravity into seams, buttons and driver surrounds before any cloth arrives, which is why liquid always goes onto the cloth, sparingly, never onto the equipment. Compressed air, used carelessly at close range, can drive dust past seals and deform delicate driver materials, which is why gentle distance and short bursts are the limit if it is used at all, and why a vacuum’s outward patience is usually the better tool.
Disassembly, detergents and other false economies
Removing a grille that was not designed to be removed risks broken clips, torn fabric and a warranty quietly voided, all to reach dust that patience would have removed from outside. Household detergents, glass cleaners and antibacterial sprays carry solvents and residues that cloud finishes and leave films on grilles; warm water, barely applied, handles almost everything a home deposits on a soundbar. Steam is the final temptation and the worst idea: it delivers heat and moisture together into every seam, exactly the two things electronics least forgive.
If a bar has suffered a genuine disaster — a full drink inside, flooding, a pet-related incident of imagination — stop cleaning and think like an insurer rather than a housekeeper. Power off, do not power on to test, let it dry unplugged for an extended period, and seek the manufacturer’s advice before electricity is reintroduced. More equipment is killed by the hopeful test after an incident than by the incident itself, and patience at that moment is the whole of the law.
Keeping a Clean Bar Clean: A Realistic Rhythm
The sustainable rhythm is small and regular rather than heroic and rare. A dry dust during weekly housework, a grille vacuum monthly, a deeper session with cables and remote twice a year, and immediate gentle attention to any spill or sticky event: that cadence keeps any bar in any home at a standard where dirt never accumulates enough to affect sound or finish. Tie the tasks to existing habits — the vacuum is already out, the cloths are already in hand — and they cost almost no additional time at all.
Knowing when dull sound is not dirt
Finally, keep perspective. If a thorough, careful clean does not restore a bar that has grown dull, muffled or distorted, the cause lies elsewhere: a failing driver, a changed setting, a new piece of furniture swallowing the sound, or hearing that has itself changed. Clean first because it is free, safe and often effective, then troubleshoot settings and placement, and only then suspect hardware. That order — clean, check, then repair — is the cheapest diagnostic sequence in home audio, and it begins, fittingly, with a soft cloth and ten unhurried minutes.
Cleaning After Events: Spills, Parties, Building Work and Moves
Certain events justify an unscheduled clean because they deposit in hours what ordinary life deposits in months. Building and decorating work fills a home with plaster and wood dust of a fineness that penetrates everywhere; cover the bar during such work if you possibly can, and if you cannot, clean it before its next use, because abrasive dust drawn across a grille by a cloth — or vibrated into it by loud playback — does the damage that ordinary dust never would. Blow and brush the loose material away first, at length, before any cloth touches any surface.
Parties, children and the morning after
After a gathering, inspect rather than assume: glasses migrate onto flat surfaces, and a bar’s top is a flat surface at a convenient height. Look for rings, splashes and sticky patches in daylight, and treat each with the barely damp, patient method while residues are fresh, because sugar and alcohol residues harden into a varnish that later cleaning must soften before it can lift. Check the subwoofer’s top and the rear speakers too; they serve as drink stands in other people’s mental furniture plan, however clearly your own household understands the rule.
Moving house is the other great cleaning opportunity, and the one chance to clean every surface including the back and underside with the system disconnected and portable. Wrap the cleaned bar in a soft cloth or its original packaging rather than in plastic that can trap moisture, keep the remote and cables with it, and let the reinstallation in the new room begin from a genuinely clean state. A system that arrives clean gets positioned carefully; a system that arrives dusty gets wiped eventually, which in practice means never.
Allergies, Hygiene and the Honest Limits of Cleaning
Homes managing allergies treat dust control as health housekeeping, and a soundbar participates like any other surface: it collects, and if neglected, it redistributes when warm air rises from its vents. Regular dry dusting with a cloth that captures rather than scatters, and gentle vacuuming of grilles with a brush attachment, keep the bar a minor contributor. During high-pollen or illness periods, the remote deserves its frequent gentle wipe, since it passes hand to hand more than any object in the room except the door handles.
What cleaning cannot sanitise
Keep claims modest. Surface cleaning removes soil and reduces what lives in it, but a soundbar is not a sterilisable object and should not be treated with the chemicals that sterility would require, because those chemicals damage finishes, fabrics and electronics. The goal is a clean, well-kept device, not a clinical one, and any product promising more than that at the cost of solvents or saturation is selling anxiety. Warm water, a soft cloth and regularity remain the whole prescription, and they are enough for any ordinary home.
If a bar has been exposed to something genuinely hazardous — smoke damage from a fire, flood water, pest infestation — cleaning leaves the domestic realm. Stop, keep the device unplugged, and take professional or insurer advice, because residues in such cases can be corrosive, conductive or a health risk, and enthusiastic home cleaning can spread the problem through the device and void assessments that should happen first. Knowing where home cleaning ends is part of cleaning wisdom.
A Note on Finishes: Piano Gloss, Matte, Wood and Metal
Each finish has its own temperament. Piano gloss shows every fingerprint and rewards a dedicated soft cloth and a light touch; its scratches come almost entirely from cloths carrying grit, so the brush-first rule matters most here. Matte finishes hide fingerprints and forgive handling, but can burnish shiny where they are rubbed repeatedly, so vary your wiping pattern and keep pressure low. Wood veneers want dry or barely damp care and dislike standing moisture at their edges, where it lifts and darkens; treat a veneered bar like the furniture it resembles, because that is what it is.
Metal grilles, plastic cabinets and printed labels
Brushed and perforated metal cleans well with a soft brush and a barely damp cloth worked along, not across, any brushing direction, and it dries fast enough that moisture risk is low if you were sparing. Plastic cabinets tolerate the standard method but scratch more readily than they appear to, and printed logos, labels and control legends on any material are fragile: wipe around them rather than across them, because the lettering that tells you which input you are on is printed on the surface, not carved into it, and a year of enthusiastic wiping can erase the map you navigate by.
Cleaning Records and Warranty Wisdom
It sounds excessive until the day it is not: a brief note of when the bar was deep-cleaned, what was used, and any incident — a spill, a drop, a pet event — with its date. If a fault develops later, that history helps a repairer distinguish damage from defect and helps you answer a warranty conversation accurately. Photographs taken during a deep clean, showing the bar’s condition and its cable arrangements, serve the same quiet purpose. None of this is housekeeping for its own sake; it is the paper trail of an object you expect to serve for years, kept with the same lightness as the settings record for the system it belongs to.
Keep the proof of purchase with that note, and the manual, whose cleaning instructions for your exact model outrank every general guide including this one wherever they differ. Manufacturers know their fabrics, coatings and seals; a general method should always defer to a specific instruction, and the two minutes spent checking the manual before a first deep clean is the cheapest insurance in this entire subject.
Teaching Children and Sharing the Care
A soundbar looked after by one careful person and used by everyone else lives a divided life, so share the care in proportion to the use. The rules worth teaching are few and mechanical: nothing sits on the bar, hands that are eating do not adjust it, spills are reported immediately rather than wiped guiltily with a sleeve, and the cloth lives in its known place for anyone’s two-second dust. Children old enough to use the system are old enough for its one-sentence cleaning method — dry cloth, gentle, never spray the bar itself — and being trusted with the care of a household object is, for most children, a promotion rather than a chore. Systems survive households that maintain them together; they decline in households where care is one person’s invisible labour, resented in proportion to its invisibility.
Related Guides
These guides and roundups cover the closest decisions and fixes in this category:
- best soundbars for televisions
- best soundbars for music
- best mini soundbars for under 50
- best soundbars for computers
- how to set up a soundbar
- how to position a soundbar
Can I remove the fabric grille to wash it?
Only if the manufacturer designed it to come off, which the manual will state plainly. Most soundbar grilles are fixed, and forcing one risks clips, fabric and warranty. A fixed grille cleans perfectly well in place with dry methods, patience and, where needed, a barely damp cloth; washing is neither necessary nor safe for the drivers waiting directly behind it.
How do I clean around a soundbar that is wall-mounted?
Work with the bar in place, power off, using a step you can stand on securely with both hands free. A soft brush and a cloth handle the front and top, and a vacuum with a brush attachment, held rather than rested against the bar, manages the grille. Do not unmount a bar just to clean it; the risk of dropping it outweighs any benefit.
Is it safe to use antibacterial wipes on the remote?
Occasionally, if wrung out so they are barely moist and kept away from seams and the battery compartment, they will do no harm to most remotes. As a habit, though, a cloth lightly dampened with water cleans as well without leaving chemical residue on an object that touches hands and faces daily. Let the remote dry completely before use either way.