Disclosure: As an Amazon Associate, kajuandouglas.com earns from qualifying purchases. Links to Amazon on this page are affiliate links; they cost you nothing extra. Listing details such as price and availability change often, so check the current Amazon listing before you buy.
Knowing how to clean a speaker properly matters because dust is not just cosmetic: it settles on cones and in ports, dulls grilles, and works its way into controls until volume knobs crackle and buttons stick. The good news is that speaker cleaning is gentle work. Almost everything you need is already in a kitchen drawer, and the main skill is restraint — the drivers under the grille are delicate, and aggressive cleaning does more harm than years of dust.
This guide covers fabric and metal grilles, cabinets in wood, vinyl and plastic finishes, the drivers themselves, and the controls and ports around the back. It also covers what never to use: soaking sprays, solvents and vacuum attachments pressed against a cone can turn a cleaning session into a repair bill. Work through the steps in order and a dusty speaker becomes a clean one in about fifteen minutes.
How to clean a speaker: The Short Answer
Power off and unplug first. Remove the grille if it comes off, vacuum it gently with a brush attachment, wipe cabinets with a barely damp microfibre cloth, and clean exposed drivers only with a dry soft brush or air from a distance. Never spray liquid directly onto any part of a speaker.
In this guide
What You Need
- Two soft microfibre cloths — one dry, one for barely damp wiping
- A soft paintbrush or makeup brush for drivers and crevices
- A vacuum cleaner with a soft brush attachment
- A can of compressed air (optional, used from a distance)
- Mild dish soap for removable fabric grilles only
- Cotton buds for knobs, seams and port edges
Step by Step
Step 1: Power down and disconnect
Switch the speaker off and unplug it from the wall; for portable speakers, power down and remove them from charge. Cleaning around live terminals and sockets invites shorts and shocks, and wiping a playing speaker risks pushing dust into moving parts. If the speaker connects with bare wire, note which wire goes to which terminal before you move anything — a phone photo saves a guessing game later. Let a warm amplifier or powered speaker cool for a few minutes before you start.
Step 2: Remove the grille if it is designed to come off
Most grilles pull straight off with gentle, even pressure at the corners, or lift from magnetic mounts. Work slowly and support the grille with both hands so it does not flex and crack. If a grille resists, stop: some are glued or screwed, and forcing them breaks clips. Check the manual or look for screws before applying more force. Lay the removed grille flat on a towel so it cannot warp or pick up grit from a worktop.
Step 3: Clean the grille
For fabric grilles, vacuum with the soft brush attachment on low suction, working in one direction. A lint roller also lifts pet hair and surface dust quickly. Stains on removable fabric can be treated by hand-washing the grille in lukewarm water with a drop of mild soap, rinsing well and air-drying completely flat — never reinstall a damp grille, because trapped moisture invites mould and rust. Metal and plastic grilles wipe clean with a barely damp cloth and dry immediately.
Step 4: Wipe the cabinet
Dust the cabinet with a dry microfibre cloth first. Then wipe with a second cloth dampened with water — wrung out until it is barely moist — and dry straight away with the first cloth. Water is the only cleaning liquid most cabinets need. Keep moisture away from seams, ports, vents and the driver surrounds, and never let liquid pool on top of a powered speaker, where it can creep down into the electronics. For sticky marks, a cloth with the faintest trace of mild soap, followed by a clean damp wipe, is enough.
Step 5: Clean exposed drivers with a dry brush only
With the grille off, dust woofer cones and tweeters using the soft brush with the lightest possible touch, or puffs of compressed air held at least 20 centimetres away. Never press on a cone, never touch a dome tweeter — a dented dome is permanent — and never use a vacuum directly on a driver, because suction can pull a cone past its travel. Dust on the rubber or foam surround wipes away with a dry cloth; do not apply oils or dressings, which can attack the material.
Step 6: Detail the controls, ports and back panel
Use cotton buds, dry or very slightly damp, around volume knobs, buttons and input sockets where grime collects. A wooden toothpick wrapped in a corner of microfibre cloth clears the seam between cabinet panels without scratching. Blow dust out of bass ports and cooling vents with short air puffs from a distance. Check speaker terminals while you are there: green or white corrosion on bare wire ends should be trimmed back to bright copper and reconnected firmly.
Step 7: Reassemble, reconnect and test
Once everything is fully dry, refit the grille, reconnect cables to the correct terminals and power up at low volume. Play something familiar and listen for anything odd — a buzz that was not there before usually means a grille is not seated or a cable is loose, not that cleaning broke something. Finish by dusting the shelf or stand the speaker sits on; cleaning the speaker and returning it to a dusty surface undoes half the work within a week.
As you work through this guide, keep the bigger picture in mind. Our roundup of best bluetooth speakers for beach shows how the main options compare, and the companion piece on how to choose a speaker covers the neighbouring decision in the same detail.
How to Clean a Speaker by Material
Real wood veneer wants the least intervention: dust dry, wipe barely damp, and keep it out of direct sunlight, which fades finishes unevenly. Avoid furniture polishes with silicone, which build up a smeary film and can contaminate driver surrounds. Vinyl-wrapped cabinets tolerate a slightly damper cloth and are the most forgiving finish in kitchens and workshops. Gloss and piano-black finishes show every fingerprint and swirl, so use a clean, plush microfibre and light pressure — grit dragged across gloss plastic scratches it permanently.
Outdoor and portable speakers with waterproof ratings are the exception to the no-water rule: a sealed IP-rated speaker can be rinsed briefly under a tap to remove mud and sand, provided the port covers are closed and it is fully dry before charging. Check the rating first — water resistance for splashes is not the same as rinse-proof construction, and a speaker that survives rain may still suffer from a tap’s direct pressure on its passive radiators.
How Often, and Keeping Dust Away
A monthly dry dust of cabinets and grilles prevents the deep clean entirely for most homes; speakers in kitchens, workshops or homes with pets and open windows benefit from attention every few weeks, because grease and fine dust combine into a film that dry cloths cannot shift. Positioning helps too: speakers kept off the floor collect less dust, and keeping them away from cooking areas avoids the sticky aerosol that ovens and hobs produce. A soft brush kept near the system turns dusting into a thirty-second habit.
If a speaker smells musty after storage, air it in a dry room with the grille off for a day before cleaning; odours trapped in fabric grilles fade with airing and a gentle vacuum far better than with scented sprays, which coat drivers in residue. Store speakers you are not using in their boxes or under a cotton cover, never sealed in plastic in a damp garage, where condensation does in a season what dust would not do in a decade.
Gear for This Guide

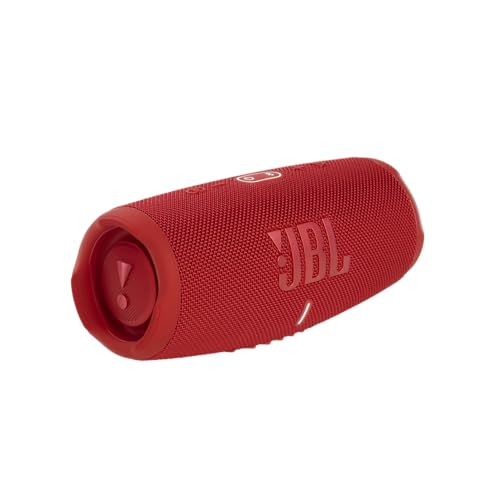
JBL Charge 5 Portable Speaker
A portable Bluetooth speaker with an IP67 waterproof and dustproof rating, designed for bathrooms, gardens and trips away. Its rugged build also makes it a forgiving speaker to clean and to move from room to room. Check price on Amazon.

Marshall Emberton II Portable Speaker
A compact portable speaker with Marshall’s amp-inspired styling and an IP67 rating. It suits desks, shelves and travel where a small footprint matters more than maximum volume. Check price on Amazon.

Sonos Era 100 Smart Speaker
A compact Wi-Fi and Bluetooth smart speaker with voice control, designed to work alone, as a stereo pair, or as rear surrounds with a Sonos soundbar. It is a tidy option for kitchens, bedrooms and offices. Check price on Amazon.
Common Mistakes
Spraying cleaner directly onto the speaker
Liquid sprayed at a speaker runs into seams, ports and driver surrounds. Always spray onto the cloth — or better, use water on the cloth — and keep liquids minimal everywhere near electronics.
Using a vacuum on bare drivers
Vacuum suction can pull a cone outward beyond its design and crease or tear it. Vacuum grilles and cabinets; use a soft brush or distant air for the drivers themselves.
Scrubbing with paper towels or rough cloths
Paper towels shed fibres and can scratch gloss finishes; rough cloths drag grit across surfaces. Microfibre, used clean and with light pressure, is the safe default for every speaker surface.
Cleaning a speaker that is still plugged in and playing
Moisture, metal tools and live terminals do not mix, and wiping a moving cone risks damage. Power off, unplug, and let the speaker sit still before you touch it.
Pro Tips
- Photograph cable connections before moving a wired speaker for cleaning.
- Clean from the top down so dust falls onto surfaces you have not done yet.
- A lint roller is the fastest grille cleaner for homes with pets.
- If a knob crackles after cleaning, rotate it fully back and forth twenty times — that usually clears the contact.
Going Deeper: Context That Helps
Cables and connections cause more speaker problems than speakers do. A single stray strand of copper touching the neighbouring terminal can short an amplifier; a loose banana plug or a corroded RCA connector adds crackle that sounds like a failing driver. Oxygen-free copper wire of adequate gauge, clean tight connections and strain relief where cables bend will keep a system reliable for years. Expensive exotic cables, by contrast, have never been shown to change sound in controlled listening tests once gauge and connection quality are adequate — spend the difference on placement, room treatment or better recordings instead.
Listening level matters for judging any speaker. Human hearing perceives bass and treble as weaker at low volumes — the Fletcher-Munson effect — so a speaker auditioned quietly can seem thin, and the same speaker loud can seem bass-heavy. Many receivers and some speakers compensate with loudness or dynamic EQ features for late-night listening. When you compare speakers or settings, match the volume between them as closely as you can, because the louder option almost always sounds ‘better’ in a quick comparison even when it is not. A cheap sound-level app on a phone is accurate enough to level-match for home comparisons.
Multi-room and streaming speakers add a networking layer to ordinary audio problems. A speaker that drops off the network, lags behind its partner in a stereo pair, or refuses to appear in an app is usually suffering from weak Wi-Fi at its location, a congested 2.4 GHz band, or a router setting — not a failed speaker. Placing the router centrally, keeping speakers within a room or two of it, and updating firmware through the maker’s app solves most of these cases. Wired Ethernet, where a speaker offers it, removes the variable entirely and is worth using for a fixed living-room setup.
Protecting speakers is mostly about restraint. Amplifiers damage speakers in two ways: too much power can overheat or over-extend a driver, but far more commonly a small amplifier driven into distortion — clipping — produces harsh high-frequency energy that burns out tweeters. If the sound turns harsh, gritty or compressed as you raise the volume, turn it down; that harshness is the warning sign. Children, pets and parties are the other risks: a volume limit in the receiver’s settings, grilles left on, and speakers placed where they cannot be knocked over will prevent most household speaker casualties.
Speaker specifications reward careful reading. Frequency response figures only mean something with a tolerance attached — ’60 Hz to 20 kHz’ without a plus-or-minus figure could hide a response that is already far down at 60 Hz. Driver size tells you about potential, not results: a well-designed 5-inch woofer in a solid cabinet can sound cleaner than a cheap 8-inch driver in a resonant box. Weight is an unfashionable but useful clue, because rigid cabinets and real magnets are heavy. Treat specifications as a way to shortlist, then let placement, room and your own ears make the final decision.
Ageing affects speakers slowly and mostly at the edges. Foam woofer surrounds on older speakers can crumble after a couple of decades, rubber surrounds last longer, and capacitors in crossovers drift with age, subtly changing the balance. None of this matters for a new purchase, but it explains why a vintage speaker may not sound as its measurements once promised. For modern speakers, dust, sunlight and humidity are the main enemies: keep them out of direct sun, wipe dust with dry or barely damp cloths, and avoid placing drinks on top of cabinets, where one spill can stain veneer and swell the wood beneath.
Whatever the product, the cheapest upgrade is usually time spent with the manual and the settings menu. Manufacturers bury genuinely useful options — EQ presets, dialogue modes, level trims, firmware updates — several layers deep, and most owners never find them. An hour spent exploring settings with familiar content playing will teach you more about your system than a week of reading reviews, and it costs nothing. Keep notes of what you changed so you can undo anything that makes things worse, and change one thing at a time so you know which adjustment caused which result.
Returns windows are part of the buying process for audio gear, and you should use them deliberately. Sound is personal and room-dependent, so a product that reviews well can still disappoint in your space. Buy from sellers with clear return policies, keep packaging until you are sure, and test with your own content at your own volumes in the first days — not the night before the window closes. A structured test, with the same three songs or scenes each time, reveals differences that casual listening misses and turns a vague feeling into a decision you can act on.
Hearing safety deserves a mention in any audio guide. Comfortable TV and music listening sits well below the levels that risk hearing damage, but portable speakers at parties, and headphones especially, can creep upward in noisy environments as you compete with background sound. If you have to shout to be heard over your own system, it is too loud for long sessions. Many devices offer volume limiting — worth enabling for children — and taking listening breaks during long sessions protects both your ears and your enjoyment, because tired ears judge sound poorly.
Speaker sound is shaped as much by the room as by the speaker itself. Hard floors, bare walls and large windows reflect sound back at you, which can make even a good speaker seem harsh or echoey, while soft furnishings, rugs and curtains absorb those reflections and calm the result. Before blaming a speaker for disappointing sound, look at the room: a rug between the speakers and your seat, curtains over a large window, or a bookshelf filled with books behind you can change the sound more than a modest upgrade would. This is why the same speaker can sound impressive in a shop demo room and merely ordinary at home — the demo room was treated, and yours is not.
Stereo imaging depends on symmetry. When the left and right speakers are at different distances from you, or one is tucked into a corner while the other sits in open space, the stereo image pulls toward the closer or louder side and voices stop sounding centred. Aim for a rough triangle: the two speakers and your head at the corners, with both speakers the same distance from your seat and at the same height. Small adjustments — ten centimetres here, a slight toe-in there — are free, reversible and often more rewarding than new cables or accessories, so always finish placement before spending money on upgrades.
Frequently Asked Questions
Can I use a vacuum cleaner on my speaker?
Yes on grilles and cabinets, with a soft brush attachment and low suction, and it is the fastest way to lift dust from fabric. No on exposed drivers: keep the nozzle away from cones and tweeters, because suction can damage them. For drivers, use a soft brush or compressed air from a distance. If your vacuum has no brush attachment, hold a piece of thin cloth over the nozzle to soften it and prevent scratches.
What cleaning products are safe on speakers?
Water, barely damp on a microfibre cloth, handles almost everything. A trace of mild dish soap helps with greasy marks on cabinets and removable fabric grilles. Avoid solvents, bleach, ammonia glass cleaners on cabinets, furniture polish with silicone, and any abrasive. Never use contact cleaners or oils on drivers or surrounds. If a manufacturer sells a specific care product for a special finish such as leather or real wood, that is the exception worth following.
How do I clean a speaker grille that does not come off?
Vacuum it gently with a brush attachment, then use a lint roller for hair and lint. For ground-in dust, wipe with a microfibre cloth that is barely damp and dry it with a second cloth immediately, taking care not to push moisture through the fabric onto the drivers behind it. Work in sections and let the grille air-dry fully before playing at high volume. Fixed grilles are a reason to dust more often, because you cannot deep-clean behind them.
My speaker cone has a dent. Can cleaning fix it?
Cleaning cannot fix a dented dust cap or tweeter dome, and pressing on it usually makes things worse. Small dents in a woofer’s central dust cap often affect looks more than sound; dented metal tweeter domes are more audible and are a repair-shop job if they bother you. Some people gently draw out dust caps with low vacuum through a tube or with tape, but that is a repair technique with real risk, not cleaning — attempt it only on a speaker you can afford to experiment on.
How do I remove sticky residue or drink spills?
Act quickly: power off, unplug, and blot — do not rub — with a dry cloth. Then wipe with a cloth dampened with water and a trace of mild soap, followed by a clean damp wipe and a dry one. Keep liquid out of ports, seams and the driver area; work from the outside of the spill inward so you do not spread it. If liquid entered a bass port or vent, leave the speaker off and let it dry for at least a day before powering up.
Can I rinse a waterproof portable speaker?
If the speaker carries a genuine waterproof rating such as IP67 and its port covers are sealed, a brief rinse under a tap to remove sand, mud or salt is within its design, and salt water in particular should be rinsed off. Let it dry completely before charging, because charging a wet port can corrode contacts or trigger moisture warnings. Splash-resistant speakers without a full rating should only be wiped, never rinsed.
Cleaning by Speaker Type: The Details That Differ
Portable and waterproof speakers
Portable speakers live harder lives than any other kind: kitchens, bathrooms, gardens, beaches and bags. Their cleaning follows the main steps, with two additions. First, the charging port and its cover deserve attention, because grit in the seal compromises the water resistance the speaker is famous for; rinse the cover area clean and let it dry fully before closing it. Second, sand is the portable speaker’s nemesis, working into grilles and buttons, and it should be rinsed or brushed away promptly rather than ground in by weeks of handling. A speaker rated for water can be rinsed under a tap as the main guide describes, but check that all port covers are sealed first, and never charge a wet speaker, because electricity and water in a charging port is the one genuinely dangerous combination in this entire guide.
Smart speakers and their fabric skins
Smart speakers wear fabric like upholstery, and they soil like it too, gathering dust, kitchen grease carried on air, and the evidence of every nearby hand. Clean them powered off and unplugged, with the dry and barely-damp cloth methods from the main steps, and be patient with fabric: several gentle passes beat one wet assault, which can drive grime deeper and leave tide marks. The top control surface, with its buttons and microphone holes, wants a soft brush and restraint, because moisture near those openings helps nobody. A smart speaker in a kitchen deserves cleaning more often than its living-room sibling, since airborne cooking grease settles on fabric invisibly and holds dust to it.
Studio monitors and serious hi-fi speakers
Speakers with exposed, delicate drivers and fine finishes ask for the gentlest version of everything. Dust with a very soft brush or a feather-light duster, working outward from the driver centres, and never press on a dome tweeter, whose shape is its function and whose dents are permanent. Piano-gloss and lacquered cabinets show every micro-scratch, so the cloth must be clean, soft and used with almost no pressure, and gritty dust should be lifted or blown away before any wiping begins. These speakers also tend to live in fixed positions for years, so the cleaning session is the right moment to check their cables, their stands’ tightness and the state of any foam or rubber parts, which age quietly in the background of a system that otherwise never changes.
Stain Clinic: Specific Marks and What Actually Removes Them
Dust that has become grime
Where dust has bonded with kitchen grease or simple time into a film, the dry methods stop working and the barely-damp cloth takes over. Work in small areas, keep the cloth almost dry, and follow with a dry pass so no moisture lingers in seams or fabric. On hard cabinets a tiny amount of mild soap in the water helps cut the film; rinse the cloth, wring it hard, and wipe again so no soap residue remains to attract fresh dirt. Patience is the active ingredient: films built over a year surrender over minutes, not seconds, and forcing them with scrubbing trades a dirty speaker for a damaged one.
Water marks, rings and sticky spots
Drink rings on wooden cabinets are a finish problem as much as a dirt problem. Blot fresh spills immediately, clean the area as above, and accept that a ring that has entered the finish may need a furniture remedy rather than a speaker remedy; test any such product in an invisible spot first, and keep it away from drivers, fabric and ports entirely. Sticky residue from labels or tape lifts best with gentle warmth and slow peeling, followed by the damp-cloth treatment, rather than with solvents whose enthusiasm for glue is matched by their enthusiasm for finishes.
Pet hair, smoke and household odours
Pet hair clings to fabric grilles with static loyalty; a lint roller or a slightly damp rubber glove drawn across the surface collects it better than brushing, which mostly relocates it. Speakers from smoky or cooking-heavy homes carry a film and a smell in their fabric that surface cleaning only partly reaches. Air them in a clean, ventilated space, clean what you can reach, and accept that deep odour in fabric is a slow fade rather than an event. The honest prevention is placement: a speaker kept out of the kitchen’s grease plume and the room’s smoke path stays cleaner for years with a fraction of the effort.
Cleaning as Inspection: The Health Check Hidden in the Chore
A cleaning session is the one time you handle a speaker slowly, closely and from every angle, which makes it the perfect inspection. Run through this list while the cloth is in your hand. Check each driver for damage, dents and perished surrounds, the rubbery rings that age and crack on older speakers. Check the cabinet seams and corners for knocks. Check terminals and cables for corrosion, looseness and fraying, and the port covers on portables for grit and seal damage. Check buttons and knobs for smooth travel, and stands and wall mounts for tightness. Anything you find early is cheap: a loose terminal cleaned, a surround noticed before it tears fully, a cable replaced before it shorts. Owners who clean their speakers twice a year with this list in mind almost never meet a sudden failure, because they have been reading the speaker’s condition all along, one cloth pass at a time.
A Cleaning Calendar for Real Households
Frequency beats intensity in speaker care, so here is a calendar light enough to survive. Weekly, or whenever you dust the room, a dry pass over cabinets and grilles keeps the film from ever forming; this is ten seconds per speaker once it is a habit. Monthly, give fabric grilles and portable speakers a closer look, because they collect the most and complain the least. Twice a year, do the full routine from the main steps with the inspection list above, ideally in spring and autumn when the house itself is being opened or closed. After any party, spill or building work, clean promptly out of schedule, because fresh contamination is always easier than old. That is the whole system. Speakers cleaned on this rhythm never need heroic restoration, and their owners never face the miserable archaeology of a decade’s grime bonded to a finish they once loved.
Tools worth owning, and the ones to skip
The complete professional kit for this entire guide fits in one hand: two soft microfibre cloths, a soft brush, a can of compressed air used with restraint, and a lint roller for fabric. Everything beyond that is either for furniture finishes or for the seller’s benefit. Skip the dedicated speaker-cleaning sprays with heroic claims, skip abrasive pads in every form, and skip any device that promises to clean drivers with suction. The drivers’ fragility is the point: the gentlest tools win, and they happen to be the cheapest ones in the shop.
When Cleaning Reveals a Problem Bigger Than Dirt
Occasionally the cloth finds what the ear had been forgiving: a buzzing driver, a cracked surround, a terminal hanging by a strand. Cleaning stops there. A damaged surround or a distorted driver is a repair decision, and the economics are kind: individual drivers and surrounds are often replaceable at a fraction of a new speaker’s cost, especially on reputable brands that support their products for years. Note the model, photograph the damage, and ask the maker or a reputable repairer before assuming the speaker is finished. Many a classic speaker has been saved by the owner who noticed, while dusting, that something looked wrong a year before it sounded wrong. That is the deepest argument for the whole chore: cleaning is not really about dust. It is about knowing your speakers well enough to catch their small problems while they are still small.
Keeping Speakers Clean in Difficult Homes
Some environments fight back, and they deserve specific tactics rather than more effort. In homes with wood stoves or open fires, fine ash and soot settle into fabric and finishes; place speakers out of the direct convection path where possible, and shorten the dry-dusting interval rather than deepening each clean. In coastal homes, salt air corrodes terminals and fixings slowly, so the inspection part of cleaning matters more than the cosmetic part, and a wipe of exposed metal connections during the twice-yearly routine pays for itself. In workshops and garages, where speakers serve bravely among dust and project debris, a grille kept on and a cover during messy work are worth more than any cleaning schedule. In children’s rooms and family spaces, sticky fingers are a certainty rather than a risk; choose the cleaning-friendly finishes when buying, keep the damp cloth handy, and treat the occasional handprint as the speaker doing its job in a lived-in house. The principle underneath all four cases is the same: adapt the rhythm and the placement to the environment, and cleaning stays a small chore instead of becoming a losing war.
Do that, and a clean speaker stops being an achievement and becomes simply what your speakers look like, which is the natural state of equipment that is looked after a little, often, by someone who knows it well.
Cleaning the Rest of the System While You Are There
A speaker rarely lives alone, and the cleaning session is the natural moment to tend its companions, because dust is a system-wide substance. Speaker cables collect it along their runs, and their connections, as the inspection section noted, benefit from being checked, tightened and, where appropriate, wiped clean, since a corroded or loose connection can imitate a failing speaker convincingly. Stands and shelves hold a season’s dust exactly where the speaker sits, and cleaning under the cabinet is the only chance to evict it. The amplifier or receiver that feeds passive speakers vents its heat through slots that clog like any other, and a dry brush and a vacuum at a respectful distance, with the unit unplugged, keep its cooling honest. Remote controls, humble as they are, gather the most handling grime of anything in the system and reward a careful damp-cloth pass, with batteries checked for the corrosion that kills remotes quietly. None of this expands the chore by much, because you are already there, cloth in hand, with the system powered down. It simply recognises that clean sound comes from a clean chain, and that the speaker, as the chain’s most visible link, gets the credit and the blame for all of it.
Records, photographs and the memory of condition
Once a year, while the speakers are clean and the light is good, take a photograph of each one. It takes seconds and creates a condition record that serves insurance, resale and your own memory: what the finish looked like, where the small mark was, how the surrounds appeared. Owners of good speakers keep these photographs the way careful car owners keep service records, and for the same reason — documented care is value, in every sense, when the day to sell, claim or simply admire arrives.
The Gentle Art of Not Cleaning
End with the restraint that separates caretakers from casualties. Some things on a speaker should be left exactly as they are. The dust cap at a driver’s centre, the dome of a tweeter, the treated surface of a paper cone: these are working parts wearing their working finish, and the urge to make them pristine has ended more speakers than dust ever has. A light accumulation of dust on a driver that the brush cannot lift without pressure is not a problem to solve; it is a condition to accept, because the driver will shed most of it itself the next time it plays something with conviction. Likewise, patina on an old cabinet is history, not dirt, and aggressive restoration of a vintage finish destroys value and character together. The mature cleaner’s skill is knowing the boundary where care becomes interference, and stopping the cloth there, satisfied. Your speakers do not need to look new. They need to be sound, sound well, and be known well by the person who owns them, and everything in this guide is in service of exactly that.
Keep the calendar, keep the cloth soft, keep the inspection honest, and your speakers will repay the small attention with the only currency they have: years of sounding exactly like themselves, in a house that looks after its things.
A closing note for the reluctant cleaner
If the whole subject still feels like housework wearing a hi-fi badge, reduce it to its smallest honest form: a dry cloth, once a week, while the music plays. That single habit, kept, delivers most of the benefit in this guide, and the rest can wait for the twice-yearly session when you are in the mood to know your speakers properly. Care that survives is care that fits a life, and a speaker dusted weekly by a reluctant owner will outshine and outlast one restored annually by an enthusiastic one.
Start there, this week, with the speakers you already own and the cloth you already have. The method scales from a portable on a kitchen shelf to the finest pair in the house, because it was never really about products. It is about attention, applied gently and often.
Attention, in the end, is what separates equipment that ages from equipment that is merely old.
Give yours the first kind of life, one soft cloth at a time.
The one-minute version, for the fridge door
Power off. Dry cloth first, barely damp only where grime insists. Brush drivers, never press them. Nothing sprayed at the speaker, nothing sucked against it. Inspect while you clean. Dry fully before playing. That is the entire discipline, small enough to remember and complete enough to trust, and it will keep any speaker in this guide sounding and looking like itself for as long as you own it.
Print it, keep it, and let the speakers gather nothing worse than compliments.
They will, if the cloth reaches them before the grime does.
That race is easily won, weekly, in seconds.
Run it, and enjoy speakers that always look as good as they sound.
That symmetry is the sign of a system properly kept.
Keep it, and the compliments will keep arriving with the music.
Which is where this guide began, and where it happily ends.
Cloth in hand, music on, speakers gleaming: begin.
The first pass takes a minute, and the habit it starts can last the speakers’ whole lives.
Which, looked after this way, will be long and musical.
Long, musical and clean is a fine ambition for any speaker, and an achievable one for yours.
Achieve it one gentle pass at a time.
Your ears will notice the care even when your eyes are elsewhere, because a known, inspected, healthy speaker simply sounds more confident.
Confidence, in a speaker, is a beautiful sound.
Keep yours confident, and it will keep your rooms musical for a very long time to come.
That is the whole reward, and it is enough.
More than enough, played daily.
So dust the grille, check the terminals, photograph the finish once a year, and then forget the whole subject until the calendar reminds you, secure in the knowledge that your speakers are known, sound and clean.
Secure is exactly how well-kept equipment should feel.
Feel it, and press play.
The music, after all, was the reason for every cloth, calendar and careful inspection in this guide, and a clean, healthy speaker delivers it without distraction, year after year.
Year after year is the promise. Keep it with a cloth.
A soft one, used often.
That is all.
Related Guides
These guides and roundups cover the closest decisions and fixes in this category:
- best waterproof bluetooth speakers for boat
- best speakers for music
- best bluetooth speakers for music
- best wireless speakers for home
- how to position a speaker
- how to fix speaker crackling
Can I use a hair dryer to dry a speaker after cleaning?
Only on a cool setting, at a distance, and only for surface moisture. Heat can damage adhesives, finishes and driver materials. Air and time are safer; patience is the correct drying technology for anything with a voice coil in it.
My speaker’s grille cloth is stained beyond cleaning. What then?
Many grilles are replaceable, and makers and fabric suppliers sell grille cloth for re-covering frames, which is a satisfying, inexpensive restoration. Take the old cloth’s colour and texture as your guide, or embrace a deliberate change of look.