Understanding how to align a projector properly is what separates a cinema image from a classroom image. Alignment means the projected rectangle is perfectly square, level, centred and focused on the screen, achieved by the projector physical position and its optical controls, not by digital correction. A misaligned projector wastes resolution, softens text, and distracts the eye in every scene, because the brain notices a tilted horizon even when it cannot name the problem.
This guide gives you the full alignment sequence for table, shelf and ceiling setups: centre, level, square, size, shift, then focus, in that order, with checks from the screen and from your seats. It also explains the geometry, why keystone correction is the last resort, and how to diagnose the specific misalignment from the shape of the image in front of you.
Disclosure: As an Amazon Associate, kajuandouglas.com earns from qualifying purchases. Links to Amazon on this page are affiliate links; they cost you nothing extra. Listing details such as price and availability change often, so check the current Amazon listing before you buy.
Quick answer: In short: centre the projector on the screen centre line, level it, point it square so the image is a true rectangle, set size with zoom, position with lens shift, level the horizon with mount roll or feet, then focus on fine text once warm, keeping keystone at zero throughout.
What You Need
- A test pattern or fine text source: A grid pattern reveals geometry errors instantly; a page of small text reveals focus and squareness together. Most projectors have a built in pattern.
- A tape measure: To centre the projector on the screen centre line and to check image diagonals, the definitive test for a true rectangle.
- A small spirit level: For levelling the projector body and checking the screen itself, because a tilted screen mimics a tilted projector.
- Patience and a helper: One person adjusting at the projector and one watching the screen speeds alignment greatly, especially for ceiling mounts.
In this guide
How to Align a Projector: Step by Step
Step 1: Centre the projector on the screen
Find the horizontal centre of your screen and confirm the projector lens sits on that centre line. Measure from both side walls if needed rather than eyeballing it. A projector off to one side must angle inwards, which makes one side of the image taller than the other, a trapezoid no focus can fix. If furniture forces an off centre position, lens shift is the correct compensation, because it moves the image optically while the projector stays square to the screen.
Step 2: Level the projector body
Place the spirit level on the projector top panel and adjust the feet, shelf or mount until the unit is level front to back and side to side. A tilted projector throws a tilted or trapezoid image before any other adjustment begins. On a ceiling mount, use the mount fine adjustments rather than bending anything, and lock each adjustment as you set it. Recheck level after any later movement, because touching the unit for cables or focus often disturbs it slightly.
Step 3: Square the image to a true rectangle
Project the grid pattern and study its shape. If the top is wider than the bottom, the projector points slightly down at the screen; if one side is taller, it angles sideways. Correct by moving the projector aim in the opposite direction in tiny increments until all four sides are parallel and the grid squares are even. Measure both image diagonals with the tape: equal diagonals prove a true rectangle. This step is the heart of alignment and deserves most of your time.
Step 4: Set the size with zoom, the position with shift
Use the optical zoom to make the image exactly fill the screen, meeting the border on all sides. Then use lens shift to move the whole image up, down or sideways into perfect registration with the screen frame, without moving the projector. If your projector lacks lens shift, achieve the same result by physically raising, lowering or sliding the unit and its support. Avoid digital image shift and keystone at this stage; they are not alignment tools in a permanent setup.
Step 5: Level the horizon and lock everything down
Display a scene with a strong horizontal reference, such as a landscape, a building or the test pattern cross, and check the image horizon against the screen frame. Correct any remaining tilt with the mount roll adjustment or a small foot adjustment, then tighten and lock every mount screw and foot. Alignment that is not locked drifts with vibration, temperature and the first cable tug, so locking is a step, not an afterthought. Note the settings if your mount has scales or marks.
Step 6: Focus last, on fine text, when warm
Let the projector run for several minutes so temperatures settle, then display fine text, stand at the screen and adjust focus until the smallest text is crisp in the centre and corners. Soft corners with a sharp centre usually mean the projector is still not perfectly square, sending you back one step rather than to the focus ring. Recheck focus after the first full film, because thermal settling in the first sessions can shift it slightly, and then leave it alone.
How to Align a Projector: Reading the Image Shape Like a Diagnostic
Every misalignment draws its own shape. A trapezoid wide at the top means the projector sits low and points up, or the screen tilts. A trapezoid wide on one side means a sideways angle. A rectangle that is square but rotated means pure roll, fixed at the mount or feet. An image that is square and level but too high or low is a shift or height problem, never a reason to tilt. Learning to read these shapes turns alignment from trial and error into diagnosis: see the shape, name the error, apply the one correction that addresses it.
Screens deserve suspicion too. A pull down screen that hangs unevenly, a fixed frame mounted slightly rotated, or a wall that is not flat can all imitate projector errors. Check the screen with the spirit level and by measuring its own diagonals before blaming the projector. On a wall, a subtly uneven surface shows as a localised focus variation that no alignment cures, which is one reason a flat fixed screen is the alignment friendly choice for a permanent room.
Why Keystone Correction Is Not Alignment
Keystone correction reshapes the image digitally to look rectangular on the screen while the projector remains misaligned. It works by scaling and discarding pixels unevenly, which reduces effective resolution, softens text on one side, and can introduce artefacts on fine patterns. Used for a one evening portable setup, that trade is acceptable. Built into a permanent installation, it permanently taxes every image you watch to excuse a position that physical adjustment could have fixed for free.
The same logic applies to digital zoom and corner correction features. They are valuable rescue tools and poor foundations. The alignment standard for a permanent setup is simple to state and satisfying to reach: keystone at zero, digital corrections off, image square by geometry alone. When you achieve it, text is uniformly sharp, the full native resolution reaches the screen, and the picture has the calm, correct quality that makes viewers forget the equipment entirely, which is the entire point of the exercise.
Common Mistakes
- Aligning to the menus instead of a pattern: Menus are too coarse to reveal geometry errors. Use the built in grid pattern and fine text for every alignment judgement.
- Tilting the projector to fix image height: Tilting creates a trapezoid. Use lens shift or change the projector height; keep the unit level and square.
- Focusing before squaring: Focus on an unsquare projector chases a moving target. Geometry first, size and shift second, focus last and once warm.
- Leaving the mount unlocked: Unlocked adjustments drift with vibration and cable movement. Lock every screw and foot as the final alignment step.
Pro Tips
Measure the two image diagonals with a tape; when they are equal, the image is a true rectangle and arguments end.
Align in the evening with the room set for viewing, because screen borders and pattern lines are easiest to judge in working light conditions.
Mark the projector position on its shelf or note mount settings once aligned, so any disturbance can be restored in minutes.
Alignment for Short Throw and Ultra Short Throw Setups
Close range projection magnifies everything this guide teaches. A short throw projector a degree off square distorts its image more than a long throw unit several degrees off, because the geometry has less distance in which to forgive. The method is identical but the increments shrink: adjust in nudges, recheck the pattern after each, and expect the final alignment to take several passes. A spirit level on the unit and a tape on the diagonals earn their keep most in exactly these setups.
Ultra short throw adds the surface to the alignment equation. The projector can be perfectly positioned while a rippled screen or uneven wall bends the image, and no adjustment at the unit can separate the two faults. The diagnostic is to project onto a known flat surface, or to shift the image to a different screen area and watch whether the distortion moves with the image or stays with the surface. Distortion that stays belongs to the wall, and the cure is a flat fixed screen, which is why that pairing is recommended so strongly for this class.
Keeping Alignment: Drift, Disturbance and Quick Restoration
Alignment is lost in predictable ways: a mount knocked during cleaning, a shelf bumped by a vacuum cleaner, a table setup rebuilt from memory, a lamp change that required handling the unit. Each has the same restoration: pattern up, diagonals measured, the one correction the shape demands, focus last. Owners who photographed their aligned pattern and recorded their mount and position notes restore in minutes; owners who did neither redo the full sequence, which is the practical argument for documentation made throughout this site projector guides.
There is also slow drift to respect. Buildings move microscopically with seasons, mounts settle under load in their first weeks, and focus shifts fractionally as a new installation thermally cycles. A one month check after any new install, pattern, diagonals, focus, locking screws, catches all of it while the corrections are still tiny. After that check, a well locked installation should be left alone, because alignment, like focus, is a thing that suffers more from attention than from neglect once it is right.
Real-World Scenarios and Examples
Abstract advice lands differently in real rooms. These scenarios apply the guidance above to the situations readers describe most often.
- The soft left edge: Centre sharp, left side soft on text. The projector angles slightly right; a nudge of aim, diagonals remeasured, and the whole field sharpens together.
- The rebuilt table setup: Projector brought out for film night. Two minutes in order: centre, level, square, size, focus. Skipping the order costs twenty minutes of chasing.
- The wavy ultra short throw image: Geometry bends in the same place on every content. The wall owns it; a flat fixed screen is the cure, and no unit adjustment should be wasted on it.
- The post lamp change drift: Image slightly rotated after the unit was handled. Mount roll corrected against the pattern, screws relocked, focus rechecked warm.
- The classroom quick check: Weekly pattern glance by the teacher: rectangle true, text sharp, keystone still zero. Thirty seconds that keep a term of lessons crisp.
Gear for This Guide
These verified examples show both alignment worlds: lens shift equipped models that align optically, and short throw models where geometry discipline matters most.
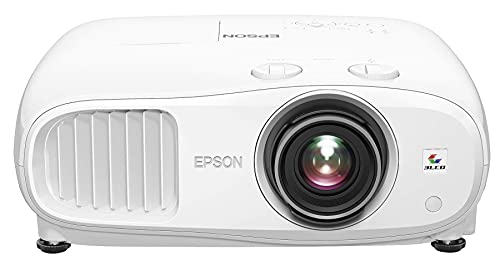
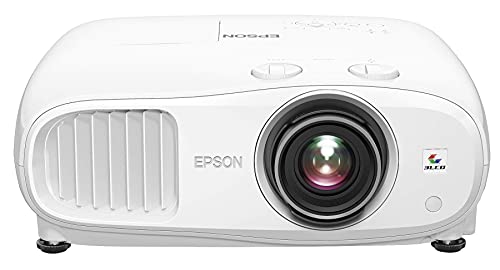
Epson Home Cinema 3800 4K PRO-UHD 3-Chip 3LCD Projector with HDR Technology — A 4K PRO-UHD model with the lens shift and zoom controls this guide relies on, showing the optical alignment tools to look for. Check price on Amazon.

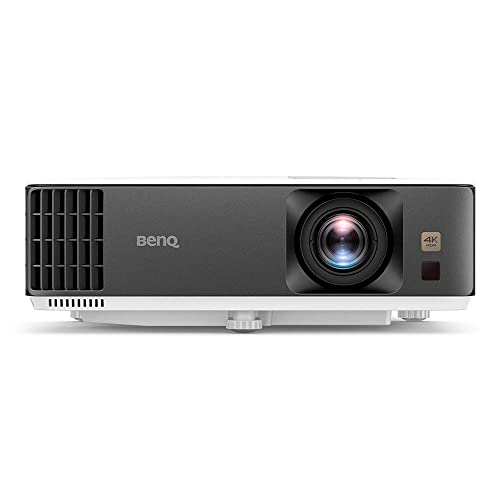
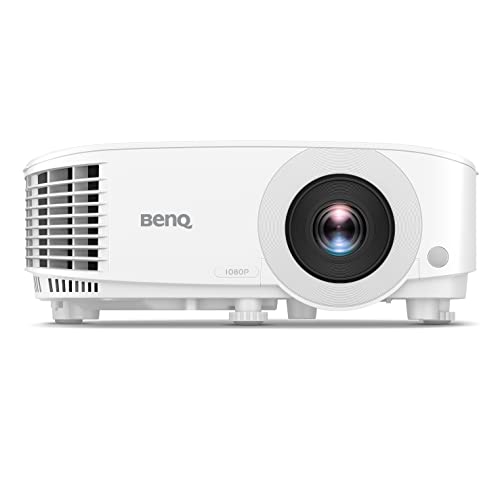
BenQ HT2150ST 1080P Short Throw Projector — A short throw example where alignment is unforgiving: small angles make big shape errors at close range, so the square first method matters most. Check price on Amazon.

BenQ TH671ST 3000 Lumens 1080p Short Throw Home Entertainment Projector — Another short throw model with auto vertical keystone, useful for understanding the difference between its convenience correction and true optical alignment. Check price on Amazon.
Alignment in Difficult Rooms: Sloped Ceilings, Off-Centre Screens and Short Walls
Most alignment advice assumes a rectangular room, a flat ceiling and a screen placed exactly where the projector wants to be. Real rooms rarely cooperate. Attic conversions slope, living rooms put the sofa against a wall that forces the screen off-centre, and rental properties forbid ceiling mounts entirely. The good news is that alignment is a set of physical relationships — distance, height, angle and level — and those relationships can be satisfied in awkward spaces if you work through them in the right order and accept small, deliberate compromises instead of one large accidental one.
Working around a screen that cannot move
When the screen position is fixed — centred on a chimney breast, fitted between bookcases, or painted onto a wall — the projector must do all the adapting. Start by finding the projector’s ideal position for that screen: on the lens centreline, at the distance its throw ratio demands for your image width. Mark that spot, then measure how far your real mounting options are from it. A ceiling mount a little behind the ideal point is usually harmless because zoom absorbs distance error. A mount displaced sideways is the dangerous one, because no zoom fixes a sideways offset; only horizontal lens shift or a yawed projector does, and yawing reintroduces the trapezoid you are trying to avoid. If sideways displacement is unavoidable, prefer a projector with generous horizontal shift, and use the shift fully before you consider angling the body.
Height compromises are more forgiving. A projector mounted higher than ideal can tilt down slightly and use a modest amount of vertical shift, and the small tilt involved rarely produces a visible trapezoid on video content, though test charts will show it. Keep a hierarchy in mind: distance errors are cheapest, height errors are manageable, and sideways errors are the most expensive. Spend your effort and, if necessary, your mount budget in that order.
Sloped ceilings and angled mounts
On a sloped ceiling the mount itself becomes part of the alignment problem. A short drop pole with a ball joint can leave the projector hanging at the slope’s angle, so level the projector body, not the mount: use a small spirit level or a phone level app on the projector’s top panel while a helper tightens the joint, then re-check after tightening because ball joints creep as they lock. Once the body is level, the image should be a clean rectangle; if it is a trapezoid with the wide edge at the bottom, the projector is still pitching, whatever the mount suggests. Longer drop poles amplify wobble, so in a sloped-ceiling room a wall-mounted shelf at the rear is often the steadier choice, provided the throw distance still works with the zoom range.
Tabletop setups that move every session
If the projector lives in a cupboard and comes out for film nights, alignment is a repeatable routine rather than a one-time installation. Make it repeatable: small adhesive markers or a strip of painter’s tape on the table edge for the projector’s feet, a note of the zoom and focus ring positions, and the screen in a fixed place. Align once, carefully, then record everything. Each subsequent setup becomes a two-minute reproduction instead of a fifteen-minute negotiation, and focus will land close enough that only a final touch on fine text is needed once the lamp or laser has warmed up.
Measuring Alignment Instead of Guessing It
Your eyes are good at spotting a tilted horizon but poor at judging whether a rectangle is truly rectangular, especially from a seat off to one side. A few simple measurements turn alignment from an opinion into a fact, and they take less time than the argument they prevent.
The four-corner measurement check
Display a plain white or light grey image and measure the projected rectangle directly on the screen or wall with a tape measure. Compare the two diagonals: on a true rectangle they are equal. If one diagonal is longer, the projector is yawed toward the opposite side. Compare top width against bottom width to detect pitch, and left height against right height to detect roll. Adjust in tiny amounts — a few millimetres of rotation at the projector becomes centimetres at the screen — and re-measure after each change rather than chasing the picture by eye. When the diagonals match within a few millimetres, geometry is as good as the room allows, and any remaining softness is a focus or lens matter, not an alignment one.
Using test patterns well
A grid or crosshatch pattern reveals what film content hides. Look for lines that bow (a lens or screen-flatness issue, not alignment), lines that converge (residual keystone), and a grid that is square in the centre but stretched at one side (yaw). Check focus with the pattern at all four corners and the centre; a projector can be perfectly aligned and still show one soft corner if the screen is not flat or the lens is decentered in its shift range. Use the pattern to finish the job, then confirm with real content: a news ticker for level, subtitles for focus, and a slow panning shot for geometry that feels right in motion.
Judging from the seats, not the screen
Final checks belong at viewing distance. Standing at the screen exaggerates problems nobody can see from the sofa and hides the one problem everybody sees: a horizon that slopes relative to the room. Sit in the main seats, play familiar content, and look at door frames, table tops and horizons in the picture against the screen’s edges. If picture horizontals sit parallel to the screen border from the seats, the job is done, even if a tape measure finds a millimetre of disagreement. Alignment serves the audience, not the tape measure.
Alignment, Focus and Sharpness: Keeping the Three Separate
Many alignment sessions go wrong because three different problems get treated as one. Geometry, focus and source sharpness each have their own fix, and applying the wrong fix makes the others harder to judge.
When a soft corner is not a focus problem
If three corners are sharp and one is soft after careful centre focus, resist the urge to keep turning the focus ring — you will trade one soft corner for another. A single soft corner usually means the projector’s lens plane is not parallel to the screen, the screen itself is not flat (common with pull-down screens that curl at the edges), or the lens shift is at an extreme where the lens performs worst. Re-check yaw and pitch with the diagonal measurement, flatten or tension the screen if it curls, and try reducing shift by moving the projector body slightly. Only when geometry measures true and the screen is flat should you suspect the lens itself.
Focus drift as the projector warms up
Lenses and housings expand slightly as the projector reaches operating temperature, and focus set on a cold machine can soften twenty minutes into a film. This is why the main sequence ends with focus last, on a warm projector. If your setup shows drift, build the habit: switch on ten minutes before the screening, focus on fine text or a pattern, and leave the ring alone afterwards. Ceiling-mounted projectors drift most noticeably because heat rises through the mount and the ceiling void is warm; a small refocus at the start of each session is normal maintenance there, not a fault.
Matching the source to the aligned image
A perfectly aligned projector fed a mismatched signal still looks wrong. Set the source to output the projector’s native resolution and the correct aspect ratio, disable overscan in both the source and the projector menus, and confirm with a pattern that you are seeing the full frame edge to edge. If the image does not fill the screen exactly after physical alignment, solve it with the zoom ring and distance — not with digital scaling or keystone, which quietly throw away the resolution you aligned so carefully to keep.
A Seasonal Alignment Routine for Permanent Installs
Permanent installations drift: mounts settle, shelves get dusted and nudged, screens are taken down for decorating and rehung a few millimetres out. A short routine twice a year keeps a good installation good.
- Check the diagonals: two tape measurements confirm geometry before you touch anything.
- Re-level the body: verify with a level on the top panel; correct at the mount, not with keystone.
- Refocus warm: after ten minutes of running, focus on fine text from the main seat using binoculars or a camera zoom if the screen is far.
- Inspect the screen: look for curl, sag or a frame that has shifted on its brackets.
- Clean the lens gently: dust on the lens softens the image in a way that mimics misalignment; use a blower and a lens cloth only.
- Record the settings: note zoom, shift and focus positions so any disturbance can be undone in minutes.
None of this requires new equipment, and most sessions end after the first two checks. The routine’s real value is diagnostic discipline: measure first, adjust second, and never let a digital correction mask a physical problem that a five-minute mount adjustment would solve properly. An aligned projector holds its image for months; the routine simply proves it still has.
Alignment for Presentations, Gaming and Films: Different Finish Lines
The standard of alignment worth chasing depends on what fills the screen. A projector aligned well enough for films may still annoy a presenter, and a gaming setup has its own demand — geometry that stays true at the edges where heads-up displays live. Finishing the job means knowing which standard you are finishing to.
Text and presentations demand the strictest geometry
Spreadsheets and slides expose everything: a slight roll that no film viewer would catch makes a table look unstable, and keystone resampling softens small text exactly where the audience is trying to read it. For presentation use, hold the strictest standard in this guide — diagonals measured equal, keystone at zero, focus checked on small text at all four corners, and the projector’s native resolution matched to the computer’s output with scaling disabled. It is also worth aligning with the actual laptop you present from, because different sources can shift the image a few pixels through overscan or underscan defaults, and discovering that in front of an audience is a special kind of silence. If the projector serves both films and work, align to the work standard; films forgive everything the stricter standard achieves, and the reverse is not true.
Gaming: geometry at the edges and input honesty
Games put critical information in the corners — health, maps, ammunition — so the soft corner that films hide becomes a gaming defect, and the corner-fit corrections some projectors offer are tempting. Resist them where possible: those corrections resample the image, and some add processing that can contribute to input delay. The gamer’s alignment is physical alignment plus the game mode that bypasses extra processing, verified with the game’s own interface rather than a film scene. Also check that the full frame is visible: a few pixels of overscan can crop the very indicators you need, and the fix lives in the source and projector aspect settings, not in the mount. Finally, check the edges during motion, because a geometry error that is invisible on a static dashboard can announce itself when the world pans and straight lines sweep across a subtly distorted field.
Films: level above all
For cinema, the hierarchy shifts: a level horizon matters most because the eye compares picture horizontals against the room constantly, then black-bar symmetry on letterboxed films, which reveals roll and vertical offset instantly — uneven bars above and below are the most honest alignment readout you own. Focus evenness matters least, because film grain and motion are forgiving and the corners of a film frame rarely hold the story. Use the black bars as your final check: pause a letterboxed film, and adjust until the bars are equal and parallel with the screen’s edges. When they are, the audience will never think about alignment again, which is the definition of success. If your screen has masking or a border, align the picture to the border rather than to the wall — the border is what the audience’s eyes use as their reference frame.
Working With Lens Shift and Zoom Like a Professional Installer
The image circle, explained simply
Lens shift works because the lens projects an image circle larger than the imaging chip’s frame, and shifting slides the frame around inside that circle. Near the centre of the circle the lens performs at its best; toward the edges, brightness and sharpness gently fall away and colour fringes can appear on high-contrast edges. This is why professional installers position the projector so the shift sits near its middle, even when the full shift range would let them mount it somewhere more convenient. Convenience today is paid for in corner quality every day. If your mount position forces extreme shift, the better fix is almost always moving the mount, and the second-best is accepting the trade knowingly rather than wondering later why one side of the picture never quite sharpens.
Zoom’s effect on brightness and your alignment plan
Zoom position changes more than size: at the telephoto end most projector lenses pass less light, so an installation planned at maximum telephoto may land noticeably dimmer than the specification’s headline, which is measured favourably. When you align, note where in the zoom range you have landed; if it is at either extreme, consider whether a small change in mounting distance could centre it, gaining brightness, evenness and adjustment headroom in one move. Installers treat mid-zoom as a design goal, not a happy accident, and the discipline costs nothing at planning time and quite a lot to retrofit. The same logic applies to focus: a lens focused at mid-zoom holds its focus more forgivingly across small disturbances than one at the edge of its travel.
Locking, marking and handing over
Professional work ends with the setup made durable: mount bolts snugged and checked, focus and zoom positions marked with a tiny dot of removable tape or a note, settings photographed, and the keystone value confirmed at zero. If anyone else uses the projector — family, colleagues, a venue’s staff — leave a one-line instruction where the remote lives: what to do if the picture looks wrong (check the projector was not bumped; call you) and what never to touch (the mount and the correction settings). Most real-world misalignment is not drift; it is a helpful person fixing a small problem with a big digital correction, and a note prevents it more reliably than any lock. Photograph the mount’s angle too, so a knocked projector can be returned to its marks in minutes rather than realigned from first principles.
Troubleshooting Alignment Problems That Keep Coming Back
The image is square in the morning and off by evening
A setup that will not stay aligned is telling you something moves: a mount on a joist that flexes with footsteps above, a shelf that sags as it warms, a projector whose feet creep on a smooth surface under its own fan’s vibration, or a screen whose housing relaxes in the sun. Diagnose by marking positions and observing when the change happens rather than by repeatedly correcting it. The cures are mechanical — a sturdier mount point, felt pads or a mat under the feet, repositioning away from the heat source — and they end the problem instead of scheduling it. Keep a simple log for a week if the pattern is elusive: time, temperature, who used the room. Movement always has a cause, and the log finds it faster than intuition.
Perfect rectangle, but the picture still looks wrong
Sometimes geometry measures true and the image still feels off: the usual suspects are a screen that is not itself rectangular or not hung level (measure the screen, not just the picture), a room reference — a sloped ceiling line or an uneven picture rail — that makes a level image look tilted by comparison, or an aspect mismatch quietly stretching the content. Trust the level and the tape over the room’s crooked references; your audience’s eyes adapt to the room, but the picture’s own horizons must agree with gravity, not with the ceiling. If several viewers disagree about whether it looks level, believe the spirit level and stop — eyes argue, instruments do not.
When to stop adjusting
Alignment has a point of diminishing returns, and it arrives sooner than perfectionists expect: when test patterns measure within a few millimetres, horizons sit level from the seats, text is sharp corner to corner and real content looks right for ten minutes without your thinking about the frame, the job is done. Beyond that point you are aligning for the tape measure’s benefit while risking the accidental nudge that undoes an hour. Stop, mark the settings, and go and watch something — the projector was bought for the watching, and a finished alignment is the one nobody in the room ever notices.
Alignment With Screens That Are Not Flat or Not Rectangular
Everything so far assumed a well-behaved screen. Two common deviations deserve their own word, because they masquerade as alignment failures while being screen realities. A pull-down screen that has developed edge curl effectively presents a curved surface: the centre sits at one distance, the edges closer or further away, and focus that is perfect centrally cannot be perfect at a curled edge at the same lens setting. Align and focus to the centre two-thirds, accept the edges, and if the curl worsens, weight or tension the bar, replace the screen, or move to a fixed frame — those are the cures, in ascending order of cost and permanence. A screen hung slightly out of square with the room, by contrast, is an alignment gift: you may align the projector to the screen rather than to the room, letting the picture and its border agree with each other while both disagree minutely with the walls. Audiences judge the picture against its frame, not against the architecture, so when the two conflict, the frame wins.
Finally, keep perspective about the whole subject. Alignment is a means to invisibility: the perfectly aligned projector is the one whose geometry nobody ever discusses. An hour spent achieving it at installation, and five minutes a season confirming it, buys years of pictures that simply look right — and that quiet rightness, more than brightness or resolution bragging, is what guests actually mean when they say a home cinema feels professional.
Alignment When the Projector Must Move Between Rooms
Some projectors live itinerant lives — classroom to classroom, home to hall, office to exhibition — and for them alignment is not an installation but a skill performed under time pressure with an audience forming. The portable version of this guide compresses to a ritual: position by eye against the screen’s centre, level the body with its feet, square by yaw before touching any menu, size with zoom, focus last on the finest text available, and check the result from the furthest seat rather than the nearest. Practised, the ritual takes three minutes; unpractised, it takes twenty and a volunteer’s patience. Two habits separate the practised: they carry a small level and a tape in the projector bag, turning guesses into measurements anywhere, and they photograph each venue’s working setup, so a return visit starts from the photograph instead of from memory. If your projector travels for work, rehearse the ritual once at home against the clock — the audience in the real room will never know you did, which is precisely the compliment the ritual exists to earn.
Related Guides
- best projectors for home theater under 300
- best projectors under 1000 for home theater
- best projectors for movies under 300
- best projectors for gaming and movies under 200
- best portable projectors for outdoor movies
- how to set up a projector
- how to clean the lens of a projector
Frequently Asked Questions
Why is my projector image a trapezoid shape?
Because the projector is not square to the screen. If the top is wider than the bottom, the projector points upward at the screen; if one side is taller, it angles in from that side. Correct it physically: level the unit, centre it, and adjust its aim in small increments until the test pattern forms a true rectangle with equal diagonals. Lens shift then positions the image. Keystone correction will disguise the shape digitally but costs resolution and sharpness, so reserve it for temporary setups.
What is lens shift and do I need it for alignment?
Lens shift moves the projected image up, down or sideways by moving the lens optics, while the projector itself stays perfectly square to the screen. It is the correct tool for placing the image on the screen when the projector cannot sit at the exact ideal height or centre. You do not strictly need it if you can position the projector precisely, but it makes alignment far more forgiving, especially for ceiling mounts, and it preserves full picture quality unlike any digital correction.
How do I know my projector image is perfectly square?
Project a grid test pattern and measure the image diagonals with a tape measure: a true rectangle has equal diagonals. Also check that the top and bottom widths match, the side heights match, and grid squares look even across the screen. Then confirm with fine text that focus is uniform into the corners, because a square image focuses evenly while a subtly angled one leaves one side soft. Those three checks together are the complete alignment verification used by installers.
Should I use keystone correction or reposition the projector?
Reposition the projector in any permanent setup. Keystone correction discards and scales pixels unevenly to fake a rectangle, permanently reducing sharpness and resolution to compensate for a position you could fix physically once. For a borrowed projector on a table for one evening, keystone is a fair trade. For your own room, centre, level and square the unit, use zoom and lens shift, and keep keystone at zero. The picture quality difference is visible on text and fine detail in every scene.
Why is one corner of my image always blurry?
A single soft corner with a sharp centre almost always means the projector is still slightly angled to the screen, so that corner sits at a different distance than the rest and falls outside the focus plane. Return to the squaring step: check the pattern shape and the diagonals, and correct the aim in tiny increments. If the image is provably square and one area stays soft on every source, suspect the wall flatness or, rarely, the lens itself, which becomes a support conversation.
How often does a projector need realigning?
A locked ceiling mount or a projector on a stable shelf should hold alignment for months or years. Realignment is needed after the unit is moved for cleaning or lamp changes, after mount screws are disturbed, or if the screen is replaced. Table setups need checking whenever the projector is put away and brought out again. The habit that saves time is documentation: photograph the aligned pattern, note mount settings and shelf position, and restoration becomes a quick comparison rather than a fresh puzzle.
Can I align a projector perfectly without lens shift?
Yes, provided you can position the projector itself accurately — centred on the screen, level, and at the right distance. Lens shift forgives imperfect placement; without it, placement must do all the work, which usually means a mount with fine adjustment or a table position you can nudge into truth. The alignment standard is identical either way; only the tolerance for where the projector sits changes.
Why does my image drift out of alignment after I move the projector for cleaning?
Because cleaning moves the projector by millimetres and the screen magnifies millimetres into centimetres. Mark the feet or mount position before moving it, photograph the settings, and realign from the marks on its return. If it lives on a shelf, a discreet outline of tape where the feet sit turns restoration into a thirty-second job.
Should I realign after changing a lamp or moving the projector?
Yes — any disturbance deserves the short version of the sequence: confirm the projector is square and level, zero any corrections that crept in, and refocus once the new lamp has warmed up. Five minutes spent then prevents the slow acceptance of a slightly wrong picture that nobody can quite name.