Knowing how to clean the lens of a projector correctly matters because the lens is the one part of the system where a fingerprint, dust film or an over enthusiastic wipe shows up directly in the picture, softening contrast and adding haze to dark scenes. Projector lenses carry coatings, like camera lenses and television screens, and they reward the same philosophy: remove dust without touching, touch as little as possible, and never use household cleaners or rough materials.
Most of the time, the lens needs nothing more than a blower. This guide covers when cleaning is genuinely needed, the safe sequence from blower to lens cloth, and the habits that keep the lens clean for months, including cap use and how to handle the projector during setup. If your image problem survives a clean lens, the guide also points you to the other causes, because a dirty lens is blamed for many faults it did not cause.
Disclosure: As an Amazon Associate, kajuandouglas.com earns from qualifying purchases. Links to Amazon on this page are affiliate links; they cost you nothing extra. Listing details such as price and availability change often, so check the current Amazon listing before you buy.
Quick answer: In short: let the projector cool fully, blow loose dust off with a hand blower, brush only with a clean lens brush if needed, and touch the glass only for fingerprints, using a microfiber lens cloth with breath moisture or a drop of lens fluid on the cloth, wiping gently from the centre outwards.
What You Need
- A hand air blower: The squeeze bulb type used for cameras. Never use canned compressed air, which can blast grit across the coating and spray propellant residue.
- A clean lens brush: A soft brush reserved only for lenses, stored in its case so it cannot pick up grit between uses.
- A microfiber lens cloth: Clean, dedicated to the lens, washed without fabric softener or replaced regularly. A contaminated cloth is the biggest scratch risk.
- Lens cleaning fluid (optional): Only a fluid made for coated camera and projector lenses, and only a drop applied to the cloth, never directly onto the lens.
In this guide
How to Clean the Lens of a Projector: Step by Step
Step 1: Let the projector cool completely
Switch off and wait until the unit is fully cool before going near the lens. A projector lens and its housing get hot in use, and cleaning a hot lens risks burns, smears fluid instantly and can stress the glass with sudden temperature change. Unplug the unit if it is portable, and if it is ceiling mounted, work from a stable platform with both hands free rather than reaching at full stretch.
Step 2: Blow off loose dust first
Hold the blower a few centimetres from the lens and squeeze firm puffs across the surface, working from one side to the other so dust leaves the glass. This step alone restores most lenses, because loose dust is the usual cause of soft spots and reduced contrast. Never blow with your mouth: breath carries moisture droplets that spot the coating. Take your time, because every particle removed now is one that cannot be dragged across the lens by a cloth later.
Step 3: Brush only if dust remains
If specks survive the blower, sweep them away with the lens brush using the lightest strokes, flicking the brush clean away from the lens between passes. The brush is for dislodging, not scrubbing. If a particle resists both blower and brush, leave it and move to the cloth step rather than pressing harder, because a trapped hard particle under pressure is exactly how coatings get scratched.
Step 4: Wipe fingerprints with a lens cloth, centre outwards
For fingerprints and smears, breathe gently on the lens to fog it very lightly, or place one drop of lens fluid on the cloth, never on the lens. Wipe with the microfiber cloth in a slow spiral from the centre outwards, using almost no pressure, then buff lightly with a dry section of cloth. Inspect with a torch at an angle: the coating should look uniformly clear. Repeat with a fresh cloth area if a smear persists, rather than increasing pressure.
Step 5: Clean the lens surround and check the light path
Dust the lens surround, the focus and zoom rings and the top panel with a dry cloth, so dust sitting beside the lens does not migrate onto it. If your projector has a removable filter or accessible intake, check the manual for its cleaning interval while you are here, because a clogged filter raises internal temperatures and fan noise. Never insert anything into the projector body or attempt to clean internal optics; that is workshop work and not needed for image quality in normal use.
Step 6: Replace the cap and store cloths properly
Fit the lens cap whenever the projector is off and cool, which is the single habit that prevents most lens dirt. Portable projectors should travel in their case with the cap on. Store the lens cloth and brush in a clean bag or case, wash the cloth regularly without fabric softener, and retire cloths that feel gritty. The two minutes spent on storage habits saves the risky cleaning sessions that cause damage.
How to Clean the Lens of a Projector: What a Dirty Lens Actually Does to the Picture
A dusty lens scatters light, which lifts black levels, washes out dark scenes and softens the whole image in a way that looks like a focus or brightness problem. Fingerprints are worse: their oils create a local haze that blooms around bright objects, so a lamp in a night scene glows and subtitles lose their crisp edges. Soft, out of focus spots in fixed positions on the image are the classic signature of dust on the lens or, if they survive cleaning, dust deeper in the light path, which is a service matter.
This is why diagnosis order matters. If your image has gone soft or hazy, clean the lens with the blower first, because it costs nothing and risks nothing. If the problem is unchanged, the cause is elsewhere: focus, a dirty screen or wall, a low resolution source, or a smudged filter. The troubleshooting guide for blurry projector images on this site works through those causes in order. Cleaning harder is never the answer to a problem cleaning did not cause.
Lens Coatings and Why the Gentle Sequence Works
Projector lenses are multi element optics with anti reflection coatings that keep contrast high and ghost images low. Those coatings are durable against correct care and vulnerable to exactly three things: abrasive particles dragged under pressure, solvents not designed for coatings, and rough fabrics. The blower, brush, cloth sequence in this guide is borrowed from camera lens care and exists to ensure that by the time anything touches the glass, everything that could scratch it has already left the surface.
Frequency is the other half of care. A capped lens in a clean room may need attention twice a year. A portable projector used in classrooms, halls and gardens collects dust far faster and benefits from a blower check before each use. Judge by the picture and by a torch inspection at an angle, not by a calendar, and remember that every cleaning, however careful, carries a tiny risk, so the best cleaning is the one the lens cap made unnecessary.
Common Mistakes
- Using canned compressed air: Canned air can blast grit across the coating and deposit propellant residue. A hand squeeze blower is slower and completely safe.
- Wiping a dusty lens dry: Dragging dust under a cloth is how coatings scratch. Always blow and brush loose particles away before any cloth touches the glass.
- Cleaning a hot lens: Heat risks burns, instant smearing and stress on the glass. Wait until the projector is fully cool, every time.
- Using household glass cleaner or tissues: Solvents can attack coatings and tissues shed abrasive fibres. Use only lens fluid on the cloth, and a dedicated microfiber lens cloth.
Pro Tips
Keep the blower and lens cloth in the projector case or mount drawer, so the safe tools are the ones within reach when you notice a smudge.
Inspect the lens with a torch at an angle before film night rather than during it; angled light reveals dust and fingerprints instantly.
If you must handle the projector during setup, hold it by the body and keep fingers off the lens; one fingerprint needs the full cloth step to remove.
Identifying What Is Actually on Your Lens
Different contamination needs different responses, and a torch inspection at an angle tells them apart. Loose dust appears as bright specks that move the picture quality only slightly until they accumulate; the blower owns them. A fingerprint shows as a swirled smear with a rainbow edge in the torch light; it needs the cloth step. A general film, from cooking, candles or a smoky room, shows as a uniform haze that dims the whole coating reflection; it needs the cloth step worked patiently across the whole surface, with fresh cloth faces, because the film transfers as you clean.
Mineral spots, the dried rings left by a splash or a careless spray nearby, are the stubborn case. They yield to a cloth barely dampened with lens fluid, worked in small circles with time rather than pressure, and they may need several sessions. What they never need is a household descaler or vinegar, however logical it seems, because coatings are not limescale tolerant. If spots survive two gentle sessions, a professional clean is cheaper than the coating damage a third, harder attempt risks.
Building the Two Minute Lens Habit
Lens care succeeds as a habit, not an event. The habit has three beats: cap on when the cooled projector goes off, blower in hand before the first film of the week if the room is dusty, and hands off the glass during every setup adjustment, holding the unit by its body only. Taught to everyone in the household, including the person who only ever presses the power button, these beats keep the lens in the condition where cleaning is a rumour rather than a routine.
Keep the evidence honest with a monthly torch check, ten seconds, lights off, beam at an angle. You are looking for change, not perfection: a lens that looks as it did last month needs nothing, whatever the calendar says. This restraint is the professional secret. Lenses in projection booths and camera kits survive decades not because they are cleaned often, but because they are touched rarely, capped always, and cleaned correctly on the few occasions they genuinely need it.
Real-World Scenarios and Examples
Abstract advice lands differently in real rooms. These scenarios apply the guidance above to the situations readers describe most often.
- The dusty attic cinema: Dust settles weekly in a converted space. Cap discipline plus a blower pass before film night keeps the picture clean with zero cloth contact for months.
- The classroom portable: Many hands, many rooms. Lens inspection becomes part of the pack up routine, and the cloth lives in the case for the fingerprint that appears monthly.
- The cooking film haze: An open plan room lays a fine film over a season. One patient cloth session with fresh faces restores it, and a cover between uses slows the return.
- The splash incident: A drink sprayed near the lens leaves dried spots. Lens fluid on the cloth, small circles, two gentle sessions; no household chemicals, however urgent it feels.
- The inherited projector: A used unit with an unknown history. Torch inspection, blower, one careful cloth clean, and a test pattern photograph to establish the new baseline.
Gear for This Guide
Lens care needs tools, not new projectors, but these verified portable examples show the class of machine that benefits most from the cap and blower habits in this guide.

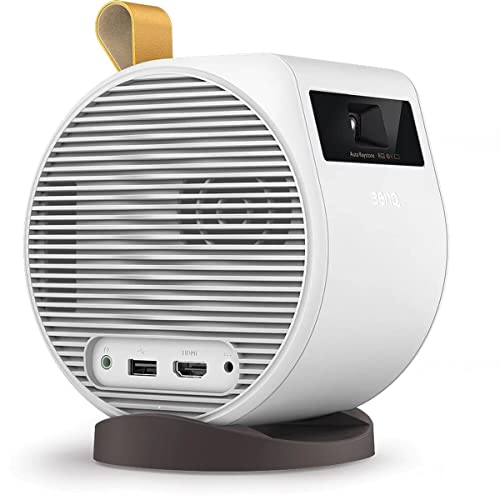
BenQ GV11 LED Portable Ceiling Projector with 135˚ Rotating Angle Projection — A portable projector of the kind that travels between rooms and venues, where cap discipline and a blower check before each use matter most. Check price on Amazon.

Epson EpiqVision Flex CO-W01 Portable Projector 3-Chip 3LCD Technology — A portable 3LCD model whose lens care routine is identical: blower first, brush second, cloth only for fingerprints. Check price on Amazon.
Why Projector Lenses Punish Casual Cleaning
A projector lens is not a window and not a pair of glasses. It is a stack of precisely shaped glass elements with delicate anti-reflective coatings, and it sits in the path of a bright light source that makes every smudge, streak, and scratch visible at enormous size on your screen. Dust that would be invisible on a television glares on a projected image because the light passes through the contamination and magnifies its shadow. The coatings that give the lens its clarity are softer than the glass beneath them, which means the wrong cloth or the wrong pressure can permanently haze the surface — damage no cleaning can reverse, because the damage is the removal of the coating itself. Everything in proper lens care follows from those two facts: contamination is unusually visible, and the surface is unusually easy to harm.
Knowing what you are looking at
Before cleaning anything, diagnose in a darkened room with the projector displaying a plain white or light-grey image. Dust specks appear as soft dark blobs, out of focus because they sit on the lens rather than in the image. Fingerprint smears show as hazy patches that soften contrast in one region. A uniform veil of haze suggests either a film on the lens or — commonly mistaken for it — dust on internal elements or a dirty projection surface. Check the screen or wall too; people have cleaned lenses thoroughly to fix marks that lived on the wall. Shine a torch across the lens from the side, with the projector off and cool, to see the surface contamination clearly without looking into the beam.
The Safe Sequence: Air First, Touch Last
Proper lens cleaning escalates reluctantly. Begin with air: a hand-squeezed blower bulb, held a short distance away, removes loose dust without any contact at all, and loose dust is the majority of most lenses’ problems. Work with the projector off and fully cool, and never use a compressed-gas canister casually — tilted cans can spray propellant liquid onto the coating, and the blast can drive particles across the surface or deeper into the housing. If air alone restores the image, stop. Most lens cleaning should end at this step, and the discipline of stopping is the core skill this guide teaches.
When contact is genuinely needed
For a fingerprint or a stubborn film, use a fresh microfibre cloth made for optics — not a shirt, not a tissue, not a paper towel, all of which carry fibres or grit that scratch coatings — and the lightest possible touch. If dry wiping smears rather than lifts, a single drop of lens-cleaning fluid made for coated optics, applied to the cloth and never directly to the lens, helps dissolve the film. Wipe in slow, small circles from the centre outward, using a clean area of cloth for each pass, and inspect with the torch between passes. The moment the contamination is gone, stop. Every additional wipe is risk without reward, and the pursuit of a surgically perfect lens has damaged more coatings than dust ever has.
What Never to Use, and Why People Reach for It Anyway
Household glass cleaner is the classic error: its chemicals are formulated for windows, not optical coatings, and its residue streaks under projection light. Breath-and-shirt cleaning is the second: breath condenses unevenly and a shirt carries the day’s grit directly onto the coating under pressure. Abrasive pads, solvents not made for optics, and ultrasonic enthusiasm all belong on the same list. People reach for these because the lens looks like glass and glass feels robust, and because the harm is invisible at arm’s length — it announces itself later, as a permanent softness or flare in the image that gets blamed on the projector’s age. The rule that protects you is simple: if a product does not say it is for coated camera or optical lenses, it does not touch your projector’s lens.
The rest of the optical path and the machine
While the lens gets the attention, the projector’s other needs are humbler and matter as much. Keep the air filters and vents clean according to the manual, because a starved, overheating projector dims itself and ages its light source, and dust inside the housing eventually finds the optical path where you cannot reach it. Clean the exterior with a dry or barely damp cloth. If blobs persist on the image after the lens is demonstrably clean and the surface is proven innocent, the contamination is likely internal — on the imaging element or internal optics — and that is a service technician’s territory. Opening a projector to chase internal dust converts a cleaning task into a warranty and safety problem; the correct move is to stop and seek service.
Prevention: Keeping the Lens Clean for Months
The best lens cleaning is the one you rarely perform. Use the lens cap or shutter when the projector sits idle for long periods in a dusty room, but skip daily capping on a ceiling-mounted unit, where the fiddling risks misalignment and the lens faces downward away from settling dust anyway. Control the room: projectors in smoking or vaping environments, near kitchens, or beside open windows in dusty seasons accumulate film far faster, and a room air filter does more for image clarity than any cloth. Keep fingers away by habit — handle the projector by its body, and teach the household that the lens is a look-but-never-touch surface, like a museum piece that happens to show films.
A care rhythm and a record
- Monthly: blower-bulb dusting of the lens, vents checked, exterior wiped.
- Quarterly: torch inspection of the lens surface in a dark room.
- As needed only: contact cleaning with optical cloth and fluid, following the escalation sequence.
- Always: projector off and cool before any cleaning; never look into the beam.
- Keep a note of cleanings and any persistent marks, with dates, for service visits.
Treated this way, a projector lens stays clear for years with almost no contact cleaning at all — which is the real secret the professionals know: the lens that is rarely touched is the lens that never gets scratched.
Reading the Image: A Diagnostic Atlas of Marks
Each kind of contamination signs its name on the screen differently, and reading the signature prevents cleaning the wrong thing. Sharp-edged dark specks that stay fixed while the image changes are debris near the imaging element or on it — internal, and a service matter if they persist. Soft, out-of-focus blobs that drift slightly when you adjust focus are dust on the lens itself, because the lens surface sits far from the focal plane and its shadows blur. A hazy patch that softens one region’s contrast and smears when the light changes is a fingerprint or film on the front element. A uniform milkiness across the whole image, worse in bright scenes, may be a film on the lens, dust inside the light path, or a screen that has itself become dirty — and each possibility has a different remedy, which is why the atlas matters before the cloth comes out.
The torch test and the white-screen test, done properly
With the projector off and cool, shine a torch across the lens surface at a shallow angle in a darkened room; contamination lights up like frost on a window while clean coated glass stays dark and reflective. Rotate your viewpoint slowly, because some films show only at certain angles. Then run the white-screen test: a plain bright image reveals blobs and haze, a plain dark image reveals bright specks and light-scatter. Together the two tests tell you whether the problem is on the front surface at all. If the torch shows a clean lens while the white screen shows blobs, stop cleaning the lens — the contamination is internal or on the screen, and persistence with the cloth only risks the coating.
Cleaning the Rest of the Optical Neighbourhood
The lens is the famous surface, but its neighbours matter. The projection window on ultra-short-throw models lies nearly flat and collects dust and the occasional splash like a tabletop; it wants the same air-first discipline, more often. The screen itself gathers dust and, in kitchens’ orbit, film; clean it only by its maker’s instructions, since screen materials — especially ambient-light-rejecting surfaces with their fine structures — damage more easily than the lens and cost more to replace. The projector’s colour wheel, filters, and internal path on older designs are service territory. Knowing the boundary between your surfaces and the technician’s is part of competent ownership: the front lens element, the exterior, and the user filters are yours; everything behind a screw is theirs.
Filters, vents, and the dust economy of the whole machine
Dust management is a system, and the lens is its last stop. A clogged intake filter starves airflow, raises internal temperatures, and encourages the projector to pull air — and dust — through every other gap, including around the lens assembly. Clean or replace user-serviceable filters on the maker’s schedule, vacuum vents gently from outside, and keep the projector’s surroundings as dust-free as the room allows. In very dusty environments — workshops, renovation seasons, homes near busy roads — shorten every interval in this guide and consider a cover for idle periods. The reward is compounding: less internal dust, fewer image blobs, cooler running, and a lens that needs touching almost never.
Incident Response: Splashes, Children, and Renovation Dust
Accidents have their own protocols. A splash of drink or a child’s full handprint on the lens is a contact-cleaning case, but sequence still protects you: power off, let the projector cool, remove loose material with air first so you never grind particles under the cloth, then proceed with cloth and optical fluid in patient passes, inspecting between them. Renovation dust is finer and more abrasive than household dust; if a projector has sat through building work unprotected, treat every surface as gritty, lean entirely on air and patience, and consider professional cleaning if the image shows internal contamination, because that dust is now inside as well as out. Smoke and vape film, the slow incident, responds to the standard fluid-and-cloth method but returns on the room’s schedule, not the lens’s — the durable fix is environmental.
Storing and transporting a projector without harming the lens
Movement is when lenses meet the world. Cap the lens before any transport, carry the projector in a padded case rather than loose in a bag of cables, and never pack it lens-down against other objects. In storage, a cool, dry shelf with the cap on beats a loft’s heat cycles and a garage’s damp, both of which invite the internal fungus that etches coatings permanently in humid climates — the one lens affliction no cleaning reverses. If you live somewhere humid and store the projector for long seasons, silica gel in a sealed container with the unit is cheap, serious insurance. Fungus prevention is unglamorous and absolute: once its threads are etched into a coating, the lens carries them forever.
The Minimal Kit, Assembled Once
- A hand-squeezed blower bulb, kept in a clean bag so it does not become a dust dispenser.
- Several optical microfibre cloths, washed separately without fabric softener, stored sealed, and retired when tired.
- A small bottle of cleaning fluid made for coated optics, replaced when old.
- A torch for the inspection test, and the projector’s manual for its filter schedule.
- A note card recording cleaning dates and any persistent marks, kept with the kit.
Assembled once and kept together, this kit makes correct cleaning the path of least resistance — which is the real goal, because in the moment of discovering a smudge before film night, people use whatever is nearest. Make the right tools the nearest tools, and the lens will outlive the projector around it.
The Science of Coatings: Why the Rules Are So Strict
Anti-reflective coatings are not paint; they are layers of mineral compounds deposited at thicknesses measured in fractions of a wavelength of light, engineered so that reflections cancel themselves and nearly all the light passes through. Their precision is their fragility. A scratch does not need to reach the glass to matter — disturbing the coating’s surface changes its optical behaviour at that spot, and under a projector’s intense beam the disturbance announces itself as flare, haze, or a soft patch that no subsequent cleaning can remove, because the cleaning would have to restore a layer deposited in a vacuum chamber. This is why every rule in this guide bends toward minimal contact: air before cloth, cloth before fluid, the lightest pressure, the fewest passes, and an absolute stop the moment the contamination is gone. The lens you barely touch is the lens that stays optically new, and optical newness, unlike cleanliness, cannot be re-bought for any price short of a new lens assembly.
Fungus, the one enemy that cannot be cleaned away
In humid climates, stored lenses face an organism rather than a particle: fungus that feeds on the microscopic organic material at coating edges and etches its branching pattern permanently into the surface. Prevention is the entire strategy — store the projector in dry air, use silica gel in sealed storage, run the projector periodically in damp seasons so its own warmth dries its internals, and never retire a projector to a damp garage or loft for a humid summer. If the torch test ever reveals the tell-tale fern-like patterns inside the lens rather than on it, the matter is professional and the prognosis guarded; surface dust, by contrast, is a five-minute blower job. Knowing which enemy you face — dust, film, or fungus — decides whether the answer is a bulb of air, a cloth, or a telephone call to a service centre, and the torch test, performed quarterly, is how you know.
Teaching the Household: The Lens as a Shared Trust
A projector lens survives its household, or does not, as a matter of shared understanding. The rules worth teaching are few enough for a child to hold: never touch the glass, never wipe it with anything that is not the special cloth, never spray anything near it, and tell an adult if something splashes or lands on it. Demonstrate the blower once and let the household see how dust leaves without contact; the demonstration converts an abstract prohibition into a visible, satisfying ritual. Keep the cleaning kit in its known place so that the right tool is always the nearest tool, and keep the projector’s own cap or shutter habit consistent. Households that treat the lens this way — as a shared trust rather than one person’s anxiety — report the same result as careful solo owners: years of clear images, almost no cleaning, and a lens that, when the torch finally inspects it, still looks like the day it was mounted.
The Clean Lens as a Long Game
Ownership of a projector is measured in years, and lens care is a long game whose winning strategy looks, from the outside, like doing almost nothing: air when dust appears, a cloth only when a film demands it, a torch inspection each season, filters kept clean so the inside stays clean, and a room whose dust and smoke are managed at the source. The owners who play this game well are not the ones with the most elaborate cleaning rituals — elaborate rituals are themselves a risk, because every contact is a wager against the coating — but the ones whose restraint is systematic. Their reward is invisible, which is the nature of all successful maintenance: an image in year seven as clear as the image in year one, and a lens that, when it is finally inspected closely, shows no evidence of ever having been cleaned at all. Aim for that invisibility. It is the signature of a lens that was understood.
Cleaning Day in a Shared Space: Offices, Classrooms, and Venues
Not every projector lives in a loving home, and shared spaces write their own cleaning rules. In offices and classrooms, the lens’s enemies are whiteboard dust, many hands, and the well-meaning colleague with a tissue — so the care strategy there is institutional: the correct kit kept in a known drawer, a small laminated card with the air-first sequence fixed near the projector, and one named person who owns the task. In venues and houses of worship, where projectors run long hours in high mounts, cleaning joins the scheduled maintenance visit rather than the spontaneous one, and the log of dates and marks becomes a genuine asset for the service contract. The principles do not change with the postcode — air before cloth, optical materials only, stop when clean — but shared spaces add the human layer: a lens is cleaned correctly when the system around it makes the correct way the easy way, for whoever finds the smudge first.
The handover note: what to tell the next custodian
When a projector changes hands — sold, donated, or inherited by the next volunteer — its lens deserves a sentence in the handover: when it was last cleaned, by what method, and whether any mark is known and stable. That sentence protects the lens from its most dangerous moment, which is a new custodian’s enthusiastic first deep clean, undertaken without knowing that the faint mark in the corner has been there, harmless and unchanged, for three years. Stable marks are information, not invitations. Record them, date them, and let the record travel with the machine, and the lens’s biography stays legible to everyone who will ever be responsible for it.
Restraint as Expertise
Every craft has a point where mastery stops looking like technique and starts looking like judgement, and in lens care that point is the decision to stop. The expert is not the person with the most elaborate cleaning ritual; it is the person who can look at a lens, name what is on it, choose the least intervention that answers it, and put the cloth away while a perfectionist would still be polishing — because the expert knows that the coating’s lifespan is spent in exactly those extra passes. Keep the air first, the touch light, the records brief, and the standards high, and your projector’s lens will do the only thing you ever asked of it: disappear, for years, between the light and the film.
The Lens and the Long Memory of Machines
A projector lens keeps a record of its care in a way few objects do: every scratch is permanent, every etched fungal fern is forever, and every year of restraint is written as continued clarity. That permanence is what makes this small subject worth a long guide. The lens cannot be un-cleaned, un-scratched, or un-fogged; it can only be kept, from its first day, by people who understood that its surface was deposited in a vacuum and defended by nothing but their habits. If this guide leaves one habit behind, let it be the pause — the half-second of thought before any hand approaches the glass, in which the questions ask themselves: is it dust, film, or fungus; is air enough; is the cloth the right one; and is this pass the one where I stop? A lens guarded by that pause will outlive the projector around it, and its clarity, years from now, will be the receipt.
Related Guides
- best projectors under 300
- best projectors for presentations
- best portable projectors for movies
- best projectors for daytime viewing
- best speakers for projectors
- short throw vs long throw projector
- projector lumens explained
Frequently Asked Questions
How often should I clean my projector lens?
Only when it needs it. Inspect with a torch at an angle, or judge by the picture: a general haze, lifted blacks or soft spots in fixed positions suggest dust or a fingerprint. A capped projector in a clean room may need attention a couple of times a year, while a portable used in dusty halls benefits from a blower check before every session. Every cleaning carries a small risk, so the goal is the fewest cleanings done properly, supported by always replacing the lens cap.
Can I use my glasses cloth or a T shirt on the lens?
A clean microfiber glasses cloth is acceptable in an emergency, provided it is genuinely clean and grit free. A T shirt is not: cotton fibres, seams, detergent residue and trapped grit make it a scratch risk on coated optics. The safe standard is a dedicated microfiber lens cloth, stored in a clean bag, washed without fabric softener and retired when it feels contaminated. Given that a proper cloth costs very little and a lens coating cannot be repaired, the dedicated cloth is the sensible choice.
Why is canned air bad for projector lenses?
Canned compressed air delivers a harsh, uncontrolled blast that can drive hard dust particles across the coating instead of lifting them away, and tilting the can sprays propellant that leaves residue on the glass. It can also chill the lens surface rapidly. A hand squeeze blower produces gentle, controlled puffs that lift dust off safely, which is why photographers and projectionists standardise on it. If dust survives the blower, a soft lens brush is the next step, never a stronger blast.
My picture is still hazy after cleaning the lens. What next?
Then the lens was probably not the cause. Work through the other suspects in order: focus, checked on fine text from close to the screen; the screen or wall surface, which may need dusting; the source resolution, because a low resolution feed looks soft at cinema sizes; and the projector filter, which the manual covers. Soft spots that survive lens cleaning and sit in fixed positions can indicate dust inside the light path, which is a professional service matter, not a home cleaning job.
Can I clean inside the projector if dust gets in?
No. Internal optics and the light path are not user serviceable. Opening the unit risks damage, exposes you to components that are unsafe to handle, and voids the warranty. Home care is limited to the external lens, the case, vents and any filter the manual explicitly describes as user removable. If internal dust is visibly affecting the picture as fixed soft spots after external cleaning, book a professional service, where the unit can be opened and cleaned in a controlled environment.
Does the lens cap really make that much difference?
Yes, more than any cleaning product. Most lens dirt arrives while the projector sits idle: household dust settling, cooking films drifting and curious fingers touching. A cap fitted whenever the cooled projector is off blocks nearly all of it, turning lens cleaning from a monthly chore into a rare event, and every avoided cleaning is avoided scratch risk. Make cap replacement part of your shutdown routine, and store portable projectors capped inside their case for the same reason.
Can I clean my projector lens with my glasses cloth or a tissue?
Not safely. A glasses cloth that has lived in a pocket carries the grit of its whole life, and tissues and paper towels are wood fibre — abrasive at the scale of an optical coating, however soft they feel to your fingers. The lens’s anti-reflective coating is softer than the glass beneath it and cannot be repaired once scratched or hazed, so the only cloth that should touch it is a clean microfibre made for optics, kept sealed when not in use and retired when tired. Start with air from a blower bulb, which handles most dust without any contact at all, and treat touching the lens as the escalation it is rather than the default.
How often should a projector lens be cleaned?
Far less often than owners fear — and the calendar matters less than the escalation discipline. Inspect quarterly with a torch in a darkened room, dust with a blower bulb whenever loose dust appears on the image, and reserve contact cleaning for the fingerprint or film that air cannot move, which in a reasonably clean room may be a rare event across years. The lens that is cleaned least, within the bounds of actual contamination, is the lens that stays clearest longest, because every contact spends a little of the coating’s life. Prevention — caps or shutters in dusty rooms, clean filters, a managed room — does more for the image than any cleaning schedule ever written.
There are blobs on my image even after cleaning the lens. What are they?
Probably not on the lens at all. Prove it with the two tests: if a torch across the powered-off lens shows a clean surface while a plain white image still shows the blobs, the contamination is internal — dust on the imaging element or within the light path — or it lives on your screen or wall. Internal dust is a service technician’s territory, because reaching it means opening a machine full of optics, electronics, and warranty seals. Do not keep polishing a clean lens in pursuit of an internal speck; that way lies a genuinely damaged coating in exchange for a blob that never moved. Book the service visit and describe the tests you ran — it shortens the diagnosis considerably.