Learning how to fix blurry photos starts with an uncomfortable diagnosis: ‘blurry’ is four different problems wearing one name. Motion blur smears along a direction, camera shake softens everything with a doubled edge, missed focus leaves one plane sharp and your subject outside it, and a dirty or poor lens veils the whole frame. Each has a different cure, and applying the wrong one — more sharpening on a motion-blurred shot, say — wastes an evening. This guide teaches you to identify which blur you have, fix what can be fixed in editing, and change the settings that caused it.
Be honest with yourself about editing’s limits: software can rescue mild softness convincingly, but no tool invents detail that was never recorded. The real fix is at capture, so most of this guide is about the shutter speeds, autofocus modes and stabilisation settings that prevent each blur type. Work through the diagnosis first — two minutes of zooming into a failed photo at full magnification will tell you exactly which section applies to you.
Disclosure: As an Amazon Associate, kajuandouglas.com earns from qualifying purchases. Links to Amazon on this page are affiliate links; they cost you nothing extra. Listing details such as price and availability change often, so check the current Amazon listing before you buy.
Likely Causes, Most Common First
In rough order of how often they ruin photographs, the causes are:
- Shutter speed too slow for a moving subject — the classic smeared child, pet or athlete
- Camera shake at slow shutter speeds, especially with long lenses and no stabilisation
- Autofocus locking onto the background, a foreground branch, or the wrong person’s eye
- Depth of field too shallow for the subject — one eye sharp, the other soft at very wide apertures
- A smeared front element, filter or condensation veiling the whole frame
- Heat shimmer, shooting through glass, or atmospheric haze on long telephoto shots
- Stabilisation left in the wrong mode, or active on a tripod where it drifts
In this guide
Step-by-Step Fixes, From Capture Settings to Editing
Apply the steps in order: first identify your blur type, then fix the capture cause, then salvage in editing what deserves salvaging.
Step 1: Diagnose before you fix
Open a failed photo at 100 percent magnification and hunt for the sharpest thing in the frame. If anything is perfectly sharp, your focus missed — the lens and shutter were fine. If nothing is sharp and edges double, that is shake. If the subject smears along its direction of travel while the background holds, that is subject motion. If the whole frame is veiled and low-contrast, suspect glass or atmosphere. Write the diagnosis down; every later step depends on it, and guessing wrong is why most ‘fixes’ disappoint.
Step 2: Set a shutter speed that matches the subject
For subject motion, shutter speed is the whole game. Use roughly 1/250s as a floor for walking people, 1/500s for children and pets in play, 1/1000s and faster for sports and birds. For camera shake, respect the stabilised limit you tested for your own hands — traditionally 1/focal length before stabilisation — and use auto ISO with a minimum shutter speed so the camera enforces it automatically, as described in how to set up for beginners a camera. Raise ISO without fear: a sharp noisy photo beats a clean blurred one every time.
Step 3: Put autofocus on the right mode and point
Use continuous autofocus with eye or subject detection for anything that moves, and confirm the camera is detecting your subject — not merely enabled in a menu. For static subjects, use single-point or small-zone focus placed deliberately on the subject, because wide-area modes guess, and they guess backgrounds surprisingly often. Focus on the nearer eye in portraits. If your camera offers focus peaking or magnification for manual focus, use them for macro and landscape work where autofocus hunts. A sharp-but-wrong-plane photo is a settings problem, and this step is its cure.
Step 4: Stabilise the camera, not just the shot
Turn stabilisation on for handheld work and use the correct mode — standard for static subjects, panning mode for tracking movement. Then add human stabilisation: elbows tucked, camera braced against your body, breath released before pressing, and the shutter pressed rather than jabbed. Lean on walls, rest the lens on a beanbag or fence, and use a two-second timer or remote for tripod work so your hand is not part of the exposure. On a tripod, follow your manual on whether to disable stabilisation — the guidance in what is ibis on a camera covers the logic.
Step 5: Give depth of field enough room
At very wide apertures like f/1.4, depth of field on a close portrait is measured in millimetres; a lean forward turns a sharp portrait into a soft one. Stop down to f/2 or f/2.8 for moving or grouped subjects, focus a third into group scenes, and step back — distance increases depth of field faster than aperture changes at close range. For landscapes, the classic f/8–f/11 with focus at the hyperfocal distance exists precisely because beginners focus on the horizon or the foreground and soften the other.
Step 6: Salvage in editing — honestly
For mild softness and slight shake, modern sharpening and AI deblur tools genuinely help: apply capture sharpening, then a deblur or ‘shake reduction’ pass at low strength, and judge at the size you will actually share — a photo unacceptable at 100 percent may be perfectly good at web size or a modest print. Add clarity and contrast, which restore perceived sharpness. What editing cannot do is move a missed focus plane or un-smear strong motion; for those, the fix is Step 2 and 3 next time, and the delete key this time. Cull ruthlessly: keep the near-miss for its moment if you love it, but do not spend an hour resurrecting a frame the next outing will replace.
Preventing Blur Is a Checklist, Not a Talent
Professionals do not have steadier blood; they have habits. Before pressing the shutter they know their shutter speed, their focus mode and what the camera has actually focused on, because they check the focus point’s position in the viewfinder as a reflex. Build the same reflex with a three-word checklist — speed, focus, stability — spoken silently before important frames. Add a fourth word for groups and portraits: depth. Within a month, the checks become automatic and your blur rate collapses.
Review your failures monthly, sorted by cause. Most photographers discover one dominant cause — usually shutter speed with moving kids, or focus placement with a new lens — and fixing that single habit transforms their keeper rate. Your camera records the settings in every file’s metadata, so the evidence is free; use it rather than blaming the lens, which is innocent in the overwhelming majority of blurry-photo cases.
Gear That Can Help
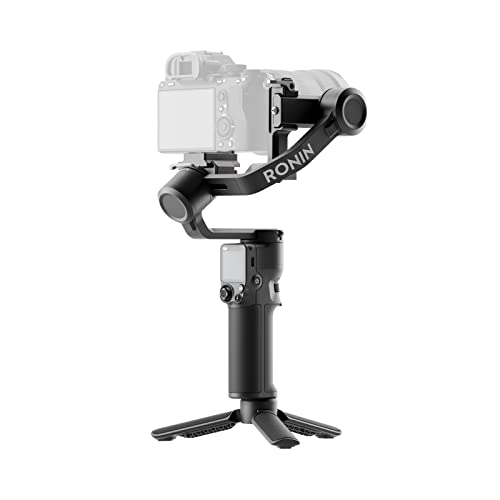
A gimbal removes camera movement from video entirely, and fast subject-tracking autofocus removes the missed-focus category — the two equipment answers to two of the four blur types:
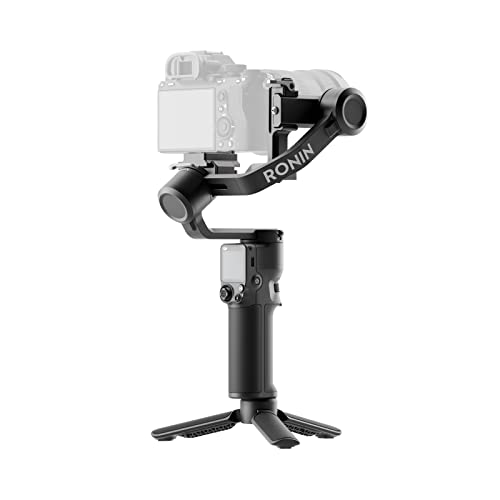
DJI RS 3 Mini Camera Gimbal Stabilizer — Check price on Amazon. A solid, widely available option that fits this guide; confirm the exact kit contents and lens mount on the listing before ordering.
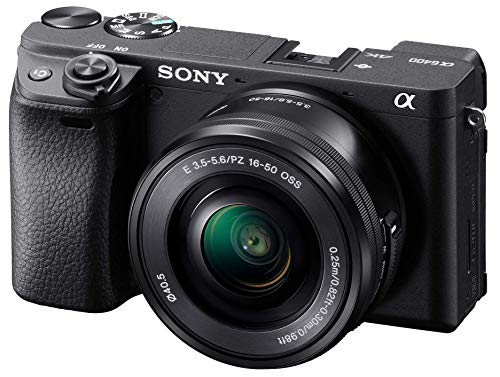
Sony Alpha a6400 Mirrorless Camera — Check price on Amazon. A solid, widely available option that fits this guide; confirm the exact kit contents and lens mount on the listing before ordering.
When to Get Professional Repair or Replace It
Suspect the equipment, and seek service, when blur survives controlled testing: mount the camera on a tripod, disable stabilisation per the manual, focus on a detailed static target with a timer release, and shoot at a fast shutter speed. If that frame is still soft across the whole image, clean the lens and repeat; if softness persists, or affects only one side of the frame (a decentred lens element), the lens or body needs professional assessment. Likewise, autofocus that consistently focuses in front of or behind the selected point — testable with a row of batteries or a focus chart — may need calibration or repair rather than new habits.
Replace rather than repair when an inexpensive kit lens shows its limits: softness at full zoom and wide aperture in an entry zoom is often design, not damage, and a modest prime lens will outperform any repair. Bodies with failing stabilisation units or shutter problems, by contrast, are usually worth a service quote before replacement, since the fault is specific and fixable.
How to Prevent It Next Time
Keep the three-word checklist — speed, focus, stability — and the monthly failure review, and blur becomes rare. Maintain the supporting habits: clean glass (a smeared filter mimics a bad lens), charged batteries so stabilisation and autofocus run at full power, and firmware updates, which periodically improve autofocus algorithms. Store and carry the camera as how to protect a camera describes, because a knocked lens is a decentred lens, and decentring is the one blur cause no setting can cure.
How to Fix Blurry Photos From Specific Subjects
Different subjects fail differently, and the fixes specialise. Children: the blur is almost always subject motion at indoor shutter speeds — set a 1/250s minimum shutter floor via auto ISO, use eye detection, and shoot bursts during play rather than single frames at poses. Pets: identical medicine, plus animal eye detection and the humility to shoot at their eye level, where focus errors halve. Sports: shutter speed is the entire discipline — 1/1000s and beyond, continuous autofocus with tracking, and panning technique for the artistic alternative. Landscapes: blur here is shake, wind and focus placement — tripod, timer, stabilisation off per the manual, focus a third into the scene at f/8–f/11.
Portraits deserve their own sentence: the classic failure is one sharp eye and one soft eye at f/1.4 on a moving, laughing subject. Stop down a little, focus on the nearer eye, and let continuous eye-AF work — the background will still melt, and both eyes will survive. Macro is the extreme case: depth of field in millimetres, shake magnified enormously — rails, tripods, flash and focus stacking exist because no handheld setting fixes macro blur. Match the fix to the subject’s physics and the checklist becomes instinct.
Reading EXIF: Your Camera’s Own Incident Report
Every digital photograph carries its settings in embedded metadata — shutter speed, aperture, ISO, focal length, focus mode on many systems — readable in any editor’s info panel. Make a habit of opening failed frames’ data before deleting them: the pattern across ten failures is diagnostic gold. Shutter speeds clustered at 1/30s in dim rooms point to missing ISO guardrails; a run of f/1.4 portraits with alternating sharp eyes points to depth of field; tack-sharp backgrounds behind soft athletes point to focus-area habits. Each pattern has exactly one fix, listed in this guide’s steps.
This is also how you audit advice — including this guide’s. When a new technique claims to fix your blur, test it against your EXIF history: if your failures are motion at 1/60s, no lens upgrade addresses them, and if they are missed focus at f/5.6 in good light, no shutter-speed sermon does either. Data ends arguments with yourself, and the camera has been keeping the data all along, waiting for you to read it.
A Diagnostic Flow You Can Run in Five Minutes
When a batch of photographs disappoints, resist changing settings at random and run this flow instead, in order, because each step eliminates a family of causes. First, look at the blur’s character at full magnification. If the whole frame is soft in one direction, with highlights smeared into streaks, suspect camera movement. If one plane is sharp and your subject sits in front of or behind it, suspect focus placement. If the centre is sharp and one corner or side is consistently soft across many frames, suspect the lens or its alignment. If everything is uniformly veiled and low in contrast rather than truly unsharp, suspect a dirty or hazy element, condensation, or a filter problem. Second, read the exposure data of a failed frame: the shutter speed tells you whether movement could explain it, and the aperture tells you whether depth of field was ever sufficient. Third, take three controlled test frames of a detailed, still subject on a support, with a timer release, manual focus magnified if available. If those are sharp, your equipment is fine and the fault lives in handheld technique or settings. If they are not, swap one variable, lens, body, filter, card, until the fault follows one component. That flow, five minutes of method, replaces weeks of forum guessing.
Blur that appears only in certain modes
Some blur is mode-specific and therefore diagnostic gold. Blur that appears only in video stills or only in electronic shutter mode points at rolling shutter behaviour with movement or vibration. Softness only at the widest aperture of a particular lens, improving dramatically one stop down, is that lens’s character rather than a fault, and the fix is to shoot it where it is strong. Softness only with a teleconverter fitted points at the combination’s limits or a calibration need. Softness only in flash photographs at slow shutter speeds is usually ambient ghosting, a sharp flash image overlaid with a blurred ambient one, cured by a faster shutter speed or a darker ambient exposure. Naming the mode in which blur lives is often the same as naming its cause.
Blur by Subject: Children, Pets, Sports, Stages and Stars
Children blur because they move toward and away from the camera unpredictably, which defeats single autofocus and slow shutter speeds simultaneously. The working recipe is continuous autofocus with eye or face detection, a shutter speed fast enough for a small sprinter rather than a seated adult, and bursts taken at the peaks of action, the top of the jump, the pause before the dash, when movement momentarily slows. Pets add lower contrast faces and faster direction changes; get to their eye level, use the fastest continuous focus your camera offers, and accept a higher keeper-rate strategy of more frames honestly culled. Sports blur is usually a panning problem or a shutter problem, and the two cures differ: panning blur wants a practised, smooth follow-through with stabilisation in its panning mode, while subject blur at the peak of action wants raw shutter speed and the sensitivity to afford it.
Stages and concerts add coloured, dim, rapidly changing light, where autofocus struggles and shutter speeds are rationed; focus on lit faces, time your frames to the lighting’s brighter phases, and let the performers’ still moments, the held note, the pause between moves, be your sharp frames. Night skies invert everything: the subject moves because the Earth does, so astro blur is cured by the rule of short exposures for untracked stars or a tracking mount for long ones, and focus must be set manually with magnification on a bright star, because autofocus has nothing to hold. In each genre the pattern from the main guide holds: identify which movement, yours, the subject’s, or the planet’s, wrote the blur, and the fix names itself.
Editing salvage, judged honestly by blur type
Editing can rescue some blur and only pretend to rescue the rest, and knowing which is which saves hours. Slight focus softness and mild camera shake respond to careful sharpening and modern detail-recovery tools, especially when the final use is a screen or a modest print. Directional motion blur of a subject, the smeared face of a turned head, is essentially unrecoverable as realism, though it can be embraced as an artistic effect. Out-of-focus backgrounds accidentally swallowing a subject cannot be refocused by any honest tool. The working rule is to salvage the photographs whose information exists but is muted, and to let the photographs whose information never existed teach the checklist lesson and be deleted without grief. A smaller library of sharp keepers beats a large one of rescued regrets, in editing time and in every other way.
Focus Calibration, Micro-Adjustment and When Sharp Is Misaligned
On DSLRs, the autofocus system looks through a separate sensor, and small manufacturing tolerances between that system and the main sensor can leave a lens consistently focusing slightly in front of or behind the intended point. The symptom is unmistakable once you look for it: focus that is repeatable, confident and always wrong by the same small amount, in the same direction, with a particular lens. The cure on bodies that offer it is autofocus micro-adjustment, set carefully using a proper target at your typical subject distance, per lens, and recorded. Mirrorless cameras focus on the imaging sensor itself and are immune to this class of error, which is one of their quiet practical advantages. If a DSLR and lens combination front-focuses or back-focuses after honest testing, adjustment or a service calibration is the fix, and no amount of technique compensates for a system that aims accurately at the wrong place. Test before you adjust, though, because most soft results are not calibration, and adjusting a healthy system manufactures the very problem you feared.
The tripod paradox: when support makes blur worse
Tripods cause their own blur family, which surprises photographers who bought one as a universal cure. Image stabilisation left active on some systems on a solid tripod can hunt and drift, softening long exposures, which is why the tripod-mode guidance matters. A light tripod in wind, an extended centre column, a hand resting on the camera during the exposure, and the slap or vibration of the camera’s own mechanisms all write movement into supported photographs. The long-exposure discipline fixes them in order: stabilisation managed, column down, legs spread, no touching, a timer or remote release, and the camera shielded from wind by your body or a bag. Mirror lock-up and electronic first-curtain or full electronic shutter options, where offered, remove the camera’s internal vibrations from the equation. A tripod photograph that is still soft after that discipline is telling you something real about focus or lens, which is exactly the diagnostic value of doing it properly.
Lenses, Filters and the Softness That Is Not Blur
Several softness sources masquerade as blur and deserve separation. A poor-quality or damaged protective filter can veil contrast and soften detail across the whole frame, and the test costs nothing: take the same photograph with and without it. Heavy diffraction at very small apertures softens detail uniformly, the price of extreme depth of field, and the cure is a wider aperture and, where needed, focus stacking rather than a single stopped-down frame. Atmospheric haze over distance softens landscapes in a way no setting fixes, because the air itself is the lens you are shooting through; early hours, shorter distances and polarising help at the margins. A lens used at its closest focus and widest aperture may simply be at its weakest, performing beautifully a metre further back. Each of these is a character to be worked with rather than a fault to be repaired, and recognising them ends the frustrating search for a blur fix where no blur exists.
Phone Photographs, Action Cameras and Other Blur Sources
The diagnostic habits in this guide transfer to the other cameras in your life, with their own twists. Phone blur is usually motion in low light, disguised by computational processing that paints over shake until it cannot; the cures are the same physics in modern dress, brace the phone, use its night mode deliberately on a support, and give moving subjects light or accept their motion as the picture. Computational sharpening can also manufacture a false diagnosis, making an adequately focused image look crunchy while a genuinely missed one looks painted, so judge phone focus by edges at full size, not by texture. Action camera blur is almost always shutter speed in low light or a smeared lens, because their automatic exposure protects frame rates for video by slowing the shutter for stills; clean the lens protector first, because a thumbprinted action camera produces a soft glow that owners chase through menus for hours. Compact and bridge cameras blur like their larger relatives, with the addition of slow lenses that ration shutter speed indoors. The family resemblance is the point: light, movement and focus explain blur on every device, and the photographer who learns the diagnosis once owns it everywhere.
Preventing blur in the photographs that cannot be retaken
Some photographs allow no second chance, and they deserve a defensive routine beyond the general checklist. For the unrepeatable, a wedding moment, a birth, a departing traveller, a rare animal, shoot a short burst rather than a single frame, because blur is statistical and a burst buys several independent chances at the decisive instant. Check the first frame’s sharpness at magnification immediately, while a correction is still possible, a habit professionals call chimping without embarrassment because it has saved more assignments than pride ever did. Carry the settings for your likely hardest moment pre-thought: the shutter speed your subject demands, the focus mode, the sensitivity ceiling you accept. Unrepeatable photographs are lost to blur in the seconds spent menu-diving; they are saved by preparation that happened before the moment arrived.
A One-Week Sharpness Training Plan
Blur is best fixed permanently by a week of deliberate practice, each day isolating one cause. Day one is shutter discipline: photograph moving subjects at descending shutter speeds and learn exactly where your subjects freeze. Day two is focus placement: still subjects, single point, deliberate placement on the detail that matters, reviewing at magnification every time. Day three is stance and release: handheld still subjects at slow speeds, elbows in, breath out, timer comparisons to measure your own movement’s cost. Day four is depth of field: the same scene at every aperture, learning what each buys and what diffraction later takes away. Day five is your hardest real subject, children, pets, sport, applying the week’s lessons in combination. Review each evening and name every failure by its cause from this guide, in writing. A photographer who can name their blur can fix it, and a week of naming turns the checklist from reading into reflex.
When Blur Is a Repair: Faults That Settings Cannot Fix
A minority of blur is mechanical, and recognising its signatures saves weeks of technique guilt. A decentered lens, one whose elements are slightly misaligned from a drop or a manufacturing fault, produces the one-sided softness described in the diagnostic flow, consistent across apertures and distances, and no setting cures it; it is a service or replacement matter, provable by rotating the camera ninety degrees and watching the soft zone rotate with the lens rather than the scene. A damaged stabilisation mechanism can inject movement of its own, producing blur that worsens with the system on and improves with it off on a support, a signature worth testing explicitly. A loose lens mount, a worn adapter, or debris on the mount faces can tilt a lens microscopically and soften one edge. Autofocus motors that have grown inaccurate focus confidently and wrongly across all conditions with one lens. Each of these faults announces itself by consistency: technique errors vary from frame to frame, while mechanical faults repeat with metronomic loyalty. If your blur is identical in every controlled test, stop practising and start the repair conversation, with your test frames as the evidence that makes that conversation short.
What to tell a repairer so the diagnosis is quick
Repairers diagnose blur fastest when the owner arrives with evidence rather than adjectives. Bring sample files with their exposure data intact, showing the fault, and be able to say which lens and body, which apertures and distances, and whether the fault follows the lens to another body or stays with the body across lenses. State when it began and whether a drop or a repair preceded it. That information, which your five-minute diagnostic flow produces naturally, can halve the assessment time and prevent the most frustrating outcome in camera repair, the returned camera reported as no fault found because the fault was never demonstrated. Blur that can be shown can be fixed; blur that can only be described often cannot.
The Psychology of Sharpness: Pixel-Peeping and Proportion
A final cause of perceived blur lives in the viewer rather than the photograph. Reviewing every frame at full magnification on a large screen reveals softness that no print, no shared image and no viewer at a normal distance will ever see, and many photographers have chased that invisible softness with money and anxiety. Calibrate your standards to your outputs. If a photograph will be shared on screens and printed at ordinary sizes, judge it at those sizes, where a great many technically imperfect frames are, in every way that matters, sharp. Reserve full-magnification judgement for the photographs destined for large prints and for your diagnostic tests, where it belongs. This is not lowering standards; it is aiming them. The photographers whose work hangs on walls are not the ones whose every frame survives the harshest zoom. They are the ones whose subjects, light and moments survive the walk across the room, and who fixed their real blur, the kind visible at honest distances, with the methods in this guide.
Sharpness Settings and In-Camera Processing, Demystified
JPEG shooters meet one more softness source that RAW shooters bypass: the camera’s own processing choices. Aggressive noise reduction at high sensitivities smears fine detail into a watercolour softness that looks exactly like blur at a glance and is actually detail being traded for smoothness by software. The cures live in the picture settings: reduce the noise reduction strength for high sensitivities if your camera separates it, choose a sharpening setting with some intent rather than the softest default, and understand that a smaller, well-processed file often looks sharper than a larger, over-smoothed one. RAW shooters make the same trade in their editor instead, where the sliders are visible and reversible, which is one of the format’s quiet advantages for photographers troubled by softness. Either way, when a camera’s results look waxy rather than focused, suspect processing before mechanics, and test with the gentlest settings and a still subject. Processing softness is the happiest diagnosis in this entire guide, because it costs nothing to fix and the improvement is immediate.
The sharpness checklist, condensed for the camera bag
- Shutter speed matched to the subject’s movement, not to the light’s convenience.
- Focus mode chosen deliberately: single for still, continuous for approaching or receding subjects.
- Focus point or zone placed on the detail that must be sharp, usually the nearest eye.
- Stabilisation on for handheld, managed for tripods, and your stance doing its share.
- Aperture giving the subject’s depth room, not merely the exposure you wanted.
- First frame checked at magnification whenever the moment cannot be repeated.
Print that list, tape it inside the camera bag’s lid, and read it before the shoots that matter for one season. By the second season it will be reflex, and blur will have changed in your life from a recurring disappointment into an occasional, diagnosable event with a known cause and a known cure, which is the most any troubleshooting guide can honestly promise.
Blur in Prints and Shared Images: Judging at the Final Size
The last refinement of blur judgement is to assess photographs where they will live. A frame that looks soft at full magnification may print beautifully at the size the print will actually be, because printing compresses detail and viewing distance forgives the rest. Conversely, a frame destined for a large wall print deserves the harshest scrutiny you own, and marginal sharpness there is a real defect worth reshooting or replacing. Build the habit of deciding a photograph’s destination before deciding its verdict, and your culling will become faster and kinder: the family album keeps the moment that is sharp enough at album size, the exhibition print demands the frame that survives enlargement, and the troubleshooting energy in this guide gets spent where it can actually be seen. Blur, in the end, is not a property a photograph has in the abstract. It is a relationship between the photograph, its size and its viewer, and the photographer who understands that stops deleting memories and starts fixing causes, which was the point of learning the causes at all.
There is a quiet satisfaction available at the end of this process that is worth naming. Once the causes are understood and the checklist is reflex, sharpness stops being a lottery and becomes a decision you make per photograph, with your eyes open about its costs in light and sensitivity. You will still lose frames, everyone does, to the child who moved impossibly and the moment that outran every setting. But you will lose them knowingly, rarely, and usually with a sharper frame on either side of the loss from the burst you had the discipline to take. That is the realistic destination of all troubleshooting: not perfection, but a small, explainable failure rate and a large, dependable keeper rate, and photographs whose sharpness you can trust without inspecting every one like a defendant.
A note on teaching sharpness to a new photographer
If you are handing these skills to someone else, a teenager with a first camera or a partner who shares yours, teach the causes in the order they can be seen. Start with shutter speed and movement, because its results are dramatic and immediate, then focus placement, then the supporting habits of stance and checking. Resist teaching settings as commandments; teach the small diagnostic question this guide returns to, what moved, and let them answer it from their own frames. A learner who can diagnose their own blur becomes independent of your advice within a month, which is the real goal of teaching anything. And lend the checklist without lending your anxiety about equipment: new photographers who believe sharpness is a talent become careful, while those who believe it is a system become sharp.
Finally, keep the whole topic in its proper proportion. Sharpness is a means, and the photographs that matter most to you in ten years will be judged by the people in them, the places they recall and the moments they saved, with sharpness as a silent supporting quality rather than the headline. Fix blur because clarity serves memory, learn the system because it frees your attention for the moment itself, and then let the checklist fade into the background where all good technique belongs. The goal was never a library of technically perfect frames. It was a library of moments, kept clearly, and that goal is well within reach of the habits you now own.
The shortest honest summary
Blur has three authors: you moved, the subject moved, or the focus was never where you thought it was. Read the failed frame’s character and its exposure data, and the author identifies themselves. Match shutter speed to the subject, place focus deliberately on the detail that matters, give the subject’s depth room in the aperture, stabilise honestly and check the unrepeatable frame immediately. Salvage in editing only what was captured softly, never what was never captured at all. Do those things and blur becomes an occasional, explainable event in a sharp body of work, which is the most that honest photography has ever asked of any of us.
Go back to your last disappointing batch now, while the method is fresh, and run the five-minute flow on it before you delete anything. Name each failure, adjust the one setting or habit responsible, and reshoot the subject if it still exists. That single act of diagnosis, performed once with this guide open beside you, is worth more than the guide itself, because it converts everything you have read into the only form in which knowledge survives: a habit you have actually practised on your own photographs.
Sharp photographs are not an accident of expensive equipment. They are the residue of a few understood causes, handled calmly, and they are now within your ordinary reach.
Related Guides
- best cameras for sports photography
- best cameras for action shots
- best cameras for beginners
- best cameras for portraits
- best tripods for cameras
Frequently Asked Questions
Can software really fix a blurry photo?
It can improve mild cases: slight camera shake and gentle softness respond well to modern deblur and AI sharpening tools, especially at social-media sizes. Strong motion blur and missed focus cannot be truly fixed, because the detail was never recorded — software can only guess plausibly, which works for small displays and fails under scrutiny. Treat editing as salvage for keepers with small flaws, and fix causes at capture.
What shutter speed stops motion blur?
It depends on subject speed and direction: about 1/250s freezes walking people, 1/500s handles playing children and pets, and 1/1000s or faster suits sports, vehicles and birds in flight. Subjects moving toward the camera blur less than those crossing the frame. When in doubt, go one step faster and let ISO rise — noise is editable, blur mostly is not.
Why are my photos blurry even on a tripod?
Check four things: stabilisation left active and drifting (some systems must be off on tripods), the tripod itself — lightweight models vibrate in wind and from shutter or mirror movement, so use a timer or remote and hang weight from the centre column; focus accuracy, since autofocus may have locked a background detail; and shutter speeds in the danger zone around 1/8–1/60s where tripod vibration peaks. A controlled test shot at a fast shutter speed isolates the cause quickly.
Why is one side of my photos always soft?
Consistent one-sided softness suggests a decentred lens element or a tilted mount — often after a knock — rather than technique. Confirm with a tripod test photographing a flat, detailed subject square-on at a mid aperture: if one side or corner stays soft while the opposite side is sharp, the lens needs professional service. Do not attempt internal lens repairs yourself; alignment is specialist work.
Does a higher megapixel camera make blur worse?
It reveals blur more clearly at 100 percent magnification, because you are inspecting the image more closely — the same photo downscaled matches a lower-resolution result. High-resolution sensors reward good technique and punish sloppy shutter speeds, which is why owners often perceive them as ‘less forgiving’. The cure is the same checklist: adequate shutter speed, accurate focus and stability.
Should I use a faster lens to fix blur?
A faster lens (wider maximum aperture) helps indirectly: it lets you choose faster shutter speeds at the same ISO in low light, and its brighter viewfinder image aids autofocus. It does not fix shake or missed focus by itself, and its shallower depth of field can create a new softness problem if used carelessly. Buy the fast lens for light and look; fix blur with settings and technique first — they are free.
Why are my photos sharp in the viewfinder but blurry in the file?
The finder shows you the scene, not the exposure, so it cannot reveal a shutter speed too slow for your hands or your subject. The file records what the shutter did, including every tremor during it. This mismatch is most common in dim light, where the finder looks bright and confident while the camera quietly chooses speeds no hand can hold. The cure is to read the shutter speed the camera is using, in the finder display, and treat it as part of the picture you are taking, not as a technical footnote.
Does image stabilisation ever cause blur?
Yes, in specific situations covered in this guide: on a solid tripod with some systems, where it can drift while hunting for movement that is not there; when panning without a panning mode, where it fights your intended motion; and when it is set for the wrong focal length with manual lenses. Outside those cases it is a reliable ally. If your blur appears only with stabilisation on and vanishes with it off in a controlled test, you have found a genuine fault or a mode mismatch, both of which are fixable.
Can a higher-resolution camera make my blur problem look worse?
Yes, in the specific sense covered elsewhere in this guide: more pixels inspect your technique more closely, so camera shake and focus errors that were invisible at lower resolution become visible when you zoom to the full file. The photograph itself, viewed whole or printed at the same size, is no worse. The cure is the same checklist with slightly faster shutter speeds as your margin, not a different camera, and most photographers adapt within a few outings.