If you have ever wondered what is dynamic range on a camera, picture a sunset photograph where the sky is pure white and the land is pure black, though your eyes saw colour in both. Dynamic range is the camera’s ability to record detail across the span from the brightest highlight to the deepest shadow in a single exposure. Your eyes handle roughly twice the range of a good camera sensor, which is why scenes that look glorious in person can disappoint in a file — and why understanding this one concept improves more photographs than any gear purchase.
This guide explains dynamic range in plain terms: how it is measured in stops, why it shrinks as ISO rises, how it differs between cameras and formats, and — most usefully — the field techniques and editing moves that let you work beyond your sensor’s limits. Whether you shoot landscapes at dawn or family photos in mixed window light, dynamic range is quietly deciding what your files can become.
Disclosure: As an Amazon Associate, kajuandouglas.com earns from qualifying purchases. Links to Amazon on this page are affiliate links; they cost you nothing extra. Listing details such as price and availability change often, so check the current Amazon listing before you buy.
Dynamic Range in Plain Language
Think of a sensor as a row of buckets catching light. Each bucket — each photosite — can hold a limited amount before it overflows; overflow is a blown highlight, recorded as featureless white. At the dark end, a bucket that catches almost nothing produces a signal buried in electronic noise; that floor is where shadow detail drowns. Dynamic range is the distance between that floor and that ceiling, measured in stops, where each stop is a doubling of light. A modern full-frame camera might offer around 14 stops in ideal conditions; a phone sensor, before computational tricks, far fewer.
Crucially, dynamic range is not brightness range in the scene — it is the portion of the scene’s range the camera can hold in one shot. A contrasty landscape may span 16 stops from sunlit cloud to shaded rock. A 14-stop sensor must sacrifice something: expose for the sky and the rocks go black, expose for the rocks and the sky blows out, or compromise and rescue both ends in editing, which is exactly what skilled landscape photographers do.
In this guide
How ISO Eats Your Dynamic Range
Dynamic range is greatest at your camera’s base ISO — usually 100 or 200 — and declines as you raise sensitivity, roughly a stop lost per doubling or so in the higher ranges. Amplifying the signal lifts the noise floor, so shadows clog sooner, while the highlight ceiling stays fixed. This is why a night street scene at ISO 6400 shows crunchy shadows and fragile highlights compared with a tripod shot at ISO 100 of the same street: the sensor’s usable span narrowed dramatically.
Practical consequence: when dynamic range matters most — landscapes, architecture, high-contrast portraits — keep ISO at base and let shutter speed or a tripod do the work. When light is low and the subject moves, accept the trade knowingly: a noisy, narrower-range file of a sharp moment beats a clean file of a blurred one. Some cameras offer dual-gain sensors with a second, cleaner high-ISO range; check your model’s behaviour, because it changes where the sweet spots lie.
RAW, JPEG and the Range You Keep
A RAW file stores the sensor’s full captured range, typically 12 or 14 bits per channel; a JPEG compresses that into 8 bits with the camera’s contrast curve baked in, discarding range at both ends. This is why a RAW landscape can be coaxed into showing cloud detail and shadow texture that the same shot’s JPEG rendered as white and black. The range was recorded; the JPEG simply threw it away at the factory.
In editing, dynamic range is spent through the exposure, highlights, shadows, whites and blacks controls — each pulls detail from one end of the recorded span. Push too far and the costs appear: noise blooms in lifted shadows, colours grey in recovered highlights. Knowing your camera’s realistic range — test it by deliberately underexposing a contrasty scene by two stops and recovering it — tells you in the field how much you can trust the file. Pair this with a grasp of camera sensor sizes explained, since larger sensors generally record a stop or so more range.
Beating the Limit: Field Techniques
When the scene exceeds the sensor, photographers cheat in four classic ways. Expose for the highlights and lift shadows in editing — modern sensors forgive this well, and blown highlights are unrecoverable while shadows usually are not. Use a graduated neutral-density filter to darken a bright sky physically at capture, a landscape staple. Bracket exposures and blend them — HDR merging in software, or your camera’s built-in HDR for JPEGs — combining several frames’ ranges into one file. Or simply wait: ten minutes of changing light can shrink a scene’s range by several stops, which is why landscape photographers are patient people.
For portraits and events, the cheat is light control: move the subject out of dappled sun into open shade, add fill flash to lift shadows toward the highlights, or turn the subject so the contrast falls within range. Dynamic range problems are usually lighting problems wearing a technical disguise, and the fixes are older than digital sensors.
Gear for This Guide
Cameras known for wide, editable dynamic range at base ISO — the kind of files that survive aggressive highlight and shadow recovery:

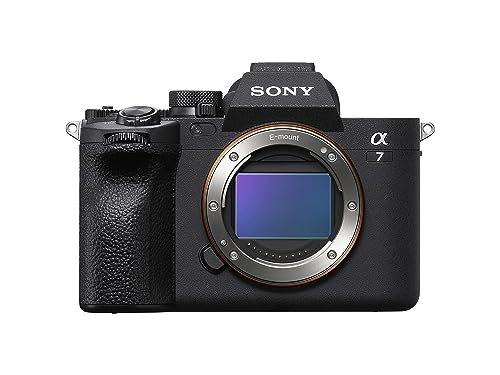
Sony Alpha 7 IV Full-Frame Mirrorless Camera — Check price on Amazon. A solid, widely available option that fits this guide; confirm the exact kit contents and lens mount on the listing before ordering.

Nikon Z 6II Full-Frame Mirrorless Camera — Check price on Amazon. A solid, widely available option that fits this guide; confirm the exact kit contents and lens mount on the listing before ordering.

Fujifilm X-T30 II Mirrorless Camera with XF 18-55mm Kit — Check price on Amazon. A solid, widely available option that fits this guide; confirm the exact kit contents and lens mount on the listing before ordering.
Common Misconceptions
Misconception one: dynamic range is the same as contrast. In fact they oppose each other in a finished image: a wide-range capture often looks flat and low-contrast until edited, because it holds detail everywhere instead of crushing ends to black and white. Misconception two: HDR mode creates dynamic range. HDR blends multiple exposures to extend beyond one frame’s range — effective, but it is a workaround for the sensor’s limit, not an increase in it, and it fails with fast-moving subjects.
Misconception three: the highest quoted figure is what you get. Manufacturers’ and testers’ best figures apply at base ISO with optimal processing; real-world range at working ISOs is lower, and your lens’s flare reduces it further in backlight. Misconception four: only landscape photographers should care. Anyone shooting a bride in white beside a groom in black, a pet in dappled shade, or a product near a window is negotiating dynamic range whether they know the term or not.
What Is Dynamic Range on a Camera in Everyday Shooting
You negotiate dynamic range constantly without naming it. A portrait by a window: the face in shade, the garden behind in sun — the camera must hold both, and the gap between them is the scene’s range. A white cat on a dark sofa, a black dog on snow, a product photograph near glass, a school stage lit by spots in a dark hall: each is a dynamic-range problem before it is anything else. Photographers who understand the concept stop asking ‘why did this photo fail?’ and start asking ‘where did the range go?’ — into the sky, into the shadows, or into an ISO setting that shrank it.
It also explains editing styles. The flat, grey look of an unedited RAW file is wide range waiting for decisions; the punchy look of a phone photo is narrow range with the decisions pre-made, contrast applied and ends clipped for immediacy. Neither is wrong — but only one of them lets you change your mind, which is why serious work is shot RAW and why the highlights-shadows dance in your editor is really a dynamic-range negotiation.
Measuring Your Own Camera’s Usable Range
Laboratory numbers are useful, but your camera’s usable range — with your lenses, your subjects and your noise tolerance — is a home experiment away. Photograph a contrasty scene at base ISO, deliberately underexposing by one, two and three stops across frames, then lift each file in your editor to match the correct exposure. Inspect shadows at full size: the frame where noise becomes unacceptable to you marks your personal shadow-recovery budget. Repeat at your common working ISOs and the budget shrinks visibly — knowledge that changes field decisions, because you will know exactly how much underexposure a dusk landscape can survive.
Do the same test toward the highlights by overexposing in steps and pulling back: most sensors forgive about a stop of highlight excess in RAW before channels clip beyond recovery, with skies and skin tones failing first in the red channel. Together, the two tests give you a private specification sheet — ‘my camera forgives two stops under, one over, at ISO 400’ — that is worth more in the field than any review’s laboratory maximum.
Worked Examples: Three Scenes and Their Range Problems
Take a portrait with the subject standing in open shade and a sunlit street behind them. The street may be several stops brighter than the face, and a camera asked to hold both will either keep the street’s detail and sink the face, or lift the face and bleach the street. The photographer’s real options are the ones this guide has described: move the subject so the background shares their light, add light to the subject with flash or a reflector to close the gap, or expose for the face and let the background go bright deliberately, which is a legitimate and often beautiful choice. The scene did not exceed photography; it exceeded a single exposure’s range, and every solution is a way of narrowing the scene’s range or choosing which end of it matters.
Now take a landscape at sunset, bright sky above a land already in shadow. This is the classic home of the graduated filter in the film era and of exposure bracketing in the digital one, and it is also where exposing carefully for the highlights and lifting the shadows in a RAW file succeeds surprisingly often with a modern sensor. Finally, take an interior with a window in frame, the single most common range problem in everyday photography, from property photographs to family rooms. The window will blow out in almost any single exposure that renders the room well, and the mature response is usually to accept it, because viewers expect windows to be bright, and a photograph that holds the room and sacrifices the window looks natural, while one that holds the window and sinks the room looks like a cave. Dynamic range problems are often judgement problems in disguise.
Stops, in numbers you can feel
A stop is a doubling or halving of light, and the range figures quoted for cameras become intuitive when translated into scenes. The difference between a sunlit exterior and a shaded interior can be ten stops or more. A face lit by a window indoors might sit four stops above the room’s shadowed corner. When a camera offers, in practical usable terms, perhaps eleven to thirteen stops at its best sensitivity, you can see why a single frame can hold a landscape’s sky and foreground, yet a room with a bright window still defeats it. You do not need the exact figures for your model; you need the instinct that scenes carry measurable spans, that your camera holds a smaller span than your eyes do, and that the craft lies in fitting one inside the other.
Dynamic Range in Video and in Your Phone
Video shooters meet dynamic range as a recording problem with fewer escapes: there is no bracketing a moving scene, and the file must hold the range in real time. This is why flat and log profiles exist, spreading the captured range across the file in a way that looks grey and lifeless until graded, and why video-centric cameras advertise their range so prominently. For the casual filmmaker, the practical lessons mirror the stills ones: avoid pointing the camera at scenes split between deep shade and full sun where you can, expose for the subject’s face, and accept bright skies. Your phone, meanwhile, solves range problems computationally, combining frames so quickly that the process is invisible, which is why phone photographs of interiors with windows look impossibly balanced. Understanding what the phone is doing, several exposures merged, demystifies both its magic and its occasional failures with moving subjects, where the merged frames disagree.
Misconceptions that survive every explainer
- A high range figure means my photos will look better automatically. Range is headroom for difficult scenes and editing, not a quality that improves an easy scene.
- HDR mode and dynamic range are the same thing. One is a capture span; the other is a technique, or a display standard, that works around that span.
- Shadow detail can always be recovered in editing. Only if it was captured. Pushed too far, lifted shadows reveal noise and banding, because the information was thin to begin with.
- More range means I can stop thinking about exposure. Range forgives small errors gracefully and large ones barely at all; the histogram habit in this guide remains the working skill.
Training Your Eye to See Range Before You Shoot
The most valuable dynamic range skill is perceptual: learning to look at a scene and sense its span before raising the camera. A simple exercise builds it quickly. In any scene, find the brightest area that matters and the darkest area that matters, ignoring extremes you are happy to sacrifice, then ask whether a single exposure can honour both. Squinting helps, because it compresses your vision’s range toward the camera’s and reveals the scene’s contrast structure. Checking the camera’s histogram and highlight warnings on the first frame then confirms or corrects your estimate, and within a few weeks of this loop your estimates become reliable enough that problem scenes stop surprising you. Photographers who work this way expose deliberately, bracket only when the scene truly demands it, and come home with files that edit in minutes, because the range battle was won in the field, where it is cheapest.
How Dynamic Range Is Measured, and Why the Numbers Differ
Laboratory measurements of dynamic range are made under controlled conditions, photographing a calibrated target of graduated tones and determining the span between the brightest tone the sensor records without clipping and the darkest tone that rises acceptably above the noise floor. The arguments begin at that last phrase, because acceptable noise is a judgement, and different testers set the threshold differently, producing figures that can differ by a stop or more for the same camera. Manufacturers’ claims, independent measurements and photographers’ usable range are three related but distinct numbers, and the usable one, the span you can actually exploit in a real photograph at a quality you would print, is always the smallest. This is not dishonesty; it is the difference between a sensor’s theoretical reach and a photograph’s practical one. For buying decisions, compare cameras using one consistent independent source, and for shooting decisions, trust your own test: photograph a high-contrast scene at base sensitivity, lift the shadows in your editor, and see where your tolerance ends. That is your camera’s dynamic range in the only units that matter to you.
ISO invariance, explained simply
A term that follows dynamic range discussions is ISO invariance, which describes sensors whose files can be brightened in editing with little more noise penalty than if the sensitivity had been raised in the camera. On such sensors, a deliberate strategy becomes possible in difficult light: keep the sensitivity lower to protect the highlights and dynamic range, and brighten the file afterwards, accepting the editing step as the price of the headroom. On sensors that are not invariant, raising the sensitivity in camera produces cleaner results than brightening later, so the classic discipline applies. Most modern sensors are close enough to invariant at most settings that the practical advice simplifies: do not fear brightening a well-exposed RAW file, and do not use the idea as an excuse for careless exposure, because no sensor forgives a file that was starved of light entirely.
Protecting Highlights and Shadows: A Field Routine
Dynamic range becomes a routine rather than a theory when you build it into the first seconds of any shot in hard light. Glance at the scene and decide which end you cannot afford to lose; in most daylight photography that is the highlights, because clipped skies, faces and dresses are unrecoverable and conspicuous, while shadows can usually be lifted or allowed to fall into a moody darkness that viewers accept. Set your exposure so the important highlights sit just inside safety, using the histogram and the highlight warnings as instruments rather than decorations. Then check the shadows: if the important shadow detail has sunk beyond rescue, your options are the honest ones from this guide, change the light, add light, bracket, or recompose to exclude the impossible span. Running that routine takes seconds once practised, and it is the difference between a photographer who experiences dynamic range as a recurring accident and one who experiences it as a material they work with, like depth of field.
Bracketing with intent, not hope
Bracketing, taking a sequence at different exposures for later blending, is most useful when it is planned rather than sprayed. Use it when the scene is static, the span demonstrably exceeds one frame, and you intend to blend; landscapes at dawn and dusk and interiors with bright windows are its natural home. Set the sequence wide enough to capture true blacks and clean highlights at its extremes, use a tripod or a braced stance so the frames align, and remember that moving elements, branches, water, people, will ghost in a blend and need the editor’s attention. For moving scenes, a single well-judged exposure almost always beats a bracket, which is why bracketing is a specialist tool in this guide rather than a default setting.
Dynamic Range Across Your Camera’s ISO Range, Visualised in Words
Picture your camera’s range as a ladder you climb down as sensitivity rises. At base sensitivity the ladder is at its longest, with the cleanest shadows at the bottom and the full highlight span at the top. Each doubling of sensitivity removes roughly a rung, mostly from the shadow end, because amplification raises the noise floor into the darkest tones first. This is why two photographs of the same evening scene, one at a low sensitivity on a braced camera and one at a high sensitivity handheld, differ so dramatically when you try to edit the shadows, even though both looked acceptable on the rear screen. It is also why landscape photographers guard base sensitivity jealously and carry tripods to afford it, while event photographers spend range freely to buy shutter speed, knowing their subjects are people in mid-tones rather than shadow detail. Neither is misusing the camera; they are spending the same currency on different priorities, and seeing range as a budget you allocate, per photograph, is the mental model that makes the whole topic practical.
Colour and range: the hidden interaction
Range is usually discussed in brightness, but colour suffers at the extremes too. Deep shadows lose colour accuracy as they are lifted, drifting toward noise and cross-toned murk, and highlights near clipping lose one colour channel before the others, which is why skies and skin can shift hue at the bright edge before they turn fully white. Shooting with a small margin at both ends, the exposure discipline this guide recommends, protects colour as much as detail. It also explains why a file can measure acceptably on a brightness histogram and still look wrong: the per-channel histograms, which many cameras can display, reveal a single channel clipping while the combined graph looks safe. Photographers who shoot saturated subjects in hard light, stage performances, sunsets, product work, learn to glance at the channels for exactly this reason.
When to Stop Fighting Range and Use It
Mature photographers do not only defend against excessive range; they compose with it. A silhouette is dynamic range embraced, the subject deliberately placed beyond the dark end while the sky holds the detail. A high-key portrait lets the background blow gracefully to white while the face is exposed with care. A night street scene lets the shadows become true black pools between lit windows, which is both honest to the scene and beautiful. In each case the photographer’s skill was not in capturing the whole span, which no camera could do, but in choosing which part of the span the photograph would be about. That reframing is the real destination of this explainer. Dynamic range is not a problem to be solved on the way to photography; handled knowingly, it is one of photography’s oldest expressive materials, and the cameras with the widest range are best understood as giving you the most freedom in deciding what to keep and what to let go.
Dynamic Range for Specific Subjects: A Field Guide in Miniature
Wedding photographers live at range’s sharp edge: a white dress and a dark suit in the same frame, in sunlight, is a span engineered to defeat cameras, and their technique is a masterclass in this explainer’s principles, exposing for the dress, positioning couples so both faces share similar light, and using flash to lift shadows rather than to illuminate. Real-estate and interior photographers face the window problem professionally and solve it with the full toolkit: bracketed blends, added light, and shoots timed for the hour when interior and exterior light balance. Concert photographers accept crushed blacks as the genre’s native look and protect skin and stage highlights instead. Landscape photographers wait, which is their own range technology: the hour after sunset, when sky and land fall within a single exposure’s span, is prized precisely because the scene’s range comes to the camera. In every genre, expertise looks less like owning range and more like arranging to need less of it, a lesson the beginner can borrow from any of them.
Your phone’s night and HDR modes, decoded
Understanding range also decodes the phone in your pocket. Its HDR processing merges several exposures so quickly that moving subjects occasionally ghost or tear at the seams of the merge, its night mode stacks many frames to build shadow detail no single frame contained, and its portrait modes simulate the depth effects that camera lenses produce optically. None of this is cheating and none of it is magic; it is dynamic range engineering by computation, trading time and processing for the span a tiny sensor cannot capture at once. Dedicated cameras are travelling the same road more slowly, with in-camera HDR and multi-frame modes of their own. The photographer who understands range recognises every one of these features as the same old problem wearing new clothes, and can therefore judge when to trust them and when to reach for the older tools: position, timing, added light and a well-judged single exposure.
A One-Week Exercise That Makes Range Intuitive
Day by day, photograph one deliberately difficult scene and study only its range. A window-lit portrait on the first day, exposing for the face and then for the window, and comparing what each choice kept. A midday street on the second, where shadows are ink and walls are white, practising the squint test and the histogram check. An evening interior on the third, spending sensitivity to buy shutter speed and watching the shadows’ cost in editing. A sunset on the fourth, returning as the light balances and feeling the scene come within reach. On the remaining days, repeat whichever scene defeated you most, armed with one new tool each time: repositioning, added light from a lamp or flash, or a bracketed blend. A week of this produces the instinct this whole explainer has been circling: you will begin to see scenes as spans of light first and subjects second, which is, not coincidentally, how cameras see them too.
Dynamic Range and Print: Where the Theory Meets Paper
Prints reveal dynamic range decisions more honestly than screens, because paper holds a smaller range than a good display and forces the photographer’s choices into the open. A file whose shadows were lifted aggressively may look moody and rich on a bright screen and print as grey murk, while a file exposed with discipline, its highlights placed and its shadows allowed their depth, prints with the glow people associate with expensive cameras. If you print, even occasionally at home or through a lab, let a test print arbitrate your editing habits: expose and edit for the print’s narrower world and your screen results will look after themselves. This is also where a camera’s range quietly earns its keep for printing photographers, not in the single dramatic sunset but in the thousand ordinary files whose tones sit comfortably within paper’s limits because the capture had room to spare.
Range, skin tones and the photographs people keep
Most cherished photographs are of people, and skin is a demanding subject for range: it lives in the upper mid-tones, shows clipping early on bright foreheads and noses, and reveals shadow noise unflatteringly when faces are lifted from darkness. The practical craft follows directly. Expose for the face in hard light, even at the cost of the background. In mixed light, move the person rather than the settings where you can, into open shade or toward the window, because repositioning a subject by two steps changes the range problem more than any menu. And when you must shoot a face across a harsh span, a touch of fill flash or a reflector is not a stylistic choice but a range tool, narrowing the scene so the camera can hold what your eyes could. The photographs families keep for decades are usually the ones where somebody managed the light on a face, knowingly or not.
Putting It All Together: Range as a Working Habit
Everything in this explainer compresses into a small set of habits that take a season to become reflexes. Look at a scene and sense its span, brightest important tone to darkest important tone, before you raise the camera. Expose so the highlights you care about survive, and verify with the histogram and the highlight warnings rather than the rear screen’s flattering brightness. Spend sensitivity knowingly, understanding that each step costs shadow range. Reach for the field tools in order: reposition, wait for better light, add light, and only then bracket or blend. Edit with restraint, lifting shadows only as far as they stay clean, and let the tones you deliberately sacrificed stay sacrificed, because a photograph with conviction about its light looks better than one rescued in every direction at once.
Do those things and dynamic range stops being a specification you compare and becomes a material you handle, like depth of field or shutter speed, with a feel for its limits that no camera upgrade can give you and no camera downgrade can take away. That feel is the actual subject of this guide. The stops and the ladders were only ever scaffolding toward it, and the photographers whose work you admire, in whatever genre, share it in common: they saw the light’s span before they pressed the shutter, and they had already decided what the photograph would keep and what it would gracefully let go.
A Final Exercise: The Same Scene at Three Exposures
Choose one scene with a genuinely wide span, a room with a bright window is perfect, and photograph it three times: once exposed for the room, once for the window, and once at the camera’s own judgement between them. Study the three files at full size and name, precisely, what each one kept and what each one surrendered. Then edit the middle file and discover how far its shadows and highlights can honestly be pushed before noise and clipping protest. That single exercise, which takes ten minutes, teaches the usable range of your own camera more truthfully than any published figure, because it is measured in your light, your subjects and your tolerance. Repeat it at a high sensitivity setting and watch the usable span narrow, and the ISO ladder in this explainer becomes something you have seen with your own eyes rather than read in an article.
One closing thought belongs to every photographer who has watched a scene with their eyes, raised a camera, and felt the photograph come back smaller than the moment. That gap is not your failure and it is not really your camera’s either; it is the honest difference between a biological system that adapts locally across a scene and a sensor that must commit to a single exposure for the whole frame. Everything in this explainer, the ladders, the histograms, the bracketing and the repositioning, is a way of negotiating that difference with skill rather than frustration. Negotiate it well and the gap narrows to the point where viewers stop seeing a recording and start seeing the moment as you saw it, which is all that dynamic range, in the end, was ever for.
The shortest honest summary
Dynamic range is the span of brightness a single exposure can hold, from the darkest tone with usable detail to the brightest tone short of pure white. Your eyes handle a wider span than any camera, your camera loses span as sensitivity rises, and RAW files keep more of the span than JPEGs do. The craft is fitting scenes into the span you have: expose for the highlights that matter, check the histogram rather than the screen, spend sensitivity knowingly, and narrow difficult scenes by moving, waiting, adding light or blending exposures. Master those moves and the number printed in your camera’s specifications becomes the least interesting thing about its dynamic range, because the range you actually use, photograph after photograph, will be the one your judgement delivers.
Keep one small promise to yourself as you finish this explainer: for the next month, check the histogram before the second frame of every difficult scene, and say, even silently, which end of the range you are protecting and why. A month of that single spoken decision builds the instinct faster than any amount of reading, including this guide. After the month, the checks become automatic, the difficult scenes become the interesting ones, and dynamic range completes its journey in your photography from a specification you once looked up to a material you handle without thinking, which is where every technical topic in photography is ultimately trying to arrive.
That is the explainer complete: the span defined, the ladder understood, the tools ordered from repositioning to blending, and the habit, histogram first, highlights protected, sensitivity spent knowingly, that turns all of it into photographs. Take it into the next hard-lit scene you meet, a window, a stage, a noon street, and notice how differently the scene reads once you can see its span. That new way of seeing, more than any figure in any specification table, is what dynamic range was always trying to teach you.
One last, practical encouragement: do not wait for a dramatic landscape to practise any of this. The range problems that decide most photographers’ results are domestic ones, the birthday by the window, the kitchen at night, the white shirt in noon sun. Practise there, where the stakes are low and the repetitions are many, and the skill will be waiting, fully formed, on the one evening the light over the mountains does something unforgettable and the span of the scene tests everything you have learned.
See the span, choose what to keep, and let the rest go with intention. Read the shadows and highlights honestly, and every bright window or dark valley becomes a deliberate choice.
Everything else, every camera you will ever own, is simply a wider or narrower version of that same decision, made with better or worse tools.
Related Guides
- best cameras for landscape photography
- best cameras for landscape photography under 1000
- best cameras for photography
- best cameras for night photography
- best cameras under 1000
Frequently Asked Questions
How many stops of dynamic range does a good camera have?
Modern full-frame cameras record roughly 13–15 stops at base ISO by laboratory measures, with APS-C typically a stop or so behind and Micro Four Thirds a little further. Usable range in real photographs is somewhat less, because the deepest shadows carry visible noise. Even so, today’s sensors hold far more range than slide film ever did — the practical limit is usually the photographer’s exposure choice, not the sensor.
How can I check if my photo has exceeded the dynamic range?
Enable your camera’s highlight warning in playback — clipped areas blink — and learn to read the histogram: bars piled hard against both edges mean the scene’s range exceeds the file’s. A single edge pile-up tells you which end you sacrificed. In editing software, the clipping indicators in the histogram panel show the same thing per colour channel.
Does shooting RAW really give more dynamic range?
Yes. RAW files keep the sensor’s full bit depth, preserving shadow and highlight information that JPEG processing discards when it applies a contrast curve and 8-bit encoding. The difference is dramatic in high-contrast scenes: skies that are blank white in JPEG often hold recoverable cloud texture in RAW, and shadows lift with far less damage. For low-contrast scenes shot carefully, the advantage shrinks to near zero.
Why do my shadows look noisy when I brighten them?
Because the deepest shadows sit just above the sensor’s noise floor, and brightening them amplifies that noise along with the detail. Every camera has a practical limit — often two to three stops of shadow lifting before noise becomes objectionable, more on large sensors at base ISO. Exposing a little brighter in the field, without clipping highlights, gives cleaner shadows than rescuing a dark file.
What is the difference between dynamic range and HDR?
Dynamic range is a property of a single capture: the span from shadow to highlight one exposure can hold. HDR (high dynamic range) imaging is a technique that combines several captures at different exposures to exceed that span, or a display technology that shows a wider span. HDR software cannot invent detail from a single clipped file; it needs the bracketed frames to contain it.
Which camera settings maximise dynamic range?
Base ISO, RAW capture, and a flat or neutral picture profile for accurate histograms. Avoid in-camera HDR and strong contrast profiles for files you plan to edit, and keep the lens clean and hooded — flare washes out shadows and quietly steals range in backlit scenes. Expose so highlights just stay below clipping; the histogram and highlight warnings exist precisely for this judgement.
Does a lens affect dynamic range?
Yes, quietly. A lens with poor flare control scatters light across the frame in contrasty scenes, lifting the shadows with veiling glare and reducing the range the sensor can usefully record. A clean, hooded, well-coated lens preserves the scene’s contrast for the sensor to capture. This is why the same camera can seem to gain range with a better lens in backlit conditions, and why keeping front elements clean and shaded is a dynamic range habit, not just tidiness.
Should I always expose to protect the highlights?
As a default in daylight, yes, because clipped highlights are unrecoverable while shadows usually retain something. But defaults have exceptions: a night scene may be exposed for its lit subjects with highlights allowed to bloom, a high-key portrait may let a background go white deliberately, and a silhouette inverts the rule entirely. Protect the highlights that matter to the photograph, which is a judgement about the picture, not a law about the histogram.
Do newer cameras always have more dynamic range?
Generally the trend is upward, but slowly, and with exceptions in both directions. Sensor design improvements have added range gradually over generations, while some high-resolution or video-focused models trade a little range for their other strengths. The differences between current cameras are smaller than the differences made by exposure decisions, which is why this guide spends more words on your histogram habit than on any model’s figures.