Knowing how to store a camera correctly matters most in the months you are not thinking about it. Fungus growing inside a lens, a battery swelling in a forgotten body, rubber grips turning sticky in a hot cupboard — these are storage injuries, and they happen silently to gear that was working perfectly when it was put away. The enemies are humidity, heat, dust and neglect, and all four are easy to defeat with the right container, the right preparation and an occasional five-minute check.
This guide covers both everyday storage between shoots and long-term storage for seasonal gear, backup bodies and film-era treasures. The principles are identical for a new mirrorless camera and a decades-old SLR; only the battery steps differ. If humidity is your local climate’s default setting, treat the dry-storage steps as mandatory rather than optional — in the tropics, fungus is not a risk but a schedule. Pair this guide with how to clean a camera before any long rest period.
Disclosure: As an Amazon Associate, kajuandouglas.com earns from qualifying purchases. Links to Amazon on this page are affiliate links; they cost you nothing extra. Listing details such as price and availability change often, so check the current Amazon listing before you buy.
How to Store a Camera: The Short Answer
Clean the camera, remove the battery, and store body and lenses in a dry, cool, dark place with silica gel keeping humidity near the middle of the safe range — roughly 40–50 percent relative humidity. Use a dry cabinet if you live somewhere humid. Exercise stored gear briefly every month or two, and never store a camera in a car, a loft or a sealed plastic bag with damp air inside.
In this guide
What You Need
Good storage needs a few inexpensive supplies and a decision about where the gear will live:
- Silica gel packets (rechargeable ones can be dried in an oven and reused) or an electric dry cabinet for humid climates
- A clean, padded camera bag or a dedicated shelf/cabinet away from windows, radiators and exterior walls
- Body caps and rear lens caps for every item, so mounts and rear elements stay covered
- A small hygrometer if you want to verify humidity rather than guess it
- Microfibre cloths and a blower for the pre-storage clean
- Labels or a simple inventory note recording what is stored where, and when batteries were charged
How to Store a Camera Step by Step
Do these steps in order whenever a camera will rest for more than a few weeks; the everyday version is simply steps 3, 4 and 5.
Step 1: Clean everything before it rests
Dirt stored is dirt cemented. Blow and wipe the body, clean the lens glass, and empty grit from the bag itself — shake it out and vacuum the seams. Check the sensor with the plain-wall test shot and clean it if needed, because spots left for a year are harder to shift. Most importantly, inspect lenses against a bright light for any web-like fungus threads; a lens showing fungus must be stored separately and dealt with promptly, since spores spread to neighbours. Our guide on how to fix a camera lens with fungus explains the options.
Step 2: Prepare batteries and cards properly
Remove the battery from any camera storing longer than a few weeks. Lithium batteries prefer storage at partial charge — around half — rather than full or empty, and a removed battery cannot leak, swell unnoticed or drain itself against a fault. Download and back up memory cards, then format them in-camera when the camera is next used rather than storing precious photos on a card in a drawer. Store batteries in their plastic cases, terminals protected, in the same cool dry place as the gear.
Step 3: Cap, cover and position the gear
Fit the body cap and rear lens caps, and leave a lens mounted only if the combination will rest undisturbed in its bag — for long storage, capped bodies and lenses stored separately avoid stress on the mount. Position lenses upright on their mounts rather than lying on their front elements. If gear lives on a shelf, keep it out of direct sunlight, which fades markings, perishes rubber and heats internals daily. A closed cabinet or the camera bag itself, zipped against dust, both work well.
Step 4: Control humidity — the critical step
Aim for roughly 40–50 percent relative humidity. Above about 60 percent, fungus risk climbs steeply; below about 30 percent, lubricants dry and leatherette and rubber can crack over years. In a dry cabinet, set the dial to the middle of its range and verify with a hygrometer. In a bag or box, add generous silica gel and recharge or replace it monthly in humid seasons — saturated gel does nothing. Never seal damp gear in an airtight box: you have built a fungus incubator. Dry the gear first, then seal the dryness in.
Step 5: Choose the right location
The ideal spot is an interior room with stable temperature: a wardrobe shelf, a cabinet in a living space, a drawer away from exterior walls that condense in winter. Avoid lofts and garages, whose temperature swings are extreme; avoid cars entirely; avoid the floor in flood-prone rooms; avoid kitchens and bathrooms for their steam. Consistency beats perfection — a steady 22 degrees and moderate humidity in a hallway cupboard beats a theoretically ideal cabinet in a freezing outbuilding.
Step 6: Exercise stored gear on a schedule
Every month or two, take each stored camera out, fit a battery, fire the shutter a few times at varied speeds, run the autofocus and aperture through their ranges, and check the lens focus and zoom rings still turn smoothly. This redistributes lubricants, keeps shutter mechanisms honest and — just as valuably — makes you notice problems early, while they are cheap. Recharge storage batteries back to roughly half afterwards. Put a recurring reminder in your calendar; gear exercised quarterly essentially never dies in storage.
Step 7: Bring gear back into service carefully
After long storage, reverse the process with the same care: inspect for fungus and dust, clean the battery contacts if the camera behaves erratically, charge the battery fully, format a card in-camera, and update firmware if the manufacturer has released fixes during the rest. Take test shots at small apertures to check for sensor spots before an important shoot. If the camera spent its rest in the cold, let it warm to room temperature inside a sealed bag so condensation forms on the bag instead of the optics — the same trick as how to protect a camera recommends after winter shooting.
Dry Cabinets, Bags and Boxes Compared
An electric dry cabinet is the gold standard in humid climates: it holds a set humidity indefinitely, displays it honestly, and doubles as tidy display storage. For temperate climates, a sealed plastic box or the camera bag with rechargeable silica gel achieves the same result at a fraction of the cost, provided you actually recharge the gel — set a phone reminder, because everyone forgets. Ordinary wardrobes are fine where indoor humidity naturally sits in range; a cheap hygrometer tells you within a day whether your home qualifies, and guessing wrong in the humid direction is the expensive error.
Whatever container you choose, keep it only for camera gear. Sharing a box with shoes, camping kit or anything that comes home damp defeats the entire system. Label stored items with the date they were put away and their battery state; future-you, hunting for a lens in a hurry, will be grateful.
Storing Film Cameras and Vintage Lenses
Film cameras add two considerations: remove batteries without fail, because decades-old cells and even modern ones corrode contacts during long rests, and store them with the shutter uncocked where the design allows, relaxing spring tension. Light seals and mirror foam degrade with age and heat regardless, so cool storage slows an inevitable refurbishment rather than preventing it. Vintage lenses deserve the same humidity discipline as modern ones — fungus is no respecter of heritage — and their simpler mechanics reward the monthly exercise routine even more, since old lubricants stiffen faster.
Gear for This Guide
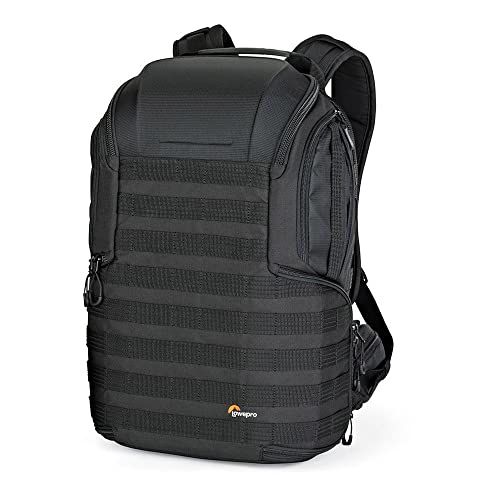
A structured, padded backpack doubles as excellent home storage: dividers keep lenses from touching, the shell sheds dust, and there is room inside for silica gel packets:

Lowepro ProTactic 450 AW II Camera Backpack — Check price on Amazon. A solid, widely available option that fits this guide; confirm the exact kit contents and lens mount on the listing before ordering.
Common Mistakes
The worst storage mistake is the airtight box of damp gear — a camera put away wet from a rainy shoot, sealed in plastic ‘to keep dust out’, grows fungus with scientific reliability. The second is the car boot or loft, where summer heat cooks batteries and lubricants. Third is forgetting entirely: gear stored without the exercise routine in Step 6 can sit for three years and emerge with a seized focus ring and a swollen battery that needs prising out.
Also avoid storing cameras with leather cases or straps in humid conditions — leather itself moulds enthusiastically and feeds the ecosystem you are trying to starve. And do not store the only copy of your photos on a card inside the stored camera; cards fail, get formatted and get lost. Back up first, then store.
Pro Tips
Keep a small ‘storage log’ note in the bag: date stored, battery charge state, gel recharge date. It turns the monthly exercise routine from a memory test into a checklist. When buying rechargeable silica gel, choose the type that changes colour when saturated — it removes all doubt about when to recharge.
If you inherit or rescue gear that has clearly lived somewhere damp, quarantine it from your healthy kit for a few weeks while you inspect and clean it. Fungus and mould spores are patient travellers, and your dry cabinet should be a sanctuary, not a hospital ward. Healthy storage is mostly this: clean, dry, capped, exercised and boring.
Storing a Working Kit vs an Archive Kit
Gear you shoot weekly and gear you keep for years need different storage philosophies. The working kit lives for access: bag packed, batteries rotating, gel checked monthly, everything reachable in the dark. Compromises toward convenience are correct here — a battery left in a body you use every weekend harms nothing. The archive kit — backup bodies, inherited lenses, the film camera you shoot twice a year — lives for preservation: batteries out at half charge, humidity verified, exercise scheduled, items labelled with their state and date.
Confusing the two causes most storage losses: archive gear stored like working gear (battery in, bag in a damp room) degrades silently, while working gear stored like archive gear (disassembled into a dry cabinet across the house) simply stops being used. Sort your shelf honestly into the two categories once, label them, and apply each regime where it belongs.
Humidity Emergencies: Floods, Leaks and Damp Houses
If stored gear meets water — a leak, a flood, a burst pipe — speed beats technique. Remove batteries immediately, do not power anything on to ‘check’, dry exteriors, and place items in a sealed box with abundant fresh silica gel or uncooked rice as a stopgap desiccant while you contact a repairer the same day; corrosion timelines run in hours. Photograph everything for insurance before moving it if you safely can. Gear that was merely in a newly damp room — a dehumidifier failure, a humid season — needs inspection, not panic: torch-check every lens for fungus, run the dry-storage regime hard for a week, and monitor.
Prevention for damp-prone homes is architectural: store the kit in the most interior, driest room, off the floor, in a dry cabinet whose reliability does not depend on your memory. In genuinely tropical housing, treat the cabinet as furniture — bought once, plugged in permanently, checked when you pass it. Every storage disaster story in photography begins with good gear in a bad room; the room is the decision.
The Science of Humidity in Plain Terms
Humidity control sits at the centre of this guide because it is the storage variable that does the most damage while attracting the least attention. Relative humidity describes how much water vapour the air holds compared with how much it could hold at that temperature, and it swings with weather, heating and season far more than most people realise. The range camera makers and archivists generally aim for sits comfortably in the middle: dry enough that fungal spores struggle to germinise on lens coatings and leather, humid enough that lubricants do not dry out prematurely and leather does not crack. Both extremes in the usual advice exist for a reason. A sealed box in a tropical rainy season can sit far above the safe range for months, which is precisely the environment in which lens fungus blooms, while a camera kept beside a dehumidifier outlet or in aggressively air-conditioned dryness for years can develop stiff focus action and brittle coverings.
The practical tool that turns guesswork into management is a small hygrometer, the inexpensive kind sold for instrument cases and cigar storage. Put one wherever the camera lives and read it across a week, morning and evening, before buying anything. Many people discover their storage spot is already acceptable for most of the year and only drifts during one season, which changes the solution from a permanent dry cabinet to a seasonal box with rechargeable desiccant. Others discover a cupboard against an outside wall runs far damper than the room around it, and simply moving the kit to an interior shelf solves a problem they were about to spend money on. Measure first is dull advice, and it is the advice that separates storage that works from storage theatre.
Silica gel, used properly
Silica gel only protects a space it can keep up with, and it saturates silently. The colour-indicating kind, which changes colour as it absorbs moisture, removes the guesswork: when the colour says it is spent, recharge it by the maker’s method, usually gentle heat in an oven, and let it cool in a sealed jar before returning it to duty. Use enough for the volume; a single small sachet in a large, frequently opened bag is decoration rather than protection. Rotate two sets so one is always active while the other recharges, and note the recharge date if you keep several kits in different places. In a properly sealed box with adequate gel and a hygrometer you trust, you have built ninety percent of what an electronic dry cabinet does, at the cost of remembering a monthly glance.
Storing Lenses Separately From Bodies
Lenses and bodies age differently in storage and benefit from being considered separately. A lens stored mounted on a body is fine for a working kit in regular use, but for longer storage many photographers separate the two, capping both, so that any problem in one, a fungus outbreak in a lens, a leaking battery in a body, cannot quietly involve the other. Store lenses upright on their mount end or lying on their side on a clean shelf, with both caps fitted and, for lenses with aperture rings, the aperture set away from its extremes. Zoom lenses are best stored at their shortest physical length, which retracts the extending barrel and protects it from knocks and dust ingress. Lenses with extending front elements should never bear weight on that element in a crowded box.
Periodically, stored lenses need light and movement as much as bodies do. Fungus dislikes light and dry moving air, so the exercise routine in this guide, a few frames and a few turns of every ring every month or two, doubles as lens protection. Work the aperture through its range and confirm the blades open and close evenly and without visible oil on the glass; oil on aperture blades is a service item that is cheap early and expensive late. Focus rings that have grown stiff in storage often free up with gentle repeated movement, but a ring that stays gritty or uneven should be serviced rather than forced, because forcing distributes whatever is inside the mechanism.
Storing filters, hoods and small accessories
Filters stored loose in a bag scratch each other and shed their coatings onto everything else. Keep each in its case, or stack them with the simple threaded stack caps sold for the purpose, and clean a filter before storing it so that fingerprints, whose mild acidity can mark coatings over months, do not sit undisturbed until next season. Hoods should be stored fitted in reverse on the lens or nested separately, never crushed under bodies in a box. Batteries, chargers, cables and cards each deserve the same tidiness: batteries at partial charge in a hard case with terminals protected, cards in a closed case rather than loose in a drawer, and cables coiled loosely rather than kinked around a fist. Storage quality is mostly the accumulation of these small kindnesses.
Storage for Different Lives: Daily Shooters, Collectors and Travellers
The daily shooter’s storage problem is barely storage at all; the camera rests for hours or days, not months, and the priorities are readiness and habit. A consistent home position, on a shelf or in an open bag away from radiators, windowsills and the reach of small children and pets, with the battery charging rotation understood by the whole household, serves better than any sealed system that adds friction to picking the camera up. Friction is the enemy: a camera that takes five minutes to liberate gets left behind, and a left-behind camera takes no photographs at all. For this user, humidity only matters if the home itself is damp, in which case a simple sealed box for overnight resting solves it without sealing away convenience.
Collectors and keepers of family cameras face the opposite problem: decades, not days. For them the dry cabinet or the disciplined sealed box, the exercise schedule, the battery removal and the written inventory all earn their place. Photograph and list every item, note serial numbers, and store that record away from the kit itself. Vintage leather cases, beautiful as they are, should not be long-term storage vessels, because old leather holds moisture and can harbour the very spores you are excluding; store the camera protected, and keep its period case separately as an artefact. Travellers returning from long trips have a third pattern: a proper post-trip routine, clean everything, dry everything for a day in open air in a dry room, inspect for sand and salt, charge batteries to storage level, back up and verify every card before formatting anything, and only then put the kit away. Trips end badly in storage more often than they end badly in the field, because damp and grit are patient.
Storing a camera during a house move or renovation
Two ordinary life events destroy more stored cameras than any climate: building work and moving house. Renovation dust is fine, alkaline and everywhere, and it penetrates ordinary bags and boxes left in the same house. During building work, seal the kit in a genuinely airtight container with desiccant and, if possible, keep it in a different building or at least a finished, closed room. For a move, pack cameras as you would for shipping: caps on, batteries out, each item wrapped, no loose accessories sharing a compartment, boxes labelled as fragile and kept upright and off the floor of any vehicle or storage unit. Storage units themselves vary wildly in dampness; an interior, upper-floor unit is a different world from a ground-floor container by a yard, and for anything irreplaceable, a relative’s spare room beats both.
Reviving Gear After Long Storage, Step by Step in Words
Bringing a camera back after a year or more away deserves the same patience as putting it away received. Begin with inspection in good light before any battery goes near it: look for fungus in lenses, corrosion in the battery compartment, perished seals, and any smell of mildew from the bag or case. Clean the exterior and the contacts, fit a battery you trust rather than the one that sat for a year, and power on with no lens fitted first if the camera allows it, listening for anything unusual. Fit a lens, format a card in the camera, and take test photographs at several apertures against a plain surface to check the sensor, then photograph something with fine detail at your usual settings to check focus and exposure behaviour. Work every dial and button through its range, because switches that sat in one position can be lazy on first use and free up with exercise.
If anything fails that sequence, stop and assess rather than repeating power cycles hopefully. A camera that was stored correctly almost always returns to service with nothing more than this routine and a fully charged battery, which is the quiet reward for the unglamorous work this guide describes. Storage done well is invisible: years later, everything simply works.
What Happens Inside a Camera That Sits Too Long
Understanding why exercise matters makes the schedule easier to keep. Lubricants in focus mechanisms, aperture linkages and shutter assemblies are designed to move; left static for years they can migrate, thicken at the edges of their travel, or allow surfaces to sit in one contact patch indefinitely. Aperture blades that rest in a single position can begin to stick, showing up later as inconsistent exposures. Shutter curtains and mirrors on older designs benefit from occasional cycling for the same reason a car benefits from being driven rather than garaged forever. On the electronic side, capacitors age whether used or not, but a camera powered up periodically at least reveals problems while they are small, a clock battery failing, a dial developing a dead spot, a card slot contact oxidising, rather than presenting all of them on the one day you reach for it after three years.
There is also a data dimension to long storage. Memory cards are not archival media; charge stored in their cells fades over years, faster in heat. A camera put away with its only copies of family photographs still on the card is not a storage system, it is a slow loss. Before any long rest, copy everything off, verify the copies, and store the card empty or with the camera as you prefer, knowing the photographs themselves live elsewhere. The same applies to settings you care about: custom configurations and menu choices are easier to note in a phone note now than to reconstruct from memory years later.
Batteries in storage, revisited with more detail
Lithium batteries age by calendar as well as by use, and storage charge is the variable you control. A cell stored fully charged stresses its chemistry continuously, while one stored completely empty risks dropping below the voltage from which a normal charger can recover it. The middle charge recommended in this guide is the compromise battery engineers themselves suggest for longevity. In practice that means charging or discharging to roughly half before a long rest, storing cells cool and dry outside the camera, and checking them every few months during your exercise routine. A battery that swells, even slightly, or that no longer sits flat in its compartment, should be retired and recycled promptly rather than stored hopefully; swelling is the one battery symptom that is never cosmetic. Mark each battery with its purchase date on a small label, and rotation becomes effortless, because you can see at a glance which cell is oldest and which has been resting longest.
Storing the Wider Photography Desk
Many camera kits share a home with the rest of a photography desk, and those neighbours have storage needs of their own that interact with the camera’s. Photo printers should be stored powered in their normal position if they will be used within weeks, because their own maintenance cycles protect the print head, and switched off and covered against dust for longer rests, accepting a cleaning cycle on their return. Ink and paper store best in the same moderate conditions as cameras, away from heat and damp, with paper kept flat in its packaging to avoid curl and fingerprints. Scanners need their glass kept clean and their lids closed against dust, and their transport locking switch, if fitted, engaged before any move and released before use.
External drives holding your archive deserve the same humidity and temperature courtesy as the cameras that made the photographs, plus one rule of their own: a drive that is never spun up cannot tell you it is failing. Power archive drives during your periodic exercise routine, let them run their own checks, and confirm a sample of older folders still opens. Storage, seen whole, is a single system that begins at the sensor and ends at the archive, and the camera in its box is only the most visible part of it.
Storage Mistakes Specific to Modern Mirrorless Kits
Newer cameras introduce a few storage considerations their predecessors did not have. A mirrorless sensor sits exposed whenever no lens or cap is fitted, so the body cap is not an optional accessory in storage; it is the sensor’s only protection against settling dust for months at a time, and it should be fitted whenever a lens comes off for more than a lens change. Some bodies close a shutter curtain over the sensor when switched off, which helps against dust but is a delicate mechanism that should never be touched or relied on as a cap substitute. Electronic viewfinders and rear screens benefit from the same dark, moderate storage as everything else, and cameras stored in bright light for years, on a sunny shelf as decoration, can age their screens and coverings unevenly. Pretty display and good storage are different goals; if a camera must live on display, rotate it out of direct sun and accept the compromise knowingly.
Adapters, electronic contacts and in-body stabilisation add small footnotes. Store adapters capped at both ends like lenses, because their contacts and inner surfaces collect the same dust. A body with in-body stabilisation parks its sensor assembly when powered down, and manufacturers advise against shaking or knocking the body in storage or transit more than necessary; normal careful handling is all that is required, but a body should not ride loose in a box of accessories. Firmware is a storage topic too, in a minor way: a camera stored for years will return to a world of newer firmware, and updating it is part of the revival routine, after you have confirmed it works as stored, so that any change in behaviour has an obvious cause.
The spare-room test for your storage spot
If you are choosing between candidate storage places at home, apply four quick tests. Is the spot out of direct sunlight at every hour of the day, in every season? Does its temperature stay within the range you would comfortably sleep in, without a radiator, boiler or sun-baked wall involved? Does the air move a little, or at least not sit sealed and damp, and can you place a hygrometer there for a week to prove it? Finally, is it a place you will actually open and use, because a perfect store that nobody visits fails the exercise requirement silently. A spot that passes all four is good storage, whatever it looks like. A beautiful cabinet that fails the sunlight test is furniture, not protection.
An Annual Storage Audit in Under an Hour
Once a year, give the whole stored kit a structured hour. Empty the storage space completely and clean the space itself, shelves, box interiors and cabinet, because the container accumulates the dust you have been excluding from the cameras. Inspect every lens against the light, work every mechanism, power every body, and charge and discharge every battery to its storage level. Replace or recharge desiccant, check the hygrometer against reality, and update the inventory with anything bought, sold or retired during the year. Photograph the kit for your records while it is all out, which refreshes your insurance evidence at the same time.
That single hour is where storage problems are actually caught: the lens beginning to haze at the edge, the battery starting to swell, the seal perishing on a favourite old body, the desiccant spent since spring. Every one of those is a small, cheap discovery in an audit and an expensive one a year later. Storage, done this way, stops being a set of anxieties and becomes what it should be, a quiet annual habit with a camera collection that simply keeps working.
Storing Cameras in Small Homes and Shared Spaces
Not everyone has a spare room or a dedicated cabinet, and good storage scales down gracefully. In a small flat, the best store is often a single sealed plastic box with a gasket lid, a rechargeable desiccant unit and a small hygrometer, kept on an interior shelf of a wardrobe or cupboard. That box outperforms a large, leaky cabinet in a damp room, because storage quality is about the air immediately around the camera, not about furniture. Label the box plainly if it shares space with household storage, so it is not mistaken for general clutter during a clear-out, and keep a simple list taped inside the lid of what belongs in it, which makes the absence of an item obvious at a glance.
Shared houses add a social dimension: housemates and family should know that the box or shelf is not general storage, that nothing damp, a gym kit, wet shoes, a recently used umbrella, gets parked beside it, and that the camera is not a household item to borrow without asking. Most shared-space damage is really shared-space misunderstanding, and one conversation prevents it. If children are in the home, height and a latched box do the work that rules alone cannot, and a separate inexpensive camera they are allowed to use freely will protect the stored kit better than any prohibition.
When storage and display genuinely have to combine
Some cameras are loved as objects as much as tools, and owners reasonably want them visible. The compromise that respects both impulses is a glass-fronted cabinet on an interior wall out of direct sun, with a desiccant unit inside and the door opened regularly for the exercise routine. Accept that coverings and screens in a lit room age faster than in the dark, rotate which camera is displayed if you have several, and keep anything of serious working or sentimental value in the dark store rather than on show. Display is a legitimate choice made with open eyes; it only becomes a storage mistake when it pretends to be protection as well.
Records Worth Keeping With a Stored Kit
Close the storage system with paper. Keep, in one place away from the kit itself, a list of bodies and lenses with serial numbers and purchase dates, service receipts, and a note of the storage location if it is anywhere unusual, a relative’s house, a storage unit, a safe. That last detail sounds excessive until a family needs to find a parent’s cameras quickly, or an insurer asks where an item was kept. Add a line in the record for each annual audit, so the kit’s maintenance history exists as a fact rather than a memory. Photographers are remembered by their photographs, but their cameras survive by their paperwork, and an hour spent on records protects the collection in ways no cabinet can.
A Final Word on Proportion
It is possible to worry about storage out of all proportion to its risks, and this guide’s detail should not be read as a warning that cameras are fragile. They are not. Photographers have kept cameras in drawers, cupboards and camera bags for a century and used them for lifetimes. The measures here are aimed at the specific, avoidable losses, fungus from damp, damage from neglect, batteries ruined by heat, that account for nearly all storage failures. Apply the few that match your climate and your home, keep the exercise habit, and then forget about storage entirely and go and take photographs, which is what the stored camera is for.
Related Guides
- best cameras for photography
- best bags for cameras
- best cameras for travel
- best cameras under 1000
- best cameras for beginners
Frequently Asked Questions
What humidity is safe for storing cameras and lenses?
Roughly 40 to 50 percent relative humidity is the sweet spot most manufacturers and repairers recommend. Sustained levels above about 60 percent invite fungus growth on lens coatings and internal elements, while very dry air below about 30 percent can, over years, dry lubricants and make rubber and leatherette brittle. A dry cabinet or silica gel in a sealed box, checked with an inexpensive hygrometer, keeps you in range.
Should I remove the battery before storing a camera?
Yes, for storage beyond a few weeks. A removed battery cannot drain against a fault, leak, or swell unnoticed inside the body. Store lithium batteries at roughly half charge, which is the state that ages slowest, in their protective cases in the same cool, dry place. For everyday storage between weekend shoots, leaving the battery in is perfectly fine.
Can I store my camera in its bag?
Yes, provided the bag is clean and dry and the room itself is not humid. A zipped bag keeps dust off and pads against knocks, and with silica gel inside it becomes a perfectly good micro-environment. The exceptions are damp bags — dry one thoroughly after a wet shoot before storing gear in it — and humid climates, where a dry cabinet’s active control is worth the investment.
How often should I take stored cameras out and use them?
A brief exercise every one to two months is ideal: fire the shutter at several speeds, run autofocus and aperture through their ranges, and turn focus and zoom rings through their full travel. Five minutes per item redistributes lubricants, keeps mechanisms from stiffening, and lets you catch fungus, battery or corrosion problems while they are still cheap to fix.
Is it safe to store a camera in a car or garage?
No. Cars and garages swing through the worst temperature and humidity ranges a home offers — hot enough in summer to damage batteries, screens and lubricants, cold and damp enough in winter to invite condensation and fungus. Short transport is fine, of course, but as a home for gear, choose an interior room with stable conditions instead.
How do I store a camera for a year or more?
Clean it thoroughly, inspect lenses for fungus, remove the battery at half charge, cap body and lenses, and place everything in a dry cabinet or a sealed box with fresh silica gel. Note the date and battery state, exercise the gear briefly every couple of months if you possibly can, and recharge or replace the gel on schedule. On its return, warm it up gradually, charge fully, format a card in-camera and take test shots before trusting it with an important shoot.
Can I store my camera in a safe or a locked cabinet?
You can, with one caution: enclosed metal safes and unventilated cabinets can trap humid air, and some safes run surprisingly damp inside. If you store a camera in one, include a rechargeable desiccant unit and a hygrometer, and check them on the same schedule as the exercise routine in this guide. A fire-rated safe protects against a rare catastrophe while quietly risking the common one, fungus, unless the humidity inside is managed. With gel and a meter in place, a safe is perfectly good storage; without them, an ordinary interior cupboard is often safer for the optics.
Should lenses be stored attached to the camera or separately?
For a working kit in weekly use, an attached standard lens is convenient and harmless, and it keeps dust out of both mounts. For storage measured in months, separating body and lenses, each capped, is the better practice: a problem in one item cannot involve the other, seals and mounts rest unloaded, and each lens can be inspected and exercised on its own schedule. Either way, caps are non-negotiable. An uncapped mount in storage is an open door, and most sensor dust that seems to appear from nowhere arrived through exactly that door during a quiet month in a cupboard.
Is it safe to store a camera near books, clothes or other household items?
Generally yes, and an ordinary wardrobe shelf is the storage many photographers use successfully for decades. Keep the camera in its box or a sealed container rather than loose among fabrics, because clothing sheds lint and holds household moisture, and keep it away from moth treatments, strong fragrances and cleaning chemicals, whose vapours do optics and coverings no favours over months. Books are benign neighbours. The rules remain the ones in this guide: moderate temperature, managed humidity, no direct sun, and a visit every month or two to exercise the mechanisms.