People often search for “how to set up for beginners a camera” the day a new camera arrives, staring at a menu system with hundreds of options and a manual the size of a novel. The good news is that a beginner only needs about a dozen settings changed from factory defaults; the rest can wait until a specific photograph demands them. Set those dozen well and the camera stops fighting you — autofocus lands where you intend, files are large enough to edit, and the controls you use most sit under your fingers.
This walkthrough assumes a typical interchangeable-lens camera or advanced compact, and every step explains why the setting matters, not just where it hides. Work through it with the camera in your hands, take test shots as you go, and by the end your camera will be configured the way most working photographers configure theirs. If you are still choosing the camera itself, start with how to choose a camera and come back here when it arrives.
Disclosure: As an Amazon Associate, kajuandouglas.com earns from qualifying purchases. Links to Amazon on this page are affiliate links; they cost you nothing extra. Listing details such as price and availability change often, so check the current Amazon listing before you buy.
Beginner Camera Setup: The Short Answer
Charge the battery, format the card in-camera, set the clock, shoot RAW+JPEG, choose single-point or eye-detection autofocus, turn on stabilisation, set auto ISO with a sensible ceiling, enable the histogram and highlight warnings, and assign your most-used function to a custom button. Then shoot in aperture-priority mode while you learn. The steps below put each of those in order.
In this guide
What You Need
Setup takes about twenty unhurried minutes. Have these ready:
- The camera with its kit lens attached and the battery fully charged
- A memory card you are happy to erase — formatting is part of setup
- The camera manual or the manufacturer’s PDF on your phone, for model-specific menu names
- A willing test subject or a still life by a window, for checking autofocus and exposure
- A notebook or phone note to record the settings you changed, so you can revisit them later
How to Set Up a Camera for Beginners, Step by Step
Menu names vary slightly between brands, but every modern camera has equivalents of all of these. Search your manual’s index when a name differs.
Step 1: Charge, insert, format and set the clock
Fully charge the battery, insert it and the memory card, then format the card in the camera — not on a computer — so the camera builds its preferred folder structure and the card starts error-free. Set the date, time and time zone accurately; correct timestamps keep your library organised and your travel photos in the right order. While you are in the setup menu, turn off the annoying beep if you shoot in quiet places, and set the screen brightness to manual so it does not mislead you about exposure outdoors.
Step 2: Choose your file type — RAW plus JPEG
Set image quality to RAW+JPEG if your camera offers it. The JPEG gives you an instantly shareable file with the camera’s colour processing applied; the RAW file keeps every scrap of data the sensor captured, so you can rescue exposure mistakes and adjust white balance later without quality loss. RAW files are large, which is the honest cost of that flexibility. If card space is tight, shoot RAW alone and batch-export JPEGs later. Beginners who shoot JPEG-only often regret it the first time a sunset’s highlights clip beyond recovery.
Step 3: Set autofocus to track your real subjects
For general shooting, choose continuous autofocus (called AF-C or AI Servo) with subject or eye detection enabled if your camera has it — modern eye autofocus is close to magic for portraits of people and pets. Learn where the single-point mode lives for static subjects through fences or foliage, where wide-area tracking gets confused. Set the camera to focus with a half-press of the shutter or, if your camera supports it, try back-button focus later; for now, the default half-press keeps things simple while the detection modes do the clever work.
Step 4: Configure auto ISO with guardrails
Auto ISO lets the camera raise sensitivity as light falls, keeping shutter speeds safe, but left unbounded it will happily produce noisy images at its maximum. Set a ceiling you are comfortable with — many APS-C cameras look good up to around ISO 3200–6400, full-frame higher — and set a minimum shutter speed near 1/125s for general work, faster for children and sports. This single step prevents the two classic beginner failures: blurred photos from slow shutters and needlessly noisy photos from runaway ISO.
Step 5: Turn on the exposure helpers
Enable the live histogram and the highlight warning (‘blinkies’) in playback, and learn to glance at them after test shots. The screen lies about brightness depending on ambient light; the histogram does not. Set your metering to evaluative/matrix for general scenes, and find the exposure compensation dial — the single most useful control for beginners — because brightening a snowy scene or darkening a sunset is a one-dial job once you know where it lives. Practise with your window still life until the histogram’s shape starts to feel predictable.
Step 6: Switch stabilisation on and set your drive mode
Confirm image stabilisation is enabled in the lens or body menu; it lets you hand-hold at slower shutter speeds without blur. Turn it off only on a tripod, where some systems can introduce drift. Set the drive mode to single shot for deliberate practice, and locate the burst mode for later — sports and wildlife days. Finally, set the self-timer location in your memory: a two-second timer on a tripod or a wall is the beginner’s secret weapon for sharp low-light landscapes without a remote.
Step 7: Customise one button and save your setup
Assign the function you will use most — often ISO, white balance or focus-area selection — to a customisable button near your right thumb, so changing it becomes reflex. Many cameras let you save the whole configuration to a custom mode on the dial (C1/U1); do that now, because menus get fiddled with and a known-good restore point is gold. Photograph your key menu screens with your phone as a backup record. Setup is done: the remaining step is the lifelong one of shooting, reviewing and adjusting. If soft photos persist despite all this, work through how to fix blurry photos before blaming the camera.
Your First Mode: Aperture Priority
Resist the green full-auto mode, which forbids most of the settings you just made, and shoot in aperture priority (A or Av) instead. You choose the aperture — small numbers like f/1.8–f/2.8 for blurred backgrounds in portraits, f/8–f/11 for landscapes sharp front to back — and the camera picks the shutter speed, with your auto-ISO guardrails keeping it sensible. This mode teaches the most important creative control in photography while the camera handles the arithmetic, and most photographers, including many professionals, live in it for everyday work.
Graduate to manual mode deliberately: pick one low-stakes session, such as a sunset or indoor still life, and work fully manually with the histogram as your guide. The understanding you gain — how aperture, shutter speed and ISO trade against each other — transfers to every camera you will ever own. Our best cameras for beginners roundup includes models whose beginner modes and guides make this learning curve especially gentle.
Colour, White Balance and Picture Profiles
Leave white balance on auto for now; modern cameras judge most lighting well, and RAW files let you change your mind losslessly later. Choose a standard or natural picture profile rather than a vivid one — it is easier to add punch in editing than to recover colours a heavy profile has clipped. If you shoot video, find the flat or log profile your camera offers but do not use it yet: log footage looks washed out until graded, and beginners are better served by standard profiles that look good immediately while they learn framing, light and audio.
Gear for This Guide
These beginner-friendly models all offer the eye-detection autofocus, guided menus and auto-ISO controls configured above:
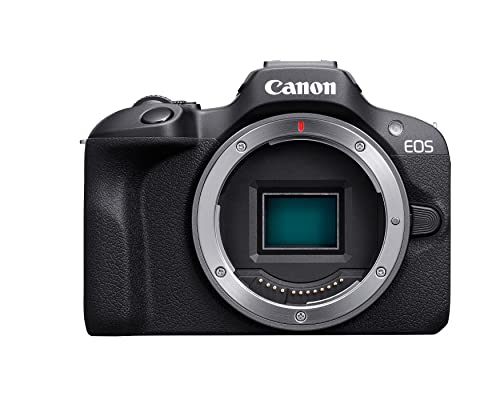
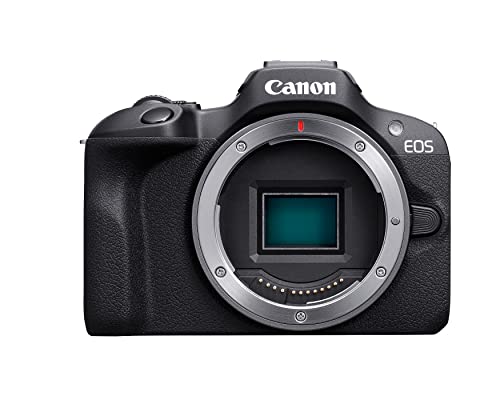
Canon EOS R100 Mirrorless Camera — Check price on Amazon. A solid, widely available option that fits this guide; confirm the exact kit contents and lens mount on the listing before ordering.

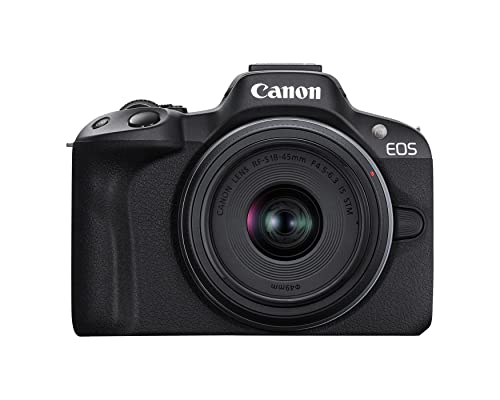
Canon EOS R50 Mirrorless Camera with RF-S 18-45mm Lens Kit — Check price on Amazon. A solid, widely available option that fits this guide; confirm the exact kit contents and lens mount on the listing before ordering.

Nikon Z 30 Mirrorless Camera with 16-50mm Lens — Check price on Amazon. A solid, widely available option that fits this guide; confirm the exact kit contents and lens mount on the listing before ordering.

Panasonic LUMIX G100 4K Mirrorless Camera — Check price on Amazon. A solid, widely available option that fits this guide; confirm the exact kit contents and lens mount on the listing before ordering.
Common Mistakes
The most common setup mistake is leaving the camera on its smallest JPEG size, sometimes a leftover from a previous owner or a showroom demo. Months of memories end up too small to print. Check image size explicitly in Step 2. The second mistake is the opposite extreme: changing fifty menu items from a forum list you do not understand, then being unable to diagnose odd behaviour. Change a few settings at a time, shoot, and keep the notes you made in Step 7.
Also avoid disabling stabilisation permanently because a forum said so, and avoid focus settings meant for specialists — tiny single-point focus as your only mode will miss moving kids all day. Defaults plus the dozen changes in this guide are a proven combination; exotic configurations can wait until a real photograph demands them.
Pro Tips
Do a five-minute settings rehearsal before any important shoot: check battery, card space, file type, focus mode and ISO ceiling in a fixed order until it becomes a pre-flight checklist. Photographers who ritualise this almost never lose a moment to a full card or a camera left in yesterday’s self-timer mode.
Revisit your setup monthly as a beginner. Settings that puzzled you in week one — back-button focus, custom white balance, zebras for video — become useful tools once your eye develops. The camera has not changed; you have. That is the whole point of setting it up thoughtfully rather than leaving it in full auto forever.
Settings to Revisit After Your First Month
Once the basics are reflexes, four deeper settings reward attention. Back-button focus separates focusing from shutter release — hold a rear button to focus, press the shutter only to shoot — and devotees swear it transforms moving-subject work; try it for a full week before judging. Custom white balance, set from a grey card or a sheet of white paper in tricky mixed lighting, rescues indoor colours that auto white balance renders orange or green. Focus peaking and magnification assist make manual-focus lenses and macro work precise. And your camera’s custom modes deserve a second slot: save a ‘fast action’ configuration (burst, tracking, fast minimum shutter) beside your everyday setup.
Video deserves its own revisit: set zebras or a waveform if offered, learn your camera’s cleanest high-ISO point for filming, and save a video configuration to the other custom slot so stills and video stops disturbing each other’s settings. The pattern to notice is that ‘advanced setup’ is not different knowledge — it is the same dozen decisions, re-made for a specific kind of photograph you have grown into.
Building Your Pre-Shoot Checklist
Convert this guide into a pocket ritual. Before anything that matters, run five checks in a fixed order: power (battery level, spare in bag), space (card formatted, second card if the day is long), files (RAW+JPEG, largest size), focus (mode matches the subject, detection on), exposure (auto ISO ceiling sane, compensation dial at zero). The order matters less than the fixity — pilots use checklists not because they forget, but because attention is finite and checklists spend it on the photograph instead.
Add a post-shoot ritual too: download and back up the same day, format the card only after the backup verifies, recharge the battery you used, and note one setting you wish you had changed. That note, reviewed monthly, is your personalised setup guide — the one no article can write for you, because it is compiled from your own photographs and your own regrets. Setup, done this way, is never finished; it just gets faster and more yours.
Understanding Exposure Settings as One Connected System
The setup steps in this guide give you guardrails, auto ISO with limits, aperture priority as your learning mode, and helpers switched on, and those choices work because the three exposure controls are connected rather than independent. Aperture controls how much light passes through the lens at once and how much of the scene is in focus from front to back. Shutter speed controls how long that light is gathered and whether movement is frozen or blurred. ISO controls how much the sensor signal is amplified, trading cleanliness for the ability to work in dimmer conditions. When you change one, at least one of the others must change to keep the photograph equally bright. Aperture priority mode, recommended earlier, is simply a way of saying: you choose the depth of field, the camera balances the rest within the limits you set. Understanding that triangle turns the camera’s decisions from mysterious to predictable, because you can look at any photograph and work out which corner of the triangle the camera pushed and why.
A useful beginner exercise is to photograph the same still scene, a plant on a windowsill works well, at every aperture your lens offers while the camera adjusts the rest, then compare the results on a larger screen. Notice the background dissolving as the aperture widens and the shutter speed climbing as it narrows. Repeat indoors in the evening and watch the ISO rise instead. Twenty minutes of this teaches more than a week of reading, and it makes the settings in this guide feel like tools you own rather than instructions you follow.
Reading the histogram and highlight warnings without fear
The histogram is a simple graph of how many pixels in your image sit at each brightness level, from pure black on the left to pure white on the right. It matters because the rear screen lies to you in bright sunlight and in dark rooms, appearing brighter or dimmer than the file really is, while the histogram reports the actual data. You do not need to chase a perfect shape. You need to watch the edges. A graph piled hard against the right edge with the highlight warning blinking means parts of the scene have recorded as featureless white, which no editing can recover. A graph crushed against the left means shadows have sunk to black. For most everyday scenes, keeping the graph clear of both walls, with a small nudge of exposure compensation when needed, produces files that edit gracefully. Check it after the first frame of any new lighting situation and then trust it.
Autofocus in Practice: Areas, Subjects and Tricky Scenes
Setting autofocus to track your real subjects is covered in the steps, but beginners benefit from knowing how focus areas behave so they can choose deliberately. A single small point gives you precision for still subjects, a subject behind branches, or a face in a crowd, because you alone decide the target. A zone or wide area hands the camera more freedom, which is faster for moving subjects but riskier when several possible subjects compete, such as a football match where the camera may prefer the nearest player rather than your child. Subject and eye detection, where your camera offers it, changes the balance again by recognising faces, eyes, animals or vehicles within the area you choose. The reliable pattern for beginners is to pair detection with a moderate zone rather than the whole frame, so the camera searches where you point it and then refines onto the eye.
Some scenes defeat every system and are worth recognising early. Low-contrast subjects such as a white bird against a bright sky, a plain wall, or a subject behind glass can make autofocus hunt. Strong backlight can pull focus to the brighter background. In those moments, focus on a nearby object at the same distance that has clear edges, or switch briefly to manual focus with magnification if your camera offers it. None of this is failure; professional sports and wildlife photographers use the same workarounds daily. What matters is having a calm fallback instead of half-pressing repeatedly while the moment passes.
Continuous versus single autofocus, settled simply
Use single autofocus for anything that is not moving toward or away from you: landscapes, buildings, posed portraits, food and still life. The camera locks once and you can recompose slightly if needed. Use continuous autofocus for anything that changes its distance: children at play, pets, sports, walking portraits and vehicles. The common beginner error is leaving the camera in continuous mode for everything, which can cause the focus to drift while recomposing a still scene, or leaving it in single mode for a running child, which guarantees a trail of almost-sharp frames. Many cameras offer an automatic switching mode that tries to decide for you. It is convenient, and for casual use it is fine, but learning to choose deliberately will give you a higher keeper rate within a few outings.
Colour and File Settings for Different Kinds of Beginners
The recommendation to shoot RAW plus JPEG gives you a safety net and an editing future in one card, but it is worth understanding what each file really is so the choice stays yours. A JPEG is a finished photograph: the camera has applied colour, contrast, sharpening and noise reduction, then discarded the extra data to keep the file small. That is ideal for sharing immediately and for beginners who do not want to edit. A RAW file keeps the sensor data with minimal processing, which lets you correct exposure mistakes, rescue bright skies, and change white balance completely after the fact, at the cost of larger files and an editing step. Shooting both means your phone-friendly JPEGs are ready tonight while your RAW files wait patiently for the day you want to learn editing, including for the early photographs you will care about most.
White balance deserves a beginner-friendly explanation because it explains many disappointing first results. Light has colour: tungsten bulbs are warm and orange, shade is cool and blue, and overcast light sits between. Your eyes correct automatically; the camera needs guidance. Automatic white balance handles most daylight well but can be fooled indoors, where it may leave family photographs looking yellow, or in mixed light where no single setting is fully correct. If your indoor JPEGs look too warm, try the tungsten or incandescent preset for a room lit by bulbs, and compare. RAW shooters can postpone this decision entirely, which is one more reason the dual-file setup suits learners.
Picture profiles and creative looks
Most cameras offer named colour styles such as standard, vivid, portrait, landscape or flat. These affect JPEGs directly and also change the preview you see, even when shooting RAW. Beginners are best served by standard or a gentle portrait style for people, because vivid modes can push skin tones toward orange and make greens glow unnaturally. Film-simulation styles on some systems are a legitimate joy and a valid reason people choose those cameras; if you love one, use it for your JPEGs while your RAW files preserve a neutral version. What to avoid at the start is stacking creative filters, heavy in-camera effects and extreme settings on top of each other. Learn what a clean file from your camera looks like first, then season to taste.
A First Month Practice Plan That Builds Real Skill
Settings only become skill through repetition, so here is a simple four-week rhythm that turns this setup into instinct. In week one, shoot only in aperture priority with auto ISO as configured, and take the camera somewhere every day, even for ten minutes around your home. Review your images each evening and delete ruthlessly; learning to judge your own work is half of photography. In week two, add deliberate aperture choices: photograph the same subject at your widest and narrowest sensible apertures and study the difference in background and shutter speed. In week three, practise autofocus choices, single mode for still subjects on one outing, continuous with tracking for anything that moves on the next. In week four, photograph in difficult light on purpose: a dim room, a bright beach or street at midday, and a backlit portrait at sunset, using exposure compensation and the histogram to hold detail.
Throughout the month, keep a tiny notebook or a note on your phone with three columns: what I tried, what worked, what confused me. Bring the confused column back to this guide and to your camera manual. Beginners often believe professionals never feel confused by settings, when in truth they simply have a shorter list of confusions because they resolved the common ones early, exactly as you are doing. By the end of the month, the setup in this guide will no longer be a list you remember; it will be the way your camera simply is.
Setting up for your first specific subjects
- Children and family at home: continuous autofocus with eye detection, a moderate focus zone, auto ISO with a reasonably fast minimum shutter speed, and burst mode in short groups so you can pick the expression rather than hope for it.
- Travel and days out: aperture priority around the middle apertures for general scenes, single-point or small-zone focus for buildings and details, and image stabilisation on; switch to continuous focus only for moving subjects such as boats, trams or street performers.
- Pets: animal eye detection if offered, continuous focus, the fastest shutter speeds your light allows, and get down to the animal’s eye level, which transforms results more than any setting.
- Landscapes: single autofocus, low fixed ISO for the cleanest files, narrower apertures for front-to-back sharpness, and a self-timer or remote release if the camera is on a tripod.
- Evening and indoor events: your widest aperture, auto ISO with the ceiling you set in the setup steps, and exposure compensation dialled slightly down to protect bright faces and lights from blowing out.
Customisation, Memory and Making the Camera Yours
The setup steps suggested customising one button and saving your configuration, and after your first month you will know which second and third controls deserve promotion. Good candidates are the functions you reach for under time pressure: switching focus area, toggling eye detection, changing ISO behaviour, or turning the electronic shutter on for silence. Avoid customising everything at once, because a camera whose every button does something non-standard becomes a puzzle when you pick it up after a break. Change one control, use it for a week, and only then consider the next. If your camera can save settings to a memory card or a custom mode on the dial, save a known-good baseline. That baseline is your recovery point after lending the camera, after a firmware update, or after an experimental afternoon leaves the menus in a state you no longer recognise.
Finally, label your batteries and rotate them, format cards in the camera rather than the computer as the steps advise, and keep one small habit that pays for itself constantly: after every outing, transfer and back up your photographs the same day, then return the camera to its place with a charged battery fitted. A beginner camera that is always charged, always emptied and always in the same spot gets used. A camera that needs archaeology before it can shoot does not, and use, in the end, is the entire point of setting it up well.
Metering Modes and Exposure Compensation in Everyday Scenes
Your camera decides exposure by measuring light through a metering mode, and beginners usually meet three. Evaluative or matrix metering divides the scene into zones and makes a balanced judgement, and it is the right default for most subjects. Centre-weighted metering favours the middle of the frame, which suits portraits where the face is central and the background is unusually bright or dark. Spot metering measures a tiny area only, which is powerful for stage performers under a spotlight or a bird against a bright sky, and unforgiving if you point it at the wrong tone. Leave the camera on its evaluative mode while you learn, and reach for exposure compensation as your everyday correction tool instead. Compensation simply tells the camera to make the next photograph brighter or darker than its judgement suggests, typically in small steps on a dial or a scale in the viewfinder.
Learn two classic situations and you will use compensation with confidence. Snow, white beaches and pale subjects fool the camera into underexposing, because it tries to render the bright scene as a middle tone, so you add positive compensation to restore whiteness. Dark subjects, a black cat on a dark sofa or a performer in black against a dark stage, fool it the other way, and negative compensation keeps the blacks rich instead of washed-out grey. Check the histogram after your first frame, adjust by a step or two, and reshoot. That small loop, measure, judge, correct, is the beating heart of exposure skill, and it works in every mode your camera offers, including full manual with auto ISO.
Drive modes, self-timers and quiet shooting
Beyond the single-shot default, your drive settings solve specific beginner problems. A short burst, three to five frames, is the honest way to photograph group portraits, because someone blinks in almost every frame and the burst gives you an unblinking alternative without a reshoot. The two-second self-timer is not only for appearing in your own photographs; on a tripod it removes the shake your finger adds when pressing the shutter, which is why landscape photographers use it constantly. Electronic or silent shutter modes help in ceremonies, performances and around sleeping children, with the two cautions already noted elsewhere in this guide about fast movement and some artificial lighting. Explore these once your core setup feels automatic, one at a time, so each new tool attaches to a problem you have actually met.
Setting Up Flash and Low-Light Shooting Without Fear
Beginners often disable flash entirely after a few harsh, direct-flash snapshots, which throws away a useful tool instead of taming it. If your camera has a built-in flash, learn two adjustments. First, flash exposure compensation, which softens or strengthens the flash independently of the overall exposure, usually fixes the overcooked look with a step or two downward. Second, slow-sync or night portrait modes keep the background exposure longer so a flashed subject does not float in blackness at evening events. If your camera has no built-in unit, the setup decision is simpler: rely on the wide apertures and auto ISO ceilings you have already configured, brace the camera against door frames and tables when shutter speeds fall, and accept a little grain, which looks far better than motion blur on faces.
Red-eye, the classic flash complaint, is reduced by red-eye reduction modes that fire a pre-flash, but the more reliable fixes are distance and angle: move a little further away, zoom slightly, and avoid shooting in near-darkness where pupils are widest. None of this requires new equipment, only the knowledge that these settings exist in your menus, which is why a guided tour of the flash section of your manual is an evening well spent for any beginner who photographs family gatherings.
Focus aids for low light
Many cameras can fire a small assist lamp or use the flash for a brief focus aid in dim rooms, and beginners sometimes disable it because it feels intrusive without realising it was the reason their indoor focus was reliable. For family photography at home, leave the assist enabled. For ceremonies and performances, disable it out of courtesy and accept slower focusing, using the focus techniques for tricky scenes described earlier. Knowing where that single menu item lives is a small thing that separates a prepared beginner from a frustrated one.
Protecting Your Settings: Backups, Updates and Resets
Once your camera behaves the way you want, protect that work. If your model can save settings to a card, save them after any session of deliberate customisation, and keep that card file with your photo backups. Firmware updates occasionally reset preferences or add new menu items that default to values you would not choose, so after updating, walk through your core settings using the checklist in this guide before your next important shoot. Keep a photograph of your main menu screens on your phone as a low-tech backup; scrolling through those photographs restores a borrowed or reset camera in minutes.
It is also worth learning the difference between the two kinds of reset most cameras offer. A settings reset returns shooting and menu choices to defaults while keeping your photographs, language and date intact. A full initialisation or factory reset goes further and may clear custom registrations, network pairings and sometimes the file numbering. Beginners who panic and choose the deepest reset lose their Bluetooth pairing, their custom modes and their carefully set copyright information in one press. Use the shallowest reset that solves your problem, and treat your saved baseline, not the factory defaults, as your true home position.
Setting Up for Sharing: Wi-Fi, Bluetooth and Your Phone
Modern beginners reasonably expect photographs to reach their phone quickly, and a few setup choices determine whether that feels effortless or broken. Pair the camera with the maker’s phone app once, at home, following the instructions in order, and then test the full journey with a real photograph: take a picture, transfer it, and share it, before you ever need the process in the field. Decide which transfer size you want as your default. Full-resolution transfers are slower and fill phone storage, while the smaller transfer size most apps offer is ideal for messaging and social sharing and arrives in seconds. Set that preference now, deliberately, rather than discovering mid-holiday that your phone is full of enormous files.
Location tagging is the other phone-linked choice worth making consciously. Many cameras can record where each photograph was taken by borrowing the phone’s location while connected, which is wonderful for travel diaries and finding that one beach again years later. It does require the app to stay connected and the phone to share its location, which uses a little battery on both devices. Turn it on for trips if you value the record, and off again at home if you prefer your everyday photographs to carry no location data. Either way, the decision should be yours, made in the setup menu, not an accident of defaults you never inspected.
Date, file numbering and copyright basics
Three dull settings repay five minutes of attention on day one. Set the date, time and time zone correctly, and revisit them when you travel, because every organisational tool you will ever use sorts photographs by these stamps, and a camera left on the wrong month quietly scrambles a library. Choose continuous file numbering if your camera offers the choice, so filenames keep rising across cards instead of restarting and creating duplicates in the same folder. Finally, if your camera allows an owner name or copyright line to be embedded in each file, enter your name. It costs nothing, travels with every image, and settles casual disputes about whose photograph something is before they start. None of these settings makes a photograph better. All of them make a thousand photographs easier to live with, which for a beginner building a library from zero is a genuine head start.
When to Leave the Beginner Setup Behind
This configuration is a starting point, not a permanent identity, and knowing its exit signs helps you grow without discarding what works. You are ready to experiment beyond it when you can predict what the camera will do before you press the shutter, when you notice the guardrails limiting you in specific, nameable ways, such as an ISO ceiling that costs you evening photographs you wanted, or an autofocus area that no longer matches a faster subject you have taken up. Change one guardrail at a time, for a defined outing, and judge the results afterwards. That is exactly how the setup was built in the first place, one deliberate choice at a time, and it is how it should evolve.
Some beginners eventually explore full manual exposure, manual focus lenses, or fully customised control layouts, and all of that is worthwhile play. Just keep your saved baseline intact as you experiment. Growth in photography is not leaving your foundations behind; it is knowing precisely where they are, so that on the day it matters, a wedding, a trip, a once-only event, you can return to the configuration that has never let you down and simply make photographs.
Related Guides
- best cameras for beginners under 200
- best cameras for beginners under 300
- best digital cameras for beginners under 100
- best cameras for youtube under 300
- best cameras for vlogging under 300
Frequently Asked Questions
Should beginners shoot in auto or manual mode?
Start in aperture priority, which is semi-automatic: you set the aperture, the camera sets shutter speed, and your auto-ISO limits keep quality safe. It teaches the most creative control first without overwhelming you. Move to full manual for controlled situations like tripod landscapes or studio-style portraits once the exposure triangle feels intuitive. Full auto is fine for snapshots, but it blocks settings you need to grow.
What is the best ISO setting for a beginner?
Use auto ISO with a maximum you choose, rather than a fixed value. Set the ceiling where your camera still looks clean — try photographing the same dim room at increasing ISO values and inspect the results at full size to find your personal limit. Pair it with a minimum shutter speed around 1/125s for everyday subjects, faster for sports, and the camera will balance sharpness against noise sensibly.
Do I need to shoot RAW as a beginner?
RAW+JPEG is the safest start. JPEGs are ready to share immediately, while RAW files forgive exposure and white-balance mistakes when you begin editing — and you will make those mistakes; everyone does. The cost is card and disk space. If you never intend to edit at all, high-quality JPEG alone is acceptable, but keep the largest size setting so prints stay possible.
Why are my new camera’s photos blurry?
Usually one of three setup causes: shutter speed too slow for the subject, autofocus set to a single tiny point that missed, or stabilisation switched off. Check the settings from Steps 3, 4 and 6 first. Review a blurry file’s data: if the shutter speed was slower than about 1/60s handheld, that is motion blur, not a faulty camera. Our troubleshooting guide on fixing blurry photos walks the diagnosis in full.
What should I set my autofocus to for kids and pets?
Continuous autofocus with eye or animal detection enabled, and a wide or zone focus area so the camera can find the subject anywhere in the frame. Use burst mode for action — a short burst dramatically raises your keeper rate with unpredictable movers. If your camera lacks animal eye detection, use continuous AF with a flexible zone and aim at the head; the hit rate is still far better than single-shot AF.
How do I reset my camera if I mess up the settings?
Every camera has a ‘reset settings’ or ‘clear all settings’ option in the setup menu, which restores factory defaults without deleting photos. Use it without shame — professionals reset hire cameras routinely. Then re-apply the dozen changes in this guide, which takes ten minutes once you know them. Saving your configuration to a custom mode afterwards prevents a repeat performance.
How do I know if my beginner setup is actually working?
Look at your last hundred photographs rather than your last one. If most are focused where you intended, exposed so that faces and important details are clear, and taken at moments you cared about rather than after a struggle with the menus, the setup is working. Occasional failures in hard light or fast action are normal at every level of photography. A pattern of the same failure, repeated across ordinary scenes, is the real signal, and it points you back to the one setting responsible, which this guide has usually already introduced.