People often search for ‘how to set up for photography a camera phone’ right after unboxing a phone with a celebrated camera and getting oddly ordinary photos from it. The gap is rarely the hardware. Phone cameras ship configured for quick snapshots — automatic everything, modest file settings, helpful features switched off — and ten minutes of deliberate setup unlocks the camera the reviewers praised.
This guide walks through the settings that matter, in the order to set them: file quality and format, grid and composition aids, focus and exposure control, lens and mode choices, and the accessories and habits that complete the setup. Everything applies to both iPhone and Android, with the setting names you will meet on each.
Disclosure: As an Amazon Associate, kajuandouglas.com earns from qualifying purchases. Links to Amazon on this page are affiliate links; they cost you nothing extra. Listing details such as price and availability change often, so check the current Amazon listing before you buy.
The Short Answer
Turn on the grid, set photo quality to its highest sensible option, enable lens correction and scene detection if offered, learn the tap-to-focus and exposure slider, and set the volume button as a shutter release. Choose your default lens and mode deliberately, clean the lens, and arrange automatic backup so your photography is protected. Then practise the three gestures — focus, expose, stabilise — until they are reflexes.
In this guide
Gear for This Guide
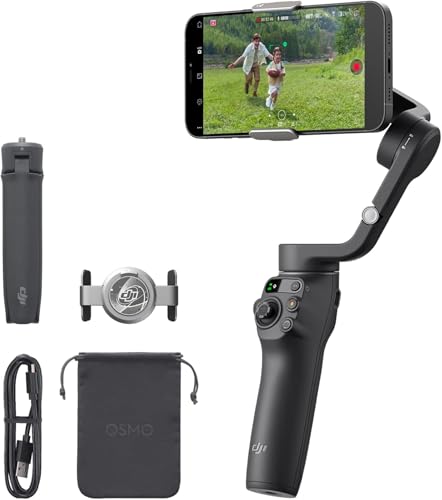
A small gimbal or tripod completes a phone photography setup more cheaply than any phone upgrade, by removing the shake no software fully fixes.

DJI Osmo Mobile 6 Gimbal Stabilizer for Smartphones, 3-Axis Phone Gimbal, Built-In… — A foldable three-axis gimbal for smartphones with tracking and a built-in extension rod, transforming phone video smoothness and enabling steady long exposures. Check price on Amazon.

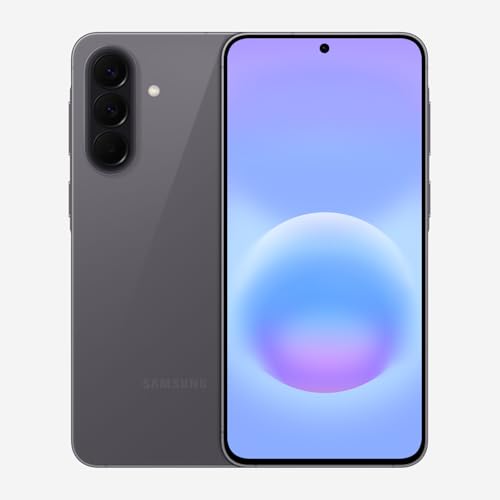
Samsung Galaxy S24 Ultra Cell Phone, 256GB AI Smartphone, Unlocked Android, 200MP, 100x… — A flagship camera phone whose pro mode, lens set and processing reward the full setup this guide describes. Check price on Amazon.
What You Need Before You Start
You need the phone, a microfiber cloth, and about fifteen unhurried minutes. Start by updating the phone’s software, because camera improvements arrive in system updates and a new phone may be several versions behind. Then open the camera app and find its settings screen; on most phones this lives behind a gear icon in the camera itself or in the system settings under the camera’s name.
Decide your storage strategy now, because photography settings and storage are linked. High-resolution modes and raw files are many times larger than standard photos. Confirm your storage headroom and switch on automatic backup to your cloud library or computer routine, so experimenting with quality settings never endangers your existing photos.
Finally, clean the lens before judging any setting change. A film of oil will make every configuration look soft, and you will chase settings to fix a problem that lives on the glass.
How to Set Up a Camera Phone for Photography Step by Step
Step 1: Set resolution and format deliberately
In camera settings, choose the standard high-quality photo mode for daily use, and learn where the full-resolution mode lives for bright, static subjects. If you edit photos, enable the raw or pro capture option your phone offers and set it to save alongside the normal photo where possible. Video shooters should pick their default recording quality — the middle high-quality option suits most people, balancing detail against file size.
Step 2: Turn on composition aids
Enable the grid so the rule-of-thirds lines appear in the viewfinder, and switch on the level indicator if your phone offers one, for straight horizons. These two aids improve more photographs than any other setting, because composition, not sharpness, is what most snapshots lack.
Step 3: Learn focus and exposure control
Practise the core gesture: tap the screen to focus on your subject, then slide the sun or exposure icon that appears to brighten or darken the shot before taking it. Learn how to lock focus and exposure with a long press for scenes where the phone keeps refocusing, such as portraits against bright windows.
Step 4: Configure each lens and mode
Open portrait mode and find its blur adjustment, which can usually be changed after the shot as well. Set night mode to automatic so it engages when light falls. If your phone offers lens correction for the ultrawide, enable it. Turn off any beauty filter defaults so faces look like faces.
Step 5: Set the physical controls
Enable the volume button as a shutter release for steadier one-handed shots, and learn the quick-launch gesture — a double press or lock-screen shortcut — that opens the camera instantly. Moments do not wait for you to find the app icon.
Step 6: Arrange backup and review your first results
Confirm automatic photo backup is running, then take a deliberate test set: a portrait, an indoor scene, a night street and a moving subject. Review them on the largest screen available, adjust the settings that disappointed you, and you have a camera configured for your photography rather than the factory’s averages.
Settings Worth Switching Off
Automatic beauty and skin-smoothing modes flatter no one at their defaults and erase the texture that makes portraits look real; switch them off and add softness deliberately in editing if you want it. Watermarks that stamp the phone’s model on every photo should go too, unless you enjoy advertising in your family album.
Extreme digital zoom deserves avoidance rather than a setting: learn the optical range of your lenses and stay within it, cropping later if needed. Similarly, leave full-resolution mode off as a default; its files are huge and its low-light results worse, so treat it as a special tool for bright, detailed scenes.
Motion-photo and live-photo features are a matter of taste: they capture a snippet of video with each still, which is lovely for children and pets and wasteful for documents and landscapes. Many phones let you toggle it per session; know where the switch is rather than discovering a library of tiny videos later.
Accessories and Habits That Complete the Setup
A phone set up well still obeys physics: it shakes in your hands and its lenses flare into the sun. A small tripod unlocks night modes and long exposures at their best and enables group photos you appear in. A gimbal transforms walking video. Neither costs much next to the phone, and both improve results more than any setting.
Build the pre-shot ritual: wipe the lens, check the horizon with the level, tap to focus on the subject’s eye or the scene’s heart, adjust exposure for the mood, and brace your elbows or lean against something solid. Five seconds of ritual per photo is the entire difference between snapshots and photographs for most people.
Review your work weekly on a big screen and delete ruthlessly. Seeing your photos large teaches your eye faster than any tutorial, and a curated library is a pleasure while an unreviewed flood becomes a chore you stop opening. Your future self, searching for one good photo of a person, will thank you.
Dialling In Each Mode: Portrait, Night and Video
Portrait mode rewards two minutes of experimentation. Photograph the same person at a few distances and notice where your phone’s portrait lens prefers to work — many phones switch to a telephoto for portraits, with a minimum distance the viewfinder will warn you about. Find the control that adjusts blur strength after the shot, and test the lighting effects if your phone offers them, discarding the theatrical ones and keeping the natural. Settle on the distance and framing that flatter your usual subjects, and portrait mode becomes a tool you reach for confidently instead of a lottery.
Night mode has one setting that matters most: its trigger. Set it to automatic for everyday use so it engages when light falls, and learn how its capture time behaves — the phone chooses a duration based on light and steadiness, and holding still for exactly that long, elbows braced, is the entire technique. If your phone allows a manual maximum duration for tripod use, note where it lives before the night you need it on a dark hillside with cold fingers.
For video, walk a short route through your home with each stabilisation level your phone offers and watch the footage on the largest screen you have. The strongest stabilisation often crops the frame and can wobble on pans; the standard level is usually the sweet spot for walking footage. Decide your default now, in calm conditions, rather than mid-event with a once-only moment unfolding in front of you.
Building Your Editing and Backup Workflow
A camera set up well deserves a workflow behind it. Choose one editing app and learn its five core adjustments — exposure, contrast, highlights, shadows and colour warmth — rather than collecting filter apps. The phone’s built-in editor covers these on most models and has the advantage of editing the original file non-destructively, so your adjustments can be revisited. Ten minutes of practice on a deliberately dull photo teaches more than a month of filter browsing.
Decide where photographs live. Automatic cloud backup is the simplest protection, but confirm it is actually running at full quality and that your storage plan can hold a photographer’s output, because a full account silently stops protecting you. If you prefer a computer library, build the import habit — cable in, import, verify, then clear the phone — into a weekly routine tied to something you already do, so the habit survives busy months.
Finally, organise lightly but consistently: favourite the keepers as you review, delete the failures while the memory of the scene is fresh, and let albums form around events rather than subjects. Photography set up as a system — capture, protect, curate — stays a pleasure. Photography as an ever-growing unsorted flood becomes a storage problem with sentimental weight, and the setup work in this guide is wasted if the results drown.
A Photographer’s Daily Settings Routine
Setup is not a one-time event but a rhythm, because phones update, settings drift and photography changes with the seasons of your life. Build a light routine around the deep setup in this guide. Before any occasion that matters — a trip, a wedding, a product launch for your small business — spend three minutes: clean the lenses, confirm storage headroom, check that backup ran last night, charge the phone, and glance at your defaults to be sure a borrowed moment or an update has not reset them to factory shyness.
Monthly, review the library with a ruthless eye on the largest screen you own. Delete the failures while scenes are still memorable, favourite the successes, and watch for patterns in your own work: the lens you never use, the mode you always forget, the subject you consistently underexpose. Your settings should migrate toward your patterns — the default mode becomes the one your real photography uses, the quick-launch goes to the camera you actually open.
After every major system update, spend five minutes in the camera settings. Updates occasionally reset preferences, introduce new modes worth adopting, or change the behaviour of ones you rely on. The photographers who complain that an update ruined their camera are usually living with a reset setting they have not visited; the ones who audit quietly absorb the improvements and restore their configuration before it costs them a photograph.
Seasonally, reconsider the system around the camera: storage filling, backup plan still sized for your output, tripod and accessories where you left them, editing app still your chosen one. Photography set up as a living system stays configured; photography set up once decays into the factory defaults and good intentions.
None of this routine exceeds a few minutes at a time. Its product is readiness — the state in which the camera in your pocket is, at any given moment, the camera the reviewers described, pointed at your life.
Common Mistakes to Avoid
- Leaving every setting at the factory default. Defaults favour quick snapshots and small files. Ten minutes of setup aligns the camera with your photography instead of the average user’s.
- Shooting everything at maximum resolution. Full-resolution files are enormous and weaker in low light. The standard mode is the right default; maximum is a special-purpose tool.
- Ignoring the exposure slider. Phones expose for the average of the scene, which fails against windows, snow and stages. One slide of the exposure control rescues more photos than any other skill.
- Never cleaning the lens before a shoot. Setup cannot compensate for a dirty lens. The wipe comes first, every time.
Pro Tips
- Set up a shortcut or lock-screen button for the camera; the best photograph is usually the one you were ready for.
- Save a favourite configuration: many phones remember your last mode and settings — enable that option so the camera reopens as you left it.
- Shoot the same scene on every lens once, at home, so you learn each lens’s character before it matters on a trip.
Going Deeper on Formats: When Each Choice Earns Its Place
Format decisions deserve more than a default. The phone’s standard compressed format is the right home for the overwhelming majority of photographs: small files, instant sharing, and quality that survives printing at family sizes. High-efficiency formats save space at a small compatibility cost with older software. Raw capture is a specialist tool: it preserves maximum editing latitude for scenes whose light defeats the phone’s processing — extreme contrast, mixed artificial light, a once-only landscape — at the cost of large files and mandatory editing time. The skilled setup is not choosing one forever, but knowing which drawer each tool lives in and reaching deliberately.
A practical raw workflow that does not collapse
Raw fails socially when every photograph demands work. Instead, shoot raw selectively: a quick toggle or mode for the scenes that merit it, standard format for the flow of life. Edit raw files in batches on the day, while memory of the scene’s true colours is fresh, export the keepers, and delete the raw originals of anything that did not earn its storage. That discipline keeps raw a pleasure rather than an accumulating debt, and it keeps your library’s search and backup fast, which matters more over years than any single file’s flexibility.
Video formats carry parallel choices. Higher frame rates smooth motion and enable slow playback but double storage and can look unnaturally slick for ordinary scenes; cinematic modes blur backgrounds pleasingly but dislike complicated edges and low light. Set defaults for your typical filming — family, travel, work — and treat exotic modes as per-occasion choices. A setup that must be re-thought before every recording will be re-thought never, and the defaults are the real camera you own.
Mastering Focus and Exposure Beyond the Basics
The tap-to-focus gesture is the beginning, not the end. Learn your phone’s focus lock for scenes where movement crosses the frame — a portrait with passers-by, a product shot with your own hands entering — because an unlocked system will happily refocus onto the intruder at the decisive moment. Learn exposure compensation as a creative control, not a correction: deliberately darkening a scene preserves skies and mood, deliberately brightening lifts a backlit face, and both beat accepting the phone’s average whenever your intention differs from average.
Metering for the photograph you mean
Phones meter for a plausible general photograph, and your subjects are not general. For a performer on a lit stage against darkness, the phone wants to brighten the darkness into noise; telling it to expose for the performer yields the photograph you attended for. For snow, glassware, documents and screens — all brighter than average — the phone’s instinct to darken needs countering in the opposite direction. Practise these three scenes until the compensation gesture is reflexive, and a whole class of disappointing photographs quietly leaves your life.
Focus technique completes the pair. For close subjects, move the phone rather than zooming digitally; for distant subjects on a telephoto, brace and let stabilisation settle for a breath before releasing the shutter; for groups, focus on a face in the middle row of depth so the system’s depth of field covers front and back. None of this is advanced artistry — it is the mechanical half of sharpness, set up once in your habits and then free forever.
Building Presets and Routines for Your Recurring Subjects
Most photographers shoot the same five subjects forever: family, food, travel scenes, documents and work, and pets or sport for many. A deliberate setup names the best configuration for each — lens, mode, format, grid and level habits — and practises reaching it in seconds. Some phones remember per-mode settings or offer custom modes; where yours does, build them. Where it does not, a mental checklist taped inside a camera bag or saved as a note serves the same purpose, because the routine, not the technology, is what removes fumbling from the moment.
The document and work setup nobody teaches
Document capture deserves its own discipline: the dedicated scanning mode if your phone offers one, otherwise a setup of even light, the phone parallel to the page, the main lens rather than the ultra-wide for undistorted edges, and a review zoom to confirm small print is legible before the original leaves your hands. Work photographs — products, sites, equipment, whiteboards — reward the same care plus a scale reference where size matters and a habit of shooting one wide context frame before the close-ups. These unglamorous photographs are the ones searched for later, and legibility is their entire aesthetic.
Family setup is the opposite discipline: speed over perfection. The right configuration is the one already loaded when a child does something unrepeatable — volume-button shutter, fast launch from the lock screen, burst for action, and processing defaults you trust unedited. Configure for the child you have, in the light you live in, and forgive the setup its technical compromises; a slightly imperfect photograph of the moment defeats a perfect configuration opened three seconds late, every time, for the rest of your life.
Reviewing Like an Editor: The Setup Behind Improvement
Setup includes how photographs return to you. Schedule a light-touch review rhythm — a few minutes weekly — in which you delete the obvious failures, favourite the keepers, and glance at what the failures share. Recurring blur at one lens, horizons tilted one way, faces consistently too dark: these patterns are setup instructions written by your own output, more personal and more accurate than any general guide. Adjust one setting or habit in response, and let the next week’s review judge it.
Metadata, albums and finding photographs later
Turn on accurate location and time settings if your privacy judgement allows, because future search depends on them; organise with a few broad albums or rely on the phone’s people, places and text search, which improve yearly and reward a library that is actually on one device or account. Rename nothing, folder nothing obsessively — modern libraries are searched, not browsed — but do favourite ruthlessly, because your favourites are the collection your family will actually see, print and inherit.
Backups complete the review setup: confirm, during setup and not during a crisis, that new photographs actually appear in your backup destination, by finding today’s test shot there. Backup systems fail silently more often than loudly, and the only proof is retrieval. Make that check part of changing phones, changing accounts or returning from a major trip, and the setup you built will protect not just how photographs are taken, but whether they exist at all in ten years.
Accessibility, Comfort and Shooting for Hours
A camera setup must fit the photographer’s body. Larger text and buttons where offered, voice commands for the shutter, volume-key capture, and a grip or case that secures the phone in one hand all convert directly into photographs taken rather than fumbled. Photographers with tremor should lean harder on stabilisation, burst and tripod habits; photographers with limited reach should explore remote shutter options through a watch or earbuds. None of this is peripheral: comfort is a photographic specification, because discomfort shortens sessions and shortens tempers, and both show in the results.
The travel-day configuration
For a full day out, set up for endurance: battery-saving habits that spare the camera, offline access to any reference material, storage checked the night before, and a power bank in the bag. Lower screen brightness habits, restraint with video length, and closing the camera between scenes preserve the afternoon’s photographs, which are usually the best ones. The travel setup succeeds invisibly — the phone simply never becomes the reason a photograph did not happen — and that invisibility is the mark of every good setup in this guide.
Setting Up for Specific Lights: Interiors, Stages and Golden Hour
A setup earns its keep when it bends towards the light you actually shoot in. Interiors mix window daylight with warm lamps, and that mixture is where white balance earns attention: learn where your phone lets you nudge or lock it, because skin under mixed light is the most common colour disappointment in family photography, and a setup that handles it deliberately outperforms one that hopes. For regular interior subjects — a child at the same table, a product on the same bench — note the configuration that pleased you and make it the room’s standing setup, written down if the phone will not save it.
Stages, screens and difficult artificial light
Performances add distance, darkness and light that changes colour by design. Set up for them by favouring the telephoto you trust, exposing for the lit performer rather than the hall, and disabling anything that brightens the whole scene at the expense of the subject. Screens and projected images flicker in ways the eye ignores and cameras record, so if banding appears, a different shutter behaviour or mode — often found by switching between standard and a dedicated setting — is the fix to discover at a rehearsal rather than at the performance itself. The principle generalises: any recurring difficult light deserves one experimental session in advance, whose findings become part of your standing setup.
Golden hour, beloved and brief, rewards a setup built for speed and intention: exposure compensation within a thumb’s reach, because the scene’s beauty lives in its brightness range; the habit of shooting both towards the light and with it, since the same setup yields two different photographs a minute apart; and restraint with enhancement modes that flatten the very contrast you waited for. Configure for the light’s character, not against it, and the hour will repay you in the currency it deals in — photographs that look like memory feels.
Setting Up the Camera for Someone Else to Use
Phones are handed over constantly — to a stranger for a group photograph, to a colleague for evidence of a job, to a grandparent for a portrait of you — and a thoughtful setup anticipates the handover. The camera should open to a mode that succeeds in untrained hands: automatic, forgiving, with the shutter where a thumb expects it and no exotic configuration from your last experiment still loaded. Develop the reset reflex — a two-second return to your standard mode before handing over — and the stranger’s photograph of your group will be the one you hoped for rather than an accidental slow-motion video of everyone smiling at nothing.
Teaching moments and shared devices
On shared family devices, setup becomes curriculum. Configure the camera to the household’s standard, agree where photographs go and how they are backed up, and teach the two or three skills that raise everyone’s floor: clean the lens, tap the subject, hold still a breath. A household whose least technical member produces decent photographs has a better family archive than one virtuoso surrounded by blur, and the setup that achieves it is a social achievement disguised as a settings menu.
For children learning photography, a deliberately simple setup is a gift: one lens’s behaviour to learn, composition aids on, editing postponed. Restrict nothing they can learn from, but remove the accidental complexities — the modes that produce baffling results, the storage traps — so their early experience teaches seeing rather than troubleshooting. The camera you set up for a child is their first instrument; tune it like one.
Power, Heat and Storage: The Logistics Layer of Setup
Serious shooting sessions fail logistically more often than optically. Heat is the summer enemy: a phone filming or shooting heavily in direct sun will protect itself by dimming and slowing, so shade the device between bursts, remove a heavy case for long video if temperatures climb, and plan demanding clips for cooler moments. Cold is the winter mirror: batteries sag, touchscreens sulk through gloves, and a phone kept in an inside pocket between scenes outlasts one carried in the hand it is slowly freezing.
Storage discipline before the big day
Before any occasion that matters — a wedding, a trip, a birth — audit storage with the same seriousness as charging. Know how much space your typical heavy day consumes, clear at least twice that, and confirm the backup destination will receive the day’s work when you return to signal or Wi-Fi. A phone that refuses to record at the decisive moment for want of space has failed at setup, not at photography, and it is the most preventable failure in this entire guide. Build the audit into the occasion’s eve, alongside charging everything, and the logistics layer will never be heard from again — which is exactly what a good setup sounds like: silence, while the photographs happen.
Revisiting Setup When the Phone Is New, Updated or Repaired
Setup is not a one-time sacrament. A major system update can move menus, reset preferences, change processing taste and introduce features worth adopting; a repair can return a phone at defaults; a new phone deserves a fresh pass through every decision in this guide rather than a cloned transfer of habits from its predecessor, because its cameras differ and your photography has grown. Schedule the revisit deliberately — an unhurried half hour with test scenes — and treat it as calibration of an instrument you depend on, because that is precisely what it is.
The setup audit checklist, in prose
Run the audit in the guide’s own order: formats and resolution as you intend them now; composition aids on; focus and exposure behaviours practised, not merely enabled; each lens and mode visited once; physical controls where you expect them; backup proven by retrieval, not assumed; accessories present and charged. Then shoot one deliberate photograph of something you love, at the quality the whole apparatus exists for, and file the audit away until the next change. A setup maintained like this compounds: every year the camera fits its photographer a little closer, and the photographs show it.
Setting Up for Video With the Same Seriousness
Video deserves its own setup pass, because its defaults are chosen for storage economy rather than for your purposes. Decide your standard resolution and frame rate by destination: family viewing on a television rewards resolution; social sharing rewards whatever the platform will not crush; slow motion is a special effect to visit deliberately, not a default to live in. Set stabilisation to its strongest sensible mode for handheld work, confirm the microphones are not being smothered by your case or your grip — a setup detail discovered by test, not by hope — and record a one-minute walking, talking test in your typical environment and watch it on a big screen before any occasion depends on it.
Sound settings and the forgotten half
Explore the audio options your phone offers for video: wind reduction, zoom-linked microphones that focus as the picture does, and any mode intended for voices. Test each against your real subjects — a person speaking across a garden, music in a hall, your own narration on a street — because audio settings, unlike video ones, cannot be auditioned from a specification. A setup that includes sound is half again as valuable as one that treats video as moving photographs, and the test costs an afternoon walk you were probably going to take anyway.
Continuity settings matter for anyone filming in sequences: consistent resolution, frame rate and colour behaviour across clips makes editing a pleasure instead of a negotiation, and locking exposure and focus behaviour for a scene prevents the visible breathing that marks amateur footage. Set these per project rather than globally, and note them in the project’s own record, so a second day of filming matches the first without archaeology.
Setting Up for Other People’s Photographs of You
A modern setup includes how you appear in other people’s cameras, because your phone is the editing and organising home for photographs taken across your whole circle. Agree, within family and close friends, on the sharing paths that preserve originals, so the photographs that arrive in your library carry their full quality. Set your library to gather shared albums automatically where you trust the source, and review your own presence settings — the face grouping, the memories features — with the same deliberateness as any camera setting, because the archive’s organisation is part of the photographic apparatus now.
The group photograph protocol
Formalise the group photograph while you are in a setting-up mood: the tallest tripod or stable surface the group can muster, the timer or remote everyone understands, the burst that guarantees one frame with all eyes open, and the rule that three versions are taken because one will be blinked, one will be perfect and one will be the funny one that gets printed. A household with a group protocol produces group photographs; a household without one produces apologies and a photographer missing from every picture, which is its own quiet argument for setting this up once, properly, today.
Troubleshooting Your Own Setup
When results disappoint and the camera is suspected, audit the setup before the hardware. Work the list in reverse order of glamour: lens clean; storage sufficient; the mode you intended actually selected; no experimental setting from a tutorial still silently active; the case not intruding into any lens’s view; the software current. Most setup faults are archaeological — a setting changed for one occasion and never restored, a mode entered for one experiment and quietly inherited by a hundred ordinary photographs. The reset-to-your-standard habit, applied monthly, excavates these before they compound, and keeping a written note of your standard makes the reset a comparison rather than a reconstruction.
When to factory-think, and when not to
Resist the full reset as a first resort; it destroys the very configuration this guide helped you build, and the fault is almost always one setting, findable by the audit. Reserve deep resets for a phone whose behaviour is erratic across many functions, and even then, export your settings record and your photographs first. The philosophy is the same one that governs the whole setup enterprise: your configuration is an asset, accumulated through attention, and it should be spent only on evidence, never on frustration.
The Setup as a Living Document
Write your setup down — in a note, in plain words, with the reasons attached. Reasons matter because they tell future-you which settings were load-bearing and which were taste, when a new phone or an update forces the decisions to be remade. Photographers who keep this document rebuild a new phone’s camera in twenty minutes and lose nothing in translation; photographers who rely on memory rebuild approximately, and spend a month wondering why the new camera feels subtly wrong. The document is the setup’s true form; the phone merely holds its current copy.
Your First Week With the New Setup: A Gentle Regime
A setup becomes yours through use, not through configuration, so give the new arrangement a deliberate first week. Carry the camera as your only one, shoot daily and variously, and keep a running note of every moment the setup helped or hindered: the mode you could not find, the gesture that delighted you, the default that kept surprising you. At the week’s end, adjust exactly what the note accuses and nothing else, because a setup tuned by a week of evidence fits like a shoe broken in by walking. Then stop tuning and start photographing in earnest; the setup’s purpose was never itself, and the photographs gathering in the library are the proof that it is finished.
Related Guides
- best camera phones for photography
- best phones for camera and video
- best camera lens for phones
- best camera phones under 500
- best tripod for smartphones
- best gimbal for smartphones
- how to choose a camera phone
- how to clean the lens of a camera phone
- how to fix blurry phone photos
Frequently Asked Questions
What is the first setting I should change on a new camera phone?
Turn on the composition grid and the level, then set your photo quality and backup. The grid improves every photograph you take from that moment by guiding composition, while backup protects the results. After that, learn the tap-to-focus and exposure gesture, because controlling brightness is the skill that rescues the most real-world shots, especially portraits against bright backgrounds.
Should I shoot in raw on my phone?
Shoot raw, or your phone’s raw-plus-normal option, when you intend to edit seriously — difficult light, important portraits, landscapes you may print. Raw files preserve far more editing flexibility in shadows and highlights. For everyday photography the processed normal photo is better: it is already well judged, smaller and instantly shareable. Many photographers shoot normal by default and switch to raw deliberately for scenes that deserve it.
What video settings should I choose?
For most people the high-quality middle setting — sharp, smooth and reasonably sized — is the right default for family and travel video. Reserve the highest resolutions and frame rates for deliberate projects, because files grow enormous and some modes disable stabilisation or lens options. Whatever you choose, consistency helps editing, and a gimbal or a steady two-handed grip improves footage more than another resolution step.
Why do my photos look worse than the reviews of my phone?
Usually one of four reasons: a dirty lens, factory settings favouring small files, shooting in conditions reviews handled with technique — exposure adjustment, night mode, bracing — or judging your photos at full size while remembering reviews at article size. Work through the setup in this guide, clean the lens, practise exposure control, and compare again in the same conditions before doubting the hardware.
Do I need a tripod for phone photography?
Not for everyday photography, but a small tripod unlocks the phone camera’s best party tricks: night modes and long exposures reach their full quality when the phone is perfectly still, and timer group shots include you. It is the highest-value accessory in phone photography relative to cost. Choose one with a secure phone clamp and legs that work on uneven ground, and keep it where you will actually carry it.
How do I stop my phone switching lenses automatically?
Phones sometimes override your chosen lens in low light or at close range, substituting a crop from the main camera. Most camera apps reveal this with an icon or in the pro and manual modes, where lens choice is respected strictly. If your phone offers a lens-lock or manual mode, use it when the choice matters — macro subjects and deliberate telephoto portraits are the usual cases.
Should I turn off the automatic scene optimiser?
It depends on your taste in its results. Scene optimisers push colour and contrast towards a vivid house style, which many people enjoy and some find heavy-handed on food, skin and skies. Shoot the same few scenes with it on and off, compare them on a bigger screen, and keep the setting that matches your eye; there is no correct answer, only your answer, applied consistently.
What is the best setup for photographing children and pets?
Prioritise speed and forgiveness: fast camera launch, burst mode within easy reach, shutter priority given to faces through face and eye detection left on, and enough light whenever you can arrange it. Accept slightly higher noise in exchange for frozen motion, because a sharp, slightly grainy photograph of a moving child beats a clean blur without exception.
Do I need to change settings for photographing documents and receipts?
Use the scanning mode if your phone has one, since it corrects perspective and boosts legibility automatically. Otherwise, shoot with the main lens, the page flat and evenly lit, the phone parallel to avoid distortion, and check a zoomed view before discarding the paper. Consistency here pays off when you search for a document months later and every scan is readable.