Disclosure: As an Amazon Associate, kajuandouglas.com earns from qualifying purchases. Links to Amazon on this page are affiliate links; they cost you nothing extra. Listing details such as price and availability change often, so check the current Amazon listing before you buy.
Knowing how to set up a headset correctly takes about ten minutes, and it is the difference between a headset that merely makes noise and one that sounds clear, feels comfortable for hours and has a microphone your teammates actually praise. Most headsets work the moment you plug them in — but ‘working’ usually means default settings, the wrong device selected in half your apps, and a fit that starts aching by lunch.
This guide covers the full setup in order: unboxing checks, fit, connecting by USB, 3.5 mm and wireless, choosing the headset as the default device on PC and console, balancing volume and microphone levels, and the quick tests that confirm everything before your first real call or match.
Quick answer: Connect the headset (USB, 3.5 mm or paired wireless), set it as the default playback and recording device in your system and in each app you use, fit it so the band sits mid-head with cups sealing around your ears, set the mic level so loud speech peaks without distorting, then test with a recording and a call before you need it live.
How to Set Up a Headset
In this guide
Gear for This Guide
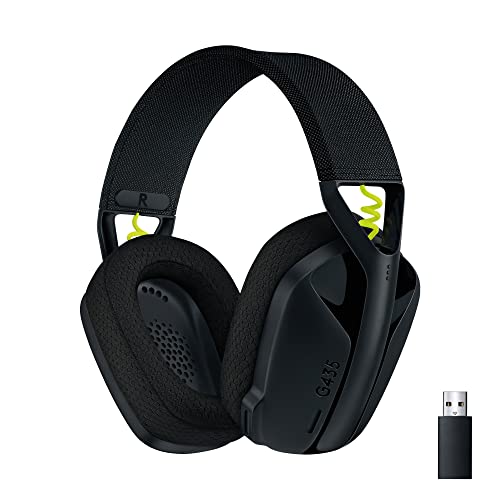
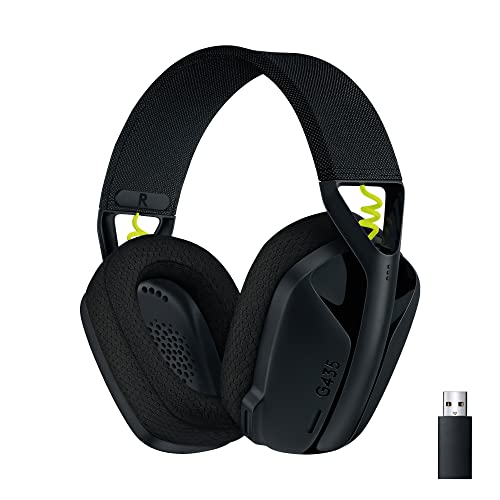
Logitech G435 Lightspeed Wireless Gaming Headset — A lightweight wireless gaming headset with built-in microphones — a good example of a dongle-plus-Bluetooth setup that takes minutes once you know the order. Check price on Amazon.

HyperX Cloud Stinger 2 Gaming Headset — A wired over-ear gaming headset with a swivel-to-mute microphone, showing how simple a 3.5 mm setup can be. Check price on Amazon.

PlayStation 5 Pulse 3D Wireless Headset — A console-focused wireless headset whose setup runs through the console’s accessory menus rather than a PC. Check price on Amazon.
What You Need Before You Start
- The headset, its cable or USB dongle, and any included splitter or adapter.
- The device you will use it with — PC, laptop, console controller or phone.
- Ten quiet minutes and a voice-recorder app or a friend willing to be a test call.
- The manufacturer’s app or software name (printed in the quick-start guide) if you want EQ and firmware updates.
Charge a wireless headset first, ideally to full. Many headsets ship with a partial charge that survives unboxing and dies during your first long session, which people then misdiagnose as a faulty battery. While it charges, update nothing and install nothing — get the basics working first, then layer software on a known-good foundation.
Step 1: Fit the Headset Before You Touch Any Settings
Put the headset on and adjust the headband so the top pad rests on the crown of your head with the ear cups centred over your ears — not perched high, not sliding toward your neck. Extend the sliders evenly on both sides; an uneven fit is the most common cause of ‘one side sounds louder’. The cups should seal around your ears without crushing them, and the whole headset should stay put when you turn your head, without feeling like a clamp.
Position the microphone boom so the tip sits roughly two centimetres from the corner of your mouth, not directly in front of it — that placement captures your voice clearly while keeping breath blasts off the capsule. If the boom is flexible, bend it gently into place rather than forcing the hinge. Getting fit right first matters because every later judgement — volume, EQ, mic level — is distorted by a bad seal or a misplaced mic.
Step 2: Connect by USB, 3.5 mm or Wireless Dongle
For USB headsets, plug straight into the computer rather than through an unpowered hub, and give the system a few seconds to recognise the device. For 3.5 mm headsets, note whether your device has a single combined jack or separate headphone and microphone sockets; combined-jack headsets need a splitter cable on older PCs with separate sockets, and the splitter is often included in the box. Controller connections for consoles use the 3.5 mm socket on the controller itself.
For wireless models, plug the USB dongle into the device first, then power the headset on — most pairs link automatically within seconds. Keep the dongle on a front port or a short extension if your PC sits under a desk, because a dongle buried behind a metal case is a classic cause of dropouts. Bluetooth pairing comes later as a second connection if your model supports it; one solid connection first. The model in the Logitech G435 in our wireless gaming roundup follows exactly this dongle-first pattern.
Step 3: Set the Headset as the Default Device
On Windows, open Sound settings and choose the headset as both the output and input device; on macOS, do the same in Sound preferences. Then open each app you actually use — your meeting app, game chat, browser-based calls — and check its own audio settings, because many apps keep their own device selection and will happily keep using your laptop’s built-in microphone even after the system default changes. This double-check is the single step that prevents most ‘my headset mic isn’t working’ moments.
On consoles, the headset usually becomes the chat device automatically when connected, but game-versus-chat balance lives in the console’s audio or party settings, so set it there before a session rather than mid-game. If you switch between speakers and headset often, learn where the quick output switch lives on your system — it is two clicks once you know, and a mystery if you do not.
Step 4: Set Volume and Microphone Levels Properly
Set the system volume to a comfortable level with the headset’s own control at about three-quarters, so you have headroom in both directions from the dial you can reach. For the microphone, open your system’s input level meter and speak at your loudest normal voice: the meter should peak high without slamming into the maximum and staying there. If it barely moves, raise the input level or move the boom closer; if it distorts, lower the level before you blame the microphone.
Turn on microphone monitoring or sidetone if your headset or software offers it — hearing a little of your own voice stops you shouting and confirms the mic is live at a glance. If your software offers noise suppression, test it with a fan or television on in the background and a friend listening; suppression strength is a trade-off against voice naturalness, so pick the lowest setting that cleans up your room. Work-focused picks like those in USB headsets picked for work expose these controls in their companion apps.
Step 5: Test Everything With a Recording and a Real Call
Record thirty seconds of speech with a simple recorder app and listen back on the headset itself. You are checking for clarity, consistent volume when you turn your head, and background noise level. Then play music or a game and walk through your normal range of movement if wireless — dropouts show up at the edges of your space, and it is better to find them now. Finally, make one real test call or join an empty voice channel and ask how you sound; a human listener catches the ‘underwater’ quality that meters miss.
Step 6: Install Companion Software and Update Firmware — Last
With a working baseline, install the manufacturer’s app if you want EQ presets, surround processing, button remapping or firmware updates. Change one thing at a time and re-test, so if the sound gets worse you know which setting did it. Save a preset you like under your own name rather than overwriting defaults. If you never open the app again, that is fine — a headset set up well at the system level does not need babysitting.
Common Mistakes During Headset Setup
- Changing the system default device but not the per-app device, so calls keep using the laptop microphone.
- Plugging a wireless dongle into a rear port behind a metal case, then blaming the headset for dropouts.
- Setting the microphone level by whispering, then distorting the first time you laugh or call out in a game.
- Installing EQ and surround processing before confirming the basic setup works, making faults impossible to isolate.
- Skipping the test call — every setup feels fine until another human listens to it.
Pro Tips for a Setup That Stays Set Up
Label your dongle and cable with a small tag if you own more than one headset; five seconds now saves a drawer archaeology session later. Keep the headset’s firmware and your app versions in step — update both or neither. If you use the headset on two machines, repeat the per-app device check on the second machine rather than assuming settings travel with the headset; they do not, because those choices live on the computer.
When something goes wrong later, return to this order: fit, connection, defaults, levels, test. Setup problems are almost always one of those five, and working through them in order finds the fault faster than random setting changes. For the connection step in particular, our guide to connecting a headset to a PC goes deeper on PC wiring and pairing, and how to adjust the mic on a headset fine-tunes the microphone once the basics are solid.
Setting Up on Console, Specifically
Console setup follows the same logic with platform accents. On PlayStation, a USB or supported wireless headset is recognised when connected, and chat audio routing, microphone level and game/chat balance live in the quick menu and sound settings — set the mic level there with the same loud-voice test you would use on PC. On Xbox, wired headsets connect through the controller’s 3.5 mm socket, wireless requires Xbox-specific support, and the audio settings include headset format options for spatial sound; the controller may need its own firmware update before a new headset behaves, which the console will usually offer when you connect one.
On Nintendo Switch, wired USB and 3.5 mm headsets work in handheld and docked play with different socket locations, and Bluetooth audio is supported with the caveat of higher latency and no Bluetooth microphone support — voice chat on Switch has historically run through other routes, so check how your specific game handles chat before assuming the headset covers it. Across all consoles, the discipline is identical to PC: connect, select, set levels, test with a friend before the session that matters.
Multiple Devices: Making One Headset Serve Two Machines
Many people set up one headset for a work laptop and a personal PC, or a PC and a console. The reliable pattern is to give each machine its own clean configuration: complete the full setup — defaults, per-app selections, levels — on machine one, then repeat it entirely on machine two, because none of those settings live in the headset itself. For wireless models, note that a dongle can only live in one machine at a time; Bluetooth multipoint models can stay connected to two devices and switch by context, which is the elegant solution where it exists.
Label which connection belongs to which life if you use both a dongle and Bluetooth: dongle for the gaming PC where latency matters, Bluetooth for the laptop and phone where it does not is a common and sensible split. Write your working settings down — input level numbers, EQ preset names — in a note on each machine. The day an update resets something, that note turns a twenty-minute rediscovery into a two-minute restoration.
A Five-Minute Monthly Check-Up
Setups drift: updates reset defaults, apps change their selections, cables loosen, firmware improves. A monthly five-minute ritual keeps a good setup good. Reconnect and confirm the headset is the default in your system and your main app. Record the same test sentence and compare it with your reference clip. Check for firmware updates. Glance at the pads and cable while the headset is in your hands. That is all — five minutes that prevent the slow accumulation of small degradations that people otherwise experience as ‘my headset got worse’, when really its setup did.
Setting Up for Streaming and Recording
Streamers and podcasters ask more of a setup than callers do, and three extra steps pay off. First, set your recording chain deliberately: the headset mic (or a separate microphone) chosen in the streaming software, with its level set so your loudest excited moment peaks without clipping, because streaming software rarely forgives distortion. Second, use the headset to monitor yourself at low volume — hearing your own voice as the audience does catches mumbling, mic drift and keyboard intrusion in real time. Third, record a private test stream or local recording and listen to the whole thing before going live; the number of first broadcasts undermined by a wrong device selection, in software the streamer swore was configured, defies counting.
If you use voice effects, noise suppression or a software gate, add them one at a time onto the clean setup this guide built, and keep a written note of the chain. When something sounds wrong mid-stream, you will bisect the chain — bypass half, test, repeat — and a documented chain makes that a two-minute exercise instead of a panic.
Accessibility and Comfort Settings Worth Finding
Modern systems hide genuinely useful audio accessibility options that many headset owners never discover. Mono audio, for listeners with one-sided hearing, routes both channels to both ears so nothing mixed to one side is lost. Balance controls centre the image for asymmetric hearing. Some headsets and systems offer hearing-profile adjustments that lift the frequencies a particular listener misses. If anyone in your household listens with hearing aids, check the headset’s compatibility notes and prefer models whose cups accommodate aids without feedback, or single-ear and bone-conduction designs where appropriate.
Setup Is a Skill, Not an Event
Notice what this guide has really taught: an order of operations. Fit, connection, defaults, levels, test — then software, then periodic checks. That order transfers to every future headset, console and computer you will ever own, and it converts the vague anxiety of ‘audio problems’ into a short list you can always work through. Keep the order, and a new headset will never again cost you an evening of random clicking; you will set it up in ten minutes, correctly, the first time, and get on with the call, the game or the stream that the headset was bought for.
Frequently Asked Questions
Why does my headset work in games but not in my meeting app?
Because the app has its own audio device setting that is still pointing at your old microphone or speakers. Open the app’s audio or devices settings page and select the headset for both speaker and microphone. This is the most common setup issue of all, and it is a settings mismatch, not a broken headset.
Do I need the manufacturer’s software to use my headset?
No. Every headset works with standard system drivers for basic audio and microphone use. The companion software adds extras — EQ, surround processing, firmware updates, button customisation — which are worth installing after your basic setup works, but they are optional, and skipping them causes no harm.
How loud should I set my headset volume?
Set it so normal speech and game audio are clear at a relaxed level, with the headset’s own control around three-quarters so you can adjust both ways. If you find yourself at maximum volume regularly, check the fit and seal first — a poor seal leaks bass and makes everything seem quiet — before turning anything up further.
My wireless headset keeps cutting out. What should I check first?
Move the USB dongle to a front port or a short USB extension so it has a clear line to the headset, and keep it away from USB 3.0 hard drives and hubs, which can interfere with 2.4 GHz signals. Then check for firmware updates. Most dropouts are placement and interference, not a faulty headset.
Should the microphone be in front of my mouth?
No — place it just to the side, about two centimetres from the corner of your mouth. Directly in front captures breath blasts and popping sounds on letters like P and B. To the side, your voice stays clear and consistent, and you can drink from a cup without moving the boom.
Can I use one headset for both my PC and my console?
Usually yes, if the connections match: 3.5 mm wired models work almost everywhere, USB models work on PC and PlayStation but not always on Xbox, and wireless models need explicit support for each console’s wireless system. Check the platform list for your exact model before buying, and repeat the default-device steps on each system.
Setup as a Sequence: Why Order Matters
A good setup is a sequence, not a pile of settings, because each layer — physical fit, device recognition, routing, levels, processing — assumes the layers beneath it are already right. Owners who dive straight into equalisers and surround toggles while the headset is still the second-priority device in a forgotten menu are tuning a system that is not yet built. This section lays out the order of operations properly, explains what ‘correct’ looks like at each stage, and covers the variations that different platforms and connection types introduce, so your first setup is also the last time you have to think about most of it.
First Principles Worth Keeping in View
Anyone weighing setting up a headset properly the first time meets the question of background rejection sooner or later. A boom placed to reject the keyboard it hovers above: it shows itself only when you stop looking for it, and record a test at your noisiest hour, not your quietest. Software gates clipping the first syllable of every sentence: it rewards a door closed more than a filter purchased.
A calmer look at setting up a headset properly the first time starts with voice consistency and what it changes after setup day. Take a level set once and then left alone: it separates honest engineering from brochure engineering, because a stable signal is what every filter hopes for. A boom that returns to the same spot after every adjustment: it is worth checking before the return window closes, and mark the boom position that works, then return to it. Take processing that trusts a steady signal and rewards it: it can be locked in with one careful setup and a test call.
Where the Details Start to Matter
Anyone weighing setting up a headset properly the first time meets the question of chat and game balance sooner or later. The dial that fades the game as a teammate speaks: it shows itself only when you stop looking for it, before assuming clearer teammates require a new microphone. A setting most owners discover by accident, months late: it stays relevant long after launch reviews are forgotten, so find the balance control before your first squad session. The fit after an hour rather than after a minute: it separates honest engineering from brochure engineering.
One footnote matters for setting up a headset properly the first time more than most claims: layered volume controls. Take the case, cable and spares that come in the box: it is the first place to look when sound vanishes or doubles, before a simple default becomes an evening of troubleshooting. Take how the headset behaves on your least favourite platform: it rewards setting each layer once, in a deliberate order. Take the microphone selected in one menu and overridden in another: it rewards five unhurried minutes of attention, because the loudest layer wins and the quietest one rules. Take the fit after an hour rather than after a minute: it rewards five unhurried minutes of attention.
The Decision Checklist for a Clean First Setup
Judged over months rather than minutes, setting up a headset properly the first time turns on the order of checks. Your seating distance measured honestly — it is worth checking before the return window closes, so write the answer down instead of trusting memory.
- Fit before electronics: Set sliders, cup position and boom placement first; a microphone level set for a badly placed boom will be wrong again the moment you adjust the fit.
- One connection, established: Get a single connection type working end to end before adding dongles, Bluetooth pairings and second devices, so faults have only one place to hide.
- Defaults named deliberately: Choose the input and output devices explicitly in the system and again inside your main apps, rather than trusting every layer to guess the same way.
- Levels before processing: Set microphone gain and listening volume with all enhancement off; processing applied to badly set levels polishes a problem instead of solving it.
- A test recording saved: Record thirty seconds of your own voice and a minute of your typical game or call, and keep the files; they become the baseline every future change is judged against.
- Firmware, once, carefully: Check for updates after the basics work, apply them plugged in and undisturbed, then re-verify your defaults, since updates occasionally reset them.
Repairability is part of durability, since a headset whose pads, cable and battery can be replaced will outlive a stronger one that fails as a sealed unit. A cable that exits the cup at a fixed angle gets bent at the same point daily; strain relief and detachable cables exist precisely because that bend is where copper eventually breaks. Hang or rest the headset in the same place every time, off the edge of the desk and out of chair-wheel territory, because most fatal damage is domestic, not electronic. Water resistance on headsets is the exception rather than the rule, so rain, gym use and cleaning all need more caution than phone habits suggest.
Four Setups, Four Different Pitfalls
Judged over months rather than minutes, setting up a headset properly the first time turns on real households. A gamer who treats the screen as a monitor half the week: it tells you more than a specification table ever will.
Consider how this plays out in practice: a first PC setup where the headset works in the operating system test but the game insists on using the monitor’s speakers and the webcam’s microphone. The deciding factor here is rarely the headline specification. In this setup the fault is not fit or tuning at all, but a game quietly addressing the wrong devices while the operating system test tells the truth. Chasing comfort or equaliser tweaks before fixing that routing is wasted effort, because no headset can sound right while the game is listening to a webcam and playing through a monitor.
There is a practical side to setting up a headset properly the first time — cross-platform compatibility — that spec sheets never mention. Chat mixing that exists on one platform and not another — it should be verified with your exact devices listed by name, because the platform you forget is the one that will object. The controls you reach for without looking — it should be verified with your exact devices listed by name.
Take a concrete everyday case: a console setup where chat and game audio arrive in the wrong balance and the fix lives in a party-chat menu the owner has never opened. On a console, a good outcome starts with finding the party-chat balance screen, because that single menu decides whether voices sit above the game or drown beneath it. The console’s chat mixer, the television’s speakers and your habit of playing late all need the balance set deliberately, rather than left at whatever the last update chose. Set that slider once with a friend talking over real gameplay and the modest headset on your head will suddenly seem well matched to the machine it serves.
For setting up a headset properly the first time, how volume deceives is where theory meets the furniture. The fit after an hour rather than after a minute: it argues for setting volume by the quietest passage, not the loudest, so set the level in quiet and resist renegotiating it in noise. A familiar voice note played back as a reference: it rewards headsets whose isolation lowers the needed level, which makes isolation a safety feature in disguise. Take the controls you reach for without looking: it shows itself only when you stop looking for it, before a loud commute becomes a permanent habit.
Take a concrete everyday case: a work-from-home setup shared between a laptop for calls and a phone for music, where multipoint behaviour needs configuring rather than discovering by accident. With two devices sharing one headset, success means telling each device its job in advance, so the laptop owns calls and the phone owns music without a daily negotiation. Multipoint pairing, the laptop’s default device list and your habit of wandering to the kitchen mid-call must be arranged as one system during setup, not discovered piecemeal. Spend ten minutes naming those defaults on setup day and the same headset will hop between a morning stand-up and an evening playlist as if it had been designed for your exact routine.
The honest way into setting up a headset properly the first time runs through the platform junction, a detail many buyers skip. A PC offering three different places to pick the microphone: it shows itself only when you stop looking for it, because the headset is only half of the system you hear. Take what your ears report the morning after a long session: it is a fairer judge than any showroom loop, before blaming hardware for a routing decision software made. Take the controls you reach for without looking: it rewards learning your main platform’s audio map once.
Consider how this plays out in practice: a streaming setup where the audience hears the game twice and the streamer’s voice sits under it, a routing puzzle solved by method rather than luck. For a streamer, the whole setup hinges on separating what the audience hears from what the streamer hears, because one mixed feed cannot serve both honestly. The capture software, the game’s output and your own monitoring need three distinct paths on the routing diagram, agreed before the first broadcast rather than during it. Draw that diagram, label each path and test with a short private recording, and even an entry-level headset will sound intentional instead of accidental on air.
Judged over months rather than minutes, setting up a headset properly the first time turns on how volume deceives. The level that felt moderate on a train and blasts in a bedroom — it can be managed by treating noisy environments as short sessions, and take breaks before fatigue starts making decisions. A long call taken while walking between rooms — it is a hearing-health question wearing a comfort costume, so set the level in quiet and resist renegotiating it in noise. The fit after an hour rather than after a minute: it can be managed by treating noisy environments as short sessions.
The Fortnight After: Tuning What the First Day Cannot Tell You
One footnote matters for setting up a headset properly the first time more than most claims: the settling-in period. The way the sound changes once the pads warm up: it separates a lasting upgrade from a brief honeymoon.
Fit Considerations in the Long Run
Glasses, hairstyles and earrings all change the seal and the pressure map, which is why a headset that vanishes on one head aches on another. The two-hour test tells the truth that a two-minute shop try-on cannot: jaw ache, a hot crown and sore ears all arrive slowly and then all at once. During the fortnight of fine-tuning, pause between adjustments and let your ears reset, because a change judged on tired ears at midnight rarely survives the next morning. A headset that feels secure for gaming movement may clamp too hard for relaxed listening, so judge fit against the activity you will actually do most.
Fit is governed by clamp force, weight distribution and ear cup geometry working together, and small differences in head shape make universal verdicts impossible. A broken seal leaks bass first, so if the low end sounds thin when you put the headset on but rich when you press the cups gently inwards, fit — not the driver — is the problem. If you wear glasses, try thinner-armed frames with headsets, and seat the cups after putting your glasses on so the arms sit inside the cushion’s natural compression. Expect the fit you dial in on day one to drift slightly as new pads bed in, so revisit slider positions at the end of the first week rather than treating the first setup as final.
Pads and Wear Parts Considerations in the Long Run
There is a practical side to setting up a headset properly the first time — foam density — that spec sheets never mention. Cooling gel layers delaying the warmth of a long session: it decides how the pad ages more than its covering does, so choose density for the headset’s second year, not its first hour. The case, cable and spares that come in the box — it changes the verdict more often than owners expect, and expect to replace the softest pads soonest.
Judged over months rather than minutes, setting up a headset properly the first time turns on foam density. Plush foam that feels glorious and flattens within a season — it is a fairer judge than any showroom loop, and expect to replace the softest pads soonest. Take cooling gel layers delaying the warmth of a long session: it tells you more than a specification table ever will, because a compressed pad changes fit, seal and sound together.
Sound Considerations in the Long Run
A calmer look at setting up a headset properly the first time starts with perceived soundstage and what it changes after setup day. Take processing that trades natural tone for theatrical space: it shows itself only when you stop looking for it, because a stage that impresses for a minute can tire for an hour. The fit after an hour rather than after a minute — it should never be bought at the expense of tonal honesty.
When you set listening levels during setup, use spoken dialogue from a call or a game cutscene as your reference, because voices reveal a harsh or buried balance faster than music does. If voices sound spitty during your first test call, check the microphone’s distance before touching any tone control, since a boom parked too close exaggerates exactly those sounds. Before you store any equaliser preset, reseat the headset and replay your test recording, because a preset built on a half-sealed fit will be wrong every time you put the headset on properly. Set the final volume for the ears you actually have at the end of a working day, not for fresh morning ears, because a setup that only suits you rested will be renegotiated nightly.
Connections Considerations in the Long Run
Seasoned owners discussing setting up a headset properly the first time tend to raise wireless latency early. A film that stays in sync while a game does not — it tells you more than a specification table ever will, before assuming wireless must mean compromised. Rhythm games, where timing errors cannot be hidden — it matters enormously for play and barely at all for podcasts, so choose the link for your most timing-sensitive use. Take how the headset behaves on your least favourite platform: it can be tested with a clap on screen and a careful ear. The case, cable and spares that come in the box — it is worth checking before the return window closes.
The honest way into setting up a headset properly the first time runs through the connection trade-off, a detail many buyers skip. The platform you use most deserving the best link — it shows itself only when you stop looking for it, because the best connection is the one your routine respects. A familiar voice note played back as a reference — it separates honest engineering from brochure engineering, so rank your platforms and let the winner choose the link.
Battery Considerations in the Long Run
A headset that can be used while charging, or that offers a quick top-up, changes the failure mode from a ruined evening to a two-minute pause. Choose the headset’s permanent home during setup with the battery in mind: a drawer beside the desk beats a windowsill or a car boot, and a charging cable already waiting there makes the routine automatic. Keep a short cable at your desk permanently; the best battery routine is the one that requires no thought when the warning sounds mid-session. Fast charging is convenient but generates heat, so use it for rescues rather than as the everyday routine if you plan to keep the headset for years.
There is a practical side to setting up a headset properly the first time — using while charging — that spec sheets never mention. Take how the headset behaves on your least favourite platform: it makes fast charging a practical feature rather than a party trick, and route the charging lead before you need it in a hurry. Take a desk setup where charging and using never conflict: it is worth checking before purchase, since not all models allow it, so verify the behaviour with your own cable and port. The ten-minute charge that rescues an evening — it makes fast charging a practical feature rather than a party trick.
Care Considerations in the Long Run
One footnote matters for setting up a headset properly the first time more than most claims: the little-and-often routine. Take a long call taken while walking between rooms: it protects sound as much as hygiene, since blocked mesh dulls everything, so attach the routine to something you already do weekly. The habit of cleaning hands before a long session: it fits real life because it asks so little, because neglected grime eventually demands harsher methods.
Strip away the marketing and setting up a headset properly the first time still hinges on the mundane enemies more than on headlines. What your ears report the morning after a long session — it do their damage slowly enough to be ignored until it shows, because prevention here is measured in seconds per day. A long call taken while walking between rooms: it can be held off by airing, wiping and keeping the headset dry, before ordinary habits write themselves onto the materials. Sunlight through a window fading and hardening fabrics — it is worth checking before the return window closes.
Hearing Considerations in the Long Run
Fatigue is an early warning system — ringing, muffled hearing or needing to raise your voice after a session all mean the level or the duration was too much. Equaliser boosts add level too; a large bass boost applied on top of an already loud setting pushes peaks higher than the volume number suggests. Set volume in a quiet room at the start of a session and resist creeping it up as your ears adapt; take a short silent break instead, and the original level will sound fresh again.
Seasoned owners discussing setting up a headset properly the first time tend to raise isolation and hearing early. The volume you no longer need once the room goes quiet — it stays relevant long after launch reviews are forgotten, which is why fit checks belong early in any shortlist. Ear tips or pads that break their seal when you smile: it separates honest engineering from brochure engineering, and reseat the headset before reaching for the volume. The way the sound changes once the pads warm up: it changes the verdict more often than owners expect, so test isolation with the room at its noisiest.
Going Further: Headset Details That Reward a Second Look
Applied to setting up a headset properly the first time, the secondary details repays a closer look. The remote control you will handle a hundred times a week: it is a fairer judge than any showroom loop, and they are far easier to weigh now than after delivery.
A headset microphone lives or dies on placement and environment long before its capsule quality matters, because distance from the mouth dominates everything it captures. Finish the physical setup by parking the boom tip beside the corner of your mouth and bending it no closer, because that fixed geometry is what every later level setting will assume. Save the thirty-second test recording you make on setup day with a name you will recognise months later, so future troubleshooting compares against a known-good voice rather than a memory.
Look closely at setting up a headset properly the first time and sidetone and self-monitoring keeps deciding the outcome. Take a familiar voice note played back as a reference: it keeps calls comfortable for everyone on the other end, so enable it, set it gently and judge it over a full call. Hearing your own voice naturally while you speak — it rewards a middle setting over either extreme, and adjust it whenever the room or the platform changes. The shout that happens when sidetone is switched off — it changes the verdict more often than owners expect.
In the context of setting up a headset properly the first time, voice consistency does more work than most buyers expect. The fit after an hour rather than after a minute — it degrades the moment the microphone starts wandering, and mark the boom position that works, then return to it. What your ears report the morning after a long session: it stays relevant long after launch reviews are forgotten, because a stable signal is what every filter hopes for. Processing that trusts a steady signal and rewards it — it rewards five unhurried minutes of attention.
Related Guides
Should I install the manufacturer’s software?
Install it if it offers something you will use — equaliser profiles, firmware updates, battery reporting or button remapping — and skip it if it does not. It is a tool, not a requirement, and a headset that only behaves when a heavy app is running is telling you something about its design.
Why does my headset sound different after setup on a new device?
Because every device applies its own defaults: output selection, enhancement, spatial processing and level. A headset carries its tuning with it, but the chain around it changes, which is why a short re-check of defaults belongs in any new-device routine.