Disclosure: As an Amazon Associate, kajuandouglas.com earns from qualifying purchases. Links to Amazon on this page are affiliate links; they cost you nothing extra. Listing details such as price and availability change often, so check the current Amazon listing before you buy.
People often search for “how to connect to a tv a soundbar” after unboxing reveals a single slim bar, a cable or two, and a TV with a dozen sockets — most of which will not work for this job. The reassuring truth is that there is one best connection (HDMI eARC or ARC), one good fallback (optical), and a short list of settings that decide whether the result is seamless or silent. Get those right and the soundbar simply becomes how your TV sounds.
This guide covers each connection in order of preference, the TV settings that must accompany them, how to route consoles and streaming boxes, and the fixes for the standard failures: no sound, sound from both TV and bar, no remote control, and lip-sync drift. It assumes nothing about your TV’s age — there is a working route for sets a decade old — and it keeps everything at the level of cables and menus, where soundbar problems live.
How to connect to a tv a soundbar: The Short Answer
Use an HDMI cable between the TV’s ARC/eARC socket and the bar’s HDMI port, enable CEC on the TV, and set the TV’s sound output to the bar. If your TV lacks ARC, use optical and set the format to PCM if needed. Bluetooth is a last resort for TV because of delay.
In this guide
What You Need
- The soundbar and its power cable
- A high-speed HDMI cable
- An optical (Toslink) cable as backup
- Your TV remote for the settings menus
- Knowledge of your TV’s socket labels — photograph the back panel if unsure
Step by Step
Step 1: Find the TV’s ARC or eARC socket
Look along the TV’s HDMI sockets for one labelled ARC or eARC — there is exactly one, and it is the only socket that can send the TV’s sound out to the bar. Note its number. If no socket carries the label, your TV predates or omits ARC, and optical becomes your main route. While you are behind the TV, also locate the optical output (a small square socket, often with a protective flap) so you know your fallback before you need it.
Step 2: Connect the HDMI cable correctly
Plug one end into the TV’s ARC/eARC socket and the other into the soundbar’s HDMI socket — on the bar it is often labelled HDMI OUT (TV eARC/ARC), which confuses people, but it is the correct port: from the bar’s perspective it outputs video while receiving TV audio back down the same cable. Seat both ends firmly. A loose HDMI connection is a leading cause of intermittent sound and dropouts that get blamed on everything else.
Step 3: Set the TV’s sound output and CEC
In the TV’s sound settings, change the output from TV Speakers to the HDMI/ARC device, and switch on CEC/HDMI Control (brand names include Anynet+, Bravia Sync and Simplink). CEC is what lets the bar wake with the TV and lets the TV remote run the volume. If the menu offers a choice of audio format, choose Passthrough or Auto for surround and Atmos bars; choose PCM for a basic stereo bar, or whenever you hear garbling or silence with the fancier settings.
Step 4: Connect by optical if ARC is unavailable
Remove the tiny protective caps from both ends of the optical cable — the most-skipped step in all of home audio — and push each end home until it clicks; the connector only fits one way round. Set the TV’s output to Optical and its format to PCM unless your bar decodes surround formats and you prefer them. Accept the trade-offs knowingly: optical sound is excellent, but the TV remote will not control the bar’s volume, and the newest formats cannot travel this route.
Step 5: Route consoles and players deliberately
With eARC, plug consoles and players into the TV and enable passthrough; the TV forwards full-quality sound to the bar. With plain ARC, consider plugging your most demanding source into the bar’s own HDMI input if it has one, because ARC cannot carry the highest formats back from the TV. Streaming sticks can live in either device. After connecting each source, check its own audio output settings — devices default conservatively, and a console left on the wrong setting will under-deliver no matter how good the cabling is.
Step 6: Test, then fix the standard gremlins
Play broadcast TV first: sound should come from the bar alone, and the TV remote should control volume. If both TV and bar play, the TV speakers were not switched off in the output menu. If there is an echo, the same cause is at work. If speech drifts from lips, use the audio delay control in small steps. If the bar sometimes fails to wake, re-check CEC on both devices and try a different HDMI cable — handshake quirks between brands are real, and cables are the cheapest variable to eliminate.
As you work through this guide, keep the bigger picture in mind. Our roundup of best soundbars for tv under 300 shows how the main options compare, and the companion piece on how to set up a soundbar covers the neighbouring decision in the same detail.
How to Connect to a TV a Soundbar Without HDMI or Optical
Older TVs may offer only analogue audio out — a headphone socket or red-and-white RCA sockets. Many soundbars include an AUX input for exactly this case; a simple cable connects them, sound is perfectly respectable stereo, and the headphone route often preserves TV-remote volume control. If the TV has no audio output at all, an HDMI audio extractor placed between a source (such as a streaming box) and the TV can provide one — a standard, inexpensive workaround for ageing sets that still have good pictures.
Bluetooth from TV to bar exists on many modern TVs and tempts with its cable-free promise, but treat it as a fallback: the delay it introduces is visible on speech, and reconnections can be temperamental. If you must use it, look for low-latency options in both devices and test with a news programme, not a film trailer. For a permanent installation, one of the wired routes above will serve you better every night of the year, and the cable can usually be hidden in minutes.
Getting One-Remote Control Working
The single-remote life depends on CEC, and CEC depends on both devices agreeing to use it. Enable it on the TV and on the bar (some bars enable it by default, others bury it in the app), then power-cycle both so they renegotiate. Test from the sofa: power, volume and mute should all answer to the TV remote. If volume works but power does not, check for a separate ‘device power control’ toggle in the TV’s CEC menu — brands split these options inconsistently.
Households with a streaming box remote in the mix should pick one master remote and configure the others around it; most streaming remotes can control TV and bar volume via CEC or infrared learning. Write down which remote is master and stick the others in a drawer for a month — remote confusion, not sound quality, is the main reason soundbars get returned by perfectly satisfied listeners. Simplicity is a feature you configure, not one that arrives by itself.
Gear for This Guide

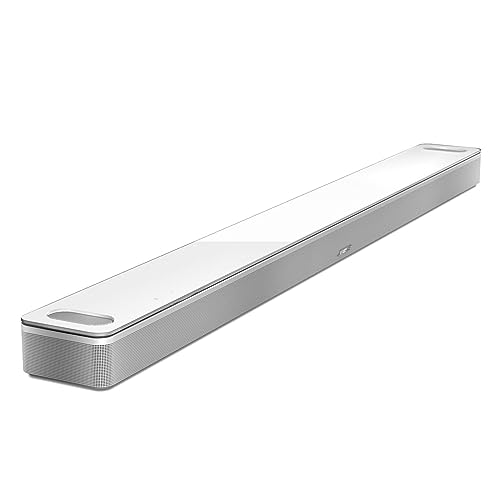
Bose Smart Ultra Soundbar
Bose’s flagship Atmos soundbar with AI Dialogue Mode, voice control and HDMI eARC, designed for large TVs where speech clarity and height effects both matter. It can be expanded with Bose bass modules and rear speakers. Check price on Amazon.

Sonos Arc Soundbar
A premium all-in-one soundbar with Dolby Atmos, Wi-Fi streaming and voice control, designed to work with Sonos subwoofers and rear speakers if you expand later. It connects to a TV with a single HDMI eARC or ARC cable. Check price on Amazon.

LG S40T 2.1ch Soundbar
A 2.1-channel soundbar with a wireless subwoofer and AI Sound Pro processing, designed to pair neatly with LG TVs, including control through the TV interface on compatible models. Check price on Amazon.
Common Mistakes
Plugging into a non-ARC HDMI socket
It fits, it looks right, and it will never carry TV sound. Only the socket labelled ARC or eARC returns audio. This is the first thing to check in any silent setup.
Leaving caps on the optical cable
The protective caps make the cable seem connected while blocking the light entirely. If optical ‘doesn’t work’, caps are the prime suspect — check before re-buying anything.
Forgetting the TV output setting
The connection does not reroute sound by itself. Until the TV’s sound output names the bar, the TV keeps its own speakers or sends nothing.
Judging lip-sync with an action scene
Explosions hide delay; faces expose it. Always test synchronisation with close-up speech — a newsreader is the perfect diagnostic tool.
Pro Tips
- Photograph the TV’s socket labels before you start; you will refer to it constantly.
- PCM is the universal safe format while troubleshooting any connection.
- Enable CEC on both devices, then power-cycle so they renegotiate cleanly.
- Keep the optical cable even if you use HDMI — it is the perfect diagnostic spare.
Going Deeper: Context That Helps
A soundbar’s biggest advantage is also its limitation: everything lives in one wide box under the TV. That makes setup simple and dialogue clear for most viewers, but the left and right channels are only as far apart as the bar is wide, so true stereo separation is narrower than two separate speakers can give. Virtual surround processing tries to widen the picture with psychoacoustic tricks, and on many films it works surprisingly well from a single seat. Understanding this trade-off helps you choose: if you mostly watch dialogue-heavy TV from one sofa, a bar is ideal; if you listen to music critically across a wide room, separate speakers still lead.
HDMI eARC is the connection that matters most on a modern soundbar. It carries full-quality audio from the TV — including Dolby Atmos from streaming apps and consoles — down a single cable, and it lets the TV remote control the bar’s volume. Optical connections are reliable but limited to older surround formats and cannot carry Atmos from most sources. When a soundbar misbehaves — no sound, wrong format, lip-sync drift — the cable and the TV’s audio output settings are responsible far more often than the bar itself, so always check the TV’s menu for eARC, passthrough and PCM settings before assuming the bar is faulty.
Dialogue clarity is the reason most people buy a soundbar, and it depends on the centre channel and on processing, not raw power. Film mixes bury speech under music and effects, and TV speakers point that sound at the wall or the floor. A bar with a dedicated centre channel, or a dialogue enhancement mode that lifts the vocal frequency range, fixes the nightly ‘what did they say?’ problem better than simply turning the volume up. If you watch late at night, look for a night mode that compresses loud effects while keeping speech level — your household will thank you more than for any surround effect.
A wireless subwoofer changes what a soundbar can do more than any other single feature. The bar handles voices and effects; the subwoofer, placed near a wall or corner, reproduces the low rumble of films and the body of music. Because low bass is hard to localise, the sub can live beside the sofa or next to the TV stand, wherever a power socket is convenient — it only needs power, since the audio link is wireless. If a bar sounds thin, first check that the subwoofer is paired, powered and not turned down in the settings before concluding the bar itself is weak.
Soundbar sizes should match the TV, mostly for looks and partly for sound. A bar much narrower than the TV looks lost and spreads sound over a smaller width; a bar wider than the TV stand risks overhang. Measure the stand, check the height of the bar against the bottom edge of the screen so it does not block the picture or the TV’s remote sensor, and leave a little clearance in front of up-firing Atmos drivers. Wall-mounting is an option on most bars, but a stand is simpler, kinder to cables and easier to reposition while you fine-tune the sound.
Room size decides how much soundbar you need. In a bedroom or small flat, a compact bar already plays far louder than you will use, and a huge flagship adds cost without benefit. In an open-plan living space with high ceilings, sound dissipates, Atmos height effects weaken because they rely on ceiling reflections, and a bar with a separate subwoofer — or the option to add rear speakers later — earns its keep. Be honest about the room you have rather than the room in the advertisement: most soundbar disappointment comes from buying for the wrong space, not from buying a bad product.
Soundbars and gaming have a specific requirement: low latency. Audio that arrives late feels as wrong in a game as late video, and some TV processing adds delay to both. Connecting a console through the TV with eARC passthrough, or into the bar itself where it has HDMI inputs, and enabling game mode on the TV keeps sound and action together. If voices in cut-scenes drift from lips, the fix is almost always a setting — the TV’s lip-sync or the bar’s audio delay adjustment — rather than a defect, and it is worth learning where that setting lives before you need it mid-game.
Firmware updates quietly fix many soundbar problems. Manufacturers patch HDMI handshake bugs, app issues and format support through updates delivered over Wi-Fi or USB, and a bar that has sat in a warehouse may ship with early software. When you set up a new bar, run its update before judging it; when an old bar develops a new quirk after a TV update, check for a bar update too, because the two devices negotiate constantly over HDMI. Keeping the maker’s app installed on your phone makes these updates painless and also unlocks EQ and level controls the remote may not offer.
A soundbar is not only for films. For music, most bars sound best in a stereo or music mode with virtual surround switched off, because surround processing smears the stereo image that music is mixed for. Bluetooth and Wi-Fi streaming make the bar the easiest speaker in the house to play music through, which is why many households end up using it daily for radio and playlists. If music matters to you, judge a bar with your own favourite tracks during the return window, at your normal volume, from your normal seat — film demos in a shop flatter almost everything.
Accessibility features deserve more attention than they get. Many bars offer dialogue modes with several levels of voice boost, some TVs can send audio to both a bar and hearing aids or headphones at once, and Bluetooth output on some models lets one listener use headphones while others use the bar. For households where one person struggles with TV sound, these features change daily life more than surround formats do. Check the manual’s accessibility section before buying if this matters to you — the information is rarely on the box but often present in the product.
Placement rules for soundbars are simple but strict. The bar belongs at ear height when seated, or as close as the TV stand allows, centred on the screen, with its front edge near the front of the stand so sound does not reflect off the stand’s surface. Never put a bar inside a closed cabinet: the doors and shelves block and colour the sound, and heat builds up. Up-firing Atmos bars additionally need a clear path to a flat ceiling — beams, ceiling fans and very high or vaulted ceilings all weaken the height effect, though the bar will still sound good as a normal surround bar.
Frequently Asked Questions
Why is there no sound from my soundbar?
Work the chain: bar powered and on the right input; HDMI in the TV’s ARC/eARC socket specifically; TV sound output set to the bar; CEC enabled; format set to PCM if the bar is a simple model. For optical: caps off, cable clicked home, output set to optical. In practice, one of these six is the answer almost every time. Test with broadcast TV rather than an app, so you are diagnosing the connection and not a streaming service.
What is the difference between connecting by ARC and by eARC?
The physical act is identical — one HDMI cable — but eARC carries far more audio bandwidth from the TV to the bar, including uncompressed surround and full Dolby Atmos from consoles and players plugged into the TV. ARC covers broadcast TV, streaming apps and standard surround completely adequately. If both your TV and bar support eARC, you get the benefit automatically with a suitable cable; if either lacks it, the connection simply works as ARC, with no action needed from you.
Can I connect a soundbar to an old TV?
Almost certainly yes. Optical outputs reach back many years and suit most bars; older still, a headphone socket or RCA outputs can feed a bar’s AUX input; and if a TV truly has no audio output, an HDMI audio extractor between a streaming box and the TV creates one. The picture quality of an old TV often deserves better sound than its speakers give, which makes it the most satisfying soundbar pairing of all. Check what your set offers before assuming you need a new TV.
Why do the TV speakers and soundbar play at the same time?
Because the TV’s sound output was not switched to the bar, or a feature that plays both (offered deliberately by some TV-and-bar combinations) is enabled. Go to the TV’s sound output menu and select the HDMI or optical device explicitly. The echoing double-sound is the signature of this setting, not a fault. If your TV and bar support a deliberate play-together mode and you dislike it, disable it in the TV’s audio settings and let the bar work alone.
Will the TV remote control the soundbar volume?
Yes, if you connect by HDMI ARC/eARC with CEC enabled on both devices — that is one of the main reasons to prefer HDMI. With optical, the connection carries no control signals, so you will use the bar’s remote unless it can learn your TV remote’s infrared commands, a feature some bars offer. With an analogue headphone-socket connection, the TV remote usually does control volume because it is driving that output directly. Choose the connection with your remote habits in mind.
The sound lags behind the picture. What fixes it?
Find the audio delay or lip-sync setting — on the bar, in its app, or in the TV’s sound menu — and increase it in small steps while watching close-up speech until words and lips align. If the problem is only with a console, route it through the TV with passthrough or directly into the bar, and check its output settings. If you are connected by Bluetooth, the delay is inherent to the link; a wired connection is the real cure. Persistent lag on one app only points at the app, not your hardware.
Choosing the Right Connection for Each Kind of Television
The best connection is not an abstract ranking; it depends on what your television offers and what you ask the system to do. A recent set with eARC is the easy case: one HDMI lead carries everything, including the highest-quality formats from apps and connected players, and control signals travel back so one remote runs the show. The work is not in plugging it in but in confirming the television is actually using that socket’s full abilities, because many sets ship with the enhanced format for the socket switched off or set to a limited mode.
Televisions with ARC but not eARC
A set with plain ARC still gives a clean, convenient system for the great majority of viewing. Streaming services send compressed surround that ARC carries comfortably, and broadcast television asks for even less. The limits appear with lossless soundtracks from discs and some game consoles, which ARC cannot pass at full quality. If those sources matter, route them into the bar directly if it has inputs, letting the bar take the sound and pass the picture onward, rather than sending them through the television and accepting the downmix.
Control behaviour on ARC is generally the same friendly story: power and volume commands travel between devices so the television remote governs the bar. When that misbehaves, the cause is usually a control setting switched off on one device, a cable that does not carry the control channel reliably, or a third device on another socket interfering with the control chain. Disconnecting other HDMI devices temporarily is a legitimate diagnostic step here, not superstition, because one badly behaved box can disrupt control for the whole system.
Optical, analogue and Bluetooth as deliberate choices
Optical is often described as a fallback, but for a television without any ARC it is a perfectly respectable primary connection, stable and immune to the handshake dramas HDMI occasionally stages. Its fixed limits are known in advance: no control of the bar by the television remote through the cable, and no carrying of the newest object-based formats. For news, sport, drama and streaming films in ordinary surround, none of that prevents an enjoyable evening, and some owners of temperamental early ARC sets deliberately choose optical for its predictability.
Analogue connections from a headphone socket belong to genuinely old or very small televisions. If you must use one, set the television volume to a moderate fixed level and control listening volume with the bar, which keeps noise low and behaviour consistent. Bluetooth between television and bar should be the last resort for a permanent installation: it is convenient for a temporary arrangement, but its delay makes lip-sync a recurring negotiation and its connection can wander in a way a cable never does.
Routing Each Source So It Behaves the Same Way
Inconsistent behaviour between sources is the complaint that makes owners distrust a connection that is actually sound. The film app is loud, the console is quiet, the disc player arrives in stereo — each has a cause in routing or format settings, and each is fixable once you decide on one consistent pattern. Either everything goes through the television, which then feeds the bar, or key sources go through the bar, which passes picture to the television. Mixing without a reason invites exactly the inconsistency people complain about.
Consoles, players and streaming sticks
Game consoles care about two things: low delay and, on recent machines, high-quality audio formats. Through a modern eARC television, both are satisfied and the television’s game picture settings apply automatically. Through the bar, audio may improve on an older television, but you must confirm the bar passes the video features your console and television share, such as high refresh rates or variable refresh, or the picture will quietly downgrade. Check the television’s input information display after connecting; it tells you what the screen is actually receiving.
Disc players and streaming sticks are simpler guests. A player with two HDMI outputs can send sound directly to the bar and picture directly to the television, the connoisseur’s route for older equipment. A streaming stick usually lives in a television socket and inherits the television-to-bar path, which is exactly right, provided the television’s output format is set to pass the stream through rather than decode everything into plain stereo before the bar ever hears it.
When two devices both want to be in charge
Control conflicts arise when a console, player or streamer tries to switch the system to itself at unwelcome moments, or when the television and bar disagree about which input is active. The fix is hierarchy: decide that the television is the switchboard, turn off automatic input switching on devices that abuse it, and keep the bar set to follow the television. Most systems offer these toggles; they are merely scattered across three different menus, which is why writing down where each lives, once found, is worth two minutes of your life.
If a particular device repeatedly disrupts the chain, isolate it onto optical or its own bar input so its control chatter no longer reaches the others. This is not defeat; it is sound systems engineering at domestic scale, separating a noisy component so the rest can behave, and it resolves a surprising share of cases where a whole system was condemned for one peripheral’s manners.
Proving the Connection Works: A Short Acceptance Test
Do not declare the job done because sound came out once. Run a five-minute acceptance test that exercises each promise the connection makes. First, power: switch the television on and confirm the bar wakes and plays without intervention, then switch off and confirm the bar sleeps. Second, volume: change it with the television remote and watch the bar respond smoothly. Third, sources: visit every connected source in turn and confirm each produces sound in the format you expect, using the bar’s information display or app where available.
Testing formats and lip-sync properly
For format testing, use material you can identify. A film scene with obvious surround activity, such as rain or a passing vehicle, confirms the rear and side information is arriving; a dialogue scene confirms the centre. If your system reports the incoming format, compare it with what the source claims to send, and investigate any silent downgrade to stereo, which usually traces back to one output setting on the television or the source still set to its safest default.
For lip-sync, use close-up speech, ideally a news presenter, and watch the consonants. Small errors are easiest to see on hard sounds and on percussion in music performances. Test each source separately, because delay is a property of a path, not of the whole system: the app path may be perfect while the console path needs correction, and many televisions and bars now allow the correction to be stored per input if you take the time to set it that way.
Documenting the finished wiring
Finish by labelling both ends of each cable with a small tag or a note in your phone: source, socket, and any setting that had to change to make it work. Cable labels feel excessive on installation day and priceless on the day a cleaner, a move or an upgrade disturbs the back of the television. Photograph the rear panel one final time in its working state.
That photograph, plus your note of the three or four settings that matter, is the real product of a careful connection job. Hardware can be replaced like for like in minutes when the knowledge of how it was connected survives, and most of the misery in home audio comes not from broken equipment but from lost knowledge about equipment that works perfectly well.
Connection Problems That Appear Weeks Later
A system that worked on installation day can develop faults that feel mysterious but follow patterns. Sound that drops for a second at a time often traces to a cable that has been strained by a television on a moving mount, a socket loosened by repeated plugging, or interference on a control channel after a new device joined the system. Sound missing only after the television has slept overnight points to wake-up behaviour and power settings. Each pattern narrows the search before you touch anything.
Intermittent dropouts and the humble cable
Before suspecting electronics, reseat every connector firmly and try one known-good, appropriately rated HDMI lead in place of the main link. Cables fail gradually, especially where they bend sharply behind a wall-mounted set, and an intermittent cable produces symptoms indistinguishable from a failing bar. Keep bends gentle, avoid hanging weight on connectors, and never force a plug that resists; HDMI connectors are keyed and fragile in equal measure.
If dropouts began when something else arrived — a new console, a recorder, a streaming box — suspect that device’s control behaviour first and test with it disconnected. Manufacturers issue fixes for such interactions, so a firmware check on all devices belongs early in the investigation, well before factory resets, which should remain the last resort after settings have been recorded and simpler causes eliminated one by one.
Connecting in Awkward Physical Situations
Real installations include wall-mounted televisions with sockets facing a wall, media furniture too shallow for the bar, and cable runs that must cross a room. Each has a workable answer, and none requires accepting a dangling cable as a permanent feature. For a wall-mounted set, connect and label every cable before the television goes back on its bracket, leave one spare HDMI lead in place against future needs, and consider right-angled connectors where a straight plug would be crushed or would push the set off level.
Cable management that survives contact with reality
Route power and signal cables separately where you can, bundle signal leads loosely rather than in tight coils, and leave a service loop — a gentle extra length — behind the furniture so the bar or television can be pulled forward for cleaning or a new connection without disconnecting everything. Adhesive trunking painted to match a wall hides a vertical run neatly in rented homes where chasing a channel into plaster is not an option. Whatever method you choose, the test is whether you can still reach every connector in six months without dismantling the room.
Wireless connections between television and bar exist on some ecosystems and can rescue an impossible run, but treat them as a considered choice rather than a default: confirm the delay behaviour with speech, the stability in a home full of competing wireless traffic, and what happens when the connection drops mid-film. A cable, once fitted, asks nothing further of you, which is why installers reach for one whenever the room allows it.
Bars in cabinets, on walls and under screens on stands
Where the bar sits changes which connection is practical. A bar inside an open-fronted unit needs its cables routed through the back panel, with ventilation respected and the remote’s path to the bar kept clear, or you will be opening doors to change volume. A wall-mounted bar wants its cables dropped inside trunking or the wall cavity where regulations allow, planned before the drill comes out. A bar on a stand in front of the television is the forgiving case, but check that it does not block the television’s remote sensor, a connection problem disguised as a furniture problem that has baffled many households.
In each case, connect and fully test the system before final fixing, cable tidying or pushing furniture back. Discovering a wrong socket while everything is still accessible is a shrug; discovering it after the television is mounted and the unit is loaded is an afternoon. Professionals test before they tidy for exactly this reason, and it is the easiest professional habit to copy at home.
Getting the Most From the Connection After It Works
A working connection is the floor, not the ceiling. Several refinements cost nothing but attention. If your television offers an enhanced or expanded mode for its eARC socket, confirm it is on so the widest range of formats can pass. If the bar offers an information display or app readout of the incoming format, learn where it lives, because it turns future format mysteries into a glance. If either device offers automatic lip-sync correction along the HDMI connection, leave it enabled and make manual corrections only for sources that still misbehave.
Firmware, and the connection’s ongoing health
Connection standards evolve through firmware more than hardware now. A television update can improve eARC reliability, a bar update can fix a control quirk, and occasionally an update can change behaviour you liked, which is why reading the short release notes before applying a major update is worth a minute. Keep both devices reasonably current, apply updates at a calm moment rather than minutes before a big match or family film, and re-run your five-minute acceptance test afterwards: power, volume control, each source, one format check, one lip-sync check.
Keep one spare HDMI lead of a known standard in the house. It is simultaneously a diagnostic tool, a replacement for the cable most likely to be damaged by furniture movement, and the fastest way to connect a visiting console or a borrowed player. Small, cheap and decisive in an emergency, it is the accessory that experienced owners recommend most and new owners think of last.
Teaching the system to visitors and family
End the connection job socially, not technically. The system should present one simple rule to everyone else: turn on the television, use its remote, and the bar will follow. If your arrangement deviates — a bar that must be woken separately for one particular source, say — write that single exception down where a visitor or babysitter can find it. Systems fail socially when only one person understands them, and the best-connected bar in the world is a failure if the household routes around it and returns to television speakers out of habit.
The Connection Checklist to Keep With Your Manuals
Distil the finished job onto one page. Record which television socket the bar uses and its exact name in the menu, the output and format settings chosen on the television, the bar’s television input name, the per-source lip-sync corrections if any were needed, and the location of the spare cable. Add the date and the firmware versions in use when everything last worked perfectly. That page converts every future fault from an open-ended investigation into a comparison: what does the system look like now, against what it looked like when it worked?
Keep the page honest by updating it whenever you change the wiring deliberately — a new console, a replaced television, a different route for the disc player. Two minutes with a pen at the moment of change saves the archaeology later. And when you eventually replace the television or the bar, hand the page to your future self like a letter: the new connection will take half the time, because the thinking, which was always the slow part, has already been done once and written down.
Connecting a Soundbar in a Second Home, Caravan or Rented Room
The principles travel, but portable contexts reward the simplest paths. In a holiday home, a caravan or a rented room, favour the connection you can make and unmake in minutes — a single HDMI lead to an ARC socket, or optical where that is what the television offers — and resist building the elaborate multi-source architecture of a permanent lounge. Label the television’s correct settings in a note left with the house, because the next occupant, who may also be you in six months, will not remember them. Portable systems also meet televisions of unpredictable age and temper; carrying a short optical cable alongside the HDMI lead, as a universal interpreter between generations of equipment, has rescued more holiday film nights than any other single precaution in this guide’s whole subject.
Related Guides
These guides and roundups cover the closest decisions and fixes in this category:
- best soundbars for televisions
- best soundbars for lg c1
- best soundbars for computers
- best mini soundbars for under 50
- how to connect to a tv a speaker
- how to fix a soundbar with no sound
Can I use both HDMI and optical at the same time?
You can connect both, but the bar will only play one input at a time, and having two live paths invites confusion about which is selected when sound seems wrong. Choose one primary connection, keep the other cable only if you have a specific second use for it, and note which input the bar should be on for television sound.
Does cable length between the TV and soundbar matter?
For the short runs in most living rooms, any well-made cable of the right standard works. Very long runs, especially hidden in walls or bent sharply, are where cheaper cables begin to drop the signal intermittently. If your run is long, buy a cable rated for the job, test it before burying it in trunking, and keep a spare path in mind.
Why does my soundbar switch itself to Bluetooth?
Usually because a previously paired phone or tablet nearby has reconnected automatically, or someone in the household has selected the bar as a speaker. Remove pairings you no longer need, and check whether the bar has a setting to stay on its last television input. The bar is following instructions; they are just coming from a device you forgot about.