Understanding how to clean the screen of a touch screen laptop matters more than it does for a regular machine, because this screen is touched constantly, lives under fingers, palms and pen tips all day, and carries coatings that the wrong cleaner can permanently damage. Fingerprints on a touch panel are not just cosmetic: skin oil builds into a film that dulls the display, makes fingers drag instead of glide, interferes slightly with touch accuracy, and in tablet mode sits exactly where you are trying to read. The correct method is gentle and quick, a dry microfibre cloth for daily care, a barely dampened cloth for stubborn grime, and a short list of things to never use. This guide covers the routine, the deep clean, pen and hinge care, and how to keep the screen cleaner for longer between sessions.
Disclosure: As an Amazon Associate, kajuandouglas.com earns from qualifying purchases. Links to Amazon on this page are affiliate links; they cost you nothing extra. Listing details such as price and availability change often, so check the current Amazon listing before you buy.
How To Clean The Screen Of A Touch Screen Laptop: What Matters Most
Power the laptop off. Wipe the screen with a clean, dry microfibre cloth in light circular motions for everyday fingerprints. For stubborn grime, dampen the cloth very slightly with distilled water, never spray the screen, and dry with a second cloth. Never use household glass cleaner, kitchen sprays, paper towels or alcohol-heavy products unless the manufacturer explicitly approves them for your panel.
In this guide
What You Need
- Two soft microfibre cloths, kept for the screen only
- Distilled water for dampening, if your tap water leaves mineral marks
- A soft brush for the hinge line and keyboard deck
- Optional: a screen cleaner specifically labelled safe for coated displays
- Five quiet minutes with the machine powered off and unplugged
Step by Step: How To Clean The Screen Of A Touch Screen Laptop
Step 1: Power off and prepare the surface
Shut the laptop down and unplug it. A dark screen shows smudges and dust honestly, and a powered-off machine cannot react to touches or suffer from an accidental drip. Work on a clean table in decent light. Shake out your microfibre cloth before you begin; a cloth that has been living in a bag carries grit, and grit dragged across a coated screen is how fine scratches happen. Keep one cloth exclusively for screens and wash it regularly without fabric softener, which leaves its own film.
Step 2: Start dry: the everyday fingerprint routine
Most touch screen grime is skin oil, and most of it lifts with a dry cloth alone. Use light pressure and small circular motions, working across the whole panel rather than scrubbing one spot. Flip the cloth to a clean face as it loads with oil, because a saturated cloth just redistributes the film. This thirty-second routine, done weekly or whenever glide feels draggy, handles ninety percent of touch screen cleaning and carries zero risk to coatings, which is why it should always be your first move.
Step 3: Dampen, never spray, for stubborn grime
For dried splashes, sticky marks or a screen that has gone months without care, dampen the cloth with distilled water until it is barely moist, not wet, and wipe with the same light circular motion. Liquid must never be sprayed or dripped onto the panel, where it can run into the edges and behind the glass. Follow immediately with the dry cloth to clear residue before it dries into streaks. Stubborn spots yield to patience and repeated gentle passes, not to pressure, which can damage the panel beneath the glass.
Step 4: Respect the coatings: know what never to use
Touch screens carry oleophobic and sometimes anti-glare coatings that household chemicals attack. Keep glass cleaner, ammonia-based sprays, kitchen and bathroom cleaners, vinegar solutions and paper towels, tissues and rough cloths away from the panel entirely. Alcohol-based cleaners are a grey area: some manufacturers permit diluted isopropyl for disinfection, others warn against it, so check your model’s guidance before using any. When in doubt, distilled water on microfibre is the universal safe answer, and it has never ruined a screen.
Step 5: Clean the pen, hinge and the rest of the input surfaces
Wipe the pen body with a dry or barely damp cloth and check its tip for wear or trapped grit, because a damaged nib dragged across the glass can scratch it; replace worn tips promptly, they are cheap and exist for this reason. Brush dust from the hinge line and keyboard deck, where debris migrates onto the screen every time the lid closes. On convertibles, clean in laptop mode and then fold and check the back panel too, since tablet mode puts that surface in your hands all day.
Step 6: Build habits that keep the screen cleaner longer
Wash or wipe your hands before long pen sessions when you can, avoid eating over the open machine, and close the lid or fold the machine away rather than leaving the screen exposed to kitchen and desk dust. A sleeve for transport stops bag lint and grit reaching the panel. None of this needs to become a ritual; the point is that a screen cleaned gently and often never needs the aggressive cleaning that risks its coatings, and its touch glide stays the way it felt on day one.
How Touch and Pen Input Actually Work on a Laptop
A touch laptop replaces the simple display of a regular machine with a layered panel: the screen itself, a digitiser that senses finger or pen position, and protective glass on top. Capacitive sensing reads the tiny electrical change a fingertip causes, which is why gloves and ordinary pens do not register, while active pens communicate their own position, pressure and tilt to a dedicated digitiser layer. That distinction explains most buying confusion: a screen that works beautifully with a finger may offer only crude pen input, and handwriting or drawing quality depends on the pen technology, not the display resolution. Palm rejection is software and sensor work combined, letting you rest a hand on the glass while writing. Hinges complete the system on convertibles, either folding a full 360 degrees or detaching entirely, and each design trades rigidity, weight and port layout differently. Judge a touch laptop by the input method you will actually use, because finger navigation, note-taking and illustration are three different requirements wearing one label.
Where Touch Genuinely Helps, and Where It Does Not
Touch earns its place in specific moments: scrolling long documents in tablet mode on a train, annotating a PDF with a pen during a lecture, sketching an idea before it fades, signing a form without a printer, or presenting while standing and tapping through slides. It is less convincing at a desk, where reaching forward to a vertical screen tires the arm and smudges the panel, and where a good touchpad or mouse is faster for precise work. Battery and weight also pay a small tax for the digitiser and glass, and glossy touch panels reflect more light than matte regular screens. The honest test is your own week: count how often you would fold the machine back, pick up a pen or tap rather than click. If those moments are daily, touch is a feature you will use for years. If they are hypothetical, a regular laptop with a better screen or larger battery for the same money may serve you better.
Caring for a Touch Screen and Its Hinges
A touch panel is the most handled surface on any laptop, so it collects skin oil, dust and the occasional splash, and it is also the most fragile and expensive part to replace. Clean it powered off, with a dry or barely damp microfibre cloth, never with household glass sprays that can damage coatings, and never by pressing hard on one spot. The hinges on a convertible work harder than on any other laptop style, cycling through laptop, tent, stand and tablet positions, so open and close the lid from the centre, keep crumbs and grit away from the hinge line, and avoid carrying the machine by its screen corner. Cases and sleeves matter more here too, because pressure on the lid in a crowded bag flexes the glass. Treat the pen as part of the machine: store it in its slot or loop so its tip is protected, and replace worn tips before they scratch. Gentle habits add years to a mechanism that cannot be serviced cheaply.
Touch Settings, Calibration and Accessibility
Modern operating systems rarely need manual calibration, because panels leave the factory aligned and the system compensates automatically, but the settings around touch still reward attention. Sensitivity, palm rejection behaviour, pen button assignments, flick and gesture controls and the on-screen keyboard all live in the pen and touch settings, and five minutes there can fix annoyances owners tolerate for years. Accessibility options deserve a look even if you do not need them daily: larger touch targets, touch feedback visuals and hold-to-right-click timing make the machine friendlier for anyone sharing it. When touch misbehaves, the cause is usually software rather than the panel itself: a disabled device in the device manager, a driver update that stalled, a screen protector lifting at one corner, or moisture on the glass. Work through settings, drivers and a clean, dry screen before assuming hardware failure, because genuine digitiser faults are the least common explanation and the most expensive one to chase first.
Why Touch Screens Get Dirty Differently, and Why Gentle Wins
A regular laptop screen collects dust and the occasional sneeze. A touch screen collects its user’s hands: every tap deposits a trace of skin oil, every palm rest during pen work spreads it, and every tablet-mode reading session holds the panel against clothing and skin. The oleophobic coating that makes fingers glide is itself a consumable layer that wears fastest exactly where thumbs scroll. Aggressive cleaning accelerates that wear, which is why harsh chemicals and rough cloths are doubly destructive here: they strip the coating that keeps the screen pleasant, making it attract visible grime faster afterwards. The gentle method is therefore not preciousness but engineering sense. Microfibre’s split fibres lift oil mechanically without chemistry, distilled water assists without residue, and light pressure protects both coating and panel. Owners who adopt the dry-cloth habit usually find their screens need a damp clean rarely, and stay slick and clear for years.
When you are ready to compare complete machines rather than individual settings, start with our roundup of the best touch screen laptops for photoshop and keep our roundup of the best laptops for photo editing under 500 open in a second tab. Reading a settings guide and a buying roundup side by side stops the most common mistake in this whole topic: changing software or hardware in isolation, without checking whether the rest of the machine actually supports the change you have in mind.
Gear for This Guide

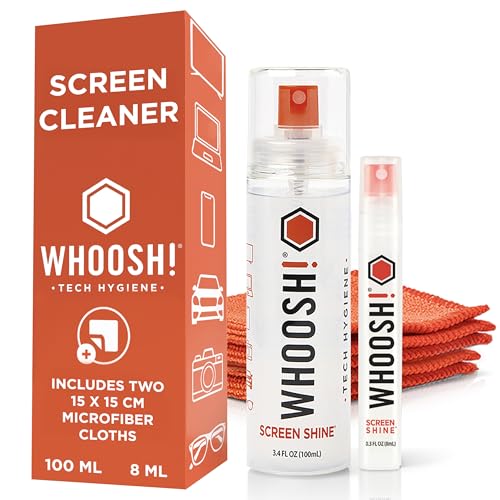
WHOOSH! Screen Shine Duo – Screen Cleaner and Wipe Kit — WHOOSH! Screen Shine Duo – Screen Cleaner and Wipe Kit, 3.4 + 0.3 fl oz | Includes 2 – 6×6″ Microfiber Cloths, Travel & Pocket Size Bottles, For iPad, Monitor, Laptop & MacBook. Check price on Amazon before you decide, because configurations and availability change often.
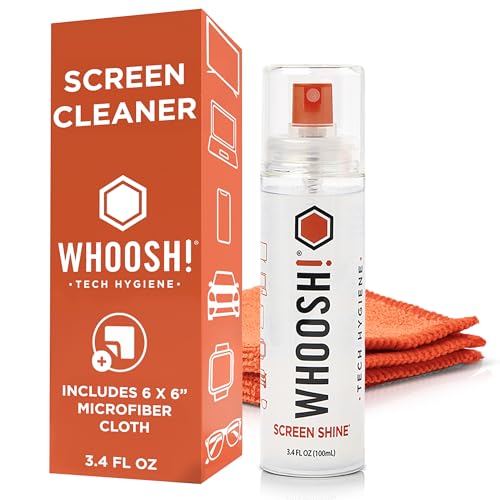
WHOOSH! Screen Shine Go XL – Screen Cleaner Spray & Wipe Kit — WHOOSH! Screen Shine Go XL – Screen Cleaner Spray & Wipe Kit, 3.4 fl oz | Includes 6×6″ Microfiber Cloth, Sleek Bottle for Home & Travel, Streak Free Finish, For Car, Computer, MacBook & Eyeglasses. Check price on Amazon before you decide, because configurations and availability change often.

WHOOSH! Microfiber Glasses & Screen Cleaning Cloth — WHOOSH! Microfiber Glasses & Screen Cleaning Cloth, 3 Pack, 14×14″, Orange | Machine Washable, Suitable for Electronics – TV, Car, Computer, Laptop, Monitor & Eyeglasses, Prevents Scratches, Lint Free. Check price on Amazon before you decide, because configurations and availability change often.
Common Mistakes
- Spraying cleaner directly onto the screen so liquid runs into the panel edges and ports.
- Using household glass cleaner or kitchen spray, which can strip the oleophobic coating permanently.
- Scrubbing a stubborn spot with hard pressure in one place, risking panel damage beneath the glass.
- Cleaning with paper towels or tissues whose fibres can leave fine scratches across a glossy panel.
Pro Tips
- Keep a dedicated microfibre cloth in your laptop sleeve so the right tool is always the nearest tool.
- Clean pen tips and check them for grit before long drawing sessions; the pen touches the screen more than your fingers do.
- If you use a screen protector, replace it when it clouds; protectors are the sacrificial layer by design.
- Photograph your screen under light monthly if you lend the machine; early coating wear is easier to address than late.
A Worked Example, From Start to Finish
Imagine the process applied to one ordinary owner rather than a test bench. They begin by writing down what success looks like in one sentence, work through the steps in order without skipping the preparation that feels skippable, and pause at the verification stage instead of declaring victory at the first encouraging sign. Two adjustments are usually needed: one step takes longer than expected, and one assumption made at the start turns out to be wrong in a small, correctable way. That is not failure; that is the normal texture of doing this properly, and it is why the guide separates preparation, execution and verification so deliberately. By the end, the result is checked rather than hoped for, the notes exist for next time, and the owner understands their own machine measurably better than when they started. Every reader’s details will differ from this example, but the shape of a good outcome rarely does: prepare honestly, change one thing at a time, verify under real conditions, and write down what you learned while it is still fresh enough to be accurate.
Putting It All Together
Work through the steps in order, test the result in your real routine for a few days, and adjust the one or two choices that your own use proves wrong rather than restarting the whole process. The guidance in this guide reflects how these machines behave across years of ownership, not just on day one, which is why the unglamorous details, placement, profiles, backups and habits, carry as much weight as the headline specifications. Keep your receipts, your notes and your original parts where parts were changed, revisit the related guides when your needs shift, and remember that a well-matched, well-kept laptop of any tier serves its owner better than a flagship that fights its owner’s life. That fit, more than any single feature, is what you were really choosing.
Understanding What Is Actually on Your Screen
What accumulates on a touch screen is more varied than it looks, and naming the layers explains why one wipe sometimes works and sometimes only rearranges the problem. The base layer is skin oil, deposited by every tap and swipe, which spreads into the broad, rainbow-tinged smears that catch the light. Over that sits ordinary dust and fabric lint, which oil conveniently glues in place. Then come the event layers: food residue from desk lunches, drink splashes, sunscreen and hand cream transferred from palms, pen-side grime from the stylus grip, and in shared or family machines, the honest archaeology of several users. Each layer responds to a slightly different treatment, which is why the main guide insists on a dry pass first: dry microfibre lifts dust and redistributes surface oil, and only the residue that survives that pass genuinely needs moisture.
Recognising the layers also prevents the most common cleaning frustration, the smear that migrates. When a screen seems to get dirtier as you clean it, you are usually pushing an oil film around with a cloth that has already saturated, or adding moisture that dissolves grime and then dries it back onto the glass in a wider, thinner pattern. The remedies are procedural rather than chemical: work in smaller areas, turn the cloth to a fresh face frequently, finish each area with a dry buffing pass, and inspect against a dark background at an angle before declaring victory. Cleaners who slow down at exactly this point discover that technique, not stronger products, was the missing ingredient all along.
Cleaning in Difficult Environments
Classrooms and shared machines
Shared touch laptops accumulate grime at several times the rate of personal ones, and they add a hygiene dimension that personal machines mostly avoid. In classrooms, training rooms and family kitchens, build cleaning into the handover rather than leaving it to chance: a dry wipe at the end of each session, a damp clean at the end of the day, and cloths laundered or replaced on a schedule, because a shared dirty cloth merely standardises the grime across every machine it touches. Where devices pass between many hands daily, follow the device maker’s own guidance on disinfecting, use only the mild products they permit, and accept the trade-off honestly — disinfection is harder on coatings than cosmetic cleaning, so reserve it for when hygiene genuinely requires it rather than making it the daily default.
Workshops, kitchens and the outdoors
Screens used near flour, sawdust, cooking vapour or sunscreen face faster and stickier accumulation, and the first defence is environmental rather than chemical. A case that actually closes, a stand that keeps the screen out of the splash zone, and a house rule that hands get washed or at least wiped before tablet mode will outperform any cleaning product. When cleaning these machines, extend the dry stage: loose abrasive particles such as sand or grit must be lifted or gently blown away before any wiping begins, because dragging grit across glass under a cloth is how fine scratches are born. Only once the surface is particle-free should the normal damp routine begin.
Cold, heat and humidity
Temperature changes how cleaning behaves. A screen brought in from a cold car will fog as room moisture condenses on it; wait for it to reach room temperature before cleaning, or you will chase condensation around the glass and risk moisture at the edges. In humid conditions, use less liquid than usual and give the screen a longer final dry pass, since a damp film that would flash off in a dry office lingers and streaks in a steamy kitchen. Small adjustments like these are the difference between a routine that works in a guide and one that works in your actual house.
Caring for the Pen, the Second Screen-Cleaning Surface
The stylus touches the screen thousands of times and carries its own contamination story. Its tip picks up grit and oil, its barrel collects hand cream and desk grime, and a worn tip with a rough edge can mark a screen that a clean, smooth tip would glide over. Wipe the barrel with the same barely damp cloth you use on the glass, inspect the tip under good light whenever cleaning the screen, and replace tips that look flattened, split or embedded with debris. Store the pen in its garage, magnetic home or case rather than loose in a bag, where it collects the lint and crumbs that it will later deliver faithfully to the centre of your display. Owners who clean screens faithfully but neglect the pen are mopping the floor while leaving the muddy boots on, and the pen takes under a minute to include in the routine.
Cloths, Liquids and Tools: Choosing and Maintaining Your Kit
The cloth is the tool, and its condition decides more outcomes than any liquid. Good microfibre works because its split fibres lift oil and hold particles away from the glass; a cloth that is old, washed with fabric softener, or loaded with previous weeks of grime has lost exactly those properties and becomes a smearing pad. Keep two cloths in rotation for a touch laptop: one working cloth and one finishing cloth kept cleaner for the final dry buff, and wash them regularly with ordinary detergent, without softener, letting them air-dry. Replace cloths that feel slick or leave lint, and never borrow the kitchen cloth, the shirt tail or the paper towel for the job — paper products in particular can carry wood fibres abrasive enough to dull coatings over time, quite apart from the lint storm they leave behind.
Liquids deserve the same restraint. For the overwhelming majority of cleaning, plain water, barely dampening the cloth, is the entire chemistry required, because the enemy is oil and dust rather than anything water cannot lift once the cloth does the mechanical work. Screen-specific cleaners from reputable makers are acceptable where the laptop maker permits them and can help with unusually greasy films, but they earn their place as an occasional aid, not a daily ritual, and more liquid never substitutes for better technique. Whatever you use, the rule from the main guide is absolute: liquid goes on the cloth, never on the screen, in quantities that leave the cloth damp rather than wet, so nothing can wander toward the panel edges, speaker grilles or hinge where it does not belong.
Building a two-minute station you will actually use
- Keep the cloths where the laptop lives, not in another room; convenience is the whole secret of regular cleaning.
- Store cloths flat or in a clean pouch so they do not gather the dust they exist to remove.
- Keep the pen with the machine, and give it a wipe whenever the screen gets one.
- Replace the working cloth when it stops lifting fingerprints in a single pass, which is its honest retirement signal.
Streaks, Smears and Residue: Troubleshooting the Clean Itself
When a cleaned screen still looks wrong in the light, diagnose the residue before reaching for anything stronger. Streaks that follow your wiping direction usually mean too much liquid or a saturated cloth; the cure is a fresh dry cloth, light pressure and a slower final pass across the grain of the earlier streaks. A hazy film that appears everywhere suggests product residue — from an over-generous cleaner, a softener-washed cloth, or hand cream transferred mid-clean — and responds to a barely damp plain-water pass followed by thorough dry buffing. Rainbow patterns that shift as you tilt the screen are thin oil films, best handled by patience and a clean finishing cloth rather than pressure, since pressing harder mostly spreads them thinner and wider.
Spots that survive everything deserve a closer look before stronger measures. A dot that does not move, does not smear and looks identical from every angle may not be dirt at all: it may be a coating blemish, a tiny scratch catching light, or a pixel fault, none of which cleaning can change and all of which aggressive rubbing can worsen. Test with the screen off and on, and under a bright light at an angle. Dirt sits on the surface and changes with wiping; damage sits in the surface and does not. Knowing the difference protects the screen from the one cleaning injury owners inflict on themselves — scrubbing at a permanent mark with escalating force and chemistry until a cosmetic speck becomes a genuine coating failure.
Screen Protectors, Coatings and Cleaning Over the Long Term
Many owners add a screen protector to a touch laptop and then inherit a second cleaning story. Protectors change the surface chemistry: some attract oil faster than bare glass, some add a matte texture that holds grime in its grain, and all of them have edges where dust and moisture collect and eventually lift. Clean a protected screen with the same gentle routine, but inspect the edges as part of the job, because a lifting corner traps grit that each wipe can drag inward. When a protector becomes hazy, scratched or permanently smeared despite correct cleaning, replace it rather than escalating your chemistry — the protector is a sacrificial layer, and its declining clarity is the sign it has done its job. Choosing protectors made for your exact model, with oleophobic treatment of their own, keeps both cleaning effort and pen feel closest to the bare-screen experience.
The factory coating beneath deserves a long-term thought. Oleophobic layers are consumable in slow motion: years of touching and wiping thin them, especially in the central area where thumbs and pens travel most, which is why older touch screens fingerprint faster and clean less completely than new ones even with perfect technique. You cannot restore a worn coating with household products, and aftermarket coating kits vary widely in quality and durability, so treat claims about them cautiously. What you can do is slow the wear from day one by following this guide’s central bargain — dry first, minimal moisture, no harsh chemistry, no abrasive materials — which preserves the coating you have for as much of the machine’s life as possible. Gentleness is not fussiness here; it is asset management for the surface you look at and touch all day.
A Cleaning Rhythm Matched to How You Use the Machine
Frequency should follow contact, not the calendar alone. A personal laptop used at a clean desk may need only a dry pass most days and a damp clean weekly. A convertible used as a tablet in bed, in kitchens and in children’s hands earns a damp clean several times a week and a cloth wash just as often. Presenters and teachers, whose screens are handled and pointed at by others, benefit from a quick dry wipe before every session, both for clarity under room lights and because a visibly cared-for screen is part of professional presentation. The principle is to clean lightly and often rather than deeply and rarely: light, frequent passes never let oil bake into film, never demand aggressive technique, and keep every individual session under two minutes, which is exactly why the habit survives. A screen that is easy to keep clean stays clean, and that small, compounding convenience is the real destination of everything in this guide.
Teaching the Habit: Households, Teams and Classrooms
Shared touch laptops stay clean only when cleaning becomes a shared norm rather than one person’s private virtue. In a household, that means the cloth lives with the machine, everyone knows the two rules that matter most — clean hands where possible, dry wipe after use, nothing sprayed on the screen ever — and children are taught the routine as part of using the device rather than as a scolding after it is filthy. In a classroom or team, a thirty-second end-of-session wipe, modelled by the teacher or team lead until it is automatic, outperforms any rota of deep cleans, because grime removed daily never becomes the baked film that demands real effort. Put a spare cloth in the kit bag, name who washes the cloths, and treat a missing cloth like a missing charger: a small logistics failure to fix immediately, not a mystery to endure.
There is a quieter benefit to making the routine communal: inspection. The person who wipes a screen daily notices the hairline crack starting at a corner, the protector lifting, the hinge loosening, the pen tip splitting — weeks before a non-cleaning user would. Early notice converts expensive failures into cheap interventions across any fleet, however small. So the humble cleaning routine in this guide is doing three jobs at once: keeping touch accurate and pleasant, preserving the coatings and glass you paid for, and quietly auditing the machine’s physical health every single day. Two minutes has rarely bought so much.
What Never Belongs Near a Touch Screen: A Definitive List
It is worth gathering the prohibitions in one place, because most screen damage comes from a short list of confident mistakes. Window and household glass cleaners are formulated for a different material and can attack coatings. Bleach, ammonia-based products and strong solvents have no place near a display assembly, its seals or its surrounding plastics. Paper towels, tissues with added lotions, rough sponges and the abrasive side of any kitchen pad trade a moment’s convenience for cumulative surface damage. Compressed air, useful elsewhere on a laptop, should never be blasted at close range into screen edges or ports near the panel. Excess water in any form — a dripping cloth, a sprayed panel, a soaked wipe — risks the electronics behind the glass for zero cleaning benefit. Keep this list on the inside of the cupboard where the cloths live if your machine is shared; the person most likely to reach for the wrong product is a helpful one who has not read the guide, and a visible list protects the screen from good intentions.
End with the reassuring truth: a touch screen asks for very little. A clean microfibre cloth, a whisper of plain water when needed, light pressure, patience with oil films, and attention to the pen and edges will keep it clear, responsive and accurate for the whole life of the laptop. Everything else in this guide is refinement of that simple core, offered so that the odd environment, the shared machine and the stubborn smear never have to become experiments conducted on your display.
Cleaning Day, Step by Step: One Complete Session Narrated
Put the whole routine together on an ordinary, moderately grubby machine and it runs like this. The laptop is shut down and unplugged, and left for a minute so the panel is fully dark and cool. The working cloth, dry, makes slow overlapping passes across the whole screen with almost no pressure, lifting dust and redistributing the oil film; already the worst of the haze is gone. A corner of the cloth is dampened — damp, not wet — and the stubborn zones get attention in small circles: the bottom edge where thumbs travel, the corners where the machine is grabbed open, the centre where the pen lives. The pen is wiped, its tip inspected against the light. Then the finishing cloth, dry and clean, buffs the whole panel in long passes while the owner tilts the machine against the window light, hunting the last streaks at the angle where they hide. Hinges and the keyboard deck get the working cloth’s final pass, the machine is left open for a breath to be certain everything is dry, and it boots to a screen that looks, briefly and satisfyingly, like the day it was unboxed. Elapsed time, once the habit exists: about three minutes, most of them unhurried.
That unhurried quality is the point worth keeping. Screen cleaning fails when it is rushed, forceful or chemical, and succeeds when it is light, patient and frequent. Build the three minutes into a moment that already exists — the end of the working day, the close of a lesson, the credits of a film — and the routine stops being maintenance and becomes simply how the machine is put away.
One last encouragement for the sceptical: put a freshly cleaned touch screen beside the same screen a week ago in your memory — the sharper text, the truer colours, the taps that land without a film of oil skating under the finger — and the case makes itself. Displays are judged through whatever we leave on them. Keep the glass honest, and the machine underneath gets to show what it can actually do, every single day you open it.
When the Screen Belongs to Someone Else: Rental, Loan and Resale
Three moments add a duty of care to the routine. A borrowed or loaned machine should be returned cleaner than courtesy strictly requires, with a proper dry and damp clean and the pen wiped, because the next user’s first impression of the device is your housekeeping. A machine being sold or passed on deserves the full session from this guide, including edges, hinges and the keyboard deck, both because presentation affects value and because a thorough clean is your last inspection for the cracks or faults you should honestly disclose. And a newly acquired second-hand touch laptop deserves one careful clean before its first use, with fresh cloths, so that its baseline is genuinely yours. In each case the technique does not change at all — only the thoroughness does, which is the mark of a routine worth keeping: it scales from a thirty-second tidy to a full restoration without ever needing stronger chemistry or harder pressure.
Keep one sentence from this guide where you can see it, if the machine is shared: damp cloth, never spray, nothing harsh. Those six words prevent nearly every cleaning injury a touch screen ever suffers, and they fit on the smallest sticky note ever made.
And teach the routine to the next pair of hands the moment the machine changes owners, lends itself out or goes to school with a child, because a cleaning method, like a language, survives by being spoken in the next household. Thirty seconds of demonstration — cloth, dry first, damp only when needed, nothing sprayed, nothing harsh — is the entire inheritance, and it will protect more glass than any case ever sold.
Related Guides
- our roundup of the best touch laptops for gaming under 600
- our roundup of the best laptops for under 500 dollars touch screen
- our roundup of the best laptops for artists under 500
- how to calibrate the touch on a touch screen laptop
- touch screen laptop vs regular laptop
Frequently Asked Questions
Can I use alcohol wipes to disinfect my touch screen?
It depends on your manufacturer’s guidance, which is the deciding document. Some makers explicitly permit occasional wipes with diluted isopropyl alcohol; others warn that alcohol degrades the oleophobic coating with repeated use. For routine cleaning, water on microfibre is sufficient and always safe. For genuine disinfection needs, follow your model’s support page precisely, use the mildest method it approves, and accept that frequent disinfection trades a little coating life for hygiene, which is sometimes the right trade.
Why does my screen smear worse right after cleaning?
Usually the cloth is the problem: a saturated or dirty microfibre redistributes oil instead of lifting it, and a cloth washed with fabric softener leaves a residue film of its own. Use a clean, dry cloth, flip to a fresh face as you work, and finish with light buffing passes. If streaks persist, a barely damp pass followed immediately by a dry pass resolves them. Persistent cloudiness that no cloth fixes may be coating wear, which cleaning cannot reverse.
How often should I clean a touch screen laptop?
A dry microfibre pass weekly suits most users, or whenever touch glide feels draggy or fingerprints distract in bright light. The damp deep clean is an as-needed event for splashes and build-up, perhaps monthly in heavy tablet and pen use. There is no benefit to daily chemical cleaning and real cost to coatings, so let the gentle routine carry the schedule. Your fingers are the best sensor: when glide changes, it is time.
Are screen protectors a good idea on a touch laptop?
They can be, especially for pen users, students in rough bags and anyone whose screen lives dangerously. A quality protector takes the scratches and wear instead of the panel, and textured versions add a paper-like feel that many note-takers love. The costs are a small reduction in clarity, possible interference with some pens if poorly fitted, and the fitting process itself. If you apply one, choose one made for your exact model and pen system, and fit it in a steamy bathroom to minimise dust bubbles.
What should I do about a scratch on the screen?
Accept what cleaning cannot fix: scratches in the glass or coating do not polish out safely, and abrasive scratch remedies make things worse. A screen protector fitted over minor scratching often makes it far less visible in daily use and prevents company. Deeper damage that affects the image or touch belongs to a repair service for a panel assessment. Prevention, grit-free cloths, healthy pen tips and sleeves, is worth real attention precisely because the cure options are so limited.
Can I clean the screen while the laptop is on?
You can wipe a powered screen, but off is better practice: a dark panel reveals grime you would otherwise miss, there is no risk of accidental input mid-wipe, and any accidental excess moisture meets a dormant machine. Build the habit of cleaning during shutdown moments, after work rather than before, and it costs no extra time at all. The one exception is a quick dry-cloth pass to clear a distracting smudge mid-session, which is harmless.