Learning how to calibrate the touch on a touch screen laptop begins with a modern truth that surprises many owners: most current machines calibrate themselves, and the setting you are looking for has quietly moved or vanished because the sensors no longer drift the way older resistive screens did. When touch feels inaccurate today, the cause is usually something else wearing calibration’s clothes: a driver that needs attention, a screen protector interfering, moisture or grime on the glass, a pen that needs pairing or a new tip, or a display scaling setting making targets feel wrong. This guide covers the genuine calibration tools where your system still offers them, then works through the modern causes in order, so you fix the actual problem instead of hunting a missing menu.
Disclosure: As an Amazon Associate, kajuandouglas.com earns from qualifying purchases. Links to Amazon on this page are affiliate links; they cost you nothing extra. Listing details such as price and availability change often, so check the current Amazon listing before you buy.
How To Calibrate The Touch On A Touch Screen Laptop: What Matters Most
First clean and dry the screen and remove the case or protector as a test. Restart the laptop, then on Windows open the Tablet PC Settings calibration tool if present and follow its tap sequence; on many modern machines it will not exist, which is normal. Update touch and pen drivers from the manufacturer, re-pair or re-tip the pen, and check display scaling. Persistent inaccuracy in one region after all that suggests hardware, not calibration.
In this guide
What You Need
- A clean, dry screen and clean hands; calibration on a dirty panel teaches it lies
- Your manufacturer’s driver and support page for your exact model
- The pen you use, with a fresh tip fitted if yours is worn
- Twenty minutes and a flat desk; calibrate in the posture you normally use
- A note of where inaccuracy occurs: everywhere, one corner, or only with the pen
Step by Step: How To Calibrate The Touch On A Touch Screen Laptop
Step 1: Clean, dry and simplify the setup first
Wipe the screen with a dry microfibre cloth and make sure it is completely dry, because moisture and heavy oil films genuinely distort capacitive sensing. Remove any case lip or thick screen protector temporarily, disconnect external monitors, and work with the laptop on a desk in its normal orientation. Many calibration mysteries end here, because the sensor was reading the environment correctly and the environment was the problem. If accuracy returns with the protector off, you have isolated the cause without opening a single setting.
Step 2: Restart and let the system self-calibrate
Modern touch controllers recalibrate continuously in the background and reset their baseline at startup. A full restart, not sleep, clears a confused baseline built up by moisture, a hot chassis or a static event. Test accuracy afterwards with deliberate taps in all four corners and along the edges, where errors concentrate. If the problem followed a spill, a knock or a very humid day, a restart on a clean dry screen in a normal room resolves a large share of cases outright.
Step 3: Run the built-in calibration tool if your system offers it
On Windows, search for the tablet and pen calibration settings; where present, the tool presents a sequence of crosshair targets to tap precisely with a fingertip, and separately with the pen on some systems, then saves the correction. Tap naturally at your normal angle rather than performing for the test, because the tool is learning your touch, and reset to defaults first if a previous bad calibration is stored. On systems where the tool is absent, that absence is information: your panel is factory-calibrated and not user-adjustable, and the remaining steps are your path.
Step 4: Update drivers and firmware from the manufacturer
Touch and pen behaviour lives in drivers and firmware that Windows updates do not always carry in their best versions. Visit your laptop maker’s support page for your exact model and install the current touch, pen, chipset and BIOS packages in the order they suggest, restarting between them. Driver updates fix a remarkable range of accuracy, palm rejection and pen pressure complaints, because the sensing stack is software-interpreted at every layer above the glass. Note what you installed, so a future regression has a timeline.
Step 5: Attend to the pen as its own system
If finger touch is accurate but the pen is not, the pen is the subsystem to fix: re-pair it if it is Bluetooth, replace a worn or damaged tip, check its battery or charge, and review the pen settings for your model’s calibration or pressure curve options. Test in more than one app, because some applications interpret pen data with their own settings layered on top. A pen that drifts at screen edges in every app after these steps may be failing, and trying a second compatible pen is the cleanest test a shop can help you run.
Step 6: Check scaling, orientation and accessibility settings
Perceived inaccuracy is sometimes geometry: a display scaling change, a rotated orientation that did not fully apply, or an external monitor arrangement confusing the touch mapping so touches land on the wrong screen. In display settings, confirm the touch display is correctly identified, use the setup tool to assign touch to the right panel if you run multiple screens, and return scaling to the recommended value while testing. Also review touch feedback and gesture settings, since an owner can inherit odd configurations from software or a previous user.
Step 7: Recognise the hardware signature and stop
Inaccuracy confined to one band or corner, dead spots where touch never registers, ghost touches with nothing near the screen, or problems that survive a clean screen, restart, drivers and a second pen point to the digitiser or its cabling rather than calibration. Those are repair diagnoses. Back up your work, note the pattern precisely for the technician, and if the machine is under warranty, go straight there rather than experimenting further. Calibration is a software conversation; a panel with a dead region is not listening.
Where Touch Genuinely Helps, and Where It Does Not
Touch earns its place in specific moments: scrolling long documents in tablet mode on a train, annotating a PDF with a pen during a lecture, sketching an idea before it fades, signing a form without a printer, or presenting while standing and tapping through slides. It is less convincing at a desk, where reaching forward to a vertical screen tires the arm and smudges the panel, and where a good touchpad or mouse is faster for precise work. Battery and weight also pay a small tax for the digitiser and glass, and glossy touch panels reflect more light than matte regular screens. The honest test is your own week: count how often you would fold the machine back, pick up a pen or tap rather than click. If those moments are daily, touch is a feature you will use for years. If they are hypothetical, a regular laptop with a better screen or larger battery for the same money may serve you better.
Caring for a Touch Screen and Its Hinges
A touch panel is the most handled surface on any laptop, so it collects skin oil, dust and the occasional splash, and it is also the most fragile and expensive part to replace. Clean it powered off, with a dry or barely damp microfibre cloth, never with household glass sprays that can damage coatings, and never by pressing hard on one spot. The hinges on a convertible work harder than on any other laptop style, cycling through laptop, tent, stand and tablet positions, so open and close the lid from the centre, keep crumbs and grit away from the hinge line, and avoid carrying the machine by its screen corner. Cases and sleeves matter more here too, because pressure on the lid in a crowded bag flexes the glass. Treat the pen as part of the machine: store it in its slot or loop so its tip is protected, and replace worn tips before they scratch. Gentle habits add years to a mechanism that cannot be serviced cheaply.
Touch Settings, Calibration and Accessibility
Modern operating systems rarely need manual calibration, because panels leave the factory aligned and the system compensates automatically, but the settings around touch still reward attention. Sensitivity, palm rejection behaviour, pen button assignments, flick and gesture controls and the on-screen keyboard all live in the pen and touch settings, and five minutes there can fix annoyances owners tolerate for years. Accessibility options deserve a look even if you do not need them daily: larger touch targets, touch feedback visuals and hold-to-right-click timing make the machine friendlier for anyone sharing it. When touch misbehaves, the cause is usually software rather than the panel itself: a disabled device in the device manager, a driver update that stalled, a screen protector lifting at one corner, or moisture on the glass. Work through settings, drivers and a clean, dry screen before assuming hardware failure, because genuine digitiser faults are the least common explanation and the most expensive one to chase first.
How Touch and Pen Input Actually Work on a Laptop
A touch laptop replaces the simple display of a regular machine with a layered panel: the screen itself, a digitiser that senses finger or pen position, and protective glass on top. Capacitive sensing reads the tiny electrical change a fingertip causes, which is why gloves and ordinary pens do not register, while active pens communicate their own position, pressure and tilt to a dedicated digitiser layer. That distinction explains most buying confusion: a screen that works beautifully with a finger may offer only crude pen input, and handwriting or drawing quality depends on the pen technology, not the display resolution. Palm rejection is software and sensor work combined, letting you rest a hand on the glass while writing. Hinges complete the system on convertibles, either folding a full 360 degrees or detaching entirely, and each design trades rigidity, weight and port layout differently. Judge a touch laptop by the input method you will actually use, because finger navigation, note-taking and illustration are three different requirements wearing one label.
Why Calibration Mostly Disappeared, and What Replaced It
Older resistive touch screens measured pressure through layers that flexed and drifted, so user calibration was a routine necessity. Modern capacitive digitisers are manufactured to tight tolerances, mapped at the factory and continuously self-corrected by their controllers, which is why operating systems have been quietly retiring the calibration screen. The accuracy problems did not vanish; their causes moved. Today’s stack interprets raw sensor data through firmware, drivers, the operating system’s touch mapping and each application’s own pen handling, and a fault at any layer feels identical to the user: the tap lands wrong. That is why this guide treats calibration as a diagnostic ladder rather than a single tool. Work it from the environment inward, screen, restart, tool, drivers, pen, settings, and you will find the layer at fault in most cases within half an hour, using nothing but patience and the manufacturer’s own software.
When you are ready to compare complete machines rather than individual settings, start with our roundup of the best laptops for graphic design under 1000 and keep our roundup of the best laptops for students under 750 touch screen open in a second tab. Reading a settings guide and a buying roundup side by side stops the most common mistake in this whole topic: changing software or hardware in isolation, without checking whether the rest of the machine actually supports the change you have in mind.
Gear for This Guide

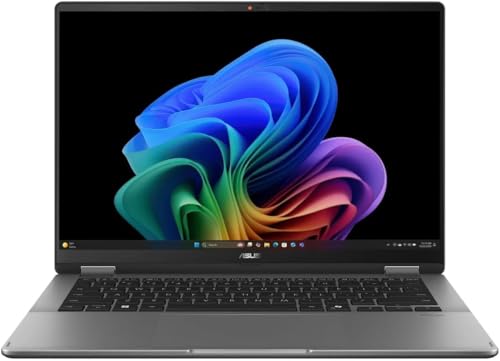
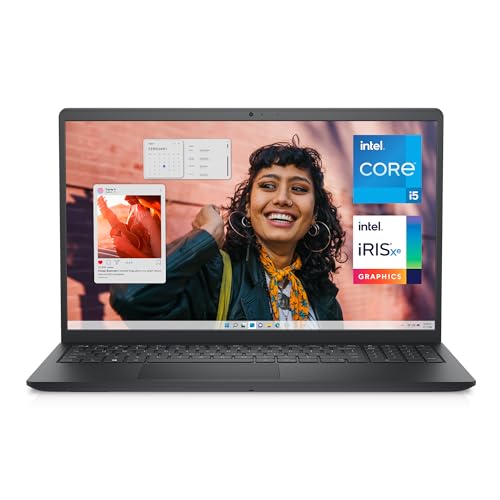
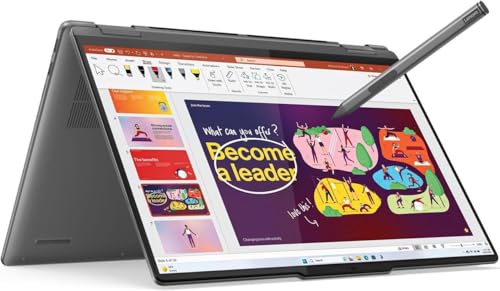
Lenovo Yoga 7i 2-in-1 w/Ultra 7 — Lenovo Yoga 7i 2-in-1 w/Ultra 7, 16G RAM, 1TB SSD, 14″ OLED, Yoga Pen | Copilot+ PC with Intel Core Ultra 7 256V Processor, 14” WUXGA 100%DCI-P3 HDR 500 Touchscreen, 5MP IR Cam, Wi-Fi 7, Win 11 Pro. Check price on Amazon before you decide, because configurations and availability change often.

LG gram 14-inch 2in1 Lightweight Laptop — LG gram 14-inch 2in1 Lightweight Laptop, Intel Evo Edition – AI-Enabled Intel Core Ultra 7 Processor, Windows 11 Home, 32GB RAM, 2TB SSD, Touch IPS Display, Black. Check price on Amazon before you decide, because configurations and availability change often.

HP Envy X360 Business 14″ Touchscreen Intel Core 7 2-in-1 Convertible Laptop — HP Envy X360 Business 14″ Touchscreen Intel Core 7 2-in-1 Convertible Laptop, 14″ FHD 1920 * 1080 Touchscreen, Core 7 150U (Beats Intel i7-14700), 16GB RAM, 2TB SSD, FP Reader, Wi-Fi 6, W11P. Check price on Amazon before you decide, because configurations and availability change often.
Common Mistakes
- Hunting for a calibration menu for an hour on a system that deliberately no longer includes one.
- Calibrating, where a tool exists, on a dirty or damp screen and saving the distortion as the new normal.
- Assuming a regional dead spot is a settings issue and reinstalling the system instead of booking a repair.
- Testing pen accuracy in only one app and condemning the hardware for that app’s own pen settings.
Pro Tips
- After any successful fix, test with a handwriting line along all four edges; edge behaviour reveals remaining error fastest.
- Keep a note of which driver version restored your accuracy, so a future update regression has an obvious suspect.
- Ghost touches after a spill mean power off and dry thoroughly first; diagnose only on a fully dry machine.
- If you use a second monitor, re-run the touch assignment check whenever your desk setup changes.
A Worked Example, From Start to Finish
Imagine the process applied to one ordinary owner rather than a test bench. They begin by writing down what success looks like in one sentence, work through the steps in order without skipping the preparation that feels skippable, and pause at the verification stage instead of declaring victory at the first encouraging sign. Two adjustments are usually needed: one step takes longer than expected, and one assumption made at the start turns out to be wrong in a small, correctable way. That is not failure; that is the normal texture of doing this properly, and it is why the guide separates preparation, execution and verification so deliberately. By the end, the result is checked rather than hoped for, the notes exist for next time, and the owner understands their own machine measurably better than when they started. Every reader’s details will differ from this example, but the shape of a good outcome rarely does: prepare honestly, change one thing at a time, verify under real conditions, and write down what you learned while it is still fresh enough to be accurate.
Putting It All Together
Work through the steps in order, test the result in your real routine for a few days, and adjust the one or two choices that your own use proves wrong rather than restarting the whole process. The guidance in this guide reflects how these machines behave across years of ownership, not just on day one, which is why the unglamorous details, placement, profiles, backups and habits, carry as much weight as the headline specifications. Keep your receipts, your notes and your original parts where parts were changed, revisit the related guides when your needs shift, and remember that a well-matched, well-kept laptop of any tier serves its owner better than a flagship that fights its owner’s life. That fit, more than any single feature, is what you were really choosing.
Why Touch Feels Wrong: A Field Guide to Error Patterns
Before calibrating anything, learn to read the pattern of the error, because each pattern points at a different cause and only some of them are calibration problems at all. An offset that is consistent — every touch landing the same small distance in the same direction — is the classic calibration signature, and the one most likely to respond to the built-in tool or a driver refresh. An offset that grows toward one edge or corner suggests a scaling or display-assignment problem, where the touch layer is mapped onto the wrong area or resolution, common after connecting external monitors or changing display settings. Random inaccuracy, where touches scatter around the target, points away from calibration entirely, toward moisture, electrical interference, a failing digitiser or a hand resting where the system cannot reject it.
Dead zones — a stripe, corner or patch that ignores touch completely — are hardware speaking plainly, usually a damaged digitiser row or a connector problem, and no software routine will resurrect them. Ghost touches, where the machine registers input nobody made, belong to the same serious family when they persist on a clean, dry screen away from chargers and protectors. Learning this vocabulary matters because it governs your stopping point: calibration and settings deserve an hour of methodical work, while dead zones and persistent ghosts deserve a warranty conversation, and confusing the two wastes the hour and delays the conversation. The main guide’s ladder is built on exactly this distinction, and your observations at each rung are what make any eventual support case fast and credible.
A simple mapping exercise that reveals the truth
Open a drawing or note application, select a fine pen or brush, and slowly draw a grid: horizontal lines top to bottom, vertical lines side to side, then two diagonals corner to corner. Watch where the ink sits relative to your pen or finger, and where lines wobble, jump or vanish. A uniform shift shows as parallel lines displaced together. An edge problem shows as lines bending away near one border. A dead zone interrupts lines at the same place every time. Interference shows as jitter that comes and goes. Five unhurried minutes with this grid will tell you more about your touch system than an hour of tapping icons, and saving a screenshot of the result gives any technician an instant, precise picture of the fault.
Multi-Monitor and Docked Setups: Where Mapping Goes Wrong
Many calibration complaints are born at the desk, not in the laptop. When an external monitor joins the setup, the operating system must decide which display the touch layer belongs to, and after docking changes, resolution changes or driver updates, that assignment can silently go wrong, leaving touches landing on the wrong screen or scaled across a combined desktop. The symptoms masquerade as calibration failure: touches offset by large, odd amounts, or a touch surface that seems to cover only part of the panel. The fix lives in display and tablet settings rather than in calibration: confirm the touch display is correctly identified, re-run the setup step that asks you to tap the touch screen to claim it, and verify scaling on the internal panel after any dock firmware or graphics driver change.
Orientation changes create a cousin of the same problem. Convertibles that rotate between landscape, portrait and tent modes rely on sensors and software agreeing about which way is up; when they disagree, touch coordinates rotate with the wrong frame and every tap lands mirrored or transposed. Locking rotation temporarily, returning to standard landscape, and restarting will usually re-teach the system its bearings. If a particular mode consistently misbehaves while others are perfect, report it in exactly those terms, because mode-specific faults are unusually informative for support and unusually resistant to general calibration advice.
Pen Calibration Deserves Its Own Routine
Because the pen is a separate input system sharing a screen, it needs separate attention whenever accuracy is in question. Begin with the physical layer: a worn or damaged tip changes how the pen reports position and pressure, so a fresh tip is the cheapest calibration you will ever perform. Re-pair or re-seat the pen connection if your model uses one, since a stale connection can produce lag and offset that look like panel problems. Then check the application layer, because serious note and drawing programs carry their own pen smoothing, offset and pressure settings that can fight the system settings; test accuracy in a simple application first to learn whether the fault follows the pen everywhere or lives in one program’s configuration.
Hover behaviour is the pen-specific test most owners skip. A healthy pen system tracks the tip smoothly as it hovers just above the glass, with the cursor directly beneath the tip across the whole panel, including near the edges where accuracy traditionally weakens. Drift that appears only in hover, or only at the edges, is valuable diagnostic information: it can reflect interference, a magnet in a case or desk accessory confusing the pen layer, or the honest physical limits of the technology near the panel border. Knowing which of those you are seeing decides whether the answer is moving a magnetic clasp six inches away — a real and recurring fix — or booking a repair.
Accessibility Settings That Masquerade as Calibration Faults
Several settings designed to help users can, when enabled accidentally or inherited from a previous user, imitate a calibration problem convincingly. Touch accommodations that require a longer press before input registers make a healthy screen feel unresponsive or lagging. Pointer and touch visual feedback settings change what you see without changing what the digitiser reports, which can mislead a careful observer into chasing an offset that exists only in the animation. Display scaling set unusually high shrinks the effective target sizes the system presents, so touches that are technically accurate keep missing the smaller controls a user is aiming at. Before any deep calibration work, walk the accessibility and pen-and-touch settings once with fresh eyes, return anything you do not recognise to its default, and retest. A meaningful share of stubborn touch complaints end at exactly this step, resolved not by recalibrating the hardware but by un-configuring the software around it.
The reverse lesson matters too: for users who enable these settings deliberately — because of tremor, limited dexterity, low vision or a hundred other good reasons — they are not faults to be corrected but adaptations to be preserved and tuned. If you share a machine, record which settings belong to whom before changing any of them, and prefer per-user profiles where the system offers them. Calibration, in the broadest sense, means the machine responding as its user intends, and intention is personal. The goal of every step in this guide is a screen that obeys its owner, not a screen that matches a laboratory default its owner never asked for.
Software Updates, Drivers and Knowing What Changed
Touch stacks are unusually sensitive to software change because so many layers must agree: the digitiser firmware, the operating system’s touch service, the graphics driver that owns the display the touch is mapped to, and the pen driver where one exists. An update to any layer can shift behaviour, which is why the appearance of touch trouble immediately after an update is such valuable information and why the main guide routes you to the manufacturer’s own driver packages rather than generic ones. Generic drivers keep a screen basically working; manufacturer packages carry the specific mapping, power and pen behaviour your model was tuned with, and the difference shows precisely in edge accuracy, wake-from-sleep reliability and pen feel.
Keep a light record whenever you work on touch problems: the date trouble started, any updates or new accessories in the preceding days, which steps you tried and what each changed. That record converts a frustrating, circular problem into a solvable one, because patterns across weeks — trouble only after docking, only after a particular update, only with one charger — are invisible in the moment and obvious on paper. If the machine goes to a technician, the record goes with it. You will have done, as a home user, exactly what professional support does: observed carefully, changed one thing at a time, and stopped at the boundary where the evidence says hardware. That discipline, more than any single calibration routine, is what keeps touch screens accurate across their working lives.
When Calibration Trouble Belongs to the Application, Not the Screen
A final diagnostic fork saves many owners a needless repair journey: test the same task in two different applications. If the pen draws perfectly in the system’s own note tool but offsets, lags or stair-steps in one particular program, the panel and its calibration are innocent; the program’s own pen handling, smoothing or canvas settings are responsible, and the fix lives in that program’s preferences or in an update from its maker. Drawing applications in particular layer their own stabilisation and coordinate handling over the system, which is wonderful when tuned and maddening when a setting survives from an old tablet or a previous machine. Resetting that one application’s pen settings to defaults, then re-applying only the adjustments you understand, resolves a stubborn share of what presents as hardware inaccuracy.
Games, remote-desktop tools and virtual machines create similar illusions by intercepting or remapping input. A remote session may add latency that feels like pen lag, and a virtual environment may map touch through an extra translation layer with its own offset. Judge your calibration only in a local, simple application on the machine itself, with the grid exercise from earlier in this guide, and treat every other environment’s behaviour as that environment’s configuration question. Owners who internalise this fork — panel, system, application, environment — stop recalibrating healthy hardware, and their remaining, genuine hardware cases become unmistakable by contrast: consistent, local, pattern-clear faults that persist through every software layer. Those are the cases warranties exist for, and you will describe them better than most professionals when you make the call.
Calibration Across a Machine’s Life: What Changes and What Does Not
Expect touch behaviour to evolve slowly across a laptop’s life, and plan your responses accordingly. In the first year, most accuracy stories are software stories: drivers maturing, settings being personalised, protectors and cases arriving and changing the equation. In middle age, the physical layer begins to speak — pen tips wear, hinges loosen enough to change how a convertible sits, batteries and heat subtly affect electronics — and your routine checks of tips, connections and environment earn their keep. In old age, digitiser faults become more plausible, and the diagnostic patterns from this guide matter most, because they separate a machine worth a panel repair from one whose remaining life does not justify it. None of this is decline to fear; it is a maintenance arc to manage, no different in spirit from tyres on a car, and owners who expect it are never ambushed by it.
Keep the perspective this guide began with: modern touch systems are designed to calibrate themselves continuously, and the user’s role has shifted from technician to observer. Observe patterns, keep the surface and the software clean and current, test methodically when something feels wrong, and stop confidently when the evidence points at hardware. A screen maintained that way will feel accurate for years, not because you recalibrated it often, but because you understood it well enough to leave it alone when it was healthy and to act precisely when it was not.
A Worked Diagnostic: From First Suspicion to Confident Verdict
Picture a convertible whose pen has begun landing a few millimetres below the tip, noticed first in a drawing application. The undisciplined response is to recalibrate immediately and repeatedly. The methodical response runs this guide’s order. The screen is cleaned and dried; the grid test in a simple note application shows the same downward offset, ruling out the drawing program. A fresh pen tip changes nothing, and hover tracking shows the same shift, ruling out tip wear. Display settings reveal a recent scaling change made for an external monitor; returning scaling to its standard value and restarting shrinks the offset but does not remove it. The manufacturer’s driver package is then installed over the generic driver the system had quietly substituted during an update — and the grid test comes back true, corner to corner. Total elapsed effort, under an hour, with exactly one change made at a time and each result observed.
Notice what that story demonstrates. The fault was real, the calibration tool was never opened, and the cure came from understanding layers: surface, pen, display mapping, drivers. Had the grid instead shown a dead stripe, the same method would have reached the opposite verdict just as efficiently, and the owner would have contacted support with a screenshot, a pattern and a short history that together justify a hardware repair without argument. Method is the product here. Calibration routines are a single rung on the ladder, and the owners who fare best with touch screens are the ones who climb the whole ladder in order, trusting each rung’s evidence about whether to climb further.
Protecting Accuracy Day to Day: Habits That Prevent Most Faults
Prevention in this area is unglamorous and almost entirely free. Keep the screen clean and dry, because moisture and film are the most common accuracy thieves. Keep magnets — in cases, clasps, desk toys and other devices — from resting against the panel and pen area, because pen layers notice them even when you do not. Use the charger supplied or a reputable equivalent, since electrical noise from poor chargers is a documented source of touch jitter. Keep manufacturer drivers current and let firmware updates complete uninterrupted. Store and carry the machine so the panel is not pressed, flexed or baked in a hot car, because digitisers remember abuse in ways that first appear as vague inaccuracy months later. And when you add a protector or case, retest touch and pen across the whole grid once, immediately, so any change it introduces is discovered on day one rather than diagnosed as a mystery fault in month three.
Follow those habits and the calibration question this guide addresses becomes what it should be: a rare, methodical investigation with a clear answer, rather than a recurring irritation. Your screen stays the honest, responsive surface it was designed to be — and on the uncommon day it does not, you will know exactly how to find out why.
There is a confidence worth taking from all of this. Touch inaccuracy feels mysterious because the technology is invisible, but its failure modes are few, patterned and readable once you know the vocabulary: offset, scaling, scatter, dead zones, ghosts, hover drift. Almost every case you will ever meet is one of those six, wearing ordinary clothes. Read the pattern, climb the ladder in order, and the mystery resolves into either a setting, a driver, an accessory — or a clear, well-evidenced hardware case. That is as much mastery as this subject asks of anyone, and you now have it.
Documenting a Hardware Case So It Gets Fixed First Time
If your methodical work ends at the hardware boundary, how you present the case decides how fast it is resolved. Lead with the pattern, in the vocabulary of this guide: a dead stripe in a named location, ghost touches that persist on a clean dry screen with the charger disconnected, an offset that survived a restart, manufacturer drivers and a fresh pen tip. Attach the grid screenshot showing the fault, note the software versions and the date the behaviour began, and list the steps already tried so the technician does not repeat them at your expense in time. State whether the fault appears in every application and every mode, because that single fact routes the case correctly. Owners who report this way are routinely believed, rarely asked to perform theatre with basic steps they have already documented, and measurably more likely to have the correct part ordered before the machine is even opened. Good documentation is not bureaucracy; it is the final diagnostic tool, and it works on the repair system exactly as the grid test works on the screen.
Finally, remember that perfection in this area is defined by your hand, not by a specification. A screen that tracks your finger and pen where you intend, in the applications you live in, at the speed you work, is calibrated — whatever any menu calls it. Chase that felt accuracy with the method in this guide, and stop the moment you have it; the goal was never to adjust a machine, but to be able to trust it without thinking, which is the state every good tool quietly aims to give you.
And when you do reach that trusted state, write down what fixed it — the driver version, the setting, the accessory that turned out to be the culprit — in the same note as your earlier observations. Touch systems reward owners with memories, because the next change, months later, will rhyme with this one, and a two-line record turns a fresh mystery into a familiar pattern you already know how to close.
Pass the grid test on, too, the next time a friend describes a haunted or drifting screen with the particular despair this subject inspires. Five minutes, one drawing application, six honest lines — and a stranger’s mystery becomes a pattern with a name and, usually, a remedy already waiting in this guide. Methods multiply their value every time they are lent, and this one costs the lender nothing but the telling.
Related Guides
- our roundup of the best touch laptops for gaming under 600
- our roundup of the best work laptops for under with touch screen
- our roundup of the best laptops for photo editing under 500
- what is a 2 in 1 laptop
- how to fix a laptop touch screen not working
Frequently Asked Questions
Why is there no calibration option on my laptop?
Because your panel almost certainly does not need one in the traditional sense. Modern capacitive digitisers are factory-mapped and self-correcting, and recent operating systems have removed the tool for hardware that reports itself as calibrated. Its absence is expected, not a fault or a hidden setting. When accuracy suffers on such a machine, work through the environment, restart, driver and pen steps in this guide; those layers are where modern touch accuracy actually lives.
My touches land slightly off from where I tap. What is most likely?
A small consistent offset usually traces to a screen protector’s thickness or fit, display scaling set away from the recommended value, touch assigned to the wrong display in a multi-monitor setup, or an outdated touch driver. Work those four before anything drastic. An offset that appears in only one screen region, or that arrived with a knock or spill, points instead toward the digitiser itself and deserves a technician’s assessment, especially under warranty.
The pen is inaccurate but my finger is fine. Why?
Because they are separate input systems sharing one screen. The pen has its own sensing, pairing, battery, tip condition and software settings, any of which can drift while finger touch stays perfect. Replace the tip, re-pair the pen, check its charge and review its settings and pressure curve, then test in a second app to rule out application behaviour. If a known-good pen shows the same errors, the digitiser’s pen layer is the suspect and professional testing is the next step.
Can a screen protector really affect calibration?
Yes. A thick, poorly fitted or lifting protector changes the distance and dielectric between your finger or pen and the sensor, and edges that trap moisture or air create local inaccuracies owners describe as dead spots. That is why removing the protector is an early diagnostic step rather than an insult to it. If accuracy returns without it, refit a fresh, model-specific protector carefully, or choose a thinner pen-focused film, and test again before blaming anything else.
What are ghost touches and should I worry?
Ghost touches are inputs registering with nothing touching the screen, often a flurry in one area. Common causes are moisture on the glass, a charger or cable fault injecting noise, a damaged digitiser or a driver problem. Dry the screen, test unplugged from the charger, restart and update drivers. Occasional ghosts after a spill that vanish on drying are benign; persistent ghosts on a clean, dry, unplugged machine are a hardware signature and should go to a technician, particularly under warranty.
When is touch inaccuracy a warranty issue?
When it survives the full software ladder: clean dry screen, restart, current manufacturer drivers, correct display assignment and, for pen issues, a fresh tip and re-pairing. Regional dead zones, persistent ghost input and one-sided drift are hardware behaviours, and on a machine in warranty they are exactly what the warranty exists for. Document the pattern with a short video and your notes from these steps; a clear record speeds any repair conversation considerably.