Knowing how to choose a mirrorless camera in 2026 means choosing between dozens of excellent bodies that differ less in image quality than in autofocus intelligence, video ambition, size and — above all — the lens system behind them. Every major manufacturer now builds its future on mirrorless mounts, so the decision you make is a decade-long one: bodies come and go every few years, but the lenses you accumulate define what your photography can do. This guide orders the decision correctly: subjects, sensor size, lens mount, then the body itself.
Work through it with your real photography in mind — the trips you actually take, the family events you actually shoot, the videos you actually finish. Mirrorless marketing pushes flagship features most owners never touch; your subject list is the antidote. By the end you will have a shortlist of two or three bodies inside one lens system, which is exactly where a confident purchase begins. If you are still weighing mirrorless against other camera types entirely, mirrorless vs dslr camera and mirrorless vs compact camera settle those questions first.
Disclosure: As an Amazon Associate, kajuandouglas.com earns from qualifying purchases. Links to Amazon on this page are affiliate links; they cost you nothing extra. Listing details such as price and availability change often, so check the current Amazon listing before you buy.
How to Choose a Mirrorless Camera: The Short Answer
Pick your sensor size by budget and carrying habits (APS-C for most people, full frame for low-light and professional work, Micro Four Thirds for minimum size), choose the mount whose lenses fit your subjects and wallet, then pick the body whose autofocus, video features and handling match how you shoot. Handle finalists in person, and budget for lenses and a spare battery from day one.
In this guide
What You Need
Before comparing bodies, assemble the facts that make comparisons meaningful:
- Your three most-shot subjects, ranked, with a note on how much video you really record
- A total kit budget covering body, first lens, spare battery, fast card and bag
- A list of the two lenses you are most likely to buy after the kit lens, to price in each mount
- Any existing lenses you own that could adapt to a mirrorless mount
- Access to a shop where you can hold finalists and test their viewfinders and menus
How to Choose a Mirrorless Camera Step by Step
Each step removes a layer of the market. Resist skipping to body comparisons before Steps 1–3 are settled — that ordering error is responsible for most buyer’s remorse.
Step 1: Fix your sensor size
Full frame gives the best low-light files, the shallowest depth of field and the largest, costliest lenses. APS-C is the balanced mainstream: excellent quality, compact fast lenses, sane prices. Micro Four Thirds minimises kit size for travel and video. Decide by your worst typical light and your carrying tolerance, not by status — and remember the equivalence maths from full frame vs crop sensor when comparing lens apertures across formats. This single choice halves the market instantly.
Step 2: Choose the mount by its lenses
Price your future kit inside each candidate mount: the kit zoom, the fast prime you fancy, the telephoto your wildlife or sports ambitions need, and check the used market’s depth. Sony’s E mount offers the broadest third-party lens support; Canon RF and Nikon Z are comprehensive but more first-party-led; Fujifilm X is APS-C-only with beloved primes; Micro Four Thirds shares one mount between two brands. A mount is a ten-year relationship — choose the catalogue, and the body decision becomes easy.
Step 3: Match autofocus to your subjects
Modern mirrorless autofocus is the technology’s crown: eye detection for people and animals, vehicle and bird modes, and tracking that holds subjects across the frame. If you shoot children, pets, wildlife or sports, prioritise the best subject-detection system in your tier — it changes keeper rates more than any other feature. If you shoot landscapes and still life, any current system suffices and you can spend the difference on glass. Test tracking in the shop on a moving person; menu claims become obvious within seconds.
Step 4: Decide how much video you truly need
Video features stratify mirrorless bodies sharply. Casual family clips need only good 4K and reliable autofocus. Serious creators need a flip screen, microphone and headphone sockets, 10-bit colour or log profiles, and — critically — proven recording endurance without overheating, the failure mode dissected in how to fix mirrorless camera overheating. Pay for video depth only if you will use it; stills shooters subsidising cinema features gain nothing. Conversely, creators who underbuy here hit walls within a year.
Step 5: Handle the finalists and interrogate the details
Grip depth, dial placement, viewfinder size and menu logic are daily experiences no review can score for your hands. In the shop, change ISO and focus mode with your eye at the finder; wear your glasses if you use them; check the screen’s articulation against your shooting angles. Then the practicalities: IBIS or not, single or dual card slots, battery life and USB charging, weather sealing, and whether the electronic shutter is silent for ceremonies. Shortlist order often flips at this step — trust your hands.
Step 6: Buy the kit, not the body
Execute the budget split you planned: body, kit lens (or your chosen prime), spare battery — mirrorless cameras earn this advice honestly — a fast card from a reputable brand, and a bag that fits. Consider last-generation bodies at clearance and quality used lenses to stretch the lens side of the budget. Register the warranty, update firmware immediately, and set the camera up properly using how to set up for beginners a mirrorless camera before your first real shoot.
The Specifications Worth Comparing (and Those to Ignore)
Compare: autofocus subject detection relevant to your subjects; sensor size and its lens implications; IBIS performance if you shoot handheld in low light; video modes you will actually use, with their crop factors and record limits; viewfinder resolution and magnification; burst rate with buffer depth for action work. These change photographs. Ignore: marginal megapixel differences within a generation, exotic scene modes, and maximum ISO figures, which describe unusable extremes rather than working range.
One under-discussed specification is the electronic viewfinder experience — lag, blackout between frames at high burst rates, and refresh behaviour. Sports and event shooters should test burst behaviour in person, because bodies differ noticeably and the spec sheet rarely confesses. Likewise check rolling shutter on electronic shutter modes if you plan silent shooting of movement; mechanical or hybrid shutter choices matter for weddings and golf alike.
Mirrorless-Specific Ownership Realities
Mirrorless ownership has three recurring surprises for newcomers. Battery life is shorter than DSLR habits suggest — carry spares and use USB power banks on trips. The exposed sensor collects dust more readily because no mirror shields it, making the cleaning routine in how to clean the sensor of a mirrorless camera a core skill. And firmware updates genuinely improve these cameras — autofocus and features evolve post-purchase — so staying current is part of ownership, not an optional extra. None of these outweigh mirrorless advantages; all of them reward foreknowledge.
Gear for This Guide
Four bodies across the sensor sizes and mounts above — an APS-C all-rounder, a video-leaning Sony, a Fujifilm prime-lover’s camera and a full-frame Nikon:

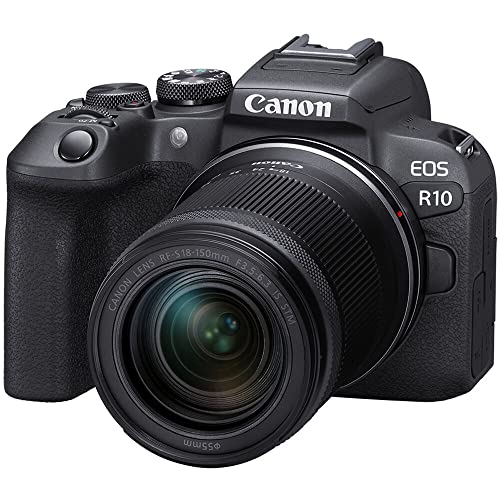
Canon EOS R10 Mirrorless Camera with RF-S 18-150mm Lens Kit — Check price on Amazon. A solid, widely available option that fits this guide; confirm the exact kit contents and lens mount on the listing before ordering.

Sony Alpha ZV-E10 APS-C Mirrorless Vlog Camera Kit — Check price on Amazon. A solid, widely available option that fits this guide; confirm the exact kit contents and lens mount on the listing before ordering.

Fujifilm X-T30 II Mirrorless Camera with XF 18-55mm Kit — Check price on Amazon. A solid, widely available option that fits this guide; confirm the exact kit contents and lens mount on the listing before ordering.

Nikon Z 6II Full-Frame Mirrorless Camera — Check price on Amazon. A solid, widely available option that fits this guide; confirm the exact kit contents and lens mount on the listing before ordering.
Common Mistakes
The defining mirrorless mistake is mount-blindness: buying a discounted body, then discovering the lenses you want are scarce, huge or unaffordable in that system. Step 2 exists to prevent it. Second is over-buying video: paying a premium for cinema specifications to record birthday clips, while under-buying the lenses that would have improved every photograph. Third is ignoring the used market’s verdict — mounts with deep used catalogues cost far less to own over five years.
Finally, do not let a shop steer you by sensor size alone. An APS-C body with two excellent lenses will out-photograph a full-frame body wearing only a kit zoom in almost every real situation, and it will travel in half the bag. Systems beat sensors.
Pro Tips
Rent or borrow your finalist for a weekend if any route exists — two days of your real subjects answers handling, battery and menu questions definitively. When renting is impossible, a shop visit with your own memory card lets you take test files home and inspect them at full size, which is the next best evidence.
Keep the upgrade path in view: standardise on one mount, prefer lenses that also serve the tier above your body, and keep packaging for resale. Mirrorless systems reward commitment — the second lens, not the second body, is where most photographers’ images leap forward.
A Worked Example: Pricing Two Mounts Honestly
Make Step 2 concrete. A travel-and-family photographer shortlists two APS-C bodies at similar prices. In Mount A, her next lenses — a fast 35mm-equivalent prime and a compact telephoto zoom — are plentiful new and used, with third-party options at every level; the three-year cost of body plus both lenses is moderate, and the used market will return much of it. In Mount B, the body is marginally prettier in the hand, but the prime exists only as a premium first-party lens and the telephoto is a full-frame model that dwarfs the little body; three-year cost runs far higher and the kit’s balance suffers daily. The bodies were equivalent; the systems were not. She buys Mount A and never thinks about the decision again, which is what a correct mount choice feels like.
Run your own version of this table before any body seduces you: body, kit lens, next two lenses, spare battery, all priced in each candidate mount, new and used. Twenty minutes of arithmetic exposes what launch reviews cannot — the cost of ownership — and it reliably reverses shortlists built on specifications alone.
Mirrorless Generations: Buying One Step Behind
Mirrorless technology moves fast enough that last generation is a strategy, not a compromise. Autofocus and sensor gains between adjacent generations are real but incremental for most subjects; the previous body at clearance, paired with the lens this generation’s buyer must postpone, usually produces better photographs for the same money. The exceptions are specific: if your work depends on the newest subject-detection category, the fastest stacked-sensor readout, or a video mode introduced this cycle, the current body earns its premium. Name the feature you need from the new generation, or buy the old one — ‘newer’ is not itself a feature.
Whichever generation you choose, check its firmware story: manufacturers support mirrorless bodies with meaningful updates for years, and a late-firmware older body is a more capable tool than its launch reviews describe. Read the current firmware notes as part of your research; they are, in effect, the camera’s final specification sheet.
Choosing by Subject: Matching the Camera to What You Photograph
Specifications only matter through the subjects they serve. Running the decision from the other direction — starting with what fills your frame — exposes which of the main steps deserve your money and which you can safely deprioritise.
Family, children, and everyday life
Unpredictable, fast, indoor subjects reward autofocus that finds eyes and holds them, good high-ISO performance for ordinary room light, and a camera small enough to actually be present. Resolution beyond the mainstream is wasted here, and the lens that matters is a fast prime or a bright standard zoom, not the longest telephoto in the shop. Parents consistently overbuy reach and underbuy low-light ability; reverse that instinct and your keeper rate will show why.
Travel and landscape
Travel rewards the system you will carry all day without resentment, which pushes toward smaller bodies and lenses even at some cost in ultimate capability. Landscape work adds different demands: dynamic range for skies and shadows, resolution for large prints, and weather sealing for the conditions in which the best light happens. A travel-landscape hybrid buyer should weight sealing and dynamic range above burst speed and video features, and should handle the shortlisted kits with a full day’s walking honestly imagined — the lightest adequate system is the one that gets carried to the viewpoint.
Wildlife and sport
Here the hierarchy inverts: autofocus tracking, burst depth, and lens reach dominate everything, and sensor size decisions follow the lenses available rather than the other way round. Crop-sensor systems offer a genuine reach advantage with smaller, more affordable telephotos, which is why so many serious wildlife photographers choose them deliberately rather than as a compromise. Budget honestly for the lens first in this genre; a modest body behind an excellent telephoto outperforms a flagship body behind a short lens on every outing.
Video-first and hybrid creators
If video is the primary work, judge cameras as video tools first: recording limits and heat behaviour, codec and colour options, stabilisation in video mode, audio inputs, and the flip screen you will actually use. Still-photo excellence is common enough that it rarely decides between video finalists. Hybrid creators should also weigh the lens system’s video-friendly glass — quiet, smooth-focusing lenses — because a superb stills lens that hunts and breathes on video will frustrate daily in a way its stills quality cannot repay.
The Lens System Decision, Taken Seriously
The main steps advise choosing the mount by its lenses; this section explains how to actually perform that judgement, because it is the decision you will live with longest and the one beginners most often skip.
Mapping the lenses you will plausibly own
Write down the three or four lenses you can realistically imagine owning over the next five years — for most people a standard zoom, a fast prime, and one speciality lens such as a telephoto or macro. Then check each candidate system for those lenses specifically: do they exist, are they current designs, and can you afford the path to them? A system that covers your map with lenses you can reach beats a system with a famous flagship lens you will never buy. This exercise takes an hour and prevents the most expensive mistake in mirrorless buying, which is changing systems in year two.
Native, adapted, and third-party glass
Native lenses focus fastest and use every feature. Adapted lenses from a maker’s own DSLR range can be excellent value and perform nearly natively on that maker’s adapter, which softens the cost of switching for existing owners. Third-party lenses have become a genuine strength of the open systems, often covering focal lengths the maker neglects, though the newest autofocus and correction features occasionally arrive there last. None of these routes is wrong; the error is buying a body whose combined native, adapted, and third-party map leaves your favourite subjects unserved.
Size is a system property
Full-frame bodies have shrunk impressively, but physics keeps full-frame fast lenses large, so the honest comparison is always body plus lens, carried, all day. Hold your shortlisted combinations, not just the bodies. Many photographers discover at this moment that the smaller-sensor system they were treating as a compromise is the one they will actually take everywhere — and a camera that goes everywhere outperforms a superior camera that stays home, on every measure that ends in photographs.
Trying, Renting, and Buying With Fewer Regrets
The final stage of choosing is where good research often dissolves into impulse. A structured approach to handling, testing, and purchasing protects the work the earlier steps did.
What to test in the shop
Ignore the test chart on the wall and test your life instead: focus on a face across the shop with eye detection on, shoot a burst, change a lens one-handed, find the exposure compensation without lowering the camera, and review an image at full magnification. Set the grip against your hand honestly — a grip that cramps in five minutes will not improve in five hours. Ask to try the camera with the lens you actually intend to buy, because balance is a property of the combination, and a body that felt perfect with a small prime can feel front-heavy and wrong with your chosen zoom.
Renting and borrowing as research
A weekend rental of your leading candidate, used on a real outing, is the highest-value research available and costs a small fraction of a system change. Rent the lens too, shoot the subjects you actually shoot, edit the files in your usual software, and notice what annoyed you — annoyances compound over years, while delights fade into expectation. If two systems remain tied after research, the rental almost always separates them, because ergonomics and menu logic are personal in ways specifications cannot predict.
Buying order and the second-hand question
Buy the body and first lens together as a working kit, add the second lens only after a season of shooting reveals what you actually miss, and resist completing a theoretical system on day one. Good used bodies one generation behind are often the smartest purchase in the whole category, since mirrorless development has matured to the point where last generation’s autofocus and sensors remain excellent; put the saving into the lens, which will outlast two bodies. Check any used body’s shutter count and sensor condition, buy from sellers with returns, and factor a new battery into the true cost.
Understanding the Specifications That Actually Shape Photographs
Product pages list dozens of numbers, but only a handful change your pictures. This section translates the important ones into photographic consequences, so comparisons between finalists are made on evidence rather than on who printed the longer table.
Dynamic range and high-ISO behaviour
Dynamic range is how much detail a sensor holds simultaneously in bright skies and deep shadows, and it decides how much rescue your files tolerate when exposure is imperfect — which, outside studios, is often. High-ISO behaviour decides how far you can push sensitivity in dim rooms before noise eats detail and colour. Together these two, more than resolution, determine how a camera feels in real light. They are also best judged from sample files at the sensitivities you will actually use, not from laboratory charts alone, because your tolerance for noise is personal and your subjects’ light is specific.
Autofocus specifications versus autofocus behaviour
Counts of focus points and lists of detection modes describe potential, not behaviour. What matters is how confidently the system finds your subject, how stubbornly it holds it through distraction, and how honestly it reports focus. Subject-detection for people, animals, and vehicles has become the feature that most changes keeper rates for the relevant photographers, while for landscape and still life, precise manual-focus aids — magnification and peaking — matter more than any tracking mode. Match the autofocus conversation to your subjects, and treat generic speed claims as marketing until you have handled the camera.
Buffers, cards, and the unglamorous throughput numbers
Burst speed is advertised; burst depth is experienced. A camera that fires rapidly but stalls after a second, clearing its buffer slowly to a single card slot, will frustrate sports and wildlife work in a way the headline number never mentioned. Card type matters for cost as well as speed, since the fastest card formats are significantly more expensive per card, and a working photographer needs several. Read the buffer figures, price the cards your finalists require, and include them in the system budget from the start rather than discovering them at the till.
Viewfinders, screens, and seeing your photograph
You will look through or at this camera for every photograph you ever take with it, so the finder deserves the scrutiny usually reserved for sensors. Electronic finder resolution and magnification decide how confidently you can judge focus and detail; a finder that lags or dims in bright sun changes how the camera feels outdoors. The rear screen’s articulation decides whether low, high, and self-facing compositions are pleasures or contortions. None of this appears in image quality, and all of it appears in your willingness to carry and use the camera, which is where image quality actually begins.
Budget Architecture: Spending Where It Shows
Without naming prices, the shape of a wise mirrorless budget is consistent across currencies and years, because it follows where photographic improvement actually comes from.
The lens-first principle
Across a system’s life, lenses contribute more to your photographs and hold their usefulness longer than bodies, which are replaced on a faster cycle. A budget that starves the first lens to maximise the body almost always regrets itself within a year, when the owner discovers that the body’s advantages cannot be seen through a lens that limits them. The healthier architecture buys the body that meets your genuine requirements — autofocus class, sealing, video needs — and directs the serious money at the lens your subjects demand.
The hidden costs line
Cards, spare batteries, a bag that fits the system, a charger that travels, and editing storage are real costs that arrive within the first month whether budgeted or not. Mirrorless cameras are notably hungry with batteries compared with the DSLRs many buyers are leaving, so the spare battery is not an accessory but a necessity for a full day’s shooting. Planning these costs from the start prevents the common outcome of an excellent camera carried in a hopeless bag with one battery and a single small card — a system undermined by everything except the part that was researched.
When to spend more, and when to stop
Spend more when a requirement is real and recurring: sealing for the photographer who shoots in weather weekly, tracking autofocus for the one whose children play sport, video capability for the creator whose income involves it. Stop when the next step up buys only numbers — resolution you will not print, burst depth you will not use, prestige you cannot photograph. The discipline of stopping is what funds the second lens, and the second lens, in almost every photographer’s story, is where the system starts to feel like theirs.
Second Opinions: Using Reviews, Samples, and Community Knowledge Well
No buyer researches alone, and the quality of your sources shapes the quality of your decision. Used well, outside knowledge sharpens the steps in this guide; used badly, it replaces your subjects and your hands with someone else’s.
What reviews can and cannot tell you
Good reviews are excellent on measurable behaviour — autofocus consistency, buffer depth, heat limits, battery endurance under stated conditions — and on the annoyances that only weeks of use reveal. They cannot tell you whether the grip fits your hand, whether the menus suit your brain, or whether the files’ colour pleases your eye, and any review that claims to settle those for you is overreaching. Weight reviewers who shoot what you shoot, distrust conclusions drawn from specifications alone, and treat sample galleries as evidence about the lens and the light as much as about the camera.
Downloading sample files before you buy
Most makers and many reviewers provide full-resolution sample files, including raw files, and spending an evening editing a finalist’s files in your own software is research of the highest value. You will learn how the files respond to your editing habits, how the noise at your working sensitivities looks through your own tolerance, and whether your computer handles the file sizes gracefully. Storage and processing are part of a high-resolution system’s true cost, and discovering your machine’s opinion before purchase is far better than discovering it after.
Community knowledge and its limits
Owner communities know the long-term truths — which firmware update transformed a focus system, which lens copy variation to check for, which bag actually fits the kit. They also amplify rare failures into apparent epidemics, because happy owners are out photographing. Read communities for patterns over time and for practical solutions, calibrate their alarm against the number of cameras sold, and remember that every system has a thread declaring it unusable alongside a generation of photographs proving otherwise.
After the Purchase: The First Month With a New System
Choosing well ends at the till only in the narrowest sense. The first month decides whether the researched camera becomes your camera, and a few deliberate practices make that transition succeed.
Learning one system deeply
Resist the urge to customise everything on day one. Shoot with near-default settings for the first outings, learn where the camera’s designers put things, and then change the few settings your actual shooting proves are wrong for you. Photographers who reprogram a new camera to mimic their old one often preserve old limitations and never discover the new system’s better native patterns. A month of honest use produces a short, personal configuration that no forum checklist can supply, because it is built from your photographs rather than other people’s preferences.
Judging your choice fairly
Every new system has a clumsy fortnight: fingers reach for absent dials, menus hide familiar settings, and keeper rates dip before they rise past the old system’s. Judge the purchase at a month, on the photographs and on whether you are carrying the camera more, not at a week on muscle memory. If a genuine mismatch remains after honest learning — the grip that still cramps, the finder you still dislike — the earlier you act on it, while returns or resale values are kind, the cheaper the lesson. But give the fortnight its chance first; most systems are acquitted by it.
Growing the system deliberately
Let the photographs you missed dictate the second lens, not the photographs you imagine. A month of shooting produces real evidence: the frames that were too wide, the light that was too dim, the distance that was too far. Buy for the evidenced gap and your system grows along the lines of your actual photography, which is the entire philosophy of this guide applied beyond the first purchase. The camera was chosen by subject, by mount, and by hand; the system it becomes should be chosen exactly the same way.
Sensor Size Revisited: The Decision Behind the Decision
Because the sensor choice shapes everything downstream, it is worth one more pass at the level of real photographs rather than formats and factors.
What the larger sensor actually buys
In ordinary light at ordinary sensitivities, the visible difference between modern crop and full-frame files is small enough that most viewers, shown prints, cannot sort them reliably. The larger sensor’s advantage appears at the edges of the day: dim rooms, high sensitivities, aggressive shadow recovery, and the shallow depth of field available from fast lenses. If your photography lives at those edges — evening events, indoor family life, deliberate background blur — the advantage is real and recurring. If your photography lives in daylight, travel, and landscape at moderate apertures, the smaller system’s advantages in size, weight, and lens reach are equally real and equally recurring.
Depth of field as a creative choice, not a contest
Shallow depth of field is a tool for isolating subjects, not a definition of quality, and many genres — landscape, architecture, much documentary work — actively prefer the deeper focus a smaller sensor delivers more easily. Beginners often absorb the idea that blurrier backgrounds mean better photographs, buy accordingly, and then spend a year fighting razor-thin focus on moving children. Choose the depth characteristics your subjects want: isolation for portraits and events, depth for places and scenes, and remember that either system can be pushed toward the other’s look with lens choice and distance, at some cost in convenience.
The upgrade path question
Some buyers choose a crop body intending to upgrade to full frame later within the same mount. This works smoothly only where the mount’s full-frame lenses were bought from the start; a bag of crop-only lenses makes the later upgrade a second system purchase. If upgrading is a genuine plan rather than a comforting story, buy dual-format lenses from the beginning and accept their size. If it is a story, buy the crop system proudly and completely — a fully committed smaller system takes better photographs than a hesitant half of a larger one.
A Closing Checklist for the Day You Buy
Bring the whole decision together on the day itself, when distractions are loudest and the research is easiest to abandon.
- Your subject list, written down, with the finalist’s autofocus and lens answers for each.
- Your five-year lens map, checked against the system you are about to enter.
- The body-plus-lens combination in your hands, loaded with a card, shot with and reviewed.
- The hidden costs — cards, spare battery, bag — acknowledged in the same budget.
- The exit question answered: if this system disappoints in a year, what would changing cost, and can you accept that?
If each line survives the shop, buy with confidence and stop researching. The post-purchase comparison spiral — reading reviews of the cameras you did not buy — is the last trap in the process, and the only defence is remembering what your decision was based on: your subjects, your lens map, your hands. Cameras chosen that way are rarely regretted, because they were never really chosen from a catalogue. They were chosen from a life, and they fit it the way a measured bag fits a laptop — precisely, and for years.
What Experienced Photographers Wish Beginners Knew
Ask photographers a decade into a system what they would tell their beginner selves, and the answers converge with suspicious consistency. They wish they had handled more cameras and read fewer charts. They wish the first lens had been chosen for their subjects rather than for its focal-length coverage on paper. They wish they had understood that the system — mount, lenses, upgrade path — was the purchase, and the body merely its first instalment. And almost none of them mention resolution, frame rates, or the specification that dominated their first month’s research.
That convergence is the real conclusion of this guide. The steps exist to get you to a shortlist of cameras that can all do the work; after that, your hands, your subjects, and your lens map are better judges than any further research. Buy the system you will carry, learn it for a month before judging it, and let the photographs you missed — not the ones you imagine — direct every purchase after the first. A mirrorless camera chosen that way stops being a product decision remarkably quickly. It becomes simply your camera, which is the only status that ever produced a body of work.
Finally, a word about confidence. The mirrorless market is engineered to make every buyer feel one model behind, one feature short, one generation late. Resist the framing. The photographers whose work you admire built it on cameras weaker than any finalist on your shortlist, and the gap between their tools and yours is not where photographs come from. Choose by subject, by system, and by hand; then go and make the pictures that render the whole comparison gloriously irrelevant.
Your shortlist, your subjects, and your hands have done the work. Trust them, buy once, and spend the attention you saved on the only specification that has ever mattered in the end: being there, camera ready, when the light does something worth photographing.
Related Guides
- best mirrorless cameras for photography
- best mirrorless cameras for travel
- best mirrorless cameras under 1000 for stills
- best mirrorless cameras for professionals
- best mirrorless cameras for landscape photography
Frequently Asked Questions
Which mirrorless brand should a beginner choose?
The one whose lens catalogue and handling suit you, because image quality across Canon, Sony, Nikon and Fujifilm at the same sensor size is close. Price your next two lenses in each mount, hold the bodies, and check the used market near you. Beginners often land on Canon or Sony for their beginner-friendly models and deep catalogues, or Fujifilm for its tactile dials — all are defensible answers.
Is full-frame mirrorless worth it over APS-C?
When your work lives in low light, shallow depth of field or professional deliverables, yes — the sensor advantage is real and the lens catalogue is deepest. For travel, family and daylight photography, APS-C delivers nearly identical results in smaller, cheaper kits, and the saved money buys lenses and trips. Decide by your worst typical conditions, not your best-day aspirations.
How important is IBIS in a mirrorless camera?
Very, for handheld low-light stills and casual video: in-body stabilisation steadies every lens, including primes without their own stabilisation, and buys several stops of shutter speed. It matters less on tripods, for fast action (where shutter speed rules) and when your lenses carry excellent stabilisation of their own. Most mid-tier and above bodies include it; treat its absence in a bargain body as a real, priced trade-off.
Can I adapt my old DSLR lenses to a mirrorless body?
Usually, with the manufacturer’s adapter — Canon EF to RF and Nikon F to Z adapters preserve autofocus and stabilisation well, making gradual migration painless. Third-party and cross-brand adapting varies: autofocus may slow and some features may not translate. If a large lens collection drives your choice, test your most-used lenses on the adapter before committing to the body.
What lens should I buy first with a mirrorless camera?
Start with the kit zoom unless you already know your subject: it covers the everyday range cheaply and reveals your favourite focal lengths from your own files’ metadata. The classic second purchase is a fast prime near your most-used focal length — a 35mm or 50mm equivalent — which transforms low-light and portrait work. Telephoto or ultra-wide come third, ordered by the subjects you actually missed.
How long will a mirrorless camera stay current?
Bodies age gracefully: a current mid-tier mirrorless camera will take competitive photographs for five to eight years, receiving firmware improvements along the way, and its mount’s lenses remain current far longer. Buy for today’s subjects rather than tomorrow’s rumours — the photographs you take this year are worth more than the specification you might gain by waiting.
How many megapixels does a beginner actually need?
For prints at ordinary sizes, screen use, and reasonable cropping, the mainstream resolution offered by current entry and mid-range mirrorless cameras is comfortably sufficient, and has been for several years. More resolution earns its keep for large exhibition prints, heavy cropping in wildlife work, and commercial demands. Chasing the highest number as a beginner usually spends money that a better lens would have turned into visibly better photographs.
Should I buy the camera with the best specifications or the one that feels best?
When specifications are close — and between current rivals they usually are — choose the one that feels best in your hands and makes sense to operate, because you will use it more, learn it faster, and keep it longer. Ergonomics and menu logic shape your photographs every single outing, while a marginal specification advantage appears only in narrow conditions. The exception is a hard requirement: if one camera cannot do something your work genuinely needs, specifications decide.
Is it worth waiting for the next model before buying?
Usually not, if a current camera meets your requirements, because mirrorless development now improves incrementally and the photographs you would take during the wait are gone for good. Waiting makes sense only when a specific, announced feature addresses a genuine limitation for your work — not a rumoured one addressing an imaginary one. Buy the camera your subjects need today, at the generation its price has settled, and let the next model be a pleasant irrelevance.
Should image stabilisation decide between two otherwise equal cameras?
It can, legitimately. If your photography involves handheld low-light work, slower shutter speeds, or video, effective in-body stabilisation changes what is possible on ordinary outings, and between two finalists equal in other respects it is a meaningful tiebreaker. It matters far less for tripod-based landscape work or fast-shutter sports, where it should not outweigh autofocus or lens considerations. Let your subjects cast the deciding vote, as with every other specification.