Knowing how to set up a doorbell camera in the app — after the physical installation — is what turns a camera on a wall into a doorbell the whole household can rely on. The hardware steps are only half the job: accounts, Wi-Fi connection, motion zones, alert tuning, shared access and chime behaviour are all decided in the app, and the defaults are rarely right for your particular door.
This guide assumes a battery or plug-in camera (the self-install types) and walks through setup in order: app and account, connecting to Wi-Fi, naming and placing the device in the app, tuning motion and alerts so they inform rather than nag, adding family members, connecting chimes and smart speakers, and the final tests. Hardwired wiring itself is an electrician’s job and is not part of this guide.
Disclosure: As an Amazon Associate, kajuandouglas.com earns from qualifying purchases. Links to Amazon on this page are affiliate links; they cost you nothing extra. Listing details such as price and availability change often, so check the current Amazon listing before you buy.
Quick Answer
Install the maker’s app, create an account with a strong password and two-factor authentication, add the camera by scanning its code, and connect it to your 2.4GHz home Wi-Fi if the model asks. Then set motion zones to your path and doorstep only, enable person and package alerts, invite family members as shared users, connect your chime or smart speakers, and test a full doorbell press from another room.
In this guide
What You Need
Before you start the app setup:
- The camera charged and within range of your router: do the app setup indoors near the router, before or just after mounting.
- Your Wi-Fi name and password: and knowledge of your 2.4GHz network name if your router splits bands.
- A phone with the maker’s app installed: from the official app store only.
- Five quiet minutes per family member: to accept shared-access invitations and set their alert preferences.
Gear for This Guide
The two verified kits whose apps illustrate this setup flow:

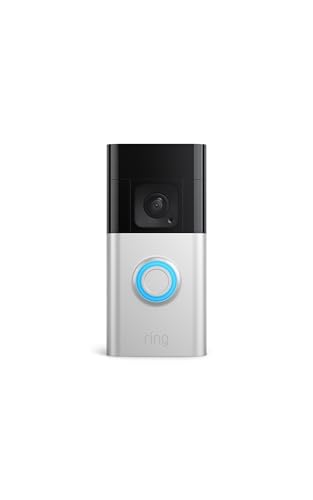
Ring Battery Doorbell Plus (2nd Gen), Head-to-toe HD+ video — Ring’s app setup for the Battery Doorbell Plus follows the pattern here: scan, join Wi-Fi, draw motion zones, enable package alerts. Check price on Amazon.

eufy Security Video Doorbell E340 Kit with Chime, 2K FHD, Built-In 8GB — eufy’s E340 kit adds a chime pairing step to the same flow, and its local storage means setup includes choosing recording preferences without a subscription. Check price on Amazon.
How to Set Up a Doorbell Camera, Step by Step
Step 1: Create the account properly
Install the manufacturer’s official app and create your account with a unique, strong password — this account can view your front door, so it deserves the same care as your email. Turn on two-factor authentication immediately if offered. If the camera is for a household, decide now whose account owns the device; the owner invites everyone else as shared users, which keeps control clear when phones change or someone moves out.
Step 2: Add the camera and join Wi-Fi
Use the app’s add-device flow, scanning the QR code or serial on the camera or its box. Connect the camera to your home Wi-Fi, following the app’s prompts; many doorbell cameras prefer the 2.4GHz band for its longer range through walls, so if your router shows separate band names, choose that one. Do this step near the router even if the camera is already mounted — a clean first connection avoids half-configured states — then confirm the live view loads.
Step 3: Update firmware and name the device
Accept any firmware update the app offers before tuning settings; updates frequently improve motion detection and battery behaviour, and settings layouts change between versions. Name the camera plainly — ‘Front Door’ — because that name appears in every alert and is spoken by smart speakers. Set the correct time zone so recordings and schedules line up with reality.
Step 4: Draw motion zones that match your property
This is the highest-value step in the whole setup. Draw zones covering your path, porch and doorstep, and deliberately exclude the street, pavement and neighbours’ gardens. A camera that alerts for every passing car trains the household to ignore it within a week. Enable person detection, and package detection if offered, and set the motion sensitivity to the middle setting as a starting point — you will tune from real events over the first days.
Step 5: Tune alerts, recording length and privacy
Choose which events notify you (person and package alerts on; generic motion often off), how long clips record after motion, and whether the camera records audio — check your local rules and household preferences on audio, and be considerate of neighbours. Set privacy zones if the camera overlooks a neighbour’s window or door; blanking those areas is both courteous and, in some places, legally expected. Review the subscription or local-storage settings so you know exactly what is being kept and for how long.
Step 6: Add the household and the chime
Invite family members through the app’s sharing feature with their own accounts — never by sharing your password. Each person sets their own alert volume and schedule. Then connect the indoor chime: plug in the wireless chime and pair it in the app, or link your smart speakers so a doorbell press announces through the house. Test from the furthest room; a doorbell only the owner’s phone can hear is a half-finished setup.
Step 7: Run the acceptance tests
Do a full rehearsal: one person presses the bell while another answers from a different room using two-way talk; walk the approach at normal pace and confirm a person alert arrives within a reasonable time; leave a parcel on the step and check it appears in frame and triggers a package alert if enabled. Finally, check the night view after dark. Adjust zones and sensitivity based on these tests, then revisit after three days of real events and tune once more.
Common Mistakes in Doorbell Camera Setup
Accepting default motion settings is the number one mistake — defaults assume an average door that does not exist. Second is skipping two-factor authentication on an account that guards a camera. Third is sharing the owner password with the whole family instead of using proper shared access, which becomes a security and control problem later. Finally, many people never test two-way talk or the chime until a real courier is standing at the door, which is the worst possible moment to discover a muted speaker.
Pro Tips for the First Week
Review the event list each evening for the first few days and adjust one setting at a time — sensitivity, zone edge, or alert type — so you can tell what fixed what. Mark genuinely useful events if the app offers feedback training for detection. Set a battery-check reminder if your model is battery powered, and save a screenshot of your final zone layout; after a future reset or replacement, you can recreate a tuned setup in minutes instead of re-learning it.
Alert Tuning as a Household Negotiation
Every alert setting is a trade between awareness and peace, and households negotiate it whether they plan to or not. The sustainable settlement most homes reach: person and package alerts on for the adults who want them, doorbell presses announced through the house, generic motion off, and quiet hours scheduled overnight except for the doorbell itself. Each member’s phone can carry different rules — the person who works from home may want every event, the night-shift sleeper almost none — which is why per-user settings exist and should be used rather than argued into a single compromise nobody likes.
Delivery patterns deserve their own tuning. If couriers arrive daily, package alerts are the system’s heartbeat; if the door is mostly family, person alerts at the boundary of your property may matter more. Review the first week’s events and ask what you actually acted on; alerts that never changed anyone’s behaviour are candidates for demotion to silent recording, where they still provide history without demanding attention.
Seasonal retuning is normal: darker evenings change night performance and trigger patterns, holiday delivery surges multiply package events, and summer foliage moves in the wind. A five-minute settings review each season keeps the system calibrated to the door’s real life instead of the week it was installed.
Privacy Settings and Courteous Defaults
Modern doorbell apps offer privacy zones that permanently blank parts of the view — use them for neighbours’ windows, doors and any area beyond your property the camera cannot help seeing. Audio recording deserves an explicit household decision: it captures conversations on your step, which many owners want for deliveries and disputes, and it is regulated differently from video in some places. Know your local rules, set the choice deliberately, and mention the camera to regular visitors if your conscience or your jurisdiction suggests it.
Data retention is the other privacy dial: how long recordings are kept, where they live, and who can see them. Cloud history lengths are set by your subscription tier; local storage keeps everything at home under your physical control. Shared access should be reviewed whenever household membership changes — a former housemate’s lingering access is the most common real-world doorbell privacy failure, and it is prevented by the per-user accounts this guide insists on.
Finally, secure the account itself as you would a house key: unique password, two-factor authentication, and a periodic glance at the list of devices signed in. The camera watches your door; these settings decide who else gets to watch through it.
Connecting Smart Speakers, Displays and Routines
Linking the doorbell to smart speakers turns a press into a house-wide announcement and lets a smart display show the visitor automatically — the feature that most makes a video doorbell feel like the future. Set it up per room: announcements in living areas and halls, not in bedrooms overnight, and the video pop-up on the display the household actually gathers around. Voice assistants from the major platforms all support the big doorbell brands, and the linking lives in the assistant’s app rather than the doorbell’s.
Routines extend the value: a doorbell press after dark can bring the porch light on, which improves the recorded view and the visitor’s experience simultaneously; a person alert while you are away can switch an indoor light on for the lived-in look. Keep routines few and purposeful — automation that fires constantly becomes background noise, and a porch light that blazes for every cat teaches the street to ignore it.
Test the full chain after linking: press the bell, hear the announcement, see the display, answer the talk. Latency in this chain is normal up to a few seconds; if it stretches longer, the Wi-Fi work in our linked offline-troubleshooting guide is the place to start, because smart-home polish cannot compensate for a struggling connection at the door.
Setting Up a Second Camera Later
The setup habits formed on the first camera pay compound interest on the second. Stay in the same app and ecosystem, reuse the account structure — owner plus per-person shared access — and copy the alert philosophy rather than the literal zones, since each viewpoint has its own geometry. Name devices by location from the start, because ‘Front Door’ and ‘Side Gate’ scale gracefully while ‘Camera 2’ does not. If the first camera’s subscription was per-device, revisit the plan structure before adding hardware; many platforms price whole-home coverage more kindly than stacked singles.
Resist reconfiguring the working first camera while adding the second. Systems grow unstable when every addition triggers a global retune; add, tune the new viewpoint against its own evidence, and leave the proven settings alone. The household’s trust in the system — the belief that an alert means something — is the asset all this discipline protects.
Resetting, Replacing and Handing Over
When a camera is replaced, given away or the home is sold, the setup has an unwinding: remove the device from your account in the app, which releases it for the next owner and severs its access to your network and history, then factory reset the hardware if it is leaving your possession. A camera left paired to a previous owner’s account is a brick to its new owner and a privacy loose end for the old one — the doorbell equivalent of the tablet activation lock, and just as avoidable with two minutes of care.
For a replacement within your own system, photograph the old camera’s settings screens — zones excepted, since the new viewpoint differs — so notification, recording and privacy choices transfer in minutes. Keep the old camera’s details in your home records until its footage retention expires, because an incident from its final week may still need its history located after the hardware is gone.
Looking More Closely at the Details That Decide It
Most discussions of setting up a doorbell camera in its app so alerts, zones and sharing work for the whole household stay at the level of headlines, yet the outcome is usually decided by smaller details that only appear once you live with the decision. Three of those details deserve attention before anything else: notification settings on each phone, not just inside the camera app, shared access levels for family, carers or trusted neighbours, and a sensible retention period for clips you may actually need later. None of them looks dramatic on a specification sheet. Together they decide whether the right phone buzzes, whether a neighbour can check in without your password, and whether last Tuesday’s clip still exists.
Start with notification settings on each phone, not just inside the camera app. A doorbell app can be perfectly configured while the phone itself buries its alerts under a focus mode, so check both layers on every handset in the house. Test each phone at the door, once in daylight and once after dark, and note which handset stayed silent. A short note naming the silent phone beats a confident belief that notifications are on everywhere.
Points to keep in mind
- Judge notification settings on each phone, not just inside the camera app in your own setting before trusting a general verdict.
- Treat shared access levels for family, carers or trusted neighbours as a first-order factor, not a footnote.
- Write down, in one plain sentence, whether you are accepting phone-by-phone notification chores, broad sharing, or short clip retention.
Then consider shared access levels for family, carers or trusted neighbours. Households usually discover an access mistake late, often only after the return window has closed or the installation is finished. Test the arrangement at its edges instead: the neighbour who should view but never change settings, the teenager whose phone is always on silent, and the carer who visits at dawn. A sharing setup that only works for an average user in average conditions will fail exactly those people, and they are the ones who generate the complaints.
Finally, weigh a sensible retention period for clips you may actually need later alongside the first two rather than in isolation. A longer retention window can mean a costlier plan, and the most generous sharing can mean the least control over who sees your doorstep. A mature decision about doorbell app setup names that trade-off out loud. Naming it lets you pick the retention and sharing balance your household actually wants, instead of discovering at renewal time that you paid for the opposite.
How This Plays Out in Real Situations
Abstract advice becomes useful when it meets a real household, so consider a busy street where the default zone records every passing pedestrian. On a busy street the priority is rarely a cleverer detection model; it is whether the basic zone still does its one job on an ordinary day of buses and dog walkers. Keep the setup plain at first: draw one honest zone over your own ground, test it with real passers-by, and only then add refinements like parcel detection. Households on busy streets often find a modest, tightly zoned setup outperforms an ambitious all-alerts configuration that trains everyone to ignore the phone.
Contrast that with a family adding a second camera at a side door months later. A second device rewrites the priorities, because names, homes and member access that were obvious with one camera suddenly need to scale. A naming shortcut that barely mattered with one doorbell becomes the deciding factor here, while the fancy detection mode everyone praised turns out to matter very little. This is why copying a friend’s conclusion about doorbell app setup so often disappoints: the friend optimised for a life that is not quite yours, with rooms, routines and patience that differ from your own.
Points to keep in mind
- During setup, finish account security, sharing permissions, and motion zones before admiring the live view.
- Start from a friend’s zone settings, then redraw them around your own street.
- Let the alert pattern from an ordinary week, not one alarming night, shape your zone and sensitivity settings.
A third pattern appears with a shift worker who needs quiet hours without disabling the camera. For a shift worker the setup has to be right almost immediately, because there is no spare afternoon to keep reopening the app between sleeps. Ten minutes spent setting the quiet-hours schedule and checking it against the rota prevents the 3 a.m. wake-ups that make people delete the app entirely. If that is your life, put a dependable schedule and a silent-but-recording night mode above every clever detection extra.
There is also the quieter case of a household caring for an elderly relative who also needs access. Nothing is broken, the camera records happily, yet the relative cannot find the live view and gives up after two attempts. A button buried one menu too deep, an alert tone too quiet, a shared invite that expired unopened: each is small, and together they decide whether the access you granted is real. Naming the exact sticking point points at its fix, whether that is a home-screen shortcut, a louder tone, or a simpler viewer role.
A Practical Method You Can Repeat
When opinions conflict, a repeatable method settles the question of setting up a doorbell camera in its app so alerts, zones and sharing work for the whole household better than another hour of reading. The method has four moves. First, write down what a finished setup must do in one sentence: who gets alerted, for what, and what gets recorded. Second, gather evidence in that exact setting. Third, change or compare one variable at a time. Fourth, judge the result against the list you wrote before opening the app, so one impressive demo feature cannot quietly rewrite your requirements.
In practice that means actions such as these: walk the setup in order and resist skipping the zone-drawing step; review the first week’s clips together and adjust as a household; and send a test visitor to the door while you tune sensitivity. Each is deliberately unglamorous. Their value is sequence: zones before sensitivity, sensitivity before schedules, and the app stops feeling like a maze of unrelated toggles. Followed in order they leave a settings trail you can retrace if an alert pattern surprises you. Changed all at once on the first evening, they produce the familiar tangle where everything was tweaked and nothing can be explained.
Points to keep in mind
- schedule a short monthly check of firmware, battery and shared users
- give each household member the least access that still lets them help
- write down which phone settings control sound, banners and quiet hours
Equally important is what to record. Useful notes for doorbell app setup include the date and time, the place, what else was happening at the time, and a simple verdict in your own words. Across a week those notes expose what a single test ring cannot: alerts clustering when the school run passes, the shared phone that never buzzes, the zone that swallows the side gate. Setup decisions built on those patterns stay right, and if an app update later scrambles your settings, dated notes are exactly what you need to rebuild them.
Allow the tuning a few days rather than expecting perfection on the first evening. The patience is repaid when the app settles into a calm rhythm instead of joining the cycle of install, frustration and reinstall that makes doorbell apps feel exhausting. Most people do not need more information about doorbell app setup; they need their own information, gathered calmly in their own setting, and this method is simply a way of collecting it without drama.
Living With the Decision Over Time
The first week with any choice about setting up a doorbell camera in its app so alerts, zones and sharing work for the whole household is a poor predictor of the first year. In the first week everyone is watching the app, the zones are freshly drawn, and nobody has yet silenced anything in irritation. Picture the setup at six months: phones have been replaced, a teenager has muted the alerts, seasons have changed the light, and the settings still have to protect the house unaided.
Long-term satisfaction usually rests on unexciting qualities connected to device naming and home structure that stay clear when a second camera arrives and firmware updates applied deliberately and checked afterwards. Clear names, sensible homes and updates you apply on purpose decide whether the app stays understandable or slowly turns into a chore of mystery devices and surprise changes. When you compare setups, weight those housekeeping qualities above novelty, because a reviewer configures an app for a week while your household will live inside its menus for years. Ask anyone who has run a doorbell app through a full year what still irritates them, and it is rarely the detection feature that persuaded them.
Points to keep in mind
- Review motion sensitivity weekly at first, then monthly once false alerts settle down properly.
- Households running theirs for years say sensible motion zones matter more than maximum sensitivity.
- Revisit setup whenever a new phone, router, or household member joins the doorbell account.
Maintenance deserves a plan rather than good intentions. Fold the app housekeeping into routines you already keep: glance at the member list when you change the door code, review retention when you clear old photos off your phone, and check for updates on a quiet Sunday rather than mid-delivery. That light rhythm stops the slow drift into a forgotten ex-partner still holding access or a storage plan silently full, and catches setting drift while it is a two-minute correction. In the context of doorbell app setup, that plan mainly means keeping an eye on a sensible retention period for clips you may actually need later before it turns into a bigger problem.
Finally, leave the setup easy to revise when household life changes. Moving home, changing work, a new household member or a new device can all reorder the priorities around doorbell app setup. A sharing arrangement that suited a couple is not a failure because a lodger, a carer or a grown-up child now needs a different level of access. Your setup notes turn that reshuffle into a ten-minute edit instead of a fresh research project starting from a blank app.
Mistakes to Avoid and Signs You Chose Well
Setup mistakes follow patterns most households repeat, so the common configuration traps come first. One is this: sharing an account password instead of using proper member access. Another, just as common, is the opposite excess — turning audio or privacy features on without thinking about visitors and neighbours. And a third, quieter error is letting a firmware update change settings without rechecking them afterwards. Look at the three and they share a root: each is an attention lapse inside the app rather than a lack of technical ability. Every one begins when a single vivid moment, usually the excitement of the first live view, is allowed to stand in for the whole work of configuring the household properly.
Avoiding them does not require expertise, only a pause. Before you call the setup finished, challenge it directly: what would have to be true in this app for the doorbell to disappoint me, and have I actually checked that screen? Which ordinary phone moment, the handset on silent, the tablet left at work, the partner’s phone in a bag, have I not yet tested with a real ring? What am I assuming about recording length and cooldown periods shaping both usefulness and battery life that I have not verified? Ten minutes of hostile questioning, aimed at your own favourite option, is the cheapest insurance available in the whole process of setting up a doorbell camera in its app so alerts, zones and sharing work for the whole household.
Points to keep in mind
- Stress-test your preferred settings before you save them permanently.
- Judge success by quiet, ordinary evidence over several weeks.
- Try small corrections before concluding that replacement is necessary.
How will you know the decision was right? Watch for ordinary evidence: whether clips you need are retained long enough to be useful; how quickly a real visitor triggers a notification; and the ratio of useful alerts to nuisance alerts across a normal week. None of these announces itself with fanfare. You notice them as absences: the parcel alert nobody missed, the settings page nobody reopens in anger, the clip that is simply there. That calm inside the app is what a careful setup actually buys, and it is a more trustworthy verdict than any badge on the app store page.
When the app evidence disappoints, respond in proportion before resetting anything. Many disappointments with doorbell app setup yield to a small correction — a setting, a position, a habit, an accessory — rather than a complete replacement. Work through the small corrections first, one toggle at a time with a test ring after each, using the method described above. Keep a full reset or a different platform for structural mismatches, such as an app your least technical housemate genuinely cannot navigate. Holding that line calmly will save you more over the years than any single setup tip in this guide.
One More Round of Checks Before You Settle
Before you call setup finished, borrow the last app audit that careful households always run, rechecking zones, alert types and member access even when every screen looks right. It concerns privacy zones and audio choices that keep neighbours out of the picture and person and parcel detection settings balanced against alert fatigue, two aspects that reveal themselves slowly. Test both deliberately rather than waiting to be surprised: stage your busiest ordinary moment, a school-run pavement outside and a parcel arriving at once, and watch what the app records and reports. The point is not fault-hunting but learning where your settings’ comfortable limits lie, while adjusting them is still a relaxed evening job.
Tell the household what those final checks showed. A setup for doorbell app setup is a household system, not a personal gadget, and other people’s routines will find edges yours never touches. Their feedback, gathered in the first week, prevents the slow build-up of workarounds and muted complaints that eventually gets blamed on the original purchase. Settle together which alerts each person receives and which nobody needs, note it in the shared family chat or on the fridge, and treat that agreement as part of the setup itself.
Points to keep in mind
- Trigger every alert type once, deliberately, instead of meeting it unprepared.
- Save a screenshot of your final motion zones and alert settings somewhere safely backed up.
- Stop retuning the zones once useful alerts outnumber nuisance ones across a normal week.
Then stop optimising. Every app setup reaches a point where another evening among the toggles trades real life for gains nobody in the house will ever feel. If your alert log, the record of useful rings and quiet nights you have been keeping, says the setup works, then let it work. Give the tinkering urge a rest and point it at something in the house that genuinely misbehaves. A fresh round of app checks can wait until a new phone, a new housemate or a changed routine gives you a reason, and your notes will make that round far quicker. With doorbell app setup, that stopping point usually arrives once how calm the system feels once the novelty period ends stops changing from week to week.
Worked Examples That Make the Trade-Offs Concrete
One setup story teaches more than checklists, so follow it closely. Imagine a family adding a second camera at a side door months later. Faced with a confusing second device, most people reach for a more capable camera instead of fixing the structure underneath. Yet the binding constraint in that picture is usually device naming and home structure that stay clear when a second camera arrives, and no amount of spending elsewhere relaxes it. That example only resolves well when the naming and home structure are sorted first, because two cameras called simply Doorbell in one list will confuse every alert that follows.
What to watch for
- Name the household bottleneck before changing settings.
- Translate every example into your own phones, your own member list and your own street before trusting its conclusion.
- If you keep redrawing the same zone for the same false alert, the zone shape is wrong, not the sensitivity slider.
Now change one variable: imagine a home where parcels arrive daily and deserve their own alert style. The app, the camera and the setup advice stay exactly the same, yet the correct settings flip, because how the household uses its alerts has changed. This is the single most transferable lesson in the whole subject of setting up a doorbell camera in its app so alerts, zones and sharing work for the whole household: context is not a detail around the decision, it is the decision. Read every setup recommendation against your own phones and routines, and distrust any guide that insists those details do not matter.
A third example works as a warning. Picture a household that skipped the early checks, committed quickly, and spent the following month applying fixes for forgetting a tablet or old phone that still receives sensitive alerts and then for turning audio or privacy features on without thinking about visitors and neighbours. Each patch seemed to help for a day or two, because each treated the visible symptom while the real mismatch underneath stayed untouched. The cost was not only money; it was confidence. By the time the household finally audited its member list and devices properly, nobody trusted the app or their own setup judgement. These examples exist so your household skips that sequence entirely: audit the app properly, in the real household, before the settings fossilise.
Use these examples as templates rather than stories. Swap their details for your own handsets, your own member list and your own alert habits, then run the same reasoning again. If a different setup wins once your handsets and members go in, the app has just shown you what your household truly values. If the same settings win under several versions of your household, you have found a robust setup, one worth keeping through phone changes and app updates alike. Applied to doorbell app setup, the detail that most often changes the conclusion is notification settings on each phone, not just inside the camera app.
A Decision Flow When You Feel Stuck
Indecision about doorbell app setup usually means two good criteria are pulling in opposite directions, not that you lack information. When that happens, stop researching and start ranking. Write your setup criteria down, the four to six that genuinely matter, from alert speed to member access, and force them into a strict order. Ranking feels forced for the first minute, then it suddenly bites, because rival setups rarely fail across the board: each falls down on one criterion, and the ranking tells you whether that criterion sits at the top of your list or near the bottom.
What to watch for
- Order your setup priorities before toggling any more settings.
- Cross out any setup option that fails a genuine access deal-breaker, then test what survives on every phone, in writing.
- If notifications overwhelm you, reduce zones before reducing sensitivity, preserving genuine visitor alerts longer.
Next, apply a simple elimination pass connected to announcement routines on smart speakers and displays inside the house. Strike off any option that fails a true setup deal-breaker, and be strict about the word: a deal-breaker means a flaw that will still irritate you on a plain weekday next winter, not a line that merely looks weak in a comparison chart. This pass is often brutal and always useful. What remains is a handful of setups you can genuinely test on your own phones, and confidence built on those tests is the kind that lasts.
Then test the survivors against battery or recording behaviour after your chosen settings settle in and whether clips you need are retained long enough to be useful in your own setting, on the same day if you can, so conditions stay comparable. Jot a score beside each test straight away, while the missed alert and the silent phone are still fresh in your mind. Most people are startled by how different that written score looks from the verdict they were carrying in their heads, because memory keeps the dramatic failure while notes keep the typical day, and your household lives through typical days.
If two setup options still tie, decide on secondary grounds without guilt: which is easier to live with, easier to maintain, easier to hand to another household member, easier to replace if it fails? A dead heat between two good setups is common, and at that point the honest truth is that either will serve your household perfectly well. Picking one today and enjoying the calm beats spending another week hunting for a difference your daily alerts will never reveal. For doorbell app setup, the easiest option to live with is usually the one that handles announcement routines on smart speakers and displays inside the house with the least fuss.
Seasonal, Household and Long-Term Angles Worth Planning For
Conditions change across the year, and a decision about setting up a doorbell camera in its app so alerts, zones and sharing work for the whole household that is tested in only one season carries hidden risk. Summer evenings fill the pavement outside, winter darkness changes what the camera sees at five o’clock, and holiday guests trigger a pattern of rings your household never produces alone. Testing all four seasons beforehand is impossible, so ask the winter question out loud instead: in the darkest and busiest week of your year, will these zones, these schedules and these sharing settings still cope?
What to watch for
- Tune setup for darker evenings and busier delivery seasons, not just today’s quiet conditions.
- Let each adult answer a test ring from their own phone before calling setup finished.
- Schedule a quarterly tidy-up: prune shared users, update firmware, and review stored clips briefly.
Households also change from inside. An app configured by one confident user gets inherited by partners, children, grandparents and guests, each with different patience for menus and alerts. The setups that last are the ones a newcomer can operate without a briefing: a device list with plain names, sensible default alerts, and a short note for the two or three steps that are not obvious. When you evaluate doorbell app setup, spend one minute imagining the least technical person in your life facing it alone. That minute is a surprisingly accurate quality test.
Count the total effort a setup will ask of you across its whole working life, not just the effort of the first evening. Count the ongoing attention honestly: the member-list checks, the zone redraws after roadworks, the retention reviews, the update rechecks, and ask whether that rhythm genuinely fits the time your household has. An app that wants weekly tending from a household that can only offer monthly tending will slowly fill with stale members and wrong settings, however elegant its design. Matching the upkeep rhythm to the household matters just as much as matching the settings to the street. With doorbell app setup, the recurring effort worth counting most honestly is the effort tied to device naming and home structure that stay clear when a second camera arrives.
Finally, think about the exit before you need it. When you leave this app or this house, can access be revoked cleanly, clips exported, and the camera handed over without your account attached? Keep a note of who holds which access level and export any clips that matter before you need to, so a future handover stays a calm half-hour rather than a lockout. That is not pessimism; it is what turns one purchase into accumulated household knowledge, so the next decision about doorbell app setup starts from experience instead of from a search box.
Related Guides
- best security cameras for front door
- best Wi-Fi security cameras for home
- best security cameras for home without subscription
- best home security cameras for under 200
- how to install a doorbell camera
- how to position a doorbell camera
- how to fix a doorbell camera that keeps going offline
Frequently Asked Questions
Should my doorbell camera use the 2.4GHz or 5GHz Wi-Fi band?
Most doorbell cameras favour 2.4GHz because it travels further and passes through exterior walls better — exactly what a camera outside the front door needs. Some newer models support 5GHz and use it well when the router is close. Follow the app’s recommendation during setup, and judge by the signal strength the app reports at the camera’s mounted position.
How do I stop getting alerts for every passing car?
Redraw your motion zones to exclude the street entirely, enable person detection and turn off generic motion alerts, and lower sensitivity one step. If the door faces the street closely, a wedge mount angling the view along your path helps physically. Tune over several days — one change at a time — rather than switching everything at once.
Can several people receive doorbell alerts?
Yes. The account owner invites each person as a shared user with their own login, and each controls their own notifications. Avoid sharing the owner’s password: shared access can be revoked per person, keeps two-factor authentication meaningful, and makes it clear who changed settings when something mysteriously differs.
Do I need to pay for a subscription to set up the camera?
Setup itself is free on all major platforms, and live view plus basic alerts typically work without paying. Subscriptions usually add video history length, richer previews and advanced detection. Local-storage models avoid subscriptions by design. Decide after setup with full knowledge of what the free tier does for your model — and what it stops doing after any trial ends.
Why does my camera say the Wi-Fi signal is weak at the door?
Exterior walls, brick and metal doors block signal effectively, and the camera sits outside all of it. Check the reported signal in the app; if it is poor, move the router closer to the door side of the home or add a mesh node inside near the door. A stronger signal improves alert speed, video quality and battery life simultaneously.
What should I check after a firmware update?
Updates occasionally reset or rename settings. After a major update, glance over motion zones, alert types and recording length, and confirm the chime still pairs. A quick doorbell press test takes ten seconds and confirms the whole chain — camera, Wi-Fi, app and chime — survived the update intact.
How long should I live with my setup before retuning the zones?
For most households, a focused week of ordinary use tells you more than a month of occasional reading about setting up a doorbell camera in its app so alerts, zones and sharing work for the whole household. Test the setup on a work morning, on a dark evening and during one genuinely busy delivery window, keep the short notes described above, and then decide. Stretching the trial beyond that point seldom changes the verdict; it mostly postpones a decision your own alert log has already settled.
What should I check first if alerts stay silent after setup?
Return to the simplest explanation before replacing anything. Recheck the basics connected with announcement routines on smart speakers and displays inside the house, repeat your most reliable test in your most familiar setting, and change one variable only. If a calm retest on your own phones still disappoints, the mismatch is probably built into the setup itself, and your notes will pinpoint whether it is the zones, the schedules or the sharing that failed you.
Is a pricier tier worth it for smarter detection zones?
Only when the higher tier improves something your own routine actually stresses, such as motion zones drawn around your property rather than the whole street. If your own notes show the frustration actually comes from silent phones or stale members, extra detection features will change nothing you feel day to day. Judge any pricier tier against the evidence in your own alert log, not against the best-case demonstration in the manufacturer’s video.