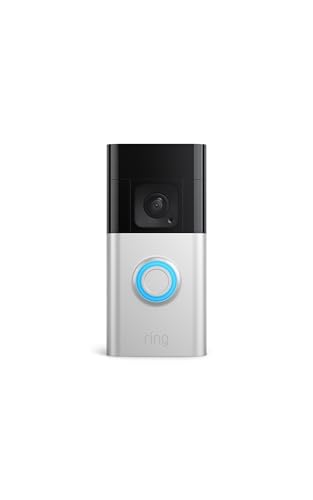
Learning how to install a doorbell camera the right way takes most people under an hour for the battery and plug-in models this guide covers — and the difference between a camera that delights and one that annoys is almost entirely placement, mounting height and a proper test before the screws are final. This guide deliberately covers battery and plug-in installations only.
That boundary matters: doorbell cameras that connect to an existing wired doorbell circuit involve a transformer powered from your home’s mains electricity. That work belongs to a licensed electrician — do not attempt to wire, replace or modify a doorbell transformer yourself. Everything below uses screws, mounts and plugs, stays entirely on the safe side of that line, and ends with positioning and app checks so the camera sees faces and packages, not the street.
Disclosure: As an Amazon Associate, kajuandouglas.com earns from qualifying purchases. Links to Amazon on this page are affiliate links; they cost you nothing extra. Listing details such as price and availability change often, so check the current Amazon listing before you buy.
Quick Answer
Charge the camera fully, set it up in the app over Wi-Fi indoors first, then choose a mounting spot about chest height beside the door with a clear view of faces and the doorstep. Test the live view from the exact spot before drilling, mount the bracket level, attach the camera, fit a wedge mount if the door sits in a corner, and finish by tuning motion zones and testing alerts at walking pace.
In this guide
What You Need
For a battery or plug-in installation:
- The doorbell camera, fully charged: battery models should start life at a full charge.
- The mounting bracket and screws in the box: plus wall plugs suited to your wall material.
- A drill and a small level: for masonry you will need the appropriate bit; many mounts also accept strong adhesive for smooth surfaces.
- Your phone with the maker’s app: signed in and connected to your home Wi-Fi.
- A wedge mount if supplied or needed: angled mounts correct views where the door is recessed or in a corner.
Gear for This Guide
Both verified examples here install exactly the way this guide describes:

Ring Battery Doorbell Plus (2nd Gen), Head-to-toe HD+ video — Ring’s Battery Doorbell Plus is the archetypal battery install: charge it, mount the bracket, click the camera on — no wiring involved. Check price on Amazon.

eufy Security Video Doorbell E340 Kit with Chime, 2K FHD, Built-In 8GB — eufy’s E340 kit adds a plug-in chime to the same battery-install pattern, solving the indoor bell at the same time. Check price on Amazon.
How to Install a Doorbell Camera, Step by Step
Step 1: Charge and set up the camera indoors first
Charge a battery model to full before it goes on the wall — the first days of heavy testing drain batteries, and ladder trips to recharge are nobody’s hobby. Then complete the app setup indoors: create the account, connect the camera to your home Wi-Fi, update its firmware, and confirm live view and two-way talk work. Discovering a faulty unit or a password problem is far easier at the kitchen table than at the top of a step stool.
Step 2: Choose the mounting position
Mount beside the door at roughly chest height — around 1.2 to 1.4 metres from the ground suits most models’ guidance — close enough that visitors naturally face it when they press. Avoid positions staring directly into low sun, which blinds the camera at the same hours each day, and avoid mounting on the door itself unless the maker explicitly supports it. If the entry is recessed or the door sits at an angle to the path, plan a wedge mount to aim the view along the approach rather than at the opposite wall.
Step 3: Test the live view from the exact spot
Hold the camera in the proposed position, or fix it temporarily with removable tape, and check the live view on your phone. You want faces at standing distance fully in frame, the doorstep and package area visible at the bottom, and minimal sky. Walk the approach path as a visitor would and watch the recording trigger. Also test at this point whether Wi-Fi holds up outside the closed door — repositioning now is free; after drilling it is not.
Step 4: Mark, drill and fit the bracket
Hold the bracket level against the wall, mark the screw holes, and drill with the bit suited to your surface — masonry bits and wall plugs for brick, smaller pilots for wood. If you are renting or avoiding holes, use the maker’s adhesive mounting option on a smooth, clean surface, understanding it is less theft-resistant. Fit the bracket firmly; a wobbling bracket becomes a wobbling picture and false motion triggers on windy days.
Step 5: Attach the camera and fit the chime
Click or screw the camera onto its bracket until it seats with the security screw or latch engaged, if provided — that small screw is the difference between a camera that stays and one that walks away. Plug in the wireless chime in a hallway socket where it will be heard, or confirm your smart speakers announce doorbell presses. For plug-in camera models, route the cable neatly to the outdoor socket with clips, keeping it clear of the door’s swing and any trip line across the step.
Step 6: Position, tune and test the whole system
Open the app and set motion zones to cover the path and doorstep while excluding the street and neighbours’ property. Set sensitivity so a person triggers it but passing cars do not. Then run real tests: press the bell and answer from your phone in another room, walk up as a visitor at normal pace, place a parcel on the step and confirm it is visible, and check the night view after dark. Adjust the wedge or zones based on evidence, not guesses.
Step 7: Finish with household setup
Invite family members through the app’s shared-access feature rather than sharing your password, set each person’s alert preferences, and confirm the camera reconnects automatically after a brief Wi-Fi interruption by toggling your router’s signal or waiting for the next natural hiccup. Note the battery level and set a calendar reminder for the first recharge window so a flat battery never silently leaves the door unwatched.
Safety Boundaries You Must Respect
This guide covers battery and plug-in models only. If you have an existing wired doorbell and want a hardwired camera, the installation involves the doorbell transformer, which is connected to mains electricity: hire a licensed electrician for that work, including checking transformer compatibility. Never open electrical boxes, swap transformers or extend mains wiring as a DIY project. Similarly, drill with awareness of what is in the wall — if your door frame area contains wiring you cannot account for, choose adhesive mounting or a different position rather than drilling blind.
Common Mistakes When Installing a Doorbell Camera
Mounting too high is the classic error, producing a view of the tops of heads and no faces. Skipping the pre-drill live-view test locks in bad angles. Setting motion sensitivity to maximum ‘to be safe’ guarantees alert fatigue and a drained battery. And many people install the camera but never the chime or family access, leaving a doorbell only one phone in the house can hear.
Mounting on Different Surfaces
Brick and masonry give the most secure fixing: drill with a masonry bit, use the wall plugs supplied, and expect dust — a helper with a vacuum nozzle beneath the drill point keeps the step clean and the household popular. Render and stucco need care, since aggressive drilling chips the finish; start with a smaller pilot and avoid the edges of stones or blocks where cracking starts. Wooden frames and cladding are the easiest surfaces of all, needing only pilot holes to prevent splitting.
Smooth surfaces — uPVC frames, glazed tiles, painted metal — suit the adhesive and no-drill mounts many makers offer, provided the surface is cleaned and fully dry before application and the mount is given its full curing time before the camera’s weight hangs on it. Rough, dusty or flaking surfaces defeat adhesives; if your wall is like that and drilling is not allowed, a door-mount bracket that clamps over the top of the door itself is the renter’s alternative, positioning the camera on the door with no fixings at all.
Whatever the surface, keep the mount clear of the door’s swing and of any existing bell push you are leaving in place, and think about the camera’s removal path: battery models come off for charging, so a mount that requires tools or contortions for every charge will be cursed monthly. Test the removal and refitting once during installation, while the ladder is still out.
Weatherproofing and Cable Care for Plug-In Models
Outdoor cameras are weather-rated, but installation choices decide how much weather they actually meet. A mount under the porch roof or eaves sheds the worst rain and extends the camera’s comfortable life; where no shelter exists, the maker’s weather hood or a position that avoids direct sun on the lens improves both longevity and picture. Check that any charging or power cable’s entry point faces downward or is sealed as the manual directs, so water cannot track along the cable into the housing.
Plug-in models add a cable run to manage: clip the cable snugly along mortar lines or trim where it is inconspicuous and safe, leave no loops hanging where they can be caught or pulled, and keep it out of the door’s closing path entirely. Where the cable passes a doorway or step, protect it from foot traffic — a cable cover strip costs little and prevents the trip hazard and the cable damage arriving together. Outdoor sockets should be weather-rated fittings with their covers usable while the plug is in place.
After the first heavy rain, inspect: check the live view for water on the lens, look for moisture inside any cover the camera design lets you open for charging, and confirm the mount is still firm. Installations rarely fail on day one; they fail in the first storm, and a five-minute inspection after it is the cheapest warranty you own.
Handover: Making the Installation the Household’s
An installation is finished when everyone in the home can use it, not when the screws are tight. Walk the household through the app: how an alert looks, how to answer a visitor, how to check an event, how to silence alerts during a garden party. Add each person’s account, set the chime volume for the house’s real acoustics, and agree the charging routine for battery models — whose job it is, where the cable lives, what the reminder is.
Record the installation details somewhere durable: the model, the date, the mount type, the Wi-Fi network it joined, and where the spare screws and wedge live. Future you — replacing a battery at midnight, adding a second camera, or explaining the system to a house-sitter — will be grateful. Then schedule the one-week review: check the event history together, tune one or two settings, and the system graduates from project to appliance, which is what a doorbell should be.
Installing for Apartments and Shared Buildings
Apartment doors add permissions and neighbours to the installation equation. Check the building’s rules before drilling anything — many leases and building policies restrict fixings on exterior doors and frames, which is precisely the situation adhesive mounts, over-door brackets and peephole-style cameras exist for. A camera that installs without a single screw and leaves without a trace is the apartment standard, and it is achievable with the battery models this guide covers.
Shared hallways raise the courtesy stakes: aim the camera at your own door’s approach, keep its view off neighbours’ doors, and expect a conversation with the building management if the hallway is a common area. Most objections dissolve when the field of view is demonstrated — a tight cone on your own doorstep, not a surveillance sweep of the corridor. Battery models also simplify the chime question in flats, where the plug-in chime inside your own hallway is entirely your business.
Security in shared buildings has a different shape too: the camera’s theft exposure is higher in a public hallway, so use the security screw, enable tamper alerts, and favour models whose footage lives in the cloud or a home base rather than only on the device. An apartment installation done with permissions, courtesy and theft in mind will outlast several tenancies’ worth of doorstep deliveries.
After Installation: The First Fortnight
Treat the first two weeks as calibration, not conclusion. Review events every few days and adjust one variable at a time — a zone edge, a sensitivity step, an alert category — so improvements are attributable. Watch the battery trend against the app’s estimate; if real life is draining it faster, the cause is almost always trigger volume, and the positioning and zone work in this guide is the remedy. Check the night view once in rain if the season offers it, since wet lenses and reflective wet paths are the night view’s hardest exam.
By the end of the fortnight the system should have faded into the household’s background — alerts that mean something, a chime everyone hears, footage that answers questions. That fade is the installation’s true completion certificate, and it is earned in the tuning, not the drilling.
Looking More Closely at the Details That Decide It
Most discussions of installing a battery or plug-in doorbell camera neatly, safely and in the right place stay at the level of headlines, yet the outcome is usually decided by smaller details that only appear once you live with the decision. Three of those details deserve attention before anything else: weather sealing around cable entries on plug-in models, chime placement so the ring is heard where people actually spend time, and wedge mounts correcting doors that face along a wall or path. None of them looks dramatic on a specification sheet. Together they decide whether rain stays out of the cable entry, whether anyone indoors hears a caller, and whether the lens faces visitors.
Start with weather sealing around cable entries on plug-in models. A seal is not a specification to admire but a habit to check: does water still bead and run off after a storm, or creep along the cable toward the housing? Fit the camera, then inspect that entry after the first heavy rain and again after the first frost, noting what you find. A two-line note about a damp cable entry in November will matter far more next spring than a confident memory that the fitting looked tidy in September.
Points to keep in mind
- Judge weather sealing around cable entries on plug-in models in your own setting before trusting a general verdict.
- Treat chime placement so the ring is heard where people actually spend time as a first-order factor, not a footnote.
- Write down, in one plain sentence, whether you are accepting visible cable, a battery to swap, or an awkward chime position.
Then consider chime placement so the ring is heard where people actually spend time. Households usually discover a badly placed chime only after the camera is fitted and the first caller has stood waiting in silence. Test the awkward cases before fixing anything: the ring with the kitchen door shut, the ring heard from the garden, and the ring during the evening programme. A chime that only works for an average listener in an average room will fail the hard-of-hearing grandparent and the teenager in headphones, who generate most missed callers.
Finally, weigh wedge mounts correcting doors that face along a wall or path alongside the first two rather than in isolation. A steeper wedge can rescue the view while making the bracket sit proud of the frame, and the neatest flush fit can leave the lens staring at brickwork. A mature decision about doorbell installation names that trade-off out loud. Stating it plainly lets you choose the compromise your doorway needs, instead of discovering in six months that you fitted the angle you did not want.
How This Plays Out in Real Situations
Abstract advice becomes useful when it meets a real household, so consider a flat entrance where drilling is limited and adhesive options are tempting. At a flat door, the priority is rarely the sharpest lens; it is whether the fitting survives an ordinary day of parcels, prams and post without peeling off the paint. Keep the flat install simple: test the adhesive spot, confirm the view, and only add screws or a wedge once the core job of framing callers works. Renters who do this often find a modest adhesive fitting outperforms an ambitious screwed installation the landlord makes them reverse.
Contrast that with a household member with limited mobility who needs the chime somewhere specific. Reach and hearing rewrite the plan, because a chime placed for a standing adult in the hall is useless to someone seated in a back room all day. A compromise about button height that seemed minor in the first scenario becomes the whole decision here, while the discreet cable route everyone praised fades into irrelevance. This is why copying a friend’s conclusion about doorbell installation so often disappoints: the friend optimised for a life that is not quite yours, with rooms, routines and patience that differ from your own.
Points to keep in mind
- During installation, photograph every existing wire before disconnecting anything, however obvious the colours look initially.
- Copy a neighbour’s bracket idea, then fit your own doorway.
- Let the doorway you use a dozen times a day, not the rare dramatic visitor, decide the bracket position.
A third pattern appears with a corner door where visitors approach from the side rather than head-on. At a corner door, most people want the wedge angle right first time, because every re-drill leaves another pair of holes in the frame. Five minutes holding the camera at the corner while a helper walks the approach path prevents the lopsided footage that follows a hurried fit. If your door sits on a corner, value a clean, repeatable test fit above any clever mounting accessory.
There is also the quieter case of a plug-in installation needing a tidy cable route to an indoor socket. The camera works, the picture is fine, yet the cable drapes across the porch and catches every eye, and every broom, that passes. A cable that droops lower each month, a clip that pings off the render, a route crossing the door swing: each is minor alone, and together they make the install feel botched. Naming the exact annoyance points at its remedy, whether that is trunking, a different socket, or a shorter route.
A Practical Method You Can Repeat
When opinions conflict, a repeatable method settles the question of installing a battery or plug-in doorbell camera neatly, safely and in the right place better than another hour of reading. The method has four moves. First, describe the finished install in one sentence: where the camera sits, how it is powered, and how a caller knows it worked. Second, gather evidence in that exact setting. Third, change or compare one variable at a time. Fourth, measure your bracket position against the marks made before drilling, so a confident guess cannot quietly move the holes halfway through.
In practice that means actions such as these: check the view at standing height for both a tall and a shorter visitor; mark the bracket position, then hold the camera there for a live test; and fit any wedge before final tightening so angle changes stay easy. Each is deliberately unglamorous. Their strength is simply order: test the view, then mark, then drill, and a confusing install resolves into three calm stages. Worked in that order they leave pencil marks and test clips you can re-check if the view surprises you. Drill first and test later, and you get four neat holes framing the wrong picture.
Points to keep in mind
- pilot holes and fixings matched to the wall material, not guesswork
- photograph the finished bracket and cable route for future maintenance
- charge, update and view the camera indoors before taking tools outside
Equally important is what to record. Useful notes for doorbell installation include the date and time, the place, what else was happening at the time, and a simple verdict in your own words. Across the first week those notes expose what one test fit cannot: the bracket loosening on a slamming door, the chime drowned by the washing machine, the cable shadow crossing the lens at noon. Install decisions built on those observations stay sound, and if a bracket fails early, dated notes about the wobble are exactly what a warranty claim needs.
Expect a careful install to take longer than the optimistic guess on the box. The extra half hour is repaid every time you remove the camera for charging without disturbing the bracket, while a rushed neighbour is re-drilling by Christmas. Most people do not need more information about doorbell installation; they need their own information, gathered calmly in their own setting, and this method is simply a way of collecting it without drama.
Living With the Decision Over Time
The first week with any choice about installing a battery or plug-in doorbell camera neatly, safely and in the right place is a poor predictor of the first year. In week one the adhesive pad is fresh, the screws are tight, and nobody has yet yanked the camera off its bracket in a hurry. Judge the install at six months instead: the door has slammed through a storm season, the battery has been swapped several times, and the fitting still has to sit square without fuss.
Long-term satisfaction usually rests on unexciting qualities connected to cable routing that avoids trip hazards, sharp edges and door movement and security screws and brackets that discourage casual removal. A bracket that has not crept, a seal that has not split, and fixings that still bite decide whether the install fades from your mind or keeps asking for attention. Weight that staying power above first-day neatness when you compare mounting options, because a reviewer fits a doorbell once while your fitting must survive years of door slams. Ask anyone whose camera has hung outside through two winters what they check now, and it will be the screws and seals, not the feature list.
Points to keep in mind
- After installing, test the chime, app alerts, and night mode again the following evening.
- Neighbours who installed theirs last year warn that transformer voltage causes most mysterious failures.
- Re-check mounting screws and seals after the first storm, extension work, or door replacement.
Maintenance deserves a plan rather than good intentions. Tie the install checks to jobs you already do: wiggle-test the bracket when you oil the hinges, inspect the cable entry when you clear the porch gutter, and check the seal when you wash the door. That rhythm catches a loosening screw while it is a quarter-turn problem, not a camera found face-down in the flower bed. In the context of doorbell installation, that plan mainly means keeping an eye on the clear boundary around mains-connected doorbell transformers and wiring before it turns into a bigger problem.
Finally, leave yourself room to reposition the camera when life at the door changes. Moving home, changing work, a new household member or a new device can all reorder the priorities around doorbell installation. A bracket height that suited a household of adults is not a failure because a wheelchair user or a small child now needs the button lower. Your fitting notes turn that repositioning into a measured adjustment instead of a fresh afternoon of guesswork.
Mistakes to Avoid and Signs You Chose Well
Fitting jobs go wrong in familiar ways, so the usual installation traps deserve naming. One is this: mounting so high that the camera looks down on hats and shoulders. Another, just as common, is the opposite excess — ignoring sun glare that blinds the lens at the same time each day. And a third, quieter error is drilling first and discovering the view crops every face. Look at the three and they share a root: each is a lapse of attention during fitting rather than a lack of skill. Every one begins when one vivid pressure, usually the urge to finish before dark, replaces a proper test fit.
Avoiding them does not require expertise, only a pause. Before the drill comes out, challenge the plan: what would have to be true about this wall, this light, this cable route for the install to annoy me, and have I checked it? Which ordinary moment at this door, the low sun, the hurried driver, the outward-opening door, have I not yet rehearsed? What am I assuming about setting up and testing indoors before any drilling begins that I have not verified? Ten minutes of hostile questioning, aimed at your own favourite option, is the cheapest insurance available in the whole process of installing a battery or plug-in doorbell camera neatly, safely and in the right place.
Points to keep in mind
- Question your preferred fitting plan before you drill anything.
- Judge success by quiet, ordinary evidence over several weeks.
- Try small corrections before concluding that replacement is necessary.
How will you know the decision was right? Watch for ordinary evidence: whether the live view shows a visitor’s face and the step below; how firmly the bracket holds when the camera is removed for charging; and alert behaviour during the first day of normal comings and goings. None of these announces itself with fanfare. You notice success as things that stop happening: nobody re-rings the bell, nobody trips the cable, and nobody mentions the camera at all. A fitting nobody talks about is the real prize of a careful install, and a far better verdict than any label on the packaging.
When the finished install disappoints, respond in proportion before reaching for the drill again. Many disappointments with doorbell installation yield to a small correction — a setting, a position, a habit, an accessory — rather than a complete replacement. Start with corrections that leave no new holes: a wedge swap, a quarter-turn of the bracket, a re-routed cable, each changed alone and tested before the next. Keep re-drilling for genuinely structural problems, such as a bracket on crumbling render or a camera where the door blocks the view. That calm order of attack saves more walls, and more money, than any single fitting tip in this guide.
One More Round of Checks Before You Settle
Before the last screw goes in, copy the walk-around careful installers do, checking level, fixing strength and cable slack even when the bracket looks perfect. It concerns mounting height and angle working together to frame a visitor and fixings suited to brick, timber, render or a door frame, two aspects that reveal themselves slowly. Test both on purpose rather than waiting for a storm to test them for you: have your tallest and shortest visitors stand at the door while you check the frame, then tug the bracket as a laden caller might. The aim is not fault-hunting but learning how much margin your fitting has, while moving it is still a ten-minute job.
Share what those checks revealed with everyone who will live with the result. A setup for doorbell installation is a household system, not a personal gadget, and other people’s routines will find edges yours never touches. Their early feedback, gathered while the ladder is still out, prevents the slow build-up of workarounds that eventually gets blamed on the original purchase. Agree the household basics together, such as who answers the app and where the chime lives, write them on a card kept by the door, and treat that card as the final fitting step.
Points to keep in mind
- Load-test the finished mounting once, firmly, instead of trusting it blindly.
- Label the breaker and transformer locations inside your fuse box for whoever maintains it next.
- Stop re-aiming the bracket once faces sit level and the fitting survives a firm knock.
Then stop optimising. Every install reaches a point where one more ladder trip trades an evening of your life for a gain nobody indoors will notice. If your own fitting log says the camera works, then let it get on with working. Save your energy for the gadget in the house that genuinely is misbehaving. A later round of checks can wait until your routine or your home actually changes, and your notes will make that round shorter than this one was. With doorbell installation, that stopping point usually arrives once how easily you can remove, charge and refit the camera without tools becoming a hunt stops changing from week to week.
Worked Examples That Make the Trade-Offs Concrete
One fitting story teaches more than rules, so follow it closely. Imagine a plug-in installation needing a tidy cable route to an indoor socket. Faced with a long, awkward cable run, most people reach for a fancier camera instead of questioning the route itself. Yet the binding constraint in that picture is usually live-view testing from the exact marked position before holes are final, and no amount of spending elsewhere relaxes it. That install only ends neatly when the live view from the marked spot is approved first; until then, careful drilling decorates an unverified guess.
What to watch for
- Find the fixing limit before choosing brackets.
- Translate every example into your own wall material, door swing and approach path before trusting it.
- If you keep patching the same loose bracket, the fixing is wrong for that wall, not the tightening.
Now change one variable: imagine a household member with limited mobility who needs the chime somewhere specific. The screws, the camera and the fitting advice stay exactly the same, yet the correct chime position flips completely, because how the household actually lives has changed. This is the single most transferable lesson in the whole subject of installing a battery or plug-in doorbell camera neatly, safely and in the right place: context is not a detail around the decision, it is the decision. Read every fitting recommendation against your own door and household, and distrust any advice that insists those details do not matter.
A third example works as a warning. Picture a household that skipped the early checks, committed quickly, and spent the following month applying fixes for using indoor fixings outdoors and watching them fail in the first storm and then for routing a plug-in cable where the door can pinch it shut. Each repair held briefly, because each treated the visible failure while the poor fitting decision underneath stayed as it was. The cost was not only money; it was confidence. By the time someone finally re-fitted the bracket properly, the household had stopped trusting its own DIY judgement. These examples are here so your install skips that sequence: test the fitting at the real door first.
Use these examples as templates rather than stories. Put your own door frame, wall material and callers into each example, then run the fitting logic again from scratch. If the recommended position moves once your details go in, you have learned which constraint is really in charge. If the same fitting wins under several versions of your household, you have found a sturdy install that stays put for years. Applied to doorbell installation, the detail that most often changes the conclusion is cable routing that avoids trip hazards, sharp edges and door movement.
A Decision Flow When You Feel Stuck
Indecision about doorbell installation usually means two good criteria are pulling in opposite directions, not that you lack information. When that happens, stop researching and start ranking. Write down the four to six fitting criteria that genuinely matter at your door, from a level frame to an audible chime, and force them into a strict order. Ranking feels forced for a minute, then it bites, because rival mounting plans rarely fail across the board: each falls down on one criterion, and the ranking tells you whether that criterion tops your list or sits near the bottom.
What to watch for
- Sort your fitting priorities before testing any more positions.
- Cross out any mounting plan that fails a genuine fitting deal-breaker, then test the survivors at the door.
- If drilling masonry and using adhesive both work, drill: winter cold weakens most pads eventually.
Next, apply a simple elimination pass connected to chime placement so the ring is heard where people actually spend time. Strike off any plan that fails a true fitting deal-breaker, and be strict about the word: a deal-breaker means a flaw that will still irritate you on a plain weekday next winter, not a line that looks weak in a comparison chart. This pass is often brutal and always useful. What remains is a handful of fittings you can trial against the door, and trials like those are where real confidence comes from.
Then test the survivors against the audibility of the chime from the rooms used most and whether cables and seals still look sound after rain in your own setting, on the same day if you can, so conditions stay comparable. Write a score beside each fitting straight after testing it, while the echo in the hall and the wobble in the bracket are still fresh. Installers are often startled by how different that written score looks from the verdict in their heads, because memory keeps the dramatic gust while notes keep the ordinary week.
If two mounting plans still tie, break the tie on daily-life grounds: which bracket is kinder to refit after charging, simpler for a partner to manage, and easier to replace if it fails in year three? A tie between two good fittings is common, and at that point the honest truth is that either will serve your doorway perfectly well. Picking one today beats spending another week hunting for a difference your household will never notice. For doorbell installation, the easiest option to live with is usually the one that handles chime placement so the ring is heard where people actually spend time with the least fuss.
Seasonal, Household and Long-Term Angles Worth Planning For
Conditions change across the year, and a decision about installing a battery or plug-in doorbell camera neatly, safely and in the right place that is tested in only one season carries hidden risk. Frost heaves fixings that felt solid in May, low autumn sun strikes the lens at a new angle, and holiday visitors lean on door furniture in ways your household never does. Testing all four seasons beforehand is impossible, so ask the winter question out loud: in the darkest, busiest week of your year, will this bracket, seal and cable route still cope?
What to watch for
- Install before winter darkness if possible, since testing night vision matters more than daylight checks.
- Walk a visitor through ringing it once installed, confirming the experience feels obvious, not technical.
- Keep the tiny screwdriver, spare screws, and release pin together in one labelled kitchen drawer.
Households also change from inside. A fitting chosen by one confident DIYer gets inherited by partners, children, parents and guests, each with different patience and different habits. The fittings that last are the ones a visitor can make sense of cold: a button where a button should be, a chime that needs no explanation, and one short note for removing the camera to charge it. When you evaluate doorbell installation, spend one minute imagining the least technical person in your life facing it alone. That minute is a surprisingly accurate quality test.
Count the total effort the fitting will ask of you across its whole working life, not just the effort of installation day. Count the ongoing attention honestly: the ladder trips, the bracket checks, the seal inspections, the battery swaps, and ask whether that rhythm fits the time your household has. A fitting that needs monthly ladder work from a household that can only manage twice a year will slowly loosen and disappoint, however neat it looked on day one. Matching the upkeep rhythm to the household matters just as much as matching the camera to the doorway. With doorbell installation, the recurring effort worth counting most honestly is the effort tied to live-view testing from the exact marked position before holes are final.
Finally, think about the exit before you need it. When this camera eventually comes down, will the holes be fillable, the adhesive removable, and the cable route reusable for whatever replaces it? Keep the spare screws in a labelled bag near the door, and photograph the cable route before clipping it shut, so a future removal stays calm rather than an excavation. That is not pessimism; it is what turns one purchase into accumulated household knowledge, so the next decision about doorbell installation starts from experience instead of from a search box.
Related Guides
- best 18650 battery for doorbell cameras
- best security cameras for front door
- best Wi-Fi security cameras for home
- best security cameras for home outdoor
- how to position a doorbell camera
- how to set up a doorbell camera
- how to choose a doorbell camera
Frequently Asked Questions
How high should I mount a doorbell camera?
Around chest height — roughly 1.2 to 1.4 metres above the ground — works for most models and puts faces squarely in frame while keeping the doorstep visible. Follow your model’s guidance if it differs, and judge by the live view test: if you see the top of a visitor’s head instead of their face, the camera is too high or needs a downward wedge.
Can I install a doorbell camera without drilling?
Often, yes. Many battery models offer adhesive mounts or no-drill brackets that clamp or stick to smooth surfaces, which suits renters. Adhesive mounts are less resistant to determined removal and to rough or dusty walls, so clean the surface thoroughly and check the mount after the first days. Screws remain the most secure option where permitted.
Can I wire a doorbell camera into my existing doorbell myself?
No — not safely as a DIY job. Existing doorbell circuits are fed by a transformer connected to mains electricity, and installing or modifying that wiring is work for a licensed electrician. Choose a battery or plug-in model for a self-install, or hire an electrician who can fit a hardwired model and verify the transformer and chime compatibility.
Why does my new doorbell camera keep triggering for cars?
The motion zone includes the street, or sensitivity is set too high. Draw the zone to cover only your path and doorstep, enable person detection if your model offers it, and lower sensitivity a step at a time, testing with real walk-ups. A wedge that angles the view away from the road helps on doors facing the street directly.
Do I need a chime if I have a doorbell camera?
You need some way to hear the bell indoors. Phone alerts alone fail when phones are silent, flat or in another room. Options include the maker’s plug-in chime, smart speaker announcements, or — for professionally installed hardwired models — your existing mechanical chime. Fit the chime the same day as the camera so the system works for the whole household.
How do I stop my doorbell camera being stolen?
Use the security screw or locking latch supplied, mount at a height that requires effort to reach while keeping faces in frame, and enable tamper or motion alerts. Cameras that record to the cloud or a home base keep their footage even if the unit is taken. Visible, well-mounted cameras also deter most opportunistic removal.
How long should I monitor the install before trusting it?
For most households, a focused week of ordinary use tells you more than a month of occasional reading about installing a battery or plug-in doorbell camera neatly, safely and in the right place. Check the fitting at breakfast, at dusk and during one busy delivery window, keep the short notes described above, and then decide. Dragging the assessment into a second week rarely flips the outcome; it usually just delays a verdict your own wall and callers have already delivered.
What should I adjust first if callers are missed?
Return to the simplest explanation before replacing anything. Recheck the basics connected with the clear boundary around mains-connected doorbell transformers and wiring, repeat your most reliable test in your most familiar setting, and change one variable only. If a calm retest at your own door still disappoints, the mismatch is probably built into the fitting itself, and your notes will pinpoint whether height, angle or fixing failed you.
Is a pricier camera worth it over fixing my fitting?
Only when the higher tier improves something your own routine actually stresses, such as live-view testing from the exact marked position before holes are final. If your notes show the frustration actually comes from a badly placed chime or a creeping bracket, a pricier camera will change nothing you feel at the door. Measure any upgrade against the fitting faults your own notes recorded, not against the polished sample clips on the product page.