Learning how to protect a mirrorless camera starts from its design: the sensor sits exposed just behind the mount, the body is dense with electronics, and there is no mirror box to absorb knocks or shield the imaging surface. Mirrorless cameras are not fragile — professionals abuse them on every continent — but their vulnerabilities differ from a DSLR’s, and the protection habits that matter most are specific: sensor discipline during lens changes, screen and EVF care, battery and heat management, and the strap-and-bag basics every camera deserves.
This guide adapts the full protection playbook to mirrorless ownership, in the order risks actually occur: the drop, the dusty lens change, the rainstorm, the hot car, the long damp storage. None of it is expensive. Most of it is habit. Build the habits while the camera is new and they will feel invisible within a month — which is when protection is working best. The general principles in how to protect a camera apply throughout; here is the mirrorless edition.
Disclosure: As an Amazon Associate, kajuandouglas.com earns from qualifying purchases. Links to Amazon on this page are affiliate links; they cost you nothing extra. Listing details such as price and availability change often, so check the current Amazon listing before you buy.
How to Protect a Mirrorless Camera: The Short Answer
Use a strap always, carry the camera in a padded bag, cap the body instantly during lens changes (mount down, back to wind), keep a clear filter on each lens, enable the shutter-closes-on-power-off option if your camera has one, respect heat — never a hot car — and store the kit dry with silica gel. Record serial numbers and insure the kit once its value would hurt to replace.
In this guide
What You Need
A small protection kit, assembled once, covers nearly every mirrorless risk:
- A comfortable strap you will genuinely wear, wrist or cross-body, with sound connectors
- A padded bag or insert sized to your body and lenses, with a rain cover
- Body caps and rear lens caps for every item — plus spares, because caps vanish
- Quality clear or UV filters matched to each lens’s thread size, and lens hoods used always
- Silica gel for bag and home storage, and a microfibre cloth plus blower carried permanently
- A rain sleeve for wet-weather shooting, and cloud-stored photos of serial numbers and receipts
How to Protect a Mirrorless Camera Step by Step
These steps are written as standing habits. The first three address the risks mirrorless design makes unique.
Step 1: Defend the exposed sensor during every lens change
The mirrorless sensor waits millimetres behind the mount, unprotected the moment a lens comes off. Make lens changes a drill: power off first (and if your camera offers ‘shutter closed when off’, enable it in the menu — the curtain shields the sensor), turn your back to wind and dust, point the mount downward, have the next lens ready with its rear cap loosened, swap swiftly, and cap the removed lens immediately. Never set a body down uncapped, even ‘for a second’ on a clean table — seconds are when grit, drips and curious fingers arrive. This single drill prevents most of the dust that sends owners to how to clean the sensor of a mirrorless camera.
Step 2: Make the strap and bag non-negotiable
Mirrorless bodies are small and smooth — and therefore easy to fumble, especially one-handed from a bag. Wear the strap whenever the camera is out: cross-body slings suit mirrorless sizes perfectly, keeping the body at your hip, instantly ready and hard to drop or snatch. Carry the kit in a padded bag with dividers set so lenses cannot touch, a base that tolerates wet ground, and closures that seal against dust. Mirrorless kits’ compactness tempts owners to toss the camera loose into a tote or rucksack with keys and bottles; that is how screens crack and mounts bend. If you want a non-camera bag, use a padded insert inside it.
Step 3: Protect screens, viewfinder and dials
The rear screen is a mirrorless camera’s largest fragile surface and, on many models, its main control interface. Fit a quality glass screen protector on day one — invisible in use, sacrificial in accidents — and learn whether your screen flips inward for storage; if it does, store it protected-side-out. Keep the EVF eyecup clean and check its rubber for tears, since a missing eyecup admits dust and light leaks into your viewing. Wipe control dials and the hot shoe free of grit before it works into the mechanisms, and keep the hot-shoe cover fitted when no flash is mounted to keep moisture and debris out of the contacts.
Step 4: Manage weather like a mirrorless owner
Check the sealing claims for your exact body and lens pairing — sealing only works when both are sealed and port covers are closed, and it means splash resistance, not waterproofing. In rain, add a rain sleeve, keep the lens angled down, and dry the camera before it goes back in the bag so trapped moisture does not steam the sensor chamber. At the beach, the rule is absolute: no lens changes in blowing sand, a filter on the lens, and a blower session before any wiping. After any wet or salty outing, the cleaning routine in how to clean a camera resets the camera to safe.
Step 5: Respect heat, cold and batteries
Mirrorless electronics run warm by design; do not add environmental heat. Never store or leave the camera in a hot car or direct sun — dashboard temperatures damage batteries, screens and lubricants, and a heat-soaked body starts video work already near its thermal limits, the world of how to fix mirrorless camera overheating. In cold, carry spare batteries warm in an inside pocket and, when coming indoors, seal the camera in a plastic bag first so condensation forms on the bag instead of inside the mount. Use genuine or reputable batteries, retire any that swell, and remove batteries for storage beyond a few weeks.
Step 6: Store dry, capped and exercised
Home storage decides a mirrorless camera’s old age: a cool interior spot, body capped or lens mounted, silica gel keeping humidity near 40–50 percent, and a brief exercise — shutter, autofocus, dials — every month or two. Humidity discipline prevents the lens fungus that ruins more stored kits than any accident; the full method is in how to store a camera. Keep firmware updated, too: updates are protection in software form, fixing bugs and occasionally thermal behaviour, and they cost nothing but ten minutes.
Step 7: Document, insure and travel smart
Photograph your bodies and lenses, record serial numbers, and keep receipts in one cloud folder today — before any loss makes the task poignant. Check home-insurance limits for items away from home and add dedicated cover when the kit’s value justifies it. When travelling, cameras and lithium batteries travel in the cabin, the working kit stays on your person in crowds, and hotel safes hold what you are not carrying. Split memory cards between bags and back up nightly, so the worst case is an insurance claim rather than a lost trip.
The Mirrorless-Specific Risk List, Ranked
By repair-shop frequency, mirrorless cameras suffer: sensor contamination and cleaning accidents (Step 1’s drill and proper swab technique prevent both); cracked rear screens (a protector and bag discipline); bent mounts from heavy lenses carried by the body alone — support long lenses by the lens, and use the lens’s own tripod foot; liquid damage from over-trusted sealing; and heat-aged batteries. Notice that theft and drops, the classic camera killers, rank below these design-flavoured risks — mirrorless owners protect best by mastering their system’s particular weaknesses rather than generic caution.
One more modern risk deserves naming: the neglected firmware and the counterfeit battery. Cheap unbranded batteries swell and leak at rates genuine ones do not, and in a sealed mirrorless body a swollen battery can jam or damage the compartment. Buy power from reputable makers; it is the cheapest insurance in this entire guide.
Carrying Comfort Is Protection
Protection fails when it is uncomfortable, because owners quietly stop doing it — the strap left off, the bag left home. So fit the system to your body: a sling adjusted so the camera rests at your hip bone, a bag whose strap does not saw your shoulder by noon, a wrist strap for the small body you carry to dinners. Mirrorless photography’s promise is a serious camera that goes everywhere; the protection that preserves it must be equally portable. Audit your setup after any day you caught yourself leaving the camera behind ‘because it was a hassle’ — that sentence is a protection failure asking for a gear adjustment.
Gear for This Guide
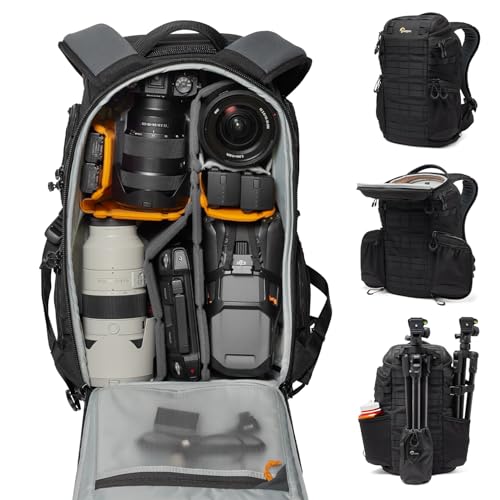
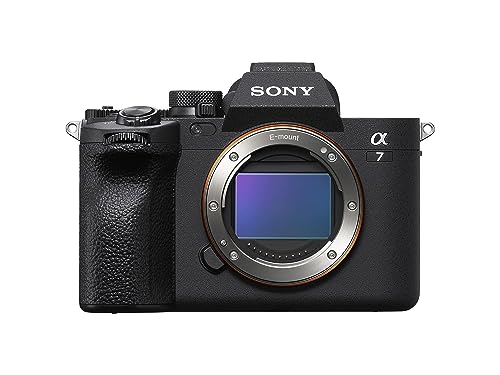
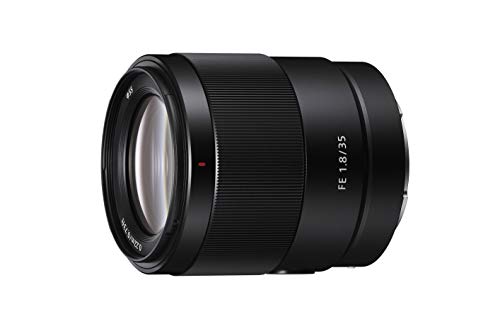
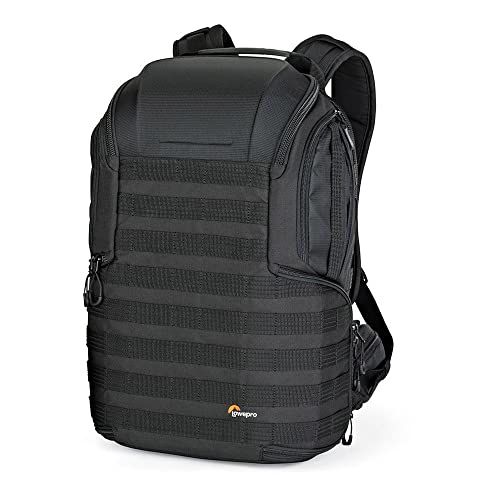
A structured padded backpack sized for mirrorless kits, and a body whose shutter can close over the sensor at power-off — the two purchases that embody this guide:

Lowepro ProTactic 450 AW II Camera Backpack — Check price on Amazon. A solid, widely available option that fits this guide; confirm the exact kit contents and lens mount on the listing before ordering.

Canon EOS R50 Mirrorless Camera with RF-S 18-45mm Lens Kit — Check price on Amazon. A solid, widely available option that fits this guide; confirm the exact kit contents and lens mount on the listing before ordering.
Common Mistakes
The signature mirrorless mistake is the casual lens change: body uncapped on a café table, mount up, while the owner hunts in a bag — dust’s invitation engraved. The second is over-trusting weather sealing in real rain without a cover, then storing the camera wet in a closed bag. Third is the loose camera in a general bag, rattling against keys and a water bottle until the screen or a dial pays.
Also avoid leaving the camera in a hot car ‘just for lunch’, storing it for months with the battery inside in a damp room, and buying bargain batteries whose swelling can write off a body. Every one of these is a habit failure, not bad luck — which is good news, because habits are fixable today.
Pro Tips
Adopt the two-second rule at every handoff: before the camera leaves your hands, confirm strap, surface and cap. Most mirrorless damage happens in placements and passes, not in dramatic falls. Keep the rescue kit — cloth, blower, gel packet, rain sleeve, spare caps — permanently in the bag so protection travels with the camera by default.
Once a season, run a five-minute protection audit: strap connectors, bag zips, filter threads, eyecup, battery health, gel freshness, firmware version, insurance paperwork. Photographers who audit seasonally almost never meet the repair shop; the audit is the difference between maintenance and luck.
How to Protect a Mirrorless Camera in Transit: Cars, Flights and Trains
Transit concentrates every risk at once — knocks, heat, theft and separation. In cars, the camera rides in its padded bag on the floor behind a seat or in the footwell, never loose on a seat (a braking event makes it a projectile) and never in a sun-baked boot for longer than the drive demands; on arrival, it leaves the car with you, because a parked car is both an oven and a shop window. On trains and coaches, the kit stays between your feet or on your lap in crowds, strap looped to your wrist or the seat arm when you doze. On flights, it is cabin baggage on your person through the terminal — the overhead bin is acceptable in its bag, the hold never is.
Separation planning completes transit protection: the day’s cards backed up before the journey and carried apart from the camera, a phone photograph of the kit as your visual inventory, and the bag’s contents standardised so a missing item announces itself at a glance. Travel tests protection systems the way storms test roofs — the time to discover a weak zip or a forgotten spare battery is the audit at home, not the platform in another country.
Small Accessories That Earn Their Place
Beyond the headline items, a handful of inexpensive accessories punch far above their cost in protection value. A rain cover that lives in the bag’s pocket — not at home — because weather does not check your itinerary. Spare body and lens caps, since the cap you lose is always the one between the sensor and a dusty world. A microfibre cloth in a sealed pouch, kept grit-free, because the dirty cloth is worse than none. A short USB cable and power bank you already carry, doubling as emergency camera power via USB charging on most modern bodies. And a simple luggage tag or contact card inside the bag — honest finders exist, and an unidentifiable camera gives them no way to be honest.
Resist the opposite temptation: armour upon armour — metal cages for a travel body, waterproof housings for a walk — until protection itself becomes the reason the camera stays home. The measure of a protection setup is invisible: the camera goes everywhere, works always, and its owner thinks about photographs instead of equipment. Audit any accessory against that sentence before it enters the bag.
Protection by Environment: Beach, City, Mountains, and Home
Threats to a camera are local. The protection that matters at the coast is irrelevant in the city, and organising your habits by environment is more effective than a single general vigilance.
Sand, salt, and the coast
Sand is the beach’s real weapon: it infiltrates dials, focus rings, and lens mounts, grinding quietly for months after a single careless lens change. Change lenses at the coast inside a bag, seated, with your back to the wind — or do not change them at all, and let one versatile lens do the day. Salt spray leaves a corrosive film that should be wiped from body and lens with a cloth barely dampened with fresh water at day’s end, before the camera goes back in its bag. A camera that lives near the sea also deserves dry storage more than most, because salt and humidity conspire in cupboards as happily as on beaches.
The city: knocks, crowds, and opportunists
Urban threats are impact and theft. The strap discipline and bag habits from the main steps do most of the work; add awareness of where the camera rides in a crowd — across the body, lens inward, a hand resting on it in the densest crush — and a reluctance to leave it on café tables, where it is one distraction from gone. Indoors, the city’s threat changes to the dropped camera on hard floors, and the unglamorous habit of setting it down lens-up, strap gathered so nothing can drag it off an edge, prevents the commonest urban accident of all.
Mountains, cold, and altitude
Cold itself rarely harms a camera; condensation when returning to warmth is the assassin, as the main steps explain. In the mountains add wind, which turns a resting camera into a falling one and drives grit into every control, and ultraviolet, which ages straps and rubber quietly over seasons. Batteries are the operational limit — keep the spare warm in an inside pocket and rotate. A camera acclimatised slowly, carried securely, and shielded from wind-blown grit will work at temperatures that stop its owner first, which is the correct order of things.
Home: the underestimated environment
More cameras are damaged at home than on expeditions: knocked from shelves by cats and toddlers, drowned by spilled drinks, cooked on sunny windowsills, and forgotten in damp cupboards where fungus writes its slow signature across lens elements. Home protection is furniture and routine — a dedicated, stable, dry place the camera lives, out of traffic and out of sun, with its strap coiled so it cannot be dragged down by a passing sleeve. If children or animals share the home, that place should also be closed or high, chosen with the same honesty you would apply to anything else valuable, fragile, and fascinating.
Long-Term Storage and the Fungus Problem in Depth
Storage was introduced in the main steps; it deserves expansion because storage damage is the slowest, commonest, and most preventable category of all — and because its chief agent, fungus, is widely misunderstood.
What fungus actually is and does
Lens fungus is a living growth feeding on dust, moisture, and even the organic compounds in lens coatings and lubricants, spreading branching filaments across internal elements. It thrives in darkness, still air, and sustained humidity — a precise description of a camera stored in a closed bag in a damp cupboard. Early fungus may affect images only as a slight softness or contrast loss; established fungus etches coatings permanently, and no cleaning restores etched glass. Professional cleaning can arrest it and remove much of the growth, but prevention is worth more than any cure, and prevention is entirely about dryness and air.
Building a storage setup that works
The target is simple: a home for the camera that stays dry and sees occasional air and light. A dry cabinet is the complete answer in humid climates and earns its cost for a serious kit. Elsewhere, a breathable shelf space away from exterior walls, with rechargeable desiccant in a sealed box for the lenses if humidity runs high, achieves most of the same protection. Whatever the arrangement, exercise the camera monthly — power it, work the dials, fire the shutter, focus the lenses through their range — because machinery that moves resists both fungus and seizure, and the monthly handling doubles as an inspection that catches problems while they are still small.
Storing for a season or a year
For long storage, remove the battery — stored batteries self-discharge and, rarely, leak — and store it separately at a partial charge. Clean the camera before storing it, since stored dirt is fungus food; cap body and lenses; and place everything in its dry home with fresh desiccant and a note of the date. On retrieval, inspect before use: look through the lenses against a bright light for the tell-tale branching patterns, check the sensor with the diagnostic test, and charge and cycle the battery patiently. A camera stored with this care wakes up as if from a weekend; a camera stored without it may wake up retired.
Insurance, Records, and Recovery: Protecting the Value, Not Just the Object
The main steps mention documenting and insuring; for many owners the camera represents a significant sum and a larger sentimental investment, and the paperwork side of protection deserves the same thoroughness as the physical side.
The records that matter in a claim or a theft report
Serial numbers — body and every lens — photographed and stored somewhere other than with the camera, are the single most valuable record you own. Add purchase receipts, photographs of the kit, and a note of distinguishing marks. With serials recorded, stolen gear can be reported meaningfully, occasionally recovered, and insured claims proceed on evidence rather than assertion. Registering products with the manufacturer, where offered, creates another dated record linking you to those serials. Ten minutes of administration, done once, is the cheapest protection in this entire guide.
Understanding what cover you actually have
Household insurance often covers cameras at home but limits value per item, excludes accidental damage away from home, or applies excesses that swallow small claims. Dedicated photographic cover exists for working and travelling photographers and typically addresses theft, accidental damage, and use abroad explicitly. The right answer depends on the kit’s value and how it travels, but the wrong answer is universal: assuming cover you have never read. Read the policy’s camera-relevant lines before the journey or the incident, not after, and schedule valuable items individually where your insurer requires it.
If the worst happens: damage and theft responses
After a drop or immersion, resist the urge to test the camera repeatedly — power off, battery out, and let drying or a technician come first, since electrical testing of wet equipment converts repairable damage into terminal damage. After a theft, the sequence is police report with serials, insurer notification, and alerts to local camera shops and online marketplaces where feasible. None of this is pleasant to contemplate, which is exactly why it belongs in a protection guide written in calm times: the plan made now will be executed then, by a version of you with less calm to spare.
Protection During Use: Habits for Shooting Days
Most protection advice concerns storage and transport, but cameras are damaged while being used, by photographers thinking about photographs. A few in-the-field habits protect the camera at the moment of its greatest exposure without dulling the shooting itself.
The two-second checks
Build two micro-habits: a glance at the strap and its anchors whenever you lift the camera after a rest, and a feel for the lens’s mounting security whenever you change position significantly. Both take seconds; both catch the loosened anchor and the incompletely seated lens at the last moment they can be caught cheaply. Photographers who work professionally perform these checks unconsciously and constantly, which is one reason their gear survives careers that would retire an amateur’s kit in a year.
Setting the camera down, anywhere
The world offers a thousand surfaces and most are traps: walls it can fall from, tables with edges and drinks, car roofs with slopes, ground with grit and traffic. The safe set-down has rules that work everywhere — lens up or lens inward, strap fully on the surface and gathered so nothing can snag it, camera behind the edge rather than on it, and never on a vehicle, whose owner will eventually drive it. When no safe surface exists, the camera stays on its strap on your body, which is the safest surface it owns.
Other people’s hands
Cameras are damaged by kindness — handed to strangers for group photos, borrowed by friends, explored by children. The protections are social rather than technical: hand the camera over with its strap already around the borrower’s neck or wrist, set it to its most forgiving mode before the handover, and keep handovers over soft surfaces and short distances. For children, a seated exploration with the strap secured turns a risk into a delight and possibly a photographer. None of this requires suspicion; it requires only that the camera’s safety not depend on another person’s reflexes.
The Annual Protection Review: A Calendar for Care
Protection works best as a rhythm rather than a series of emergencies. An annual review, supported by small seasonal habits, keeps every layer of this guide alive with very little total effort.
Once a year, in a quiet hour
Inspect straps and anchors for wear and replace anything frayed without debate. Clean the sensor with the diagnostic test as your evidence, exercise every lens through its focus and aperture range, update firmware, and review your records — serials current, receipts filed, insurance still matching the kit’s value and your travel pattern. Check desiccants and storage arrangements with fresh eyes, because a storage system degrades silently and is usually discovered by the fungus it was meant to prevent.
Seasonal small habits
Before a wet season, check bag zips and rain covers. Before a hot season, review where the camera will live in cars and houses, since heat damage is a summer specialty. Before travel, rehearse the transit protections — caps, case, documents — while there is time to replace what is missing. Each check takes minutes, and each aligns the camera’s protection with the threats actually approaching, which is the entire philosophy of this guide expressed as a calendar.
Knowing when protection becomes the problem
A final balance: a camera so protected that it stays home, stays cased, or stays feared for is not protected in any sense that matters, because its purpose is photographs. The measures in this guide exist to make carrying and using the camera feel safer, and therefore more frequent. If a precaution costs you photographs regularly, redesign the precaution — a better strap, a tougher bag, an insured mind — rather than surrendering the photography. Protection serves the work, never the reverse, and the best-protected camera is ultimately the one that is used for decades and shows it honourably.
Lenses Deserve Their Own Protection Plan
This guide has centred the camera body, but a mirrorless kit’s value and vulnerability live increasingly in its lenses, which have their own specific enemies and defences.
Front and rear elements: asymmetric risks
The front element faces the world and collects its spray, dust, and fingerprints; the rear element faces the sensor, sits millimetres from it when mounted, and is the element whose contamination lands closest to your photographs. Cap discipline matters most at the rear: a lens off the camera gets its rear cap immediately, every time, before it is set down or bagged. Clean elements with air first and a proper lens cloth second, never with clothing, because modern coatings are hard but not harder than the grit a shirt carries.
Focus and zoom mechanisms
Grit in a focus or zoom ring announces itself as a grinding feel that should stop you mid-turn: working grit deeper is how smooth mechanisms become rough ones permanently. Store lenses upright, caps on, in the same dry conditions as the body, and exercise their rings during the monthly check described earlier. A lens that will sit unused for a long season deserves a desiccated, sealed home of its own, because fungus colonises a neglected telephoto in a cupboard exactly as happily as the body it once served.
Carrying spare lenses safely
In the bag, lenses travel capped, separated, and unable to strike each other or the body — padded dividers exist for this, and improvising with clothing works only if the arrangement cannot shift in transit. The lens change itself, rehearsed in the protection steps, is the moment of maximum mutual risk for body and glass together; performing it seated, sheltered, and unhurried is the whole technique. Photographers are often surprised that their lenses outvalue their body; carry them as if you had noticed.
Protecting the Photographs: Cards, Files, and the Other Half of the Kit
A protection guide that ends at the hardware has protected only half of what a camera is for. The images themselves have enemies — loss, corruption, and chaos — and their defences are habits as learnable as any strap drill.
Cards and the journey home
Treat a full card as exposed film: it stays in its case, in a consistent pocket, until its contents exist in two other places. Format cards only in the camera and only after verified backup, and retire cards that have ever behaved oddly, because a card’s price is trivial against the photographs it might take with it. Photographers working on irreplaceable events use bodies with two slots writing simultaneously for a reason, and if your work approaches that category, the second slot is a protection feature worth more than resolution.
Backup as a protection discipline
The rule that survives contact with reality is simple: a photograph does not exist until it exists twice, and it is not safe until one copy lives somewhere else — another drive, a cloud, a different building. Automate what you can, because manual systems fail on tired evenings, and test a restore occasionally, because an untested backup is a hope wearing a backup’s clothes. This is the least photographic section of the guide and, for many owners, will prove the most valuable paragraph in it on exactly one future day.
When Protection Fails: First Responses to Common Accidents
Even excellent habits meet bad luck. The first minutes after an accident decide much of its cost, and the correct responses are calm, specific, and mostly consist of not doing things.
The drop
Pick the camera up, resist firing a burst of test shots, and inspect methodically: lens mount seating, filter or front element, dials’ movement, and the rear screen. Photograph a plain subject and review at full magnification for decentering — a drop that bends a lens mount often announces itself as one side of the frame persistently softer than the other. A camera that looks and shoots normally after a modest drop is usually fine; a camera with any new asymmetry, stiffness, or grinding deserves a technician before its next important outing, because internal misalignments do not heal and early attention is cheaper than late.
The soaking
Power off immediately, remove the battery and card, and do not attempt to test anything. Dry the exterior, then let the camera rest in moving air or with desiccant for days, not hours — fresh water rewards patience, and most such cameras recover if they were not powered while wet. Salt water is the grave exception: it corrodes actively, and professional attention within the day, even at travel inconvenience, is worth more than any home remedy. In both cases, the instinct to check whether it still works is the most damaging impulse in this entire guide; unlearn it here, in advance, in the calm.
The sand incident
If the camera is dropped in sand or blasted by it, do not work any control that grinds, do not extend a zoom, and do not blow with your breath, which adds moisture to grit. Brush and blow loose sand away with the camera held mount-down, wipe with a barely damp cloth, and accept professional cleaning if grit has reached the mount or the rings. Sand damage is cumulative and patient; a camera cleaned promptly usually escapes with a story, while a camera used for a week with sand in its rings keeps the scar permanently.
The Protected Camera Is the Carried Camera
Every section of this guide, from straps to serial numbers, serves one outcome: a camera that goes everywhere, works for years, and accumulates photographs instead of precautions. It is worth ending by saying plainly that protection is a means with a notoriously poor memory of its purpose. Owners begin by protecting the camera so they can use it freely, and some end by barely using the camera they have protected so well. Audit yourself once a year with a single question — did my protection habits give me more photographs this year, or fewer? If the honest answer is fewer, loosen something: carry the camera on the walk you deemed too rough, take it to the beach with the care this guide describes rather than not at all. The camera’s worst enemy was never weather, crowds, or children. It is the cupboard, and the only protection against the cupboard is use.
So insure it, strap it, store it dry, record its numbers, and then take it out into the weather and the crowds and the years. A mirrorless camera’s fragility is real but manageable, and its rewards are measured in decades of photographs. Protect it like something you intend to use hard for a very long time — because with the habits in this guide, that is exactly what you will be doing.
Photographers who keep cameras for decades develop a recognisable relationship with them: neither precious nor careless, but practised — the way a carpenter treats good tools. That relationship is available to any owner, and it is assembled from exactly the unglamorous habits collected here, repeated until they disappear into reflex.
That is the standard to hold this guide to as well: not whether your camera remains flawless, but whether it remains faithfully, capably yours.
Related Guides
- best mirrorless cameras for photography
- best mirrorless cameras for travel
- best mirrorless cameras under 1000 for stills
- best mirrorless cameras for professionals
- best mirrorless cameras for landscape photography
Frequently Asked Questions
Does the closing shutter on some mirrorless cameras really protect the sensor?
Yes, meaningfully: a shutter curtain closed at power-off shields the sensor from dust during lens changes and storage, and owners of such models clean sensors less often. It is not a seal — dust still enters during shooting and the moments of a swap — and the curtain itself is delicate: never touch it, blow at it closely or poke past it. Treat it as a helpful dust cover and keep your lens-change drill regardless.
Should I use a UV filter to protect my mirrorless lenses?
A quality clear or UV filter is cheap sacrificial glass against scratches, spray and sticky fingers, and on mirrorless lenses — often used in close, everyday environments — it earns its place. Buy reputable multi-coated filters to avoid flare, pair with the hood for impact protection, and remember the filter protects the front element only; caps, bags and handling protect everything else.
Can I leave my mirrorless camera in the car while I run errands?
For a quick stop in mild weather with the camera hidden, the risk is mainly theft — never leave it visible. For heat, the rule is stricter: a sun-parked car reaches temperatures that age batteries, stress screens and pre-heat the body toward its thermal limits. Take the camera with you or leave it at home; cars are transport, not storage, for mirrorless gear.
How do I protect my mirrorless camera in the rain?
Use a sealed body-and-lens pairing if you have one, add a rain sleeve or improvised cover regardless, keep the lens pointed down between shots, and protect the open mount fanatically — no lens changes in rain if you can avoid it. Afterwards, dry the exterior before bagging the camera, then let it air with silica gel at home. Weather sealing survives drizzle; your habits must survive the downpour.
Are mirrorless cameras more fragile than DSLRs?
Not meaningfully in drops or build — professional mirrorless bodies are sealed, alloy-framed tools. Their risk profile differs rather than worsens: an exposed sensor instead of a shielded one, larger screens, denser electronics and greater heat sensitivity, balanced against fewer moving parts (no mirror mechanism to fail). Protect the specific vulnerabilities in this guide and a mirrorless camera’s working life matches any DSLR’s.
What insurance does a mirrorless kit need?
Start with your home policy’s cover for items away from home and its single-item limit; schedule bodies and lenses individually once values exceed it, or choose a dedicated photographic policy if you travel or shoot paid work. Keep serial numbers, receipts and photographs of the kit in cloud storage — assembled before any loss, they turn a claim from an argument into a formality.
Should I keep silica gel packs in my camera bag permanently?
They help in humid conditions, with two conditions of their own: the packs must be the rechargeable or replaceable kind, actually renewed when saturated, and the bag must mostly stay closed for them to influence its air. A saturated pack forgotten for a year is decoration. Used actively — dried or replaced on a schedule, combined with storing the bag open in dry rooms when possible — they are a cheap and genuinely useful layer of defence.
Is a protective filter a good idea or a waste of money?
It depends on your environments. In sand, spray, crowds, and children’s reach, a quality clear filter is sacrificial glass that has saved many front elements and is easy to defend. In controlled conditions it adds a reflective surface that can cost a little contrast and invite flare, for protection against risks that are not present. Judge by where your lens actually lives, buy quality if you buy one, and remove it for critical night work where bright lights make its reflections visible.
How do I protect my camera during a house move or long car journey?
Pack the camera as luggage, not as cargo: in its padded bag, inside the car cabin rather than the boot where temperatures swing and loads shift, wedged so it cannot slide, and never beneath heavier items. For a house move, the camera travels with you personally rather than in the van, in the same bag you would carry onto an aircraft. On arrival, let a cold camera warm gradually before opening the bag in a warm house, so condensation forms on the bag rather than inside the camera.
Does keeping my camera in its bag at home protect it enough?
Only if the bag itself is stored dry, clean, and uncompressed — a bag in a damp cupboard protects nothing, and a closed bag can hold humid air against the camera for months. In a dry, temperate room, the bag is a perfectly good home that also guards against dust and knocks. In humid conditions, prefer open shelving in a dry space or a dry cabinet, and treat the bag as transport rather than as the storage environment itself.