People often search for “how to set up for beginners a mirrorless camera” while unboxing a camera whose menus hold hundreds of options and whose dials promise more control than they yet understand. The reassuring truth: a mirrorless camera needs only a short list of deliberate settings to behave beautifully, and its electronic viewfinder — which previews your exposure live — makes it the most forgiving camera type ever made for learners. Set the essentials once, and the camera starts teaching you every time you lift it.
This walkthrough configures a typical mirrorless body in about twenty minutes: files, autofocus, exposure guardrails, stabilisation, viewfinder aids and one custom button. Every step explains the ‘why’ in a sentence, because settings you understand are settings you keep. If the camera is not yet bought, how to choose a mirrorless camera precedes this guide; once set up, protect your work with the habits in how to protect a mirrorless camera.
Disclosure: As an Amazon Associate, kajuandouglas.com earns from qualifying purchases. Links to Amazon on this page are affiliate links; they cost you nothing extra. Listing details such as price and availability change often, so check the current Amazon listing before you buy.
Beginner Mirrorless Setup: The Short Answer
Format the card in-camera, set the clock, shoot RAW+JPEG, enable eye-detection autofocus in continuous mode, switch IBIS on, set auto ISO with a ceiling and a minimum shutter speed, turn on the live histogram and highlight warnings in the viewfinder, and save everything to a custom mode if your dial has one. Then live in aperture-priority mode while you learn.
In this guide
What You Need
Setup is easier with the camera charged and a test subject handy. Prepare:
- The mirrorless camera, kit lens mounted, battery fully charged — setup drains power and updates may require it
- A memory card you can erase, to format in-camera as part of setup
- The manual or its PDF, since menu names differ between Canon, Sony, Nikon, Fujifilm and others
- A person, pet or window still-life to test eye autofocus and exposure preview
- Your phone, to photograph your final menu screens as a recovery record
How to Set Up a Mirrorless Camera for Beginners, Step by Step
Work in order; each step builds on the last, and the viewfinder will show you the effect of several changes immediately.
Step 1: Charge, format, set the clock and update firmware
Begin with a full battery, insert the card, and format it in the camera so the file system starts clean and matched to the body. Set date, time and time zone — mirrorless cameras stamp every file, and your future library organisation depends on it. Connect to the manufacturer’s site or app and check for a firmware update before changing anything else: updates on mirrorless bodies regularly improve autofocus and add features, and updating first means your setup matches the current menus, not last year’s.
Step 2: Set RAW+JPEG and check the image size
Choose RAW+JPEG at the largest size. The JPEG is your instant, shareable photo with the camera’s colours applied; the RAW is your insurance file, holding the sensor’s full data for rescuing exposure and white-balance mistakes in editing — and beginners make those mistakes daily, which is fine, because RAW forgives them. Confirm no previous setting has left the camera on a small JPEG size, a surprisingly common leftover on ex-display or borrowed bodies.
Step 3: Configure mirrorless autofocus — continuous, with eye detection
Set autofocus to continuous (AF-C) and enable face/eye detection, choosing ‘people’ or ‘animal’ subject detection to match your life. This is the mirrorless superpower: the camera finds eyes and holds them as subjects move, freeing you to compose. Learn the focus-area choices — wide for detection-led shooting, zone for groups and sports, single point for precise static work through clutter. Set focus priority so the shutter waits for focus confirmation while you learn; missed-focus frustration teaches nothing except deletion.
Step 4: Set auto ISO guardrails and your minimum shutter speed
Mirrorless cameras make auto ISO genuinely trustworthy when you fence it: set a maximum ISO where your sensor still looks clean (test at home; many APS-C bodies are happy to around 3200–6400, full-frame higher) and a minimum shutter speed around 1/125s for general subjects, faster for children and sport. The camera then balances the three exposure variables inside your quality limits. This single configuration prevents the twin beginner failures of blur (shutter too slow) and mush (ISO runaway).
Step 5: Turn on IBIS and choose your shutter type
Enable in-body image stabilisation (or lens stabilisation) for handheld shooting — it is the feature that makes slow-shutter dusk shots possible, as what is ibis in a mirrorless camera explains. Then choose shutter behaviour: mechanical or electronic first-curtain for general use, and know where the fully silent electronic shutter lives for ceremonies and sleeping babies — while remembering it can distort fast movement and band under some artificial light. Beginners should default to the mechanical option and treat silence as a special tool.
Step 6: Set up the viewfinder to teach you
Turn on the live histogram and highlight warnings in the EVF display settings, and cycle the display button until both are visible. The EVF’s gift is honesty: what you see is the exposure you get, so learn to glance at the histogram rather than trusting brightness, which ambient light distorts. Set the diopter adjustment beside the viewfinder until the displayed numbers are razor sharp for your eye — a step half of all new owners never discover, wondering why the finder looks soft. Enable touch focus on the rear screen if you like it, or disable it if your nose keeps selecting focus points.
Step 7: Customise one button, save a custom mode, and set cleaning
Assign your most-used control — commonly ISO or focus-area — to the custom button nearest your thumb. If the mode dial offers a custom slot (C1/U1/Memory), save this whole configuration there as your known-good home base. Finally, enable automatic sensor cleaning at shutdown if offered, and set the camera to close its shutter when off if that option exists, reducing the dust you will eventually manage with how to clean the sensor of a mirrorless camera. Setup complete: go and shoot something today.
Your Learning Mode: Aperture Priority With a Live Preview
Shoot in aperture priority (A/Av) for your first months. You set the aperture — wide (small f-number) for blurred-background portraits, narrow (f/8–f/11) for landscapes — and the camera sets shutter speed inside your Step 4 guardrails. On a mirrorless camera this mode is a tutor: the EVF shows depth of field and exposure changing as you turn the dial, so cause and effect connect in real time in a way no DSLR could offer. Add exposure compensation, one dial away, and you control the two decisions that shape most photographs.
Graduate deliberately: pick one calm session — a sunset, a still life — and shoot fully manual, watching the histogram judge you. Mirrorless previews make manual mode dramatically less mysterious than it was a generation ago. Return to aperture priority for daily life without guilt; most professionals live there too.
Video Settings for the Occasional Filmmaker
If you will film family and travel, set one video configuration now: 4K at 25/30p (or Full HD if your cards are slow), standard colour profile, continuous autofocus with eye detection, and stabilisation on. That combination produces attractive footage with zero further thought. Leave log profiles and high frame rates until you have a reason — log looks grey until graded, and slow motion is a spice, not a staple. Note your camera’s behaviour on long takes by filming a ten-minute test at home; forewarned about heat limits, per how to fix mirrorless camera overheating, you will never lose a school-play finale to a shutdown.
Gear for This Guide
These beginner-oriented mirrorless bodies all offer the eye detection, IBIS or lens stabilisation, custom modes and guided menus configured above:
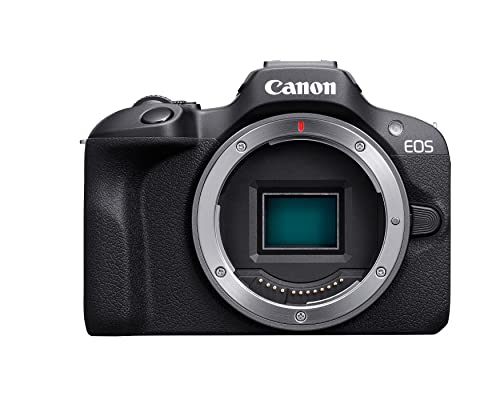
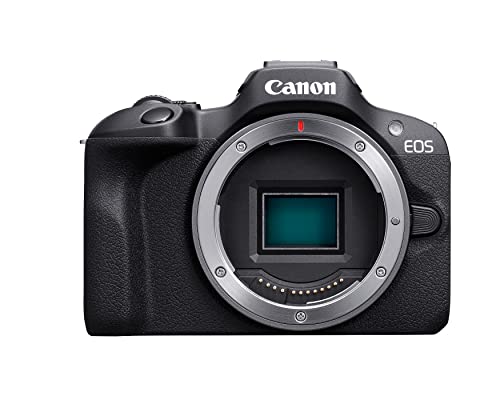
Canon EOS R100 Mirrorless Camera — Check price on Amazon. A solid, widely available option that fits this guide; confirm the exact kit contents and lens mount on the listing before ordering.

Nikon Z 30 Mirrorless Camera with 16-50mm Lens — Check price on Amazon. A solid, widely available option that fits this guide; confirm the exact kit contents and lens mount on the listing before ordering.

Canon EOS R50 Mirrorless Camera with RF-S 18-45mm Lens Kit — Check price on Amazon. A solid, widely available option that fits this guide; confirm the exact kit contents and lens mount on the listing before ordering.

Panasonic LUMIX G100 4K Mirrorless Camera — Check price on Amazon. A solid, widely available option that fits this guide; confirm the exact kit contents and lens mount on the listing before ordering.
Common Mistakes
The most common beginner error is leaving subject detection off and focus on a single central point, then concluding the camera ‘misses focus’ on the children it was never told to track. The second is shooting tiny JPEGs because a menu default or a previous owner set them — check Step 2 on any new-to-you body. Third is menu tourism: changing dozens of settings from internet lists before understanding five. Change few, shoot much, keep notes.
A mirrorless-specific mistake is ignoring the diopter and then distrusting the viewfinder, retreating to the rear screen for everything — slower and worse in sunlight. Another is never updating firmware, missing autofocus improvements the manufacturer gives away free. Both are five-minute fixes with permanent benefits.
Pro Tips
Build a pre-shoot ritual: battery, card space, RAW+JPEG, eye detection on, ISO ceiling sane. Thirty seconds, in the same order, before anything that matters. Photographers are not born careful; they are checklist-trained, and mirrorless cameras reward the ritual with near-zero technical failures.
Revisit this setup at three months. Settings that seemed exotic — back-button focus, zebras for video, custom white balance — will have become relevant to photographs you are now attempting. Your camera has not changed; your eye has. That progression, not the gear, is the hobby.
How to Set Up for Beginners a Mirrorless Camera: Your First Week of Practice
Setup sticks when it is exercised deliberately. Day one: photograph your home and garden in aperture priority, watching the EVF preview change as you turn the aperture dial — connect the dial to background blur physically. Day two: a moving subject — a pet, a child, traffic — with eye detection and burst mode, then review at full size to see what the autofocus actually caught. Day three: a dim room, where your auto-ISO ceiling and IBIS meet; find the shutter speed where your handheld shots stay sharp. Day four: ten minutes of video at your saved settings, including a walk, to learn your stabilisation’s character. Day five: a deliberate mistake day — wrong white balance, wild exposure compensation — rescued in editing from the RAW files, so you learn your safety net’s real strength.
By the end of the week the menus have become a map you have walked rather than a list you have read, and the settings from this guide have meanings attached to photographs you took. That is the actual goal of beginner setup: not a correctly configured camera, but a photographer who knows why it is configured so. Keep the camera’s custom mode updated as your answers evolve.
Mirrorless Settings Worth Knowing by Month Three
Four features graduate from trivia to tools once the basics are reflexes. Focus peaking with magnification makes manual lenses and macro work precise — set peaking colour to something your scenes lack, usually red or yellow. Zebras (or a waveform, where offered) discipline video exposure far better than the rear screen’s brightness, which lies in sunlight. The electronic shutter’s silent mode, already located in Step 5, becomes your ceremony and wildlife setting — paired with awareness of its rolling-shutter limits on fast pans. And your camera’s intervalometer opens timelapse and stacked-exposure techniques that cost nothing to explore.
Add one organisational habit: a monthly five-minute review of your own files’ metadata, noting which settings your failures share. Setup advice — including this guide — is generic by necessity; your EXIF history is specific. The photographers who improve fastest are those who let their own photographs, rather than forums, assign their homework.
The Exposure Triangle, Taught by Your New Camera
Setup only matters because it serves exposure, and a mirrorless camera is the finest exposure teacher ever made, because its viewfinder shows the result before you press the shutter. This section connects the settings from the main steps to the three controls they govern.
Aperture, in the finder
Set the camera to aperture priority as the main guide suggests, then spend ten minutes on one subject — a plant by a window serves perfectly — photographing it at every aperture your lens offers. Watch two things change in the finder as you work: the brightness stays constant because the camera compensates, and the depth of field visibly deepens as the number rises, backgrounds sharpening from blur to detail. That visible deepening is the entire concept, learned in the way mirrorless makes possible. Note also the shutter speed the camera chooses at each step, because the partnership between the two numbers is the triangle’s first side.
Shutter speed and the IBIS partnership
Now fix the aperture and vary the shutter speed on a subject with movement — a fan, a pet, running water. Slow speeds blur the motion, fast speeds freeze it, and somewhere in your handheld range the stabilisation you enabled during setup quietly extends how slow you can go while keeping static subjects sharp. Learn your personal limit by photographing a detailed still subject at progressively slower speeds and reviewing at full magnification. That number, your number, is what the auto ISO guardrails in the main steps should be built around — not a figure from anyone else’s hands.
ISO and the honest cost of darkness
Finally, in a dim room, take the same frame at rising ISO values and compare them honestly at full size. Modern sensors are remarkably capable, and most beginners fear ISO far beyond what their files justify — but the cost is real at the extremes, appearing first as lost shadow detail and muted colour rather than the obvious grain of older cameras. Knowing your camera’s comfortable ceiling, from your own test rather than a forum’s opinion, turns the auto ISO maximum you set during setup from a guess into a decision, and it frees you to raise sensitivity without anxiety whenever the light demands it.
A First-Month Practice Curriculum
Settings decay without use, and the camera you set up so carefully deserves a month of deliberate, light practice that turns its menus into reflexes. Each week has one theme, small enough to survive a busy life.
Week one: the camera as a daily object
Carry the camera daily, even briefly, and make a handful of photographs of ordinary things in aperture priority. The goal is not portfolio work; it is familiarity — powering on without thinking, adjusting aperture without lowering the camera, reviewing an image and returning to shooting in one motion. Change nothing in the menus this week except what the main setup already established. Beginners who shoot a little every day outlearn beginners who shoot a lot once a fortnight, because the camera stays warm in the hands and the settings stay alive in the mind.
Week two: focus as a subject
Devote the week to the autofocus you configured: photograph people and pets with eye detection, track a moving subject across the frame, and practise moving the focus point or area deliberately rather than accepting the centre. Learn what your camera does when it cannot find an eye — where it falls back, and how you override it. By week’s end you should be able to place focus where the photograph needs it, which is a more valuable skill than any other single control on the camera.
Week three: light and its failures
Shoot deliberately in the conditions that defeat beginners: backlit portraits, dim interiors, mixed artificial light, harsh midday sun. Use exposure compensation — the control worth finding blindfolded by now — and watch the live histogram and highlight warnings you enabled during setup do their teaching. Keep the failures and study them; a month of examined failures builds judgement faster than a year of unexamined successes, and your mirrorless finder’s preview means every failure arrives with its explanation attached.
Week four: your photographs, your settings revisited
End the month by reviewing everything and revisiting the setup with evidence. Which customisations did you actually use? Which menu item did you hunt for repeatedly — that one earns a place in your quick menu or on a button. Save the refined configuration to your custom mode as the main steps describe, so the camera now holds your settings rather than the internet’s. This is the moment the camera becomes yours, and it is the true completion of the setup this guide began.
Common Beginner Questions the Manual Answers Badly
Camera manuals are precise and unhelpful in equal measure. A few questions every beginner asks deserve plainer answers than the manual’s, in the context of the setup you have just built.
Why do my indoor photos look orange or green?
That is white balance meeting artificial light. Your camera’s automatic white balance handles daylight beautifully and negotiates with household lighting, sometimes losing to warm lamps or flickering tubes. The live preview shows you the cast before you shoot, which is your cue to choose the appropriate preset or set a custom balance from a neutral surface. Shoot raw alongside JPEG, as your setup does, and the cast is fully correctable afterwards — one of the quiet reasons that setting earns its place from day one.
Why does the camera sometimes refuse to take a picture?
Almost always, it cannot confirm focus and is configured to prioritise focus over release — it is protecting you from a blurry photograph you would blame it for. The cure is understanding, not force: give it a contrasty edge to focus on, move the focus point to your subject, or switch the priority setting if your subjects demand release regardless. Knowing this behaviour in advance converts a moment of panic at a birthday into a calm adjustment, which is precisely what setup and practice are for.
Why do my files look flat compared with my phone’s?
Your phone applies aggressive processing — saturation, sharpening, computational blending — before showing you anything, while your camera’s default picture profile is comparatively honest, especially in raw. The camera is not underperforming; it is declining to make decisions for you. Choose a livelier picture profile for your JPEGs if you prefer the look straight from camera, and expect your raw files to need the small amount of editing that is the normal second half of digital photography. The ceiling of the camera’s files is far higher; the floor simply starts lower, by design.
Menus Without Tears: Finding, Favouriting, and Forgetting
Modern mirrorless menus run to hundreds of items, and beginners often experience the camera as a filing cabinet they cannot search. The solution is not memorisation; it is curation, applied once your first month has shown you what you actually use.
The quick menu and the custom menu are your real menu
Nearly every camera offers a customisable quick menu and a personal menu page. Stock them from evidence: the settings you changed during your practice month — white balance, focus area mode, drive mode, format, stabilisation mode, and the handful of others your photography touches weekly. Everything else can live in the deep menus, visited rarely and searched calmly. A well-curated quick menu means the camera’s hundreds of options effectively become the dozen you use, presented in one button press, and menu anxiety largely evaporates.
Settings worth leaving alone
Some defaults exist because the engineers were right: colour space for general use, the standard noise-reduction behaviour for JPEGs, and the camera’s automatic sensor cleaning schedule among them. Beginners occasionally change these on forum advice without a specific need, then chase the consequences through their files for weeks. The rule that protects you is simple — change a setting when you can name the problem it solves in your photographs, and leave it when the argument is merely that someone, somewhere, prefers it otherwise.
Recording your configuration
Once your setup has survived its first month, write it down or photograph the key menu pages. Cameras get reset — by firmware updates, by service visits, by an adventurous borrowed afternoon — and a recorded configuration restores your camera in minutes instead of reconstructing it from memory and regret. Some bodies can save settings to a memory card; use that too, and keep the card file with your other backups. This small administrative habit separates owners who fear their menus from owners who merely visit them.
Accessories and Settings: The Second Layer of Setup
Beyond the camera’s own menus, a few setup decisions involve the objects around the camera. Each is small; together they determine whether the camera is ready at the moments photography actually happens.
Cards, spares, and the readiness kit
Set up your carrying kit with the same deliberateness as the camera: a card fast enough for your burst and video habits, a spare card, a spare battery that rotates with the main one so both age evenly, and the charger living in one fixed place. Configure the camera’s card settings knowingly — overflow to the second slot for capacity, backup for irreplaceable work, or separation of raw and JPEG — rather than inheriting whatever the default happens to be. Readiness is a setup topic: the finest autofocus configuration in the world is silent on a dead battery.
The strap, the grip, and handling setup
Fit the strap properly on day one, adjusted so the camera rides securely and comes to the eye without a fight, and consider a wrist strap if your photography is urban and quick. If your hands are large or your lenses heavy, a grip extension changes handling more than any menu item. These are setup decisions in the truest sense — they configure the interface between you and the camera — and they deserve the same first-day attention as the electronic ones, because you will feel them in every photograph.
Phone connection and the sharing setup
Pair the camera with your phone once, properly, at home: transferring a few images, testing the remote function, and setting the location tagging if you value it. Done calmly at a desk, this takes minutes and works thereafter; attempted for the first time in a field, it consumes the light and the mood together. Decide also what the connection is for in your photography — quick shares, backups, geotagging — and configure only that, because a camera connected for everything is a battery drained for anything.
Video Setup for Beginners Who Mostly Shoot Stills
The main guide touches video settings; this section gives the occasional filmmaker a complete, calm starting configuration, because the day you first need video is never the day to learn its menus.
A sane default video configuration
Choose the recording quality your editing computer handles happily rather than the camera’s maximum, set a standard frame rate appropriate to your region’s lighting to avoid flicker from artificial lights, and let the camera’s video autofocus use the same subject detection you trust for stills. Set the stabilisation for handheld reality if that is how you will shoot, and check the audio level display exists on your screen before the event, not during it. Record a minute of ordinary life and play it back with sound; that single test exposes more setup errors — silent audio, flicker, hunting focus — than an hour of menu reading.
Sound: the beginner’s blind spot
New filmmakers obsess over image and are betrayed by audio. The camera’s built-in microphones record handling noise and wind faithfully, so learn where the audio meters live, keep them out of the red, and position yourself close to your subject. If voices matter to your videos, an inexpensive external microphone is the highest-value accessory in all of beginner videography, and setting its levels belongs in your setup session, not at the school play.
Switching between stills and video without chaos
Most mirrorless bodies remember separate settings for stills and video, which is a gift if you configure both deliberately and a trap if you do not — settings changed in one mode will not follow you to the other. Do one calm setup pass in video mode, exactly as you did for stills, and thereafter the mode dial becomes a true switch between two prepared cameras rather than a door into an unfamiliar menu landscape.
Troubleshooting Your Own Setup: When the Camera Surprises You
Every beginner meets a few behaviours that feel like faults and are actually settings. Meeting them here, in print, is cheaper than meeting them at a wedding.
The viewfinder looks different from the room
If the finder seems too bright, too dim, or oddly coloured compared with reality, you have likely met the exposure simulation and display settings doing their jobs — or a picture profile altering the preview. The finder is showing you the photograph, not the room, and once that clicks, the difference becomes the point. But if the preview does not match the captured file, check the setting that controls whether effects are simulated, because a mismatch there undermines the mirrorless camera’s central teaching gift.
The camera sleeps, lags, or eats batteries
Aggressive power-saving makes a camera feel sluggish; generous settings make it feel hungry. The balance is personal and is set in the power-saving menus: a wake time that matches your shooting rhythm, a finder and screen brightness appropriate to your light, and the wireless features off when unused, since radios sip power all day. Judge battery life only after this tuning, and carry the spare regardless — mirrorless cameras spend power to show you the photograph before you take it, which is a fair trade, honestly priced.
Files, folders, and finding your photographs
Set the file numbering to continuous so your photographs never collide in name across cards, choose folder behaviour you understand, and decide your transfer ritual now: card to computer, verify, back up, then format in camera. Beginners lose more photographs to filing chaos than to any camera fault, and the loss is always discovered months later. Setup, properly understood, includes the photograph’s whole journey — and the final step of that journey should be as deliberate as the first menu you ever opened.
People, Pets, and Places: Three Starter Configurations
The general setup becomes concrete when it is tuned for the subjects beginners actually photograph first. Each configuration below adjusts the same foundation rather than replacing it, so you can move between them in seconds.
People and family
Continuous autofocus with eye detection on, a wide focus area so the camera can find faces anywhere in the frame, aperture priority with the lens near its wider apertures for pleasing backgrounds, and auto ISO with a sensible ceiling for indoor light. Add a quiet or silent shutter option for ceremonies and sleeping children, discovered now rather than during the event. This is the configuration most beginners will live in, and it is worth saving as your first custom mode once the practice month has proven it.
Pets and children in motion
Keep the eye detection — most systems include an animal setting worth enabling — and raise your minimum shutter speed in the auto ISO guardrails, because motion blur, not noise, is this genre’s enemy. A tracking focus area and a moderate burst mode complete the picture; review at full magnification to learn how fast is fast enough for your particular small athletes, since a toddling child and a sprinting dog live at very different shutter speeds.
Places, trips, and everyday scenes
For places, single-point or small-area focus placed deliberately, aperture priority stopped down for depth, and the stabilisation trusted at slower speeds will carry most travel and landscape beginnings. Turn on the level indicator if your camera offers one, because horizons are this genre’s signature beginner flaw, and let the histogram guard your skies. The configuration is calmer than the other two, as the subjects are, and switching between these three personalities is exactly what your custom modes and quick menu were built for.
The Beginner’s Second Month: From Setup to Style
Setup ends; photography begins. The second month is where the configured camera starts returning information about its owner, and a few signposts help you read it.
Your files are a report on your settings
Review the month’s metadata, not just its images: the apertures you actually used, the sensitivities you actually reached, the focal lengths you actually lived at. Patterns there are purchase advice, upgrade advice, and self-knowledge in one — the focal length you never leave is the prime lens you would love; the ISO you constantly hit is the faster lens or the steadier habit you need. Beginners who read their own data stop buying for imaginary photographers and start equipping the real one.
When to change a setting permanently
A setting earns permanent change when the same friction appears across several outings, not when it appears once, memorably. Keep a small note of frictions as they occur — the camera slept too fast, the focus area was wrong for the third time — and act on the repeats at month’s end. This is the same evidence discipline as the first month’s, continued, and it is how a setup matures from the guide’s recommendations into your camera’s personality without ever passing through a phase of random, weekly reconfiguration.
Your Setup, Revisited at Six Months
Half a year in, the camera you configured as a beginner deserves one deliberate review, because you are no longer the photographer the setup was designed for. By now your files have told you your real subjects, your real focal lengths, and your real frustrations, and the setup should be re-cut to that evidence. Promote the settings your photography actually uses into your custom modes and quick menu; demote the ones you never touch without guilt; revisit your auto ISO ceilings with the confidence of someone who has seen their own files at every sensitivity. Update the firmware, refresh your recorded configuration, and notice how short the session feels compared with the first one. That difference in feeling is the truest measure of what the setup process, and the months of practice it launched, have actually built: not a configured camera, but a photographer who can configure any camera — including the next one, whenever it comes, in an afternoon instead of a anxious week.
One last piece of advice for the beginner reading this with a new camera still in its box: do not postpone the first photographs until the setup feels complete. Work through the steps, then go and shoot the same afternoon, however imperfectly, because every setting in this guide was designed to be corrected by experience — and experience only arrives through the finder. The camera is set up. The rest is photography.
It is also worth forgiving the process its early clumsiness in advance. Every photographer you admire once stood where you are standing, reading a menu by lamplight and wondering whether the camera was smarter than them. It was not, and it is not; it was simply configured by someone patient, for someone specific. After this guide, that someone is you — on both sides of the sentence.
Keep the box and the manual a little longer than your pride suggests, keep the spare battery charged, and keep the camera somewhere it will be picked up daily rather than admired weekly. Setup was the first act of ownership; a camera within reach, ready and understood, is the whole of the second — and it lasts for years.
Charge the battery tonight, format the card, and leave the camera by the door. Tomorrow has photographs in it, and for the first time, your camera is genuinely ready for them.
Related Guides
- best mirrorless cameras for photography
- best mirrorless cameras for travel
- best mirrorless cameras under 1000 for stills
- best mirrorless cameras for professionals
- best mirrorless cameras for landscape photography
Frequently Asked Questions
Should a beginner use the camera’s auto mode or aperture priority?
Aperture priority, because full auto locks away the settings this guide configures and makes the creative decision — depth of field — for you, often wrongly. Aperture priority keeps you in charge of the one variable that most shapes a photograph’s look while the camera handles shutter speed inside your guardrails. The EVF preview makes the learning immediate: turn the dial and watch the background blur change before you shoot.
What focus settings suit photographing children and pets?
Continuous autofocus (AF-C), eye or animal subject detection enabled, and a wide or zone focus area so the camera can find the subject anywhere in the frame. Add burst mode for play and sport. If your camera separates human and animal detection, set the one matching the day’s subject; if it offers a combined mode, that is fine too. Review a few frames zoomed in to confirm eyes — not noses or ears — are the sharp plane.
Why does my mirrorless battery drain so fast?
The sensor and electronic viewfinder run continuously to show you the live preview, so mirrorless cameras use more power than DSLRs did. Mitigations: shorten the screen/EVF auto-off timers, lower EVF brightness indoors, disable always-on Wi-Fi and Bluetooth, and avoid reviewing every shot at full brightness. Even so, carry a spare battery for full days out — it is standard mirrorless practice, not a sign of a faulty camera.
Do I need to update my camera’s firmware?
Yes — check after purchase and a few times a year. Mirrorless manufacturers ship meaningful improvements by firmware: faster and smarter autofocus, new subject-detection categories, better stabilisation and longer video record times have all arrived this way. Follow the maker’s instructions exactly, with a full battery, and never interrupt an update in progress.
What is the best video setting for a beginner?
4K at 25 or 30 frames per second in the standard colour profile, with continuous eye-detection autofocus and stabilisation on, records attractive, easy-to-edit footage on every current mirrorless camera. Use Full HD if your computer or cards struggle with 4K. Avoid log profiles until you are ready to colour-grade, and slow-motion modes until a subject actually moves fast enough to deserve them.
How do I stop dust spots appearing in my photos?
Enable automatic sensor cleaning, keep the body capped or lens-mounted in storage, and change lenses quickly with the mount facing down, away from wind. If your camera can close its shutter when powered off, enable that shield. Spots that still appear are a normal maintenance item: the blower-first routine in our mirrorless sensor-cleaning guide removes them safely at home.
Should a beginner shoot in full manual mode to learn faster?
Not at first. Manual mode on a mirrorless camera is an excellent teacher once you understand what each control does individually, but as a starting point it makes every photograph a three-variable puzzle and slows learning to a crawl. Aperture priority with auto ISO guardrails, as set up in this guide, isolates one decision at a time while the finder teaches you the consequences live. Graduate to manual for specific purposes — studio work, long exposures, deliberate consistency — when the semi-automatic modes feel like assistance rather than mystery.
How often should I format my memory card?
Format the card in the camera after every successful transfer of its contents to your computer and backup — not before the transfer is verified, and not by deleting images individually, which fragments the card and invites errors. Formatting in-camera also refreshes the card’s file structure exactly as the camera prefers it. Make it part of the same ritual as charging the battery, and card problems will largely leave your life.
What is the one setting beginners most often leave wrong?
The image quality setting, left on JPEG alone at a reduced size by a previous owner, a shop demo, or an unexamined default. It silently caps everything the camera can do, and it is discovered months later when an important photograph cannot be printed or edited as hoped. Check it on day one, exactly as this guide’s setup does, and choose the full-size, highest-quality option with raw included if your editing habits allow.