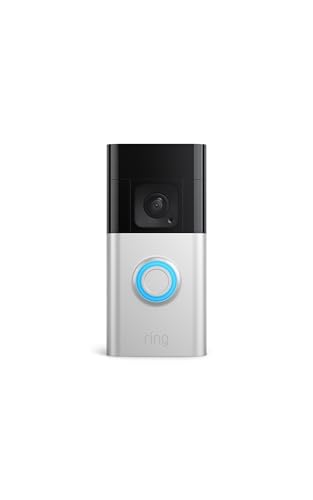
Knowing how to position a doorbell camera is the difference between footage that identifies a visitor and footage of the top of their head. Position is a geometry problem with three variables — height, angle and distance — plus two environmental ones: sunlight and what the camera should politely avoid seeing. Small changes, a wedge mount or a half-metre shift, transform the results.
This guide gives you the standard starting position, how to correct for the common problem layouts (recessed doors, corner entries, doors facing the street, long paths), how to use wedge and swivel mounts, and how to verify the view with real tests at day and night. It applies to battery and plug-in cameras you mount yourself; it involves no wiring of any kind.
Disclosure: As an Amazon Associate, kajuandouglas.com earns from qualifying purchases. Links to Amazon on this page are affiliate links; they cost you nothing extra. Listing details such as price and availability change often, so check the current Amazon listing before you buy.
Quick Answer
Mount the camera beside the door at about chest height — roughly 1.2 to 1.4 metres up — aimed so a standing visitor’s face sits in the middle of the frame and the doorstep shows at the bottom. If the door is recessed or angled, use a wedge mount to aim along the approach. Avoid direct low sun in the lens, keep the street at the edge of the frame rather than the centre, and verify with a real person standing where visitors stand.
In this guide
What You Need
Positioning is mostly testing, so bring:
- Your phone with live view open: the only honest way to judge a position.
- A helper or a patient family member: to stand where visitors stand while you check the frame.
- Removable tape or a temporary hold: to test positions before committing to screws.
- The wedge mounts from the box: most kits include an angled wedge; aftermarket angles exist for awkward entries.
How to Position a Doorbell Camera, Step by Step
Step 1: Start at the standard position
Begin beside the door on the handle side or centred above the bell position, at roughly chest height. This height exists for a reason: it places the lens near face level for most adults, keeps the unit reachable for battery changes, and looks down just enough to include the doorstep. Resist the instinct to mount high ‘for a better view’ — height is the single most common positioning error, and it trades faces for scalps.
Step 2: Frame faces first, packages second
Have your helper stand at the door as a visitor pressing the bell, then at the step as a courier placing a parcel. Check both in live view. The visitor’s face should be fully framed with a little headroom; the parcel spot should be visible at the frame’s bottom edge. Models with a tall, head-to-toe view make this easy; with a wide, short view you may need to tilt the camera down slightly with a wedge so both fit.
Step 3: Correct the angle for your entry layout
If the door sits in a recess or porch, angle the camera outward so it sees the approach, not the porch walls. If the path approaches from one side — common with corner houses and side paths — use a horizontal wedge to turn the view along the path, so visitors are seen approaching rather than appearing suddenly at the edge. If the door faces the street squarely, a slight downward tilt plus tight motion zones keeps the camera’s attention on your property.
Step 4: Manage sunlight and night conditions
Check the view at the sunniest time your door faces: direct low sun into the lens washes faces into silhouettes. Shifting the mount a short distance, adding the maker’s sun shade, or angling slightly away from the sun’s line can fix it. After dark, check the night view too — porch lights behind visitors silhouette them, while the camera’s own night vision works best when the scene is not dominated by a bright wall inches away. Position so the infrared light illuminates the approach, not just the adjacent brickwork.
Step 5: Respect privacy — yours and your neighbours’
Aim the camera at your own doorway, path and doorstep. Avoid framing neighbours’ doors, windows or gardens as the centre of the view, and use the app’s privacy zones to blank any unavoidable sensitive areas. Besides courtesy, some jurisdictions regulate recording beyond your property, particularly audio. A camera positioned tightly on your own entry also performs better: fewer irrelevant triggers, longer battery life, and alerts that mean something.
Step 6: Lock it in and run the verification set
Once the taped position passes the face, parcel, sun and night checks, mount it permanently at exactly that spot and angle. Then run the full verification: a bell press answered from indoors, a normal-pace approach from the street, a parcel left on the step, and a night approach. Review the recorded clips rather than only the live view — recordings reveal the motion trigger timing, which should start as the visitor enters your path, not as they reach the door.
Common Positioning Mistakes
Mounting high above the door is the classic, guaranteeing unidentifiable visitors. Centring the street in the frame floods the camera with car triggers and drains batteries. Aiming straight into a porch wall wastes the night vision on brickwork. And positioning for the live view alone — without checking when motion recording actually starts — leaves cameras that wake up as the visitor is already leaving. Every one of these is avoidable with the helper-and-tape test before drilling.
Pro Tips for Difficult Doors
For very long paths, accept that one doorbell camera cannot identify faces at distance; its job is the doorstep, and a second camera covering the path belongs to a different part of the system. For glass-heavy doors, reflections at night can fool motion detection — angle the camera slightly so its night light does not fire straight back from glass. For shared or terraced entries, coordinate with neighbours; two cameras aimed with mutual courtesy outperform one camera aimed carelessly.
Positioning for Packages, Faces and Number Plates
Different evidence needs different geometry. Faces need the lens near face height and the visitor looking toward the door — which they naturally do when pressing a bell beside the camera, one reason doorbell placement outperforms high corner mounting for identification. Packages need the bottom of the frame to include the step and the wall base where couriers leave parcels, ideally with a little of the path beyond, so the moment of placement and any later removal are both recorded. A head-to-toe view achieves both in one frame, which is why that design has spread across the category.
Number plates are the unrealistic expectation to retire: a doorbell camera at conversational distance, with a lens tuned for the doorstep, will rarely read plates on the street reliably, especially at night or in motion. If plates matter — repeated vehicle incidents, a driveway dispute — that is a dedicated security camera’s job, positioned and specified for the distance, as our linked comparison explains. Asking one device to do both distances is how both get done badly.
Test with the actual evidence standard in mind: can you describe the visitor’s face and clothing from the clip, see the parcel arrive and remain, and tell when each event began? If yes, the position is right regardless of what any diagram says. If the clips are beautiful but the faces are hats, the position is wrong regardless of how level the bracket is.
Seasonal and Lighting Changes
A position chosen in spring is tested by winter: the sun drops, shadows lengthen, and a view that was shaded in June may take direct low sun in December, silhouetting visitors at the same hour daily. Foliage grows into frames; porch decorations migrate into the motion zone; snow changes the scene’s brightness and the camera’s exposure behaviour. None of this means repositioning constantly — it means reviewing the view at the change of seasons, the same five-minute habit as retuning alerts.
Artificial light changes too: a new porch light, a neighbour’s security floodlight, or your own festive lights can each transform night recordings, usually by creating a bright region the camera exposes for, darkening faces elsewhere. The fixes are positional and habitual — angle slightly away from the glare source, use privacy of exposure where the app allows, and keep the lens clean, because a smeared lens turns every light source into a halo.
Battery behaviour is seasonal as well: cold reduces capacity, and a camera positioned to record the street works hardest exactly when its battery is weakest. Tight, property-focused positioning is thus also a winter survival strategy, and the seasonal review should include the battery trend the app reports.
Working With an Awkward Door: Case Notes
The door at the end of a long side path: angle the camera along the path with a wedge so visitors are seen in profile-to-front as they approach, accepting a less symmetrical view of the step itself; the approach footage is worth more. The door beside a busy pavement: mount at standard height, aim tightly, lean on person detection and zones, and consider that your camera’s deterrent visibility is a feature here, not a flaw. The door under a deep porch: watch for the porch roof darkening the scene — the camera may need to sit nearer the porch edge to see faces lit by daylight rather than silhouetted against it.
The glass-panelled door tempts mounting on the door itself; resist unless the maker supports it, because door movement shakes footage, complicates charging and reflects night-vision light straight back. A frame-side position a few centimetres away does the same job stably. And the door with no wall beside it — full sidelight panels, open porches — may suit a corner post or the adjacent wall with a stronger wedge angle; the tape test with a helper settles what theory cannot.
Positioning and the Law, Briefly and Carefully
Rules about cameras vary by place, and this guide is not legal advice — but the widely shared principles are stable enough to design by. Recording your own property’s entrances is broadly accepted; recording neighbours’ private spaces, or audio of conversations you are not part of, is where restrictions bite in many jurisdictions. The positioning discipline in this guide — tight views, privacy zones, deliberate audio choices — is therefore both courtesy and compliance in most places, and checking your local rules takes minutes compared with repositioning after a dispute.
Signage is the other practical point: some areas expect notice that recording is in progress, and a small sign near the door is cheap, honest and — as couriers and callers consistently report — barely noticed by legitimate visitors while being very visible to anyone casing the property. Deterrence and transparency, it turns out, are the same small sticker.
Re-Checking Position After Changes
Position is not a one-time decision because doors are not static: a new porch light, a grown hedge, a changed path, a different delivery habit, even a new door with a different swing can each quietly degrade a once-perfect view. Build the check into the seasonal review this guide’s companions recommend — stand where visitors stand, review a day and a night clip, and adjust the wedge or zones if the evidence has drifted. Five minutes, four times a year, keeps the camera’s geometry married to the door’s reality.
Looking More Closely at the Details That Decide It
Most discussions of positioning a doorbell camera for faces, parcels and a view that respects the street stay at the level of headlines, yet the outcome is usually decided by smaller details that only appear once you live with the decision. Three of those details deserve attention before anything else: parcel visibility on the step, porch floor or beside a plant pot, the geometry of height, distance and lens angle at a real front door, and verification with real people at real times rather than a single test photo. None of them looks dramatic on a specification sheet. Together they decide whether a face fills the frame, whether a parcel sits inside the picture, and whether the street stays out of view.
Start with parcel visibility on the step, porch floor or beside a plant pot. Parcel visibility is not a number on a box but a patch of ground: the slab where couriers drop boxes at your door. Check that patch through the live view at midday and again under the porch light, and write down where the frame’s bottom edge cuts it. A short note about the step vanishing below the frame beats a confident memory of a fine test photo.
Points to keep in mind
- Judge parcel visibility on the step, porch floor or beside a plant pot in your own setting before trusting a general verdict.
- Treat the geometry of height, distance and lens angle at a real front door as a first-order factor, not a footnote.
- Write down, in one plain sentence, whether you are accepting a higher mount, a sideways wedge, or some street in frame.
Then consider the geometry of height, distance and lens angle at a real front door. Households usually discover a geometry mistake late, often only after the return window has closed or the installation is finished. Test the position at its edges: the tallest visitor leaning in, the shortest standing back, and the parcel at the frame’s bottom edge. A position that only frames the average caller in average light will miss exactly the extremes who generate the complaints.
Finally, weigh verification with real people at real times rather than a single test photo alongside the first two rather than in isolation. A taller mount can buy path view at the cost of faces, and a lower mount can perfect faces while losing the parcel patch entirely. A mature decision about camera positioning names that trade-off out loud. Naming it lets you choose the compromise your doorway needs, instead of discovering in six months that you fixed the wrong angle.
How This Plays Out in Real Situations
Abstract advice becomes useful when it meets a real household, so consider a long path where early detection matters for a useful alert. On a long path the priority is rarely the widest lens; it is whether the basic view still catches a visitor early enough on an ordinary day to be useful. Keep the position plain at first: aim down the path, confirm a face at the gate, and only then refine for parcels. Households on long paths often find a modest, well-aimed position outperforms an ambitious wide installation that alerts too late.
Contrast that with a recessed porch that turns the camera view into a bright opening and dark interior. A recess rewrites the priorities, because exposure and shadow now matter more than the approach the camera was aimed at. A height compromise that barely mattered on the open path becomes the whole decision here, while the wide view everyone praised fades into irrelevance. This is why copying a friend’s conclusion about camera positioning so often disappoints: the friend optimised for a life that is not quite yours, with rooms, routines and patience that differ from your own.
Points to keep in mind
- When positioning a doorbell camera, judge faces at the doorstep, not silhouettes against bright daylight behind.
- Note a neighbour’s camera angle, then test heights at your step.
- Let the approach visitors use every day, not the one burglar story, set the height and angle.
A third pattern appears with a door tucked into a corner where visitors arrive from the left. At a corner door, most people want the wedge angle settled quickly, because a camera staring into the side wall helps nobody while they deliberate. Ten minutes testing the leftward approach with a helper walking in from the street prevents the month of sideways footage that follows an untested guess. If your door hides in a corner, put a verified sideways view above every clever detection extra.
There is also the quieter case of a household mainly concerned with parcels left low on the step. The camera records, the alerts arrive, yet the parcel sits in a blind strip at the frame’s bottom and nobody notices until it is gone. A frame a hand’s breadth too high, a step behind a plant pot, a delivery tucked against the wall: together they decide whether positioning protects parcels. Naming the blind spot precisely points at its remedy, whether that is a downward tilt, a lower mount, or a wedge turned the other way.
A Practical Method You Can Repeat
When opinions conflict, a repeatable method settles the question of positioning a doorbell camera for faces, parcels and a view that respects the street better than another hour of reading. The method has four moves. First, state the camera’s one job at your door in a single sentence: whose face, which patch of ground, and how far down the path. Second, gather evidence in that exact setting. Third, change or compare one variable at a time. Fourth, judge each position against the marks made before drilling, so one flattering test photo cannot move the goalposts.
In practice that means actions such as these: test with the tallest and shortest regular visitors you can recruit; start from the standard height, then correct for your door’s geometry; and mask or zone out areas the camera does not need to watch. Each is deliberately unglamorous. Their strength is order: height first, then angle, then zones, so a confusing view resolves into three solvable problems. Followed in that order they leave tape marks and test clips you can retrace if the finished view surprises you. Adjusted all at once, they produce the familiar muddle where the camera moved six times and nobody knows which move helped.
Points to keep in mind
- recheck after seasonal changes, new porch furniture or a changed door
- view test clips at night as well as in bright daylight
- angle the camera across the approach rather than straight down the path when needed
Equally important is what to record. Useful notes for camera positioning include the date and time, the place, what else was happening at the time, and a simple verdict in your own words. Across a week those notes expose what one test photo cannot: faces blown out by evening sun, the neighbour’s gate inside your frame, the parcel spot shadowed by the hedge. Positioning decisions built on those patterns stay right, and if you ever query a fitting under warranty, dated notes are exactly what support will ask for.
Expect careful positioning tests to take longer than eyeballing it from the doorstep. The time is repaid the first time a tall visitor’s face lands squarely in frame, instead of joining the cycle of re-aiming that makes positioning feel exhausting. Most people do not need more information about camera positioning; they need their own information, gathered calmly in their own setting, and this method is simply a way of collecting it without drama.
Living With the Decision Over Time
The first week with any choice about positioning a doorbell camera for faces, parcels and a view that respects the street is a poor predictor of the first year. In the first week the sun sits where it sat during fitting, the plants are trimmed, and nobody has tested the view in rain. Judge it at six months: the sun has swung across the porch, the hedge has grown into the frame, and the camera still has to catch faces unaided.
Long-term satisfaction usually rests on unexciting qualities connected to motion-sensor direction, because detection and lens view are not identical and weather exposure changing with small shifts under an eave or porch roof. A sensor aimed where people walk, a lens sheltered from the rain, and a frame that respects the neighbours decide whether the position quietly serves you or becomes a chore. When you compare positions, weight those lasting qualities above a perfect first photo, because a reviewer positions a camera for a day while your fitting has to survive years of seasons. Ask anyone who has lived with one position through a full year what they still check, and it will be sun, growth and drift.
Points to keep in mind
- Recheck the viewing angle after hanging wreaths, growing hedges, or fitting a new porch light.
- Owners who repositioned once say a small wedge angle fixed more than expensive camera upgrades.
- Adjust position whenever the path, gate, or usual parcel spot changes, even slightly at first.
Maintenance deserves a plan rather than good intentions. Tie the position checks to outdoor jobs you already do: glance at the frame when you sweep the step, wipe the lens when you clean the porch light, and re-check the view after any serious storm. That rhythm catches a creeping hedge or knocked bracket while it is a two-minute tweak, not a blind spot discovered after a parcel vanishes. In the context of camera positioning, that plan mainly means keeping an eye on verification with real people at real times rather than a single test photo before it turns into a bigger problem.
Finally, leave the position open to revision when life at the door changes. Moving home, changing work, a new household member or a new device can all reorder the priorities around camera positioning. A height that suited a household of adults is not a failure because a child, a wheelchair user or a new delivery habit now needs the frame lower. Reviewing the view calmly, with your earlier tape marks, turns that change into a small adjustment instead of a fresh research project.
Mistakes to Avoid and Signs You Chose Well
Positioning errors repeat at door after door, so the framing traps are worth naming. One is this: aiming for the street and missing the step where parcels land. Another, just as common, is the opposite excess — mounting at eye level for the installer rather than for the visitor’s face. And a third, quieter error is forgetting that a white wall beside the lens can ruin night images. Look at the three and they share a root: each is an attention lapse during positioning rather than a lack of ability. Every one begins when a single vivid factor, usually the installer’s own eye level or a dramatic test photo, stands in for the whole picture of who stands at the door.
Avoiding them does not require expertise, only a pause. Before fixing the bracket, challenge the position: what would have to be true about the sun, the step and the approach path for this view to disappoint me, and have I checked it? Which doorway moment, the low winter sun, the courier at the far gate, the child on the bottom step, have I not yet tested? What am I assuming about sun position through the day and across the seasons that I have not verified? Ten minutes of hostile questioning, aimed at your own favourite option, is the cheapest insurance available in the whole process of positioning a doorbell camera for faces, parcels and a view that respects the street.
Points to keep in mind
- Doubt your favourite mounting spot before you fix it.
- Judge success by quiet, ordinary evidence over several weeks.
- Try small corrections before concluding that replacement is necessary.
How will you know the decision was right? Watch for ordinary evidence: how little of the neighbouring property the camera captures; night footage clarity without blown-out walls or black shadows; and alert timing as someone walks up your usual approach. None of these announces itself with fanfare. You notice them as absences: the neighbour who never complains, the parcel never missed, the re-aiming never needed. That quiet, well-mannered frame is what careful positioning buys, and a more trustworthy verdict than any number on the box.
When the positioning evidence disappoints, respond in proportion before drilling new holes. Many disappointments with camera positioning yield to a small correction — a setting, a position, a habit, an accessory — rather than a complete replacement. Work through the small corrections first, nudging height or angle one small step at a time and testing after each move. Keep repositioning from scratch for structural mismatches, such as a door whose only mounting surface faces the wrong way entirely. Holding that line calmly will save you more over the years than any single positioning tip in this guide.
One More Round of Checks Before You Settle
Before you tighten the bracket for good, copy the framing check experienced owners run, testing tall visitors, parcels and night glare even when daylight looks ideal. It concerns wedge and swivel mounts correcting awkward approach angles and head-to-toe framing for a visitor standing close to the bell, two aspects that reveal themselves slowly. Test both deliberately: stage your most awkward ordinary approach, a tall visitor with a parcel at dusk, and watch the frame without intervening. The aim is not fault-hunting but learning where your position’s comfortable limits lie, while nudging it is still cheap.
Tell the rest of the household what those checks revealed about the view. A setup for camera positioning is a household system, not a personal gadget, and other people’s routines will find edges yours never touches. Their feedback, gathered in the first week, prevents the slow build-up of workarounds that eventually gets blamed on the original purchase. Settle together which parts of the street stay masked, note it on a card by the door, and treat that card as part of the fitting.
Points to keep in mind
- Test frame edges with tall and crouching visitors before drilling permanently.
- Mark the final height and wedge direction on the bracket before drilling anything permanently today.
- Stop nudging the angle once faces, parcels and the path all sit inside the frame.
Then stop optimising. Every position reaches a point where one more degree of tilt trades real life for a gain nobody watching the footage will ever notice. If your frame log, the record of caught faces and quiet neighbours you have been keeping, says the position works, then let it work. Put the ladder away and save your attention for something in the house that genuinely misbehaves. A later round of checks can wait until your routine or your home changes, and your tape marks will make it shorter than this one. With camera positioning, that stopping point usually arrives once whether the position still works in low winter sun and summer glare stops changing from week to week.
Worked Examples That Make the Trade-Offs Concrete
One framing story teaches more than charts, so trace it carefully. Imagine a door beside a wall that bounces infrared light back into the lens. Faced with that night-time glare, most people reach for a more capable camera instead of questioning the angle causing it. Yet the binding constraint in that picture is usually privacy masking for neighbours’ doors, windows and gardens, and no amount of spending elsewhere relaxes it. That example only resolves well when the masking and the wall angle are addressed first, because a sharper lens pointed at a glowing wall is decoration.
What to watch for
- Find the framing bottleneck before adjusting angles.
- Translate every example into your own door, step and approach path before trusting its conclusion.
- If you keep tilting for the same cropped face, the height is wrong, not the tilt.
Now change one variable: imagine a household mainly concerned with parcels left low on the step. The camera, the bracket and the positioning advice stay exactly the same, yet the correct height flips, because what the household needs the frame to do has changed. This is the single most transferable lesson in the whole subject of positioning a doorbell camera for faces, parcels and a view that respects the street: context is not a detail around the decision, it is the decision. Read every positioning recommendation against your own step and callers, and distrust advice that insists those details do not matter.
A third example works as a warning. Picture a household that skipped the early checks, committed quickly, and spent the following month applying fixes for accepting the daytime view without testing after dark and then for recording more of a neighbour’s property than their own. Each remedy bought a quieter week, because each calmed the symptom it aimed at while the wrong height underneath stayed exactly as it was. The cost was not only money; it was confidence. By the time the household finally tested the night view properly, nobody trusted their own positioning judgement any more. These examples exist so your household skips that sequence: test the view at the real door, in day and darkness, before it becomes permanent.
Use these examples as templates rather than stories. Swap their details for your own step, your own sun path and your own tallest and shortest visitors, then run the same reasoning again. If the winner changes once your details go in, that tells you which of your priorities is really in charge. If the same position wins under several versions of your household, you have found a robust placement, one worth fixing firmly and keeping for years. Applied to camera positioning, the detail that most often changes the conclusion is weather exposure changing with small shifts under an eave or porch roof.
A Decision Flow When You Feel Stuck
Indecision about camera positioning usually means two good criteria are pulling in opposite directions, not that you lack information. When that happens, stop researching and start ranking. Write your positioning criteria down, the four to six that matter, from face framing to neighbour privacy, and force them into order. Ranking feels forced for a minute, then it bites, because rival positions rarely fail across the board: each falls down on one criterion, and the ranking tells you whether that criterion tops your list.
What to watch for
- Order your framing priorities before testing any more angles.
- Cross out any position that fails a genuine framing deal-breaker, then test what survives with real visitors.
- Between a wider view and clearer faces, choose faces: identification beats scenery every single time.
Next, apply a simple elimination pass connected to parcel visibility on the step, porch floor or beside a plant pot. Strike off any position that fails a true framing deal-breaker, and be strict about the word: a deal-breaker means a flaw that will still irritate you on a plain weekday next winter, not a line that merely looks weak in a comparison chart. This pass is often brutal and always useful. What remains is a handful of positions you can genuinely test at your door, and confidence from those tests lasts.
Then test the survivors against night footage clarity without blown-out walls or black shadows and how little of the neighbouring property the camera captures in your own setting, on the same day if you can, so conditions stay comparable. Jot a score beside each test straight away, while the blown-out wall and the cropped chin are still fresh in your mind. Most people are startled by how different that written score looks from the verdict in their heads, because memory keeps the one perfect test photo while notes keep the typical dusk.
If two positions still tie, break the tie on daily-life grounds and feel no guilt about it: which is easier to live with, easier to maintain, easier to hand to another household member, easier to replace if it fails? A dead heat between two good positions is common, and at that point either will serve your doorway perfectly well. Picking one today beats a week hunting for a difference your daily footage will never reveal. For camera positioning, the easiest option to live with is usually the one that handles parcel visibility on the step, porch floor or beside a plant pot with the least fuss.
Seasonal, Household and Long-Term Angles Worth Planning For
Conditions change across the year, and a decision about positioning a doorbell camera for faces, parcels and a view that respects the street that is tested in only one season carries hidden risk. Low winter sun rakes across porches shaded in June, summer growth pushes branches into the frame, and holiday visitors approach in groups your household never forms. Testing all four seasons beforehand is impossible, so ask the winter question out loud: in the darkest, busiest week of your year, will this height, angle and mask still frame your door?
What to watch for
- Check positioning at midday glare and midwinter dusk, because both extremes expose bad angles cruelly.
- Have a shorter family member stand at the door to confirm the camera frames everyone fairly.
- Revisit the angle seasonally as shrubs grow, and keep the wedge kit for future tweaks.
Households also change from inside. A position chosen by one confident installer gets inherited by partners, children, parents and guests, each with different patience and different habits. The positions that last are the ones a visitor can make sense of cold: a camera aimed where callers stand, a button easy to find, and no expectation that guests perform for the lens. When you evaluate camera positioning, spend one minute imagining the least technical person in your life facing it alone. That minute is a surprisingly accurate quality test.
Count the total effort a position will ask of you across its whole working life, not just the effort of fitting day. Count the ongoing attention honestly: the lens wipes, the hedge trims, the seasonal re-checks, the battery swaps at height, and ask whether that rhythm fits the time your household has. A position that needs monthly ladder work from a household that can only manage twice a year will slowly drift out of usefulness. A position whose upkeep fits the household’s real rhythm will outlast a perfect frame that demands monthly ladder work. With camera positioning, the recurring effort worth counting most honestly is the effort tied to privacy masking for neighbours’ doors, windows and gardens.
Finally, think about the exit before you need it. When this camera eventually moves, will the holes be fillable and the new position start from your old tape marks? Keep a note of the height and angle, and photograph the final frame, so a replacement starts from evidence. That is not pessimism; it is what turns one purchase into accumulated household knowledge, so the next decision about camera positioning starts from experience instead of from a search box.
Questions Worth Asking Before You Spend Anything
Answering a few questions about height, angle and neighbours now prevents most costly repositioning mistakes later. First: what exactly is the problem this position is solving, stated without naming any product or gadget? If your problem statement names a wedge or a feature, rewrite it until it describes your doorway: a cropped face, a blind step, a neighbour’s window. Solutions chosen for a life-shaped problem age far better than solutions chosen for a catalogue-shaped one, especially with camera positioning.
What to watch for
- Describe the framing fault in doorway terms, not gadget terms.
- Write down the heights and angles you know work at your door, and mark the untested ones honestly.
- Ask who else is affected, especially neighbours whose windows face your door, before fixing the position.
Second: what evidence do I already have? You know more about your own doorway than you credit yourself with. You know which hours the sun strikes the porch, which visitors arrive from the left, and which household members will resist anything complicated. Getting that doorway knowledge onto paper before you shop stops a confident demo from overwriting it. Mark the gaps in that evidence honestly as gaps: a gap you can see can be tested at the door, while an assumption you never noticed quietly becomes the foundation of a bad position. For camera positioning, that existing evidence usually includes what you already know about verification with real people at real times rather than a single test photo in your own setting.
Third: when, not if, this position needs attention again, what will you do about it? Hedges grow into frames, porches get repainted glossier, children grow taller than the frame expected, and doors get replaced. A choice with a calm answer to that question, involving steps like recheck after seasonal changes, new porch furniture or a changed door, is worth more than a choice with a slightly better specification and no answer at all. A position that can be nudged and re-tested without new holes is a resilient position, even though resilience never appears in a feature list.
Fourth, and last: who else should have a say? Decisions about positioning a doorbell camera for faces, parcels and a view that respects the street often affect people who were not in the room when the research happened, and their late objections can sink an otherwise sound setup. Ask the household and the closest neighbour early, while the camera is still on tape: here is the view I am planning, what would annoy you? The final position may be the one you first chose, but it will be one the household and street have accepted, and accepted positions stay up while resented ones get argued about.
Related Guides
- best security cameras for front door
- best security cameras for home outdoor
- best Wi-Fi security cameras for home
- best home security cameras for under 200
- how to install a doorbell camera
- how to set up a doorbell camera
- doorbell camera vs security camera
Frequently Asked Questions
How high should a doorbell camera be?
About chest height, roughly 1.2 to 1.4 metres from the ground, is the standard recommendation across major makers. It frames faces properly and includes the doorstep. If your household includes wheelchair users or the door has steps changing the approach level, judge by the live view with a person standing at the door rather than by the tape measure alone.
My door is in a corner. How do I aim the camera?
Use an angled wedge mount to turn the camera’s view along the approach path instead of straight out from the wall. Test with tape first: have someone walk the path and confirm they are visible for the whole approach, with their face framed when they reach the door. Stackable wedges exist if one angle is not enough.
Why does my camera only record visitors as they leave?
The motion trigger is starting too late — usually because the camera is aimed so visitors cross the frame’s edge-on, or sensitivity and zones are set conservatively. Angle the camera so the approach crosses the view diagonally, widen the zone along the path, and raise sensitivity a step. PIR-based detection responds best to movement across the frame rather than straight toward the lens.
Should the camera see the street?
Only incidentally at the frame’s edge. A view centred on the street produces constant car and pedestrian triggers, drains batteries and fills storage with non-events. Tighten the physical angle and the motion zones to your property. If you genuinely need street coverage, that is a job for a separate security camera positioned for the purpose.
How do I avoid filming my neighbours?
Aim tightly at your own door and path, use privacy zones in the app to blank neighbours’ windows, doors and gardens, and consider disabling audio recording. Tell neighbours the camera is there and what it covers — most concerns evaporate when people see the actual field of view, which is usually far narrower than they feared.
Does position affect battery life?
Yes, significantly. A camera triggered hundreds of times a day by street traffic may need charging several times more often than one triggered by genuine visitors. Positioning and zones that limit recording to your property are the most effective battery-saving measures available — more than any battery setting in the app.
How long should I trial a position before fixing it?
For most households, a focused week of ordinary use tells you more than a month of occasional reading about positioning a doorbell camera for faces, parcels and a view that respects the street. Test the position on a bright morning, at dusk and during one busy delivery window, keep the short notes described above, and then decide. Stretching the trial beyond that seldom changes the verdict; it mostly postpones a decision your own evidence has settled.
What should I move first if faces look cropped?
Return to the simplest explanation before replacing anything. Recheck the basics connected with infrared reflections from walls, porches and glossy paint at night, repeat your most reliable test in your most familiar setting, and change one variable only. If a calm retest still disappoints, the mismatch is probably built into the position itself, and your notes will pinpoint whether height, angle or mask failed you.
Is a pricier camera worth it over repositioning mine?
Only when the higher tier improves something your own routine actually stresses, such as privacy masking for neighbours’ doors, windows and gardens. If your notes show the frustration actually comes from sun glare or a cropped step, a pricier camera will change nothing you see. Judge any pricier tier against evidence from your own doorway, not the manufacturer’s best-case footage.