Learning how to clean the sensor of a mirrorless camera is close to a rite of passage, because mirrorless design exposes the sensor every time you change a lens — there is no mirror to shield it. The symptom is always the same: soft grey blobs appearing in skies and plain backgrounds, worst at small apertures, identical in every frame. The good news is that most sensor dirt is loose dust that a blower removes in seconds, and even stubborn spots yield to a careful swab clean that thousands of photographers perform safely at home.
This guide follows the professional escalation order — test, automatic cleaning, blower, then wet swabs — and flags the mirrorless-specific traps: the sensor sits close to the mount, it may float on its stabilisation stage, and the shutter is delicate. Work patiently in a clean room and stop at the first step that clears your test shot. For whole-camera care beyond the sensor, see how to clean a camera.
Disclosure: As an Amazon Associate, kajuandouglas.com earns from qualifying purchases. Links to Amazon on this page are affiliate links; they cost you nothing extra. Listing details such as price and availability change often, so check the current Amazon listing before you buy.
Mirrorless Sensor Cleaning: The Short Answer
Confirm the spots with an f/16 test shot of a plain bright surface. Run the camera’s sensor-cleaning cycle, then use a rocket blower with the mount facing down. Only if spots persist, use sensor swabs matched exactly to your sensor size with a drop or two of sensor fluid, one pass per swab side, with the camera in cleaning mode and IBIS locked per your manual. Never use canned air or touch the sensor with anything else.
In this guide
What You Need
Sensor cleaning needs the right tools and a charged battery; gather everything before the mount opens:
- A large rocket-style hand blower — never canned air
- Sensor swabs sized exactly for your sensor (full-frame, APS-C or Micro Four Thirds) — wrong sizes smear or miss edges
- Sensor cleaning fluid made for camera sensors, if you reach the wet-clean step
- A fully charged battery or mains power — cameras can refuse cleaning mode, or worse, close the shutter mid-clean on low power
- A bright lamp for inspecting the sensor at an angle
- A plain wall or bright sky for before-and-after test shots
How to Clean a Mirrorless Camera Sensor Step by Step
Escalate only as far as your test shots demand. Most cleans finish at Step 3.
Step 1: Prove the sensor is dirty, and how dirty
Fit a lens, set aperture to f/16 or f/22, manual focus to infinity, and photograph a plain, evenly lit white wall or clear sky, moving the camera slightly during a longer exposure to blur any wall texture. Examine the file at full size: dust appears as soft-edged grey blobs that sit in identical positions across frames. Note their locations — you will compare after each cleaning stage. Spots that move between frames are on the lens or filter, not the sensor; clean those first before opening the body at all.
Step 2: Run the built-in cleaning cycle, twice
Every mirrorless camera vibrates its sensor ultrasonically to shake dust loose — find ‘sensor cleaning’ or ‘clean now’ in the setup menu and run it two or three times, with the camera resting mount-down on a table so loosened dust falls out of harm’s way. Some models also offer a dust-off reference photo for software spot-mapping. Retake the Step 1 test shot. A surprising share of ‘dirty sensors’ clear here, because the dust was fresh and dry. If the blobs persist in the same places, they are stuck, and you move to air.
Step 3: Blow with the rocket blower, mount down
Remove the lens in a clean, still room, hold the camera with the mount facing the floor, and squeeze the blower in strong puffs across the sensor area — without ever inserting the nozzle tip past the mount or touching the sensor. Gravity is your assistant: dislodged particles fall out rather than resettling. Refit the lens and retest. This step clears the majority of remaining cases. If spots survive air, they are adhered — typically pollen, oil mist or dried moisture — and need the wet method.
Step 4: Prepare correctly for the wet clean
Charge the battery fully or connect mains power. Enter the camera’s manual cleaning mode if it has one — on mirrorless bodies this typically locks the IBIS sensor stage so it cannot float while you swab, which is essential: swabbing a floating sensor is ineffective and risks damage. Consult your manual for your model’s exact behaviour, because procedures differ — some cameras want the power left on, others have a dedicated lock setting. Work on a stable table, lay out two swabs, and breathe calmly; you have minutes, not seconds, but dust settles continuously, so be deliberate.
Step 5: Swab once per side, with minimal fluid
Apply the fluid drops your swab maker specifies — usually one or two — to the swab paddle, never directly onto the sensor. Place the swab at one edge of the sensor, tilt it slightly toward the direction of travel, and draw it across in one smooth, slow pass with light, even pressure. Flip the swab and return with the unused side. That is one swab’s whole life: discard it. More passes with a used swab drag collected grit back across the glass. If your sensor is full-frame and the swab is correctly sized, one pass covers the full height; smaller sensors likewise. Refit the lens and retest immediately.
Step 6: Inspect, repeat only if needed, and finish cleanly
Compare the new test shot with your Step 1 map. Most spots should be gone; a faint streak usually means slightly too much fluid and yields to a fresh, barely-moistened swab. One or two remaining specks that never show at working apertures can be left alone — perfection-chasing causes more sensor incidents than dust does. Exit cleaning mode, refit a lens or body cap promptly, and note the date and method used. If spots survive two careful swab passes, or you see anything that looks like damage, coating marks or mould rather than dust, stop and book a professional clean instead of escalating force.
Why Mirrorless Sensors Get Dirty Faster
Three design facts conspire: the sensor sits millimetres behind an open mount with no mirror box depth to trap dust; lens changes expose it fully; and the sensor’s static charge attracts particles. Add IBIS, whose floating stage can redistribute settled dust, and the mirrorless owner simply cleans more often than a DSLR owner. The countermeasures are behavioural: change lenses mount-down, quickly, in sheltered air; keep rear caps on lenses and the body cap on the camera; and store the body capped or with a lens mounted, per how to store a camera. Photographers who adopt those habits clean sensors a few times a year; those who do not, clean monthly.
Some newer bodies close the shutter curtain when powered off, shielding the sensor during lens changes — enable that option if your model offers it, while remembering the curtain itself is fragile and must never be touched or blown at close range. Treat it as a dust cover, not armour.
When the ‘Dust’ Is Not Dust
Spots that survive swabbing deserve a second look under the lamp at a low angle. Oil spots from shutter mechanisms appear as small, sharp-edged dots and usually yield to a fresh swab. Stubborn pollen can need a second pass. Anything threadlike or spreading suggests mould — rare on sensors, serious when present — and anything that looks like a scratch, pit or coating bloom is damage, not dirt. All three belong to a service centre. Similarly, if your camera is new and under warranty and you feel any hesitation, a dealer clean is inexpensive and keeps your warranty story spotless.
Gear for This Guide
Both of these mirrorless bodies include automatic sensor cleaning and clear cleaning-mode procedures in their manuals — the two features this guide leans on:

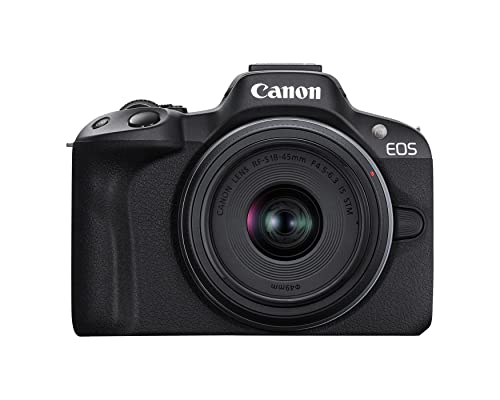
Canon EOS R50 Mirrorless Camera with RF-S 18-45mm Lens Kit — Check price on Amazon. A solid, widely available option that fits this guide; confirm the exact kit contents and lens mount on the listing before ordering.

Nikon Z 30 Mirrorless Camera with 16-50mm Lens — Check price on Amazon. A solid, widely available option that fits this guide; confirm the exact kit contents and lens mount on the listing before ordering.
Common Mistakes
The cardinal sin is canned air: propellant residue on a sensor is a professional-clean problem you created from a home-fixable one. Second is the wrong swab size — an APS-C swab on a full-frame sensor leaves dirty edges and tempts extra passes; a too-large swab cannot sit flat. Third is reusing swabs or pressing harder when a spot resists; force never cleans sensors, it only risks the glass. Fourth is cleaning on a low battery, inviting a shutter or IBIS fault mid-procedure.
Also avoid cleaning in the field, in vehicles or in dusty rooms where the open chamber collects new dust faster than you remove old. And never use lens-cleaning tissues, cotton buds or your microfibre cloth on the sensor — the swab’s engineered edge and lint-free material exist because sensors punish improvisation.
Pro Tips
Keep a ‘sensor kit’ — blower, correct swabs, fluid — in your home kit rather than your camera bag; sensor cleaning is a table task, not a field task. Photograph the f/16 test before any important shoot or trip, so cleaning happens calmly at home instead of anxiously in a hotel.
Track your cleaning results over time: if spots return within days, your lens-change environment or a particular lens’s rear element is the source — clean rear elements and check the body cap’s felt for trapped grit. Prevention beats technique, and technique here is mostly patience.
How to Clean the Sensor of a Mirrorless Camera Without Making It Worse
The failure modes of sensor cleaning are worth studying, because every one is a technique error rather than bad luck. Smearing means the swab was too wet or was reused past its single pass — the fix is a fresh swab with less fluid, not more pressure. New dust after cleaning means the room or the blower technique introduced it — clean indoors with settled air, and never blow with your mouth, whose moisture spots the glass. Edge bands mean the swab size was wrong for the sensor. And the rarest, worst outcome — a scratched filter — comes from dragging a dry, grit-loaded implement across the surface, which is why the blower always precedes contact and swabs are single-use.
Adopt the professional’s stopping rule: two swab passes maximum per session. If spots survive two correct passes, the contaminant is not ordinary dust — it is oil, damage or growth — and further passes add risk without diagnosis. Photograph the test frame, note what remains and where, and hand that evidence to a service centre. Knowing when to stop is the difference between maintenance and gambling, and it is the skill this guide most wants to leave with you.
Keeping the Sensor Cleaner for Longer
Cleaning skill matters less than contamination rate, and contamination rate is behaviour. Audit your own: do you change lenses with the camera powered on (some bodies hold the shutter open and the sensor live — power off first, and enable the close-shutter-on-off option if offered)? Do you swap lenses outdoors facing the wind because the light is better there? Is your body cap’s inner felt carrying a grey film of old dust, re-seeding the chamber at every storage? Is one particular lens’s rear element the dirtiest object in your kit? Each yes is a cleaning session scheduled in advance.
Simple upgrades compound: a rocket blower kept in the bag for mount-area puffs before swaps, rear elements wiped during monthly maintenance, caps replaced when their felt degrades, and the camera stored capped or lens-mounted rather than open in a drawer. Photographers in dusty trades — equestrian, motorsport, desert travel — add one more: a sacrificial versatile zoom that stays mounted for the whole event, trading lens changes for a single evening’s sensor clean. Prevention is unglamorous and utterly decisive.
Understanding What You Are Actually Cleaning
Confidence in sensor cleaning grows from knowing what the swab actually touches, because it is not the bare silicon of the sensor itself.
The filter stack in front of the sensor
What you see when you look into the mount is a glass filter stack bonded over the sensor — typically including an infrared-cut filter and, on many cameras, an optical low-pass element or a protective cover glass. This surface is hard, smooth, and considerably more forgiving than the word sensor suggests, which is why correct swabbing is safe. It is also the surface that coatings and cleaning fluids interact with, which is why only fluids made for the purpose belong on it: the wrong solvent can cloud or streak coatings in ways that no second clean fully reverses.
Why spots look the way they do
A dust speck does not sit in focus; it casts a shadow on the sensor, and the shadow’s sharpness depends on the aperture. At wide apertures the shadow is a faint, soft blob that most photographs hide completely, while at narrow apertures it hardens into the crisp dark spot that sends owners to this guide. This is why the test in the main steps uses a narrow aperture against a plain, bright surface — it is a diagnostic exposure, deliberately harsher than your real photography, designed to reveal everything so you can judge whether what is revealed actually matters at the apertures you use.
Dust, oil, and the spots that are neither
Loose dust blows away. The stubborn spots are usually something else: tiny oil droplets flicked from shutter mechanisms, pollen with a natural stickiness, dried moisture marks from condensation, or lubricant specks that smear when a dry swab passes over them — which is why a spot that streaks under a swab is telling you it is oil-based and needs the wet method and a fresh swab rather than more pressure. Learning to read a spot’s behaviour under the first gentle pass turns cleaning from a ritual into a diagnosis, and diagnosis is what keeps you from swabbing a clean sensor out of habit.
Cleaning in Difficult Conditions: Travel, Humidity, and Old Cameras
The main method assumes a calm room and a full kit. Real life supplies hotel bathrooms, humid climates, and cameras that have not been cleaned since they were bought, and each condition modifies the method in specific ways.
Cleaning while travelling
On the road, prevention outranks cleaning: change lenses inside a bag or turned away from wind, keep the body capped whenever a lens is off, and carry the blower, which solves most travel dust without any of the wet method’s risks in an unfamiliar room. If a wet clean is unavoidable while travelling, a bathroom after a shower has run is the classic field clean-room, because the steam settles airborne dust — let the steam clear, work on a clean towel, and use a fresh swab for every pass, since a swab dropped or fumbled in a strange room is retired, not rinsed. Photograph the test frame before and after, as at home, so you know the clean worked before the morning’s shoot depends on it.
Humid climates and condensation marks
In humid environments, the enemy shifts from dust to moisture: a cold camera brought into warm, wet air fogs internally, and dried condensation can leave faint tide marks on the filter glass that a blower will never move. These marks usually yield to a proper wet clean with a fresh swab and minimal fluid. The longer lesson is storage — a dry cabinet, or at minimum a sealed bag with rechargeable desiccant for the camera’s home — because a sensor that needs monthly wet cleans in a humid house is reporting a storage problem, not a cleaning problem.
The neglected camera: years of dust
A camera bought used or retrieved from a cupboard may carry compacted dust that has sat through seasons of humidity, and the first clean should be approached as restoration: expect two or three wet passes with fresh swabs, inspect between each, and never increase pressure to compensate for patience. Dust that has effectively glued itself down loosens gradually as fluid works at its edges. If three careful passes leave significant marks untouched, stop and hand the camera to a professional, because what remains may be a coating issue, fungus, or debris behind the filter glass — none of which a swab can reach and all of which force will worsen.
When Cleaning Is Not the Answer
Part of cleaning well is recognising the problems that merely resemble dirt, because swabbing them wastes time and occasionally hides a fault that deserves attention.
Hot pixels, dead pixels, and sensor faults
A single bright or dark point that appears in exactly the same place at every aperture, glows in dark frames, and never moves is a pixel fault, not dust — dust shadows are soft, grey, and aperture-dependent, while pixel faults are sharp, often coloured, and constant. Most cameras offer a pixel-mapping routine in their menus that identifies and compensates for such pixels, and running it is the correct response. A growing cluster of faults, or lines across the frame, is a service issue, and cleaning the glass above a failing sensor achieves nothing except delay.
Fungus and debris behind the glass
Fungus presents as branching, web-like patterns that no swab shifts, usually on cameras stored damp for long periods. It lives on or under the filter glass and requires professional dismantling; attempting it yourself risks the sensor assembly for a problem you cannot reach. Similarly, a speck that is clearly visible but never moves under blower or swab may sit beneath the cover glass, placed there by a previous impact or a manufacturing escape. Both cases share the same correct action: stop cleaning, document with a test frame, and take the camera to a service centre with the evidence in hand.
Scratches and coating damage
A fine line that appears identically in every test frame and catches light at an angle when you inspect the glass may be a scratch — most often the souvenir of a past clean performed with a contaminated swab or a household cloth. Scratches cannot be cleaned away, and further swabbing only risks company for it. The practical questions are photographic: many fine scratches are invisible in real images at working apertures, showing only in the brutal diagnostic test. If your photographs do not show it, the wisest treatment is to leave it alone, note it, and let the camera keep working.
The Wet Clean, Examined Stroke by Stroke
The main steps give the wet-clean sequence; this section slows it down further, because almost all wet-clean disappointments trace back to small details of fluid, pressure, and swab handling rather than to the method itself.
Fluid quantity: the most common error
Too much fluid is the leading cause of streaked cleans. Excess solution pools at the swab’s edges, dries in lines, and leaves the owner swabbing a second and third time to remove the evidence of the first — each pass adding risk to solve a problem of quantity, not dirt. The correct amount barely darkens the swab’s edge; the glass after a pass should look dry within seconds. Too little fluid, by contrast, drags dry swab across adhered spots and can smear oil rather than lift it. Aim for the narrow middle, and if a first pass streaks, let the glass dry fully, take a fresh swab, and use less — never chase wet streaks with a wetter swab.
Pressure, angle, and the single direction rule
The swab should travel with the pressure of its own light contact, the way you would wipe a lens — the goal is to collect, not to scour. Keep the swab’s angle consistent through the stroke so its full edge works, and complete each pass in one unhurried motion from edge to edge without stopping, because a pause deposits whatever the swab has gathered at the pause point. One pass per side, as the main steps insist, is not economy; it is contamination control, since a used side carries the very material you are removing and redeposits it on any second journey.
Edges and corners: where the last spots live
After a technically good clean, remaining spots cluster at the sensor’s edges and corners, because the swab’s stroke naturally centres itself and because dust migrates outward under the blower’s air. A final, deliberate pass that consciously covers the full width — feeling the swab meet both edges of the glass — usually clears them. Inspect with the diagnostic frame rather than by eye, since the glass can look perfect while the test frame disagrees, and the test frame is the one that will appear in your photographs.
Building a Cleaning Kit That Matches Your Camera
Sensor cleaning supplies are sold in a fog of sizes and claims. Assembling the right kit once — matched to your sensor’s actual dimensions — removes the guesswork from every future clean.
Swab sizing, precisely
Swabs are sized to sensor formats, and the match matters more than brand: a swab narrower than the sensor forces overlapping passes that leave lines at every overlap, while an oversized swab folds at the edges and cannot clean into the corners. Measure by format, not by camera marketing name — the same body line can span formats across generations. Keep the size noted with your kit, because reordering the wrong size in a hurry, mid-cleaning-crisis, is how most owners end up improvising with the wrong tools at the worst moment.
Fluids, blowers, and the supporting cast
Use a fluid made specifically for sensor filter glass, from a sealed bottle, and replace it on the maker’s schedule rather than keeping a years-old bottle whose purity you can no longer vouch for. The rocket blower should be the kind with a filtered intake, kept in a clean bag so it does not become a dust distribution device. Add a bright torch for inspection, a magnifier if your eyes appreciate one, and a microfibre reserved exclusively for the camera’s exterior — never the sensor — and the kit is complete. Anything beyond this is retail enthusiasm.
Where cleaning happens
Choose the cleanest, calmest room available: a bathroom after the shower’s steam has settled the dust is the classic, a tidy desk away from open windows and pets serves as well. Lay out everything before the sensor is exposed, work seated with the camera stable, and keep the total exposure time of the bare sensor as short as your calm allows. The environment is half the method — a perfect technique performed in a dusty, breezy room is a lottery, while a merely good technique in settled air succeeds almost every time.
Sensor Cleaning Across Camera Types: IBIS, Sealed Shutters, and Crop Formats
Not every mirrorless sensor presents itself to the swab in the same way. Modern features change the cleaning picture in specific, practical respects that owners should understand before the first clean.
Cleaning a sensor that moves: IBIS bodies
On a camera with in-body stabilisation, the sensor floats on its stabilisation mechanism when the camera is off, and it may shift slightly if the camera is tilted during cleaning. Most makers provide a cleaning mode that locks or parks the sensor for exactly this purpose — find it in your manual and use it, rather than chasing a wandering sensor with a swab. Never attempt to hold the sensor still with the swab itself, and never clean with the camera powered in a shooting mode, because a stabilisation system waking mid-swab is a meeting nobody wants. Performed in the proper mode, an IBIS sensor cleans exactly like any other; performed casually, it teaches an expensive lesson about reading manuals first.
Cameras whose shutter closes over the sensor
Some bodies close a protective shutter curtain when powered down or when the lens is removed. That curtain is not the sensor, and it should not be swabbed as if it were — it is thinner, more delicate, and not the surface your spots live on. To clean such a camera, the manual’s cleaning mode opens the curtain and presents the filter glass; follow that procedure precisely. The curtain also changes your dust expectations, since it shields the sensor during lens changes, which is why owners of these bodies often find their diagnostic frames cleaner than their habits deserve.
Smaller formats and tighter spaces
Crop-sensor and smaller-format bodies present a smaller target in a tighter mount, which demands the correctly sized smaller swab and a steadier hand, and rewards working seated with the camera braced. The principles are identical; the margins are thinner. Owners moving between formats should kit each camera separately rather than improvising with a trimmed or folded swab, which cannot clean evenly and risks fibres at its cut edges — the false economy most likely to put a scratch on the glass it was meant to save.
After the Clean: Verification, Records, and the Next Interval
A clean is not finished when the swab is discarded. It is finished when the evidence says the sensor is clean, the record says when it happened, and your habits have absorbed whatever the clean revealed.
Verifying like a sceptic
Take the diagnostic frame under the same conditions as the before frame — same aperture, same plain bright target, same lens if possible — and compare them side by side at full magnification, panning across the whole frame rather than admiring its centre. A clean that moved dust from the middle to the corners is a partial result, and it is better discovered now than in a sky over a landscape next week. If a faint remainder sits only where no photograph will ever look for it, at apertures you never use, you are permitted to call the clean complete; perfection on the diagnostic frame beyond your photography’s needs is effort spent on a test, not on pictures.
Keeping a cleaning log
Note the date, what the diagnostic showed, and what the clean required — blower only, one wet pass, a professional visit. Across years, that tiny log becomes genuinely diagnostic: cleans needed more and more often point at storage or lens-change habits; a sudden change after a trip points at an environment; a camera that goes years between cleans confirms your prevention is working. The log also serves a future buyer, to whom a documented, gently maintained sensor is worth real money, and a future technician, who will thank you for the history.
Setting the next interval by evidence
There is no universal cleaning calendar, because dust accumulation is a biography, not a schedule. Cameras that change lenses outdoors weekly live differently from cameras wearing one lens in a studio. Let the diagnostic frame, taken whenever you notice a spot or before an important shoot, set the rhythm — clean when the evidence asks, prevent always, and never swab on a timetable alone, because every unnecessary wet clean is a small risk taken for no photographic benefit at all.
Stories From the Field: Three Cleans and What They Taught
Abstract method settles into judgement through cases. These three, drawn from the common experiences of mirrorless owners, show the guide’s principles deciding real outcomes.
The wedding photographer’s Friday night
A diagnostic frame on the evening before a wedding showed a constellation of spots from a season of outdoor lens changes. The blower cleared half; one wet pass with a fresh swab cleared most of the rest; a second pass, edges attended to, finished the work. The lesson was not the cleaning but the timing: the check happened the night before, when there was leisure to do it properly, rather than during the wedding, when there would have been none. Professionalism in sensor care is mostly a calendar habit — the important shoot is always preceded by the unimportant test frame.
The traveller and the spot that was not dust
Mid-trip, a traveller swabbed twice at a persistent spot with no change, then did the wisest thing in this guide: stopped. Aperture comparison showed the mark stayed sharp at every setting, the signature of something other than surface dust, and the camera finished the trip making excellent photographs in which the mark, at working apertures, never appeared. A service centre later identified a mark beneath the cover glass, addressed under warranty — an outcome that pressure with a third and fourth swab might have converted into a chargeable scratch. Restraint was not passivity; it was the correct technique for the actual problem.
The inherited camera and the patient restoration
An inherited camera, stored for years in a damp house, presented a diagnostic frame speckled like a night sky. Its new owner worked through the sequence across an unhurried evening — automatic cycles, blower, then three wet passes with fresh swabs, inspecting between each — and watched the frame clear progressively until only two faint marks remained, invisible at any aperture the owner used. The camera went back to work. The case is the counterweight to the traveller’s: persistence, in the right order and with the right evidence, is also a technique, and the difference between persistence and recklessness is inspecting after every pass and letting the frame, not frustration, decide whether there is a next one.
A Calm Word About Fear: Why Owners Avoid Cleaning, and Why They Need Not
Most sensors that need cleaning are not dirty because their owners are careless; they are dirty because their owners are frightened, and the fright deserves a direct answer. The surface you clean is protective glass, the tools are made for it, the method is used by technicians and careful amateurs thousands of times a day, and the alternative — a permanently spotted sensor, or a service bill and a wait for every accumulation of dust — is worse on every axis. What the fear gets right is that the first clean deserves respect: read the method, prepare the room, use the correct swab, and work without hurry. What it gets wrong is the conclusion that respect means avoidance. Owners who perform one careful clean almost universally report the same discovery — that the dread was the largest object in the room, larger than the dust, larger than the task. Clean once, cleanly, and the sensor becomes what it should have been all along: a maintained component, not a shrine.
Keep the kit together, the log current, and the diagnostic habit alive, and sensor cleaning will shrink to its proper size in your photographic life: a ten-minute maintenance task, performed rarely, without drama, that keeps the heart of your camera as clear as the photographs it was bought to make. That ordinariness is the goal of every page of this guide — the moment cleaning becomes boring, it has been mastered.
And when a fellow photographer confesses, as one eventually will, that they have never dared clean their sensor and have the spotted skies to prove it, you will be able to offer the most useful gift this guide can pass on: not just the method, but the calm that comes from having done it, verified it, and watched a clear diagnostic frame come back where the constellation used to be.
Related Guides
- best mirrorless cameras for photography
- best mirrorless cameras for travel
- best mirrorless cameras under 1000 for stills
- best mirrorless cameras for professionals
- best mirrorless cameras for landscape photography
Frequently Asked Questions
How often should I clean my mirrorless camera’s sensor?
When test shots show spots that reach your real photographs — for most owners, a few times a year, more if you change lenses outdoors often. Run the automatic cleaning cycle whenever spots first appear and use the blower before reaching for swabs. Cleaning on a fixed schedule regardless of need adds risk without benefit; cleaning on evidence keeps the sensor healthy and your skies clean.
Is it safe to touch the sensor with a swab?
Yes, with the correct swab and fluid, because you are not touching the bare sensor — you are wiping the protective glass filter bonded over it, using a tool designed for exactly that surface. The risks come from wrong tools, excessive force, a floating IBIS stage that was not locked, or power loss mid-clean. Follow your manual’s cleaning-mode procedure and the one-pass-per-side discipline and the process is routine.
Why do spots show at f/16 but not at f/2.8?
Dust rests on the filter glass slightly above the sensor. At small apertures, light arrives in narrow, near-parallel rays, casting a defined shadow of each particle onto the sensor. At wide apertures, light arrives from many angles and the shadow blurs into invisibility. That is why the diagnostic test uses f/16, and why portrait shooters can ignore dust that drives landscape photographers to the swabs.
Can I use the same swabs for different sensor sizes?
No — match the swab to the sensor. A swab must span the sensor’s full height in one pass; too small leaves bands, too large cannot sit flat and may catch edges. Swabs are sold by format (full-frame, APS-C, Micro Four Thirds and others). They are inexpensive and single-use; buy the right size for each body you own and label the packs.
My camera has a shutter that closes when off. Does it still get dusty?
Less often, but yes — dust enters whenever the shutter opens for shooting and during the moments of a lens change before it closes, and particles already inside migrate. The closing shutter is a helpful shield, not a seal. Keep the option enabled if offered, never touch or blow directly on the delicate curtain, and expect to clean occasionally regardless.
When should I pay for a professional sensor clean instead?
When two careful swab passes have not cleared the spots, when you see possible damage, oil that smears rather than lifts, or any threadlike growth, when the camera is under warranty and you prefer a documented service, or simply when your hands are not steady and the camera is valuable. Professional cleans are quick and modestly priced; a scratched sensor filter is neither.
Can I use compressed air from a can on my sensor?
No. Canned air can expel liquid propellant at sensor temperatures and pressures that damage coatings and leave residue, and its blast is far stronger than a sensor cavity needs. A hand-squeezed rocket blower delivers clean, gentle, controllable air and is the only air source that belongs near an exposed sensor. This is one of the few absolute rules in sensor care, and it is worth following without exception.
My camera’s automatic cleaning shakes the sensor. Does that replace manual cleaning?
It replaces most of it, most of the time. The built-in vibration routine is genuinely effective against loose, dry dust, which is the majority of what lands on a sensor, and running it regularly is the reason many owners rarely need a swab. What it cannot move is anything adhered — oil, pollen, moisture marks — and that residue is what the blower and wet method in this guide exist for. Think of the automatic cycle as daily housekeeping and manual cleaning as the occasional deep clean it makes rarer.
I cleaned the sensor but one spot refuses to move. What now?
Stop swabbing and diagnose. A spot identical in position and character through blower, wet passes, and fresh swabs is unlikely to be surface dust: it may sit beneath the cover glass, be a coating mark, or be a pixel fault masquerading as dirt. Photograph the diagnostic frame, compare its behaviour across apertures — true surface dust softens dramatically at wide apertures, while faults and marks behave differently — and take both the camera and the evidence to a service centre rather than escalating pressure at home.
Should I clean the sensor right before an important shoot?
Check it right before an important shoot; clean it only if the diagnostic frame says you must, and if you must, do it with time to spare rather than against a deadline. A calm clean the evening before, verified with a fresh test frame, is good practice. A hurried first-ever wet clean twenty minutes before leaving is how small problems become large ones — if the sensor’s state is tolerable at your working apertures, the disciplined choice can be to shoot and clean afterwards.