Knowing how to measure a laptop for a laptop backpack is a five-minute skill that prevents the most common backpack mistake in existence: buying for the screen size on the box and discovering the sleeve does not fit the machine in your hands. Screen size is a diagonal marketing number. Backpack sleeves care about three physical dimensions — width, depth, and thickness — and two laptops with identical screen sizes can differ in all three by enough to matter.
This guide gives you the exact measuring method, how to find the numbers without a ruler if you must, how to read a backpack compartment specification honestly, and how much clearance a good fit actually wants. Measure once, write the numbers in your phone, and every future bag purchase becomes a thirty-second comparison instead of a return label.
Disclosure: As an Amazon Associate, kajuandouglas.com earns from qualifying purchases. Links to Amazon on this page are affiliate links; they cost you nothing extra. Listing details such as price and availability change often, so check the current Amazon listing before you buy.
Quick answer: close the laptop and measure its width (left to right), depth (front to back), and thickness (including the feet) in inches or centimeters. Compare those three numbers — not the screen size — against the backpack laptop compartment stated internal dimensions. You want a close fit: the machine slides in with light finger pressure, with roughly a finger-width of total grace, not inches of swimming room.
Gear for This Guide
Verified bags from makers who publish compartment dimensions — the shortlist your measurements deserve.

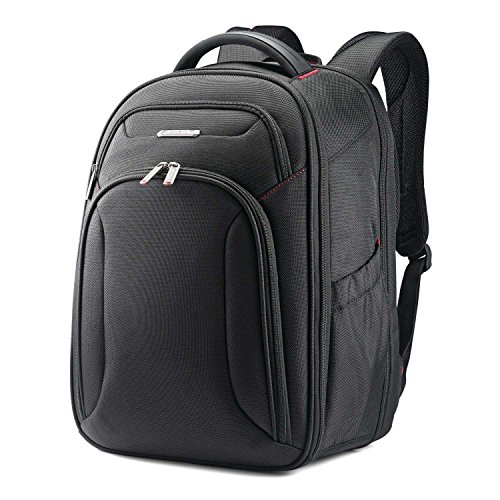
Samsonite Xenon 3.0 Laptop Backpack, 1680D Ballistic Poly, Fits 15.6” Laptop, TSA Compatible, Air Mesh Back Padding, Tablet Pocket, Smart Sleeve, Quick Stash Pocket, Durable & Lightweight – Large — A compartment specified to the standard 15.6-inch class with published dimensions — the kind of honest spec this guide teaches you to demand. Check price on Amazon.

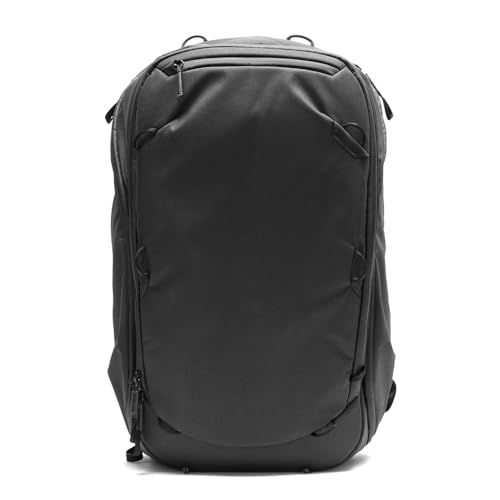
Peak Design Everyday Backpack 20L, Black, Fits 15″ Laptop — A design that publishes fit by laptop size and backs it with a structured sleeve — measure against its stated 15-inch class fit before assuming your variant qualifies. Check price on Amazon.

Thule Paramount Backpack 24L, Black — A mid-size commuter whose sleeve dimensions are listed by the maker — an easy test-fit candidate for standard 14- to 15-inch class machines. Check price on Amazon.
In this guide
What You Need
- A tape measure or ruler
- Your laptop, closed
- A phone or notebook to record three numbers
- The backpack listing or tag showing laptop compartment dimensions
No tape measure? Use a sheet of standard paper as a gauge — letter paper is 8.5 by 11 inches, A4 is 210 by 297 millimeters — or find your exact model dimensions on the manufacturer support page, which lists them to the tenth of a millimeter. Both beat guessing from the screen size.
How to Measure a Laptop for a Laptop Backpack: Step by Step
Step 1: Close the laptop and measure the width
Width is the long horizontal edge, left to right across the keyboard side, with the laptop closed and sitting as it would slide into a sleeve. Run the tape straight across the widest point, including any slight protrusions — some machines have a lip or hinge that extends the true footprint. Record the number exactly, to the nearest eighth of an inch or millimeter. Do not round down out of optimism; sleeve fit is a physical negotiation and the tape is the honest broker.
Step 2: Measure the depth, front edge to hinge
Depth is the distance from the front edge — where your wrists rest — to the back hinge edge, again with the machine closed. This is the dimension that most often surprises: two laptops with the same screen diagonal can differ in depth by half an inch because of bezel sizes and hinge designs, and depth is usually the tight dimension in a sleeve. Measure at the deepest point if the shape is irregular. Record it beside the width: you now hold the footprint, the two numbers that decide most fits.
Step 3: Measure the thickness honestly, feet included
Thickness is measured with the laptop closed, from the desk surface to the top of the lid, including the rubber feet — because the sleeve must swallow the feet too. Modern thin laptops make this easy; older or gaming machines can be three times thicker than an ultrabook, and thickness is the dimension that decides whether a slim designer sleeve is even a candidate. If you use a hardshell cover or a thick skin on the machine, measure with it on if you intend to keep it on inside the bag.
Step 4: Alternatively, pull the official dimensions
Every manufacturer publishes exact dimensions on the model support or specifications page, usually as width by depth by height in millimeters. Search your full model name plus dimensions or specifications. Cross-check against your tape if you measured — they should agree within a couple of millimeters; if they disagree wildly, you measured a different edge or a different model variant, and resolving that now is cheaper than resolving it at the returns desk. Save the official numbers in your phone notes under the laptop name; you will reuse them for sleeves, bags, and docks.
Step 5: Read the backpack compartment spec like a skeptic
Find the laptop compartment internal dimensions on the product page or tag — reputable makers publish them; a listing that only says fits 15-inch laptops is giving you a genre, not a measurement. Compare dimension by dimension: your width against their width, depth against depth, thickness against thickness. Your numbers must be smaller in all three, by a little. If a maker publishes only a maximum laptop size statement, treat it as approximate and favor retailers with painless returns. Our choosing guide flags this spec as a top quality tell for exactly this reason.
Step 6: Judge the fit margin: snug, not stuffed, not swimming
The ideal sleeve admits the laptop with light, even pressure — a finger-width of total grace across the footprint is a good mental image. Too tight is a daily wrestling match that wears the sleeve lining and your patience, and risks the zipper teeth meeting the machine corners. Too loose lets the laptop shift and strike the compartment edges in transit, defeating the padding purpose. If you are between sizes, the tiebreaker is padding quality: a slightly roomy fit in a thick, structured sleeve protects better than a painted-on fit in a thin one. When possible, test with the real machine before cutting tags.
Common Mistakes
Trusting the screen-size label
The founding error. A thin-bezel 15.6-inch machine and an older thick-bezel one share a label and almost nothing else. Screen diagonal measures the display corner to corner; sleeves contain the whole computer. Anyone who has returned a beautiful, wrong bag has learned this — learn it from them instead, with a tape measure, in five minutes.
Measuring with the laptop open
Open measurements give you keyboard-deck numbers that omit the lid, hinge overhang, and the true closed profile the sleeve must contain. Always measure closed, as the machine travels. It takes ten seconds longer and produces the only numbers that mean anything.
Forgetting the charger and mouse in the plan
Fit is not only the sleeve. A machine that fits perfectly in a bag with no sane home for its charger brick and mouse has not actually fit your life. When you compare bags, hold the whole carry in mind — the measuring mindset applies to your daily load and its dimensions too, as our packing and sizing guides detail.
Rounding in your favor
A laptop that is 15.1 inches wide does not fit a compartment rated to 15.0 because the numbers are close and you want the bag. Manufacturers rate compartments conservatively or not; assume not. If your machine exceeds a stated dimension by any amount, believe the tape, and look at the next size up — or accept a test-fit with a guaranteed return as the only honest path.
Measuring once and forgetting the numbers
The point of measuring is a permanent record. Three numbers in your phone notes — plus the model name — turn every future sleeve, bag, dock, and stand purchase into a lookup. Owners who skip the record remeasure or re-guess at every purchase, and the guessing error rate, as the returns industry can testify, is undefeated.
Pro Tips
Measure in both inches and centimeters if you shop international brands; spec sheets vary by market and a unit mix-up is a silent fit killer.
Gaming and workstation laptops: measure the power brick too. Its size eliminates more slim bags than the laptop itself does.
If your laptop lives in a hardshell case, decide whether the case travels inside the sleeve — then measure the combination and shop for that.
Keep the three numbers with the laptop serial and purchase date in one note. It is the machine identity card, useful for support calls, insurance, and every accessory decision.
Worked Examples: Measuring Real Laptops and Matching Them to Bags
Abstract instructions become clear the moment you run the numbers on actual machines. The examples below follow the same measuring method as the main steps, and they show where owners most often go wrong — usually by trusting the screen-size label instead of the tape.
A typical thin 14-inch laptop
A mainstream 14-inch thin-and-light typically measures around 31 to 32 centimetres wide, about 22 centimetres deep, and under 2 centimetres thick including its rubber feet. On paper that sounds like it belongs in any bag sold for 14-inch machines, and usually it does — but the depth is the figure to watch, because a few models with deep hinge designs or protruding rear ports push closer to 23 centimetres. A compartment whose internal depth is exactly your laptop’s depth will technically fit and practically fight you every morning, so the margin guidance in the main steps applies: a centimetre or so of breathing room in width and depth makes daily use pleasant rather than a wrestling match.
A 15.6-inch mainstream laptop and the 16-inch trap
The classic 15.6-inch laptop is roughly 36 centimetres wide and 25 centimetres deep, while many newer 16-inch models are barely larger — some are actually narrower thanks to thin screen bezels, despite the bigger display. This is the clearest proof that screen size does not predict body size. Owners upgrading from an older 15.6-inch machine to a modern 16-inch model are often pleasantly surprised that the old bag still fits, while owners who buy a bag labelled for their new screen size without checking can end up with a compartment sized for a much bulkier older design. Measure the new machine, compare it with the internal dimensions of the bag you already own, and only then decide whether a new bag is needed at all.
Gaming laptops and other outliers
Gaming machines break every assumption. A 17-inch gaming laptop can exceed 39 centimetres in width and 29 centimetres in depth, with thickness approaching 3 centimetres once feet and rear cooling protrusions are counted — and many designs extend beyond the hinge with exhaust housings that must be included in the depth measurement. These machines need compartments from bags designed for them, not the largest mainstream commuter bag. The same caution applies to mobile workstations, rugged laptops with protective bumpers, and any machine kept permanently in a hard shell case, which adds its own thickness and width to every dimension you measured on the bare laptop.
Two-in-ones, tablets, and secondary devices
A 2-in-1 measured like a laptop — closed, flat, feet included — gives you its true footprint, but remember that many owners also carry its pen and a separate keyboard or stand, which need a home in the plan. Tablets with attached keyboard covers should be measured with the cover on, since that is how they travel. If you carry both a laptop and a tablet, measure and plan for both footprints rather than assuming the tablet can simply slide in beside the laptop; in most compartments that arrangement presses the two screens’ surfaces together and leaves both under-protected.
Reading Backpack Specifications Like a Manufacturer
Bag listings mix internal dimensions, external dimensions, and marketing numbers with very little consistency between brands. Knowing what each figure actually describes lets you compare two bags honestly instead of hoping the larger-sounding one is larger where it counts.
Internal versus external dimensions
Only the internal dimensions of the laptop compartment decide fit. External bag dimensions include padding, shell thickness, and organisational panels, and can overstate the usable laptop space by several centimetres in each direction. If a listing gives only external measurements and a screen-size claim, treat the claim as approximate and look for the compartment measurements in the detailed specification, the size chart images, or the manufacturer’s own product page, which is usually more precise than a marketplace listing. When two sources disagree, trust the smaller figure — it is the safer planning number.
What litre capacity does and does not tell you
Litres describe total volume across all compartments, measured by methods that vary between brands, and they say nothing about the laptop compartment’s shape. A tall, narrow bag and a short, wide bag can share a litre figure while fitting entirely different machines. Use litres to judge cargo space for everything else you carry — clothes, books, lunch, gym kit — and use the compartment’s width, depth, and thickness figures to judge the laptop. Owners who shop by litres alone are the ones surprised at the door by a bag that holds plenty and fits nothing.
Sleeve sizing and the stretch question
Separate laptop sleeves are sized the same inconsistent way, so apply the same discipline: compare your three measurements with the sleeve’s internal dimensions, not its label. Neoprene and stretch fabrics forgive a few millimetres, which can rescue a marginal fit, but a sleeve stretched tight over a laptop offers less padding, strains its own zip or stitching, and can press on the laptop’s lid. A sleeve that closes without force and holds the machine without sliding is the target. If you plan to use a sleeve inside a backpack compartment, measure the sleeved laptop as a single unit and check that combined footprint against the compartment.
Fit Problems Diagnosed: Too Tight, Too Loose, and Just Awkward
If you already own a bag and the fit feels wrong, the symptoms point to specific causes. Diagnosing them properly tells you whether the fix is technique, a sleeve, or a different bag.
Signs the compartment is too small
You have to angle the laptop in rather than sliding it straight down; the zip closes only with pressure on the lid; the compartment’s seams are visibly strained; or the laptop’s corners have begun wearing shiny spots — or worse, small tears — into the lining. A too-tight fit also flexes the laptop slightly every time the bag is set down or squeezed in a crowd, which screens and hinges dislike over months. There is no technique fix for a genuinely undersized compartment. A thinner sleeve will not help if the bare machine already strains the space, and forcing the fit trades a bag problem for a laptop problem.
Signs the compartment is too large
The laptop slides side to side when you walk, tips forward when the bag is half empty, or arrives with its corners knocked despite thick padding. Excess space lets momentum build, so a loose laptop can hit the compartment’s edge harder than a snug one in a drop. The fix here is easy and cheap: a correctly sized sleeve inside the compartment takes up the slack and adds a second layer of padding, or a folded soft item placed beside the machine on light days keeps it settled. Many bags also have an internal strap for exactly this purpose — use it, since it exists to stop the slide.
Awkward fits: chargers, mice, and odd shapes
Sometimes the laptop fits and everything else does not. A bulky gaming charger, a full-size mouse, or a laptop stand can distort the main compartment and press hard points into the laptop’s lid through the divider. Plan homes for these items with the same measurements you used for the laptop: check the charger’s brick dimensions against the pocket you intend for it, and never let a charger brick rest directly against the laptop compartment’s wall without padding between. If the accessories genuinely cannot ride without pressing on the machine, a small separate tech pouch carried in the main compartment — or a bag with a dedicated accessories pocket — solves what measuring alone cannot.
Measuring for Special Cases: New Purchases, Gifts, and Growing Needs
Not every measurement starts with a laptop in your hands and a bag on a screen. A few common situations need the method adapted slightly, and each has a trap worth avoiding.
Buying the bag before the laptop, or the laptop before the bag
When a laptop purchase is planned but not made, shortlist the exact models first and pull their official dimensions from the manufacturers’ specification pages, then shop for the bag against the largest of them. Guessing a future machine’s size from its screen class is how owners end up rebuying bags. The reverse order — bag first for a current machine, laptop changing later — argues for a compartment with a centimetre or two of margin over today’s machine, since laptops in the same class vary enough that today’s perfect fit can be next year’s strain.
Buying for someone else
For a gift, ask for the laptop’s exact model name and look up its dimensions rather than asking the owner to measure, unless they enjoy that sort of task. Model names are printed on the base sticker or in the system settings, and one lookup gives you all three dimensions reliably. If the model cannot be identified, a bag with an adjustable or generously sized compartment and a good returns policy is the honest fallback. Keep the receipt either way; fit is a physical fact that no amount of research fully guarantees until the machine slides in.
When your carry changes: stands, monitors, and new kit
Measuring is not a one-time event. Adding a portable monitor, a laptop stand, or a full-size keyboard changes the footprint of what travels, and each addition deserves the same three-measurement treatment before it is assigned a place in the bag. Portable monitors in particular are nearly as large as the laptop itself and just as fragile, and they need their own padded position rather than sharing the laptop’s compartment unprotected. Re-run your numbers whenever your kit changes materially, and the bag that results will keep fitting the life you actually live.
Measuring Odd Shapes: Thick Hinges, Bumpers, Stands, and Docks
The standard three measurements assume a tidy rectangular slab. Many real machines depart from that ideal, and each departure has a correct way to be measured so the number you plan with is the number the compartment will actually experience.
Hinges, exhausts, and rear protrusions
Measure depth from the very front edge to the furthest rear point of the closed machine, including any hinge housing, exhaust extension, or decorative rear bar. Some designs extend a centimetre or more beyond the hinge line, and that extension is unforgiving: it either fits the compartment’s depth or it does not. Similarly, measure width including any side protrusions such as chunky port housings on rugged models. When a specification sheet and your tape disagree, the tape is describing your actual machine, including its manufacturing tolerances, so plan with the tape.
Laptops that live on stands or with attached accessories
If your laptop travels attached to nothing but lives on a stand at each end, the stand needs measuring too, as its own item, before it is promised a place in the bag. Collapsible stands vary enormously in folded footprint; some are slim bars, others are flat plates nearly the size of the laptop itself. The same applies to portable monitors, external drives in rugged cases, and docking stations carried between home and office. Each gets three measurements and an assigned home, and anything that cannot be assigned a home without pressing on the laptop should travel separately rather than hopefully.
Feet, cases, and the thickness stack
Thickness is where small additions stack up invisibly: rubber feet, a snap-on shell, a keyboard cover left in place, a privacy screen. None adds much alone; together they can add the better part of a centimetre. Measure the machine in its full travelling configuration, then check that figure against the compartment with particular honesty, because thickness is the dimension with the least give — a compartment’s width and depth have fabric flex, but a thick laptop in a thin compartment strains the zip along its whole length every single day.
A Buyer’s Checklist: From Measurements to Purchase Without Regret
With honest numbers in hand, the purchase itself becomes a sequence of checks rather than an act of optimism. Working through them in order prevents the common outcome of a bag that is nearly right in three ways and wrong in the one that matters.
The desk check before you order
- Write your laptop’s three measurements in centimetres and inches, since listings mix units freely.
- List your three bulkiest regular carry items with their rough sizes, so total capacity is judged honestly.
- Decide your non-negotiables before browsing: compartment access style, water resistance, strap comfort, appearance for your workplace.
- For each candidate bag, record the compartment’s internal dimensions specifically — not the bag’s external size, not the headline screen size.
- Check the margin in each dimension against the guidance in the main steps: comfortable clearance in width and depth, honest thickness.
This paperwork takes ten minutes and eliminates most returns. Bags that survive the desk check have earned a closer look; bags that fail it will not be rescued by good looks or a tempting discount.
The in-person or first-day fit test
When the bag arrives or you try it in a shop, test with your real laptop and your real daily load, not with cushions or optimism. The laptop should slide in and out without angling or force, the zip should close without pressure, and the loaded bag should sit comfortably on your back at your normal strap setting. Walk with it, set it down, open it, and retrieve the laptop as you would at a desk or security tray. If buying online, keep the packaging until this test is done, and do the test on the first day while a return is effortless rather than discovering the strain a month later.
When two bags both fit: the tie-breakers
Fit being equal, decide on the details that govern daily satisfaction: how the compartment opens, whether the bag stands upright when set down, whether the straps suit your shoulders, and whether the organisation matches your small items. A bag you enjoy using gets used properly; a bag that irritates you gets overfilled, forced, and left unzipped. Comfort and convenience are not soft criteria — over years of daily use they determine whether the protection you bought is the protection you actually get.
Keeping the Numbers Useful: Records, Changes, and Second Bags
Measurements taken once and forgotten help once. Kept and revisited, they make every future purchase — bags, sleeves, cases, even the next laptop — faster and more accurate.
Recording and reusing your measurements
Keep your laptop’s three dimensions in a note on your phone alongside its exact model name. That single note answers questions for years: whether a sleeve fits, whether a friend’s spare bag would work, whether the machine fits an airline-friendly carry case. When you help family members with the same task, measure their machines into the same note rather than relying on memory. It sounds like a small administrative habit, and it is — which is exactly why it works where grander systems fail.
When to measure again
Measure again whenever the travelling configuration changes: a new case, a different machine, a portable monitor joining the daily carry, or a move from a slim laptop to a workstation. Also measure again if a bag that once fit begins to strain, because that change is information — something has been added, padding has compressed, or a case is thicker than the one it replaced. Treating fit as a current fact to be checked, rather than a permanent fact established once, keeps the whole system honest with very little effort.
Sizing a second, smaller carry option
Many owners eventually add a sleeve or a small day bag for light days. The measurements discipline applies unchanged, with one addition: decide which items transfer and measure the transfer kit — laptop, charger, pouch — as a set. A sleeve sized to the laptop alone that cannot accommodate how you actually move between bags will sit unused. The light option succeeds when moving down a size takes under a minute and nothing essential gets left behind in the big bag’s pockets.
Understanding Compartment Design: Why Two Bags With the Same Numbers Fit Differently
Internal dimensions are necessary but not sufficient, because compartments are built differently. Two bags quoting identical measurements can accept the same laptop with very different ease, and knowing why helps you read between the lines of a specification.
Suspended, padded, and false-bottom designs
Many quality compartments suspend the laptop slightly above the bag’s base, so a set-down impact compresses padding rather than the machine’s corner. This design steals a little usable depth, which is rarely reflected in quoted dimensions. A compartment with a reinforced false bottom protects superbly but can make a marginal depth fit impossible. When a bag’s description emphasises suspension or a false bottom, allow a touch more margin in depth than the bare numbers suggest, and prefer the fit test over arithmetic for the final decision.
Opening styles and usable space
A compartment that opens fully, clamshell style, accepts a laptop more easily than a top-loading slot of the same internal size, because you can place the machine rather than slide it past friction on all sides. Side-access compartments are convenient but their openings are often narrower than the compartment itself, making the opening — not the interior — the limiting measurement. If a design interests you, check the opening width where it is given, and picture the daily motion honestly: a fit that requires a specific angle and a wiggle will annoy you hundreds of times a year.
Padding thickness and where it sits
Padding quoted in a listing is usually the thickest point, often the back panel, while corners and the base — where impacts actually land — may be thinner. Generous overall dimensions with thin corner padding can protect worse than snug dimensions with serious corner reinforcement. None of this appears in the three numbers, which is why the numbers are a filter, not a verdict: they eliminate bags that cannot fit, and then design, construction, and the fit test choose among the bags that can.
Common Measuring Questions From Real Buying Situations
Beyond the frequently asked questions at the end of this guide, a few situations come up so often in buying conversations that they deserve fuller treatment here.
My laptop fits, but only diagonally. Is that acceptable?
No — a laptop that must be angled in is telling you the compartment is too small in at least one dimension, and diagonal carrying concentrates pressure on two corners while leaving the machine free to shift. It also means every removal and replacement is a small struggle that will eventually scuff the laptop and wear the lining. Treat a diagonal fit as a failed fit, however close it feels, and size up or choose a different compartment shape.
The brand’s size chart and my tape disagree. Which do I trust?
Trust your tape for your machine and treat the brand’s chart as describing their compartment as they measured it — which may include padding differently, round generously, or describe a different production revision. When the two disagree by a small margin, the fit test decides; when they disagree by a lot, believe the smaller usable figure and choose accordingly. Keeping a note of your machine’s true dimensions, as suggested earlier, means you only ever have to resolve this argument once per bag rather than once per shopping session.
Does weight distribution change what size I should buy?
Indirectly, yes. A larger bag invites a larger load, and a larger load carried daily has ergonomic costs that sizing guides never mention. If your measured laptop fits a compact bag and your other carry is modest, choosing the compact option protects your back as well as your machine. Size for the laptop first, the honest daily load second, and the exceptional day last — exceptional days can borrow a tote, but your shoulders live with the daily choice all year.
From Measurements to a Shortlist: Comparing Candidate Bags Side by Side
Owners often stall at the final stage, with three bags open in three tabs and no way to choose. A small comparison table of your own — built from your measurements, not from marketing — resolves the stall quickly and honestly.
Building the comparison
For each candidate, write down the compartment’s internal width, depth, and thickness, the margin each leaves over your laptop’s figures, the total capacity in litres, and one line on the opening style. Bags usually separate themselves at this point: one will have the honest margins, another will be revealed as relying on its headline screen size, and a third will fit the laptop while clearly failing your other carry. If a candidate’s internal dimensions cannot be found anywhere, that absence is itself a finding — makers who measure carefully tend to publish carefully.
Reading reviews with your numbers in hand
Owner reviews become far more useful once you know your measurements. Search them for your laptop’s model name or its dimensions rather than reading generally, because fit experiences only transfer between machines of similar size. A review saying a bag swallowed a slim ultraportable tells a gaming-laptop owner nothing. Equally, complaints about a compartment being oddly tight often name the machine involved, and comparing its published dimensions with yours converts anecdote into data you can actually use.
The final sanity check before paying
Re-read your own numbers once, confirm the bag’s compartment figures one final time on the manufacturer’s page rather than a marketplace listing, and check the returns terms in case the fit test disagrees with both. Then buy without reopening the question. Measurement, done properly, has already answered the question that matters; the remaining differences between bags that genuinely fit are comfort and taste, and either finalist will serve you well.
A Quick Word on Units, Rounding, and Honest Numbers
Listings mix centimetres and inches freely, sometimes within the same size chart, and conversion errors are a quiet cause of bad fits. Convert carefully — one inch is 2.54 centimetres — and when a converted figure lands suspiciously close to your laptop’s measurement, treat the margin as smaller than it looks rather than larger. Round your laptop’s measurements up to the nearest half centimetre for planning, and round a compartment’s quoted dimensions down by the same amount. That double pessimism sounds excessive until you remember it is absorbing manufacturing tolerances, padding compression, and optimistic marketing all at once, and that the cost of the habit is occasionally choosing a bag one size more generous, while the cost of skipping it is a bag that never quite closes.
Related Guides
- best laptop backpacks for work
- best laptop backpacks for under 100
- best backpacks for camera
- best laptop backpacks for men
- best laptop backpacks for women
- how to pack a laptop backpack
- laptop backpack vs messenger bag
- hard shell vs soft laptop backpack
Frequently Asked Questions
My laptop is 15.6 inches. What backpack size do I buy?
Whichever one whose compartment internal dimensions exceed your machine measured width, depth, and thickness — which you now know is a measurements question wearing a screen-size costume. Many 15.6-inch machines fit compartments labeled for the 15- to 16-inch class; thin models sometimes fit generous 14-inch class sleeves. Start with bags whose stated compartment dimensions beat your tape numbers slightly, and ignore any listing that will not state dimensions at all.
How much extra room should the sleeve have?
Aim for a close fit with roughly a finger-width of total grace — enough that the machine slides in with light pressure and slides out one-handed, not so much that it shifts in transit. In numbers, a few millimeters to about a centimeter per dimension beyond your machine is the healthy zone. More than that and the padding cannot do its job in a knock; less and daily use becomes a fight you will eventually solve by leaving the laptop out of the sleeve, unprotected.
The listing only gives a liter capacity. How do I judge fit?
Liters describe the whole bag volume and say nothing reliable about the sleeve — a tall, narrow 25-liter bag can reject a machine a squat 20-liter swallows. If the maker will not publish compartment dimensions, treat fit as unverified: buy only with a free return, test with your machine immediately, and decide within the window. Better, shortlist makers who publish dimensions; the spec sheet honesty correlates with build honesty more often than not.
Do I measure a 2-in-1 or tablet the same way?
Yes — closed footprint and thickness, exactly as with a laptop, with one addition: note where its ports and buttons sit if you will charge it in the bag, and for pen-equipped devices, measure with the pen attached if it rides attached. Tablets in keyboard cases should be measured in the case, as that is the object the sleeve must contain. The method is universal because physics is.
What if my laptop is an unusual size, like a 17-inch gaming machine?
Then dimensions matter even more, because your shortlist is genuinely small: look for bags explicitly built for 17-inch class machines, verify all three numbers with extra care on thickness and the power brick, and expect a larger-capacity bag as the honest consequence. Do not be talked into a 15-inch class bag that almost fits — almost, in sleeve language, means the zipper closes on your computer corner twice a day.
Can a sleeve that is too big still protect well?
Partially. Thick, structured padding compensates for modest looseness, and adding a slim internal sleeve sized to your machine inside a roomy compartment is a legitimate two-layer solution many travelers use. What does not work is a loose machine in a thin, floppy compartment — the knock travels straight through. Judge the combination of fit and padding together; either one excellent can rescue the other merely good, but neither poor is acceptable.
Does a laptop compartment’s stated size include the padding?
It varies by brand, which is exactly why margins matter. Some manufacturers quote the compartment’s internal usable space, while others quote the padded pocket’s outer dimensions, making the usable space smaller than the number suggests. Planning for roughly a centimetre of clearance in width and depth absorbs most of this inconsistency, and a bag with a clear internal-dimensions figure from the manufacturer is always preferable to one that only advertises a screen size.
Should I measure my laptop with its case or skin on?
Yes, if that is how it travels. A hard shell case can add several millimetres to the thickness and a little to the width and depth, and a thick skin or bumper adds more. Measure the machine exactly as it will ride in the bag — case on, feet included, lid closed — and use those figures. Owners are most often caught out on thickness, where a case quietly turns a comfortable fit into a strained zip.
How do I measure for a backpack if my laptop has a particularly thick base but a thin lid?
Measure thickness at the thickest point of the closed machine, which is almost always the base near the hinge, and plan the compartment around that figure. Compartments experience the maximum thickness, not the average, and a lid-end measurement will understate what the zip and seams must accommodate. If the difference between the two ends is large, a compartment with some fabric give or a slightly deeper profile will close more comfortably than a rigid, exactly sized one.
Should I trust a bag that lists only a maximum laptop diagonal?
Treat it as a rough filter, not a promise. Diagonal figures describe a screen class, and two machines with the same diagonal can differ by centimetres in width and depth depending on their bezels and design era. A bag listing only a diagonal has not given you enough information to guarantee fit, so look for its full internal dimensions elsewhere or choose a maker who publishes them. Your three tape measurements remain the standard every claim should be checked against.