Knowing how to clean a laptop backpack properly matters more than it sounds, because the thing carries your computer against your back through every coffee spill, train floor, and rainy platform of your life — and most owners never wash it once. The good news: backpacks are forgiving. The caution: they are not laundry. Structured laptop compartments, foam padding, coatings, and leather trim all have opinions about washing machines and hot water, and ignoring them turns a cleaning day into a replacement purchase.
This guide covers the safe universal method — hand washing with mild soap — plus spot care for the classic stains, odor rescue, and the drying step everyone rushes and nobody should. Check your bag care label first; where it and this guide disagree, the label wins, because the maker knows what is inside the seams.
Disclosure: As an Amazon Associate, kajuandouglas.com earns from qualifying purchases. Links to Amazon on this page are affiliate links; they cost you nothing extra. Listing details such as price and availability change often, so check the current Amazon listing before you buy.
Quick answer: empty and vacuum the bag completely, spot-treat stains, hand wash in a tub of lukewarm water with a small amount of mild detergent, rinse thoroughly, press water out with towels — never wring — and air dry fully, upside down then right side up, away from direct heat. Skip the washing machine unless the maker explicitly allows it.
Gear for This Guide
Two verified bags whose fabrics reward the gentle method — for different reasons.

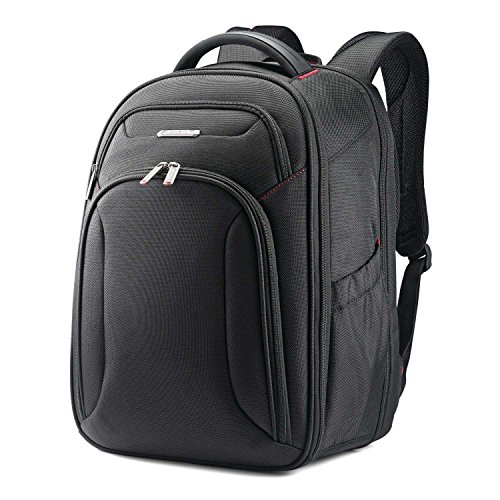
Samsonite Xenon 3.0 Laptop Backpack, 1680D Ballistic Poly, Fits 15.6” Laptop, TSA Compatible, Air Mesh Back Padding, Tablet Pocket, Smart Sleeve, Quick Stash Pocket, Durable & Lightweight – Large — Ballistic-nylon business bags like this one clean exactly as this guide describes — the tight weave releases dirt well and shrugs off spot treatment, one more argument for the fabric. Check price on Amazon.

Thule Chasm 26L Backpack, Fits 16″ Laptop, Weather-Resistant Materials — Weather-resistant shells such as this Thule design mostly need a wipe-down routine rather than full immersion — check the label, because coated fabrics often prefer the gentlest path of all. Check price on Amazon.
In this guide
What You Need
- A bathtub, large sink, or basin
- Mild detergent — a small amount of gentle laundry liquid or castile soap
- A soft brush or old toothbrush, and a soft cloth
- Two or three clean towels
- A vacuum with a crevice tool
- White vinegar or a baking soda paste for odors and stubborn spots (optional)
Before any water touches the bag, photograph the care label and test your detergent on a hidden patch — inside the back panel seam is ideal — and wait ten minutes. Colorfastness surprises are preventable in exactly this one way.
How to Clean a Laptop Backpack: Step by Step
Step 1: Empty it completely — then vacuum the evidence
Remove everything, including the crumbs, paper clips, and mysterious grit that live in every working backpack. Unzip every pocket, turn the bag upside down over a bin, and shake. Then vacuum inside every compartment with the crevice tool, paying attention to seams and the laptop compartment corners where grit accumulates — that grit is abrasive, and washing it into the fabric grinds it in. Remove any detachable straps, hip belts, or inserts the maker designed to come off, and note the care label instructions now that you can actually read them in good light.
Step 2: Spot-treat the stains before the bath
Most backpack grime is local: the bottom panel, the straps where hands grab, the water-bottle pocket. Pre-treat those areas with a dab of your mild detergent worked in with the soft brush, and give grease spots — the classic is a leaked lunch or hand-cream mark — a paste of baking soda and water for fifteen minutes to draw the oil out. Ink responds to patience and a cloth with a little rubbing alcohol, dabbed, never rubbed, and tested first. Spot work done now means the overall wash can stay gentle, which is the whole strategy.
Step 3: Hand wash in lukewarm water with restraint
Fill the tub with lukewarm water — never hot, which can damage coatings, foam, and adhesives — and add a small amount of detergent; a teaspoon or two is plenty, because excess soap is the enemy of rinsing. Submerge the bag, press it gently to work water through, and let it soak twenty to thirty minutes. Then go over surfaces with the soft brush: straps, back panel, bottom, and pocket linings. Work the laptop compartment gently — its foam and structure are the parts you are protecting. If the water is filthy, change it once rather than scrubbing harder.
Step 4: Rinse until the water runs clear
Drain the tub and rinse the bag under lukewarm running water, or in repeated changes of clean water, pressing gently as you go. Detergent residue left in fabric attracts dirt faster afterward and can irritate skin where straps touch your neck — rinse longer than feels necessary. Pay special attention to padded straps and the back panel, which hold soap like sponges. When the squeeze water shows no suds and feels slick-free, you are done; not before.
Step 5: Press the water out — never wring
Lift the bag, let it drain, then press it between towels, rolling gently to push water out of the padding. Never wring or twist a structured backpack: the laptop sleeve frame, foam panels, and strap attachments can crease, crack, or tear at their stitching under torsion. Stand the bag upside down over the tub or a towel for the first hour so the main compartment drains by gravity, with all zippers open and pockets pulled outward to expose their linings to air.
Step 6: Air dry completely, with patience as the method
Dry the bag in moving air — a fan in the room is ideal — away from radiators, direct sun, and tumble dryers, whose heat warps foam and melts coatings. Prop compartments open with clean towels or pool noodles so air reaches the laptop sleeve. Drying takes a day, sometimes two for thick padding, and it is finished when the padding feels dry under firm pressure, not when the surface feels dry. Putting a damp bag back into service is how mildew moves in — and mildew is a smell that outlives apologies.
Step 7: Finish: deodorize, reproof, inspect
If any odor survives washing, a light interior wipe with diluted white vinegar, left to air, handles most cases; persistent smells yield to an enzyme-based odor spray made for sports gear. If your bag had a water-resistant coating that years and washing have thinned, a spray-on fabric water repellent restores the beading — apply it outdoors, evenly, and let it cure fully. Finally, inspect while it is clean: zipper action, strap stitching, the laptop sleeve seams. Cleaning day is inspection day, and a loose stitch found now is a free fix compared to a failed strap in month nine.
Common Mistakes
Machine washing a structured laptop backpack
Agitators and spin cycles attack exactly what makes a laptop bag a laptop bag: the sleeve structure, foam panels, glued reinforcements, and strap anchors. Some soft, unstructured daypacks tolerate a gentle machine cycle if the maker allows it — the label decides. When in doubt, the tub is always safe and the machine is a gamble with your computer protection as the stake.
Using hot water, bleach, or harsh detergents
Heat degrades water-resistant coatings and foam; bleach and strong chemicals attack colors, fibers, and the adhesives inside structured panels. Mild detergent in lukewarm water cleans a backpack completely — the grime is ordinary dirt and body oil, not a hazmat event. If a stain survives gentle treatment, treat the stain specifically rather than escalating the whole wash.
Drying with heat to save time
Radiators, hair dryers, and tumble dryers warp the very structure you washed the bag to preserve, and can delaminate coatings in a single session. Air and time are the method. A fan pointed at the bag is the only acceptable accelerator, and even then, padding decides the schedule — test by firm pressure before declaring it dry.
Storing or using the bag while still damp inside
The laptop compartment is the last place to dry and the first place mildew wants to live. A bag put away damp returns with a smell that survives ordinary washing and a mold risk against the computer it carries. Confirm the deep padding is dry, store the bag unzipped in a ventilated place, and never seal a just-washed bag in plastic or a closed closet.
Forgetting the straps and back panel
The parts against your body collect the most oil and sweat and get the least cleaning attention, because they are not where the visible dirt is. They are also where odor lives. In the wash, give straps and back panel the brush time their contact with you has earned — your shirts will notice the difference before your eyes do.
Pro Tips
Clean on a schedule, not a crisis: a working commuter bag benefits from a wash every few months, and a quick vacuum-and-wipe monthly keeps the deep wash easy.
Between washes, a damp cloth with a drop of mild soap handles fresh spills in two minutes — coffee treated today is a wipe; coffee treated next month is a stain with a biography.
Keep a small liner or pouch habit for the dirty actors — gym clothes, lunch containers, umbrellas — so the bag interior needs cleaning for dust, not for soup.
Photograph the bag before its first wash. If a warranty question ever arises about a coating or a seam, the before picture is evidence you will be glad exists.
Cleaning Different Backpack Materials, Panel by Panel
The general wash in the main steps treats your pack as one object, but a laptop backpack is really four or five different materials stitched together, and each one rewards slightly different handling. Spending ten minutes treating them individually is the difference between a bag that looks refreshed and a bag that looks tired in new places.
Nylon and polyester shells
Most laptop packs use woven nylon or polyester with a water-repellent coating on the face and a polyurethane layer underneath. These fabrics tolerate the lukewarm hand wash well, but they dislike prolonged soaking, which can soften that inner coating over repeated washes and eventually cause flaking inside the compartment. Keep total immersion under about twenty minutes, work the dirtiest areas first so the bag is not sitting in grey water while you scrub one cuff, and never use fabric softener. Softener leaves a residue that attracts dirt, dulls the water-repellent finish, and can make straps feel oddly slick against clothing.
Mesh back panels and shoulder straps
The padded mesh that sits against your back absorbs more sweat than any other part of the bag, and it is also the slowest to release odours. Work a small amount of diluted detergent directly into the mesh with a soft brush, using short strokes that follow the direction of the knit rather than scrubbing in circles, which can pill the surface. Rinse this area twice as long as you think necessary, because detergent trapped inside foam padding is a common reason a freshly washed bag smells fine when dry and then turns sour again the first warm day you wear it.
Leather, suede, and coated trims
Leather zip pulls, handle wraps, and logo patches should never be submerged. Wipe them with a barely damp cloth, then, once the bag is fully dry, work in a tiny amount of leather conditioner with a soft cloth if the leather looks pale or stiff. Suede and nubuck need a dry approach entirely: let mud dry completely, brush it off with a stiff suede brush, and lift scuffs with a suede eraser. Coated canvas and synthetic leather panels sit in between — damp wiping is fine, soaking is not, because water can creep under the coating at stitched edges and cause bubbling months later.
The laptop compartment itself
Clean the padded laptop sleeve last and most gently. Crumbs and grit collect in its bottom corners, and that grit is exactly what scratches a laptop lid over time. Turn the compartment inside out if the design allows, shake it, vacuum the seams with a crevice tool, and wipe the padding with a damp cloth rather than soaking it, since thick compartment foam can take days to dry and can mildew internally while the outside feels dry. If the compartment has a fleece or microfibre lining, a lint roller after drying removes the last of the debris without stressing the fabric.
A Stain-by-Stain Playbook for Everyday Accidents
General washing handles general grime, but most owners clean a bag because of one specific incident. Treating the stain type correctly matters more than scrubbing harder, and in several cases the wrong first move — usually hot water or vigorous rubbing — sets the mark permanently.
Coffee, tea, and food spills
Blot, never rub, and start with cold water as soon as you can. Heat sets tannin-based stains, so the lukewarm wash described earlier should only happen after the spill area has been flushed cold several times. For a spill that soaked through to the padding, place a folded towel inside the compartment behind the stain and press from the outside, pushing the residue into the towel rather than deeper into the foam. Greasy food marks respond to a drop of washing-up liquid worked in with a fingertip and left for fifteen minutes before the main wash, because the surfactants need contact time to lift oils out of synthetic fibres.
Ink, pen leaks, and marker
Ink is the stain owners most often make worse. Dabbing with a cloth dampened with rubbing alcohol, working from the outside edge of the mark inward, can lift ballpoint ink from nylon without spreading it, but test on a hidden area first because alcohol can lighten some dyes and damage coated finishes. Place a clean cloth behind the fabric to catch transferred ink, and change the cloth as it picks up colour. Gel ink and permanent marker are far more stubborn; expect improvement rather than complete removal, and accept a faint shadow rather than destroying the fabric’s coating in pursuit of perfection.
Mud, road salt, and winter grime
Mud should always dry before you touch it. Wet mud smears into the weave, while dried mud mostly brushes away with a stiff brush over a bin. Winter road salt leaves white tide marks on dark bags, especially around the base and lower straps. These dissolve rather than scrub off: wipe repeatedly with a cloth dampened with plain water, rinsing the cloth between passes, until the white edge stops reappearing as it dries. Salt left in stitching and zipper tape quietly degrades both, so this rinse is maintenance, not just cosmetics.
Odours that survive a wash
If a bag still smells after washing, the source is usually bacteria living in strap foam or a spill that reached the padding. Sunlight helps more than fragrance sprays: a few hours of indirect sun with all compartments open ventilates and discourages bacteria without fading the shell the way prolonged direct sun can. An overnight fill of crumpled newspaper absorbs lingering moisture and some odour. Spilled milk and gym-kit smells may need an enzyme-based cleaner made for sports gear, applied to the affected panel and left for the full contact time on its label before rinsing, because enzymes need time to break down the proteins causing the smell.
Drying and Storage: Where Most Cleaning Damage Happens
More backpacks are ruined after the wash than during it. Heat, sunlight, and impatient storage undo careful washing, and the laptop compartment — the part you bought the bag for — is the most vulnerable to all three.
Setting up an effective drying station
Hang the bag upside down first for half an hour so water drains out of the main compartment rather than pooling in its base, then turn it right side up with every zip open and the laptop sleeve propped open with a rolled towel. Airflow matters more than warmth: a fan pointed at the bag in a ventilated room dries it faster and more safely than a warm, still bathroom. Stuffing the compartments loosely with dry towels for the first few hours wicks moisture from the padding, but replace those towels once they feel damp, otherwise you have simply moved the water into a slower-drying material.
Knowing when it is truly dry
Foam padding lies. The shell can feel bone dry while the centre of a shoulder strap or the base of the laptop compartment is still cool and damp, and that trapped moisture is what produces the musty smell owners blame on the wash itself. Press the thickest padding firmly between your palms: if it feels cooler than the surrounding fabric, it is still wet. Weighing the bag is a surprisingly reliable check — a bag that still holds water is noticeably heavier than its usual empty weight, and returning it to service when it matches its normal heft is a good rule. Give thick commuter packs a full two days when in doubt.
Storing a clean bag properly
Store the bag unzipped, empty, and upright or hanging, never compressed under other luggage, because long-term compression permanently flattens the laptop compartment’s padding and can set creases into structured shells. A cool, dry cupboard beats a garage or loft, where temperature swings and humidity encourage mould on any trace of remaining dirt. If the bag will sit unused for months, a quick vacuum and wipe before storage matters, since stored organic grime is what mould feeds on. When it comes back into service, check zips and strap stitching before trusting it with a laptop again.
Building a Light Maintenance Routine So Deep Cleans Stay Rare
A full wash is a half-day project once drying is counted, so the real skill is making it an occasional event. Small habits, matched to how you actually use the bag, keep grime from ever reaching the point where a soak is the only answer.
Weekly, monthly, and seasonal habits
- Weekly: empty the bag fully, shake it over a bin, and vacuum the laptop compartment corners where grit accumulates.
- Monthly: wipe the base, straps, and back panel with a damp cloth, and check zips for grit before it grinds into the teeth.
- Seasonally: do the full hand wash, reproof the water-repellent finish if rain now soaks in instead of beading, and inspect strap stitching and zipper tapes under good light.
- After any spill: deal with it the same day if you can, because nearly every stain in the playbook above is dramatically easier fresh.
Commuters who carry the bag daily in all weather will sit at the frequent end of that schedule, while a bag used twice a week for a short drive may only need the seasonal wash. Let condition, not the calendar alone, decide: visible grime on the back panel, a sour smell when you open the main compartment, or grit you can hear when you shake the bag are all signals that the deep clean is due regardless of dates.
Protecting the finish between washes
Water-repellent coatings wear fastest at abrasion points — the base, strap edges, and anywhere the bag rubs a desk or train floor. Placing the bag on a chair or hook rather than the floor, at home and at work, removes most of that wear and most of the dirt in one habit. When rain stops beading and starts darkening the fabric immediately, a spray-on reproofer made for synthetic outdoor fabrics restores the effect in minutes; apply it to a clean, dry bag outdoors, let it cure fully before use, and keep it off leather trims. This small renewal also makes the next wash easier, because dirt sits on the coating rather than working into the weave.
Zip, Hardware, and Detail Cleaning Owners Skip
A wash that only addresses the fabric leaves the bag’s hardest-working components dirty, and dirty hardware is what eventually jams, corrodes, and stains the fabric you just cleaned. Ten extra minutes on the details finishes the job properly.
Zippers and sliders
Grit lodged between zipper teeth acts like sandpaper every time the slider passes. After the bag dries, run a dry, stiff toothbrush along each zip track, then work the slider slowly through its full travel a few times. If a zip feels rough, a tiny touch of graphite from a pencil rubbed along the teeth lubricates without attracting dirt the way oils do. Avoid petroleum-based lubricants on fabric zips, because they migrate into the tape and leave permanent dark marks that no wash will remove.
Buckles, adjusters, and strap webbing
Plastic buckles and metal adjusters collect a surprising film of sweat and dust, especially where webbing threads through them. A cotton bud dampened with diluted detergent reaches into those slots. Webbing itself holds odours deep in its weave; if the straps still smell after the main wash, a second targeted soak of just the straps in a basin, weighted down so they stay submerged, usually succeeds where the general wash did not. Rinse webbing thoroughly, because dried detergent in webbing makes it stiff and oddly crunchy in the hand.
Interior linings, pockets, and the small disasters
Small pockets accumulate the strangest residue: leaked hand sanitiser, melted lip balm, pen ink, sweet wrappers fused to lining fabric. Sanitiser and balm respond to a cloth with a little washing-up liquid worked in patiently. Sticky residues soften with warm water and time rather than force. Check the seams at pocket bottoms while you clean, because a pocket seam that has opened will quietly swallow coins, keys, and memory sticks into the bag’s lining, where they rattle mysteriously for months.
When Cleaning Reveals Damage: Small Repairs Worth Doing Now
A deep clean doubles as the best inspection your bag will ever get, because you handle every panel slowly and under good light. Catching small failures now, while they are cheap and simple, prevents the mid-commute strap failure that endangers the laptop inside.
Loose threads and early stitching wear
Snip loose threads flush rather than pulling them, since pulling can unravel a seam run. The critical stitching is at strap roots, handle attachments, and the corners of the laptop compartment. If threads there are fraying or a seam is opening by more than a few millimetres, a cobbler or luggage repairer can usually restitch it quickly and cheaply, and the repair is far stronger done before the seam fully separates and the fabric edges fray. Mark any suspect area with a small piece of tape during cleaning so you do not forget it once the bag is dry and back in service.
Fraying webbing, worn base corners, and tired padding
Webbing ends that are starting to fuzz can be sealed carefully with the briefest touch of a lighter flame by a confident adult, melting the fibres just enough to stop the fray — or, more safely for most owners, a drop of fabric glue achieves a similar result without any flame near synthetic fabric. Base corners wear thin first; adhesive fabric patches applied inside the compartment can reinforce them invisibly. Padding that has gone flat in one shoulder strap or in the laptop compartment’s base no longer protects as designed, and no amount of cleaning restores it. That discovery is genuinely useful information: it tells you the bag is entering its final season and a replacement should be planned before, not after, a drop.
Deciding between repair and replacement
Repair makes sense when the shell, zips, and laptop padding remain sound and the fault is local — a seam, a slider, a buckle. Replacement makes sense when two or more core systems are tired at once: padding flat, a main zip unreliable, and strap stitching worn. A bag is protective equipment for an expensive machine, and judging it by protective standards, rather than by whether it still roughly holds things, keeps that priority straight.
Cleaning a Backpack in Difficult Circumstances
Not every clean happens at home with a basin and a free afternoon. Travellers, students in shared housing, and anyone whose bag suffered an accident away from home need methods that work with limited space, limited time, and limited equipment.
The hotel-room and hostel clean
A sink, a small amount of shampoo or body wash in place of detergent, and a towel are enough for an emergency clean. Work on the affected area rather than the whole bag, rinse by repeatedly pressing with a wet towel instead of soaking, and roll the bag in the towel to extract water. Hang it over a shower rail or chair back with compartments open; a bathroom with an extractor fan running dries a bag overnight surprisingly well. Keep the laptop and electronics somewhere else entirely that night, even if the bag feels dry, because padding holds moisture longer than fabric suggests.
The quick turnaround: bag needed tomorrow
If the bag must be used the next morning, do not soak it. Spot clean the visible marks, wipe the straps and back panel, vacuum the interior, and attack odours with ventilation and newspaper rather than water. A fan aimed into the open compartments for several hours freshens more than owners expect. Reserve the full wash for a weekend when the bag can dry for two days without being needed, and treat the quick version as honest triage rather than a shortcut you will regret.
Shared spaces and delicate neighbours
In shared housing, the bathtub wash needs negotiation and a thorough rinse of the tub afterwards, and drying space is usually the real constraint. A folding airer in your own room with a fan beats draping the bag over shared radiators, which is both a heat risk to the bag and a fast way to annoy housemates. Fragrance-free detergent is a considerate default in shared laundry spaces, and it is also better for the bag, since fragranced products leave more residue in padding.
Cleaning for Allergy, Hygiene, and Shared Use
Some owners clean for appearance; others clean because the bag is a hygiene item in daily contact with their back, their hands, and the surfaces they eat and work on. That perspective changes a few priorities and justifies a slightly more rigorous approach for certain users.
What actually lives in a daily-carried bag
The interior of a commuter bag collects skin cells, food crumbs, dust, and whatever its owner’s hands carried that day, while the back panel collects sweat against fabric that rarely fully dries between uses in humid weather. None of this is dangerous for most people, but it explains why bags develop odours that surface washing misses, and why allergy sufferers often find a regularly vacuumed and washed bag noticeably kinder during pollen season, when the bag ferries outdoor dust into offices and bedrooms. Emptying and vacuuming weekly, as the maintenance routine suggests, removes most of the loose load before it embeds.
Cleaning a bag used by children or shared between people
A bag that changes hands — a family laptop bag, a school bag, a work bag shared across shifts — deserves a clean between users and a more frequent wipe of handles, strap adjusters, and zip pulls, the parts every hand touches. Choose fragrance-free products, since the next user’s tolerance is unknown, and make sure the bag is completely dry before handover, because passing on a damp bag passes on the musty smell with it. If the bag carried anything medical or was involved in a sickness bug incident at school or work, an enzyme cleaner on the affected panels and a full airing outdoors is a sensible, proportionate response.
When to simply retire a bag on hygiene grounds
Occasionally a bag absorbs something that cleaning cannot honestly fix: a large milk spill that soaked deep into foam and soured, mould that has colonised the inside of padding, or contamination from chemicals. Surface mould you can clean; mould inside foam announces itself by a smell that returns within days of every wash, stronger each warm day. At that point continued cleaning wastes time and the bag is no longer a fit home for a laptop. Retiring it is not defeat — it is the correct maintenance decision, and it is better made early than after the smell transfers to everything the bag carries.
Products and Tools: What Earns Its Place in the Cleaning Kit
The cleaning market will happily sell you a dozen specialised products for a task that needs about five things. A small, permanent kit, kept where the bag gets cleaned, removes the friction that stops owners starting the job at all.
The core kit
- A soft brush for shells and a stiff brush for dried mud and suede.
- A mild, fragrance-free detergent you already trust on technical fabrics.
- Two microfibre cloths — one for washing, one kept clean for rinsing and finishing.
- An old toothbrush for zips, seams, and strap hardware.
- A handheld vacuum or crevice attachment for interiors and grit.
Everything else is situational: an enzyme cleaner if gym kit or spills are part of your bag’s life, a reproofing spray if you commute in rain, leather conditioner only if your bag actually has leather, and a lint roller if your laptop compartment is fleece-lined. Buying the situational items when the situation first arises, rather than stocking for every possibility, keeps the kit small and the routine believable.
Products to avoid on technical bags
Bleach and bleach-containing cleaners attack dyes and weaken synthetic fibres. Fabric softener coats fibres and kills water repellency. Scented heavy-duty detergents leave residues in foam that reactivate with sweat. Solvent-based stain removers can dissolve the inner coating of laptop compartments, which then flakes onto the laptop itself. When a product’s label warns against use on waterproof or technical fabrics, believe it: your backpack is exactly the garment that warning describes, and the damage usually appears slowly, weeks after the wash that caused it.
A Note on Warranties, Care Labels, and Manufacturer Guidance
Before any deep clean, spend sixty seconds looking for the bag’s care label, usually sewn inside a pocket or along an interior seam, and check the maker’s website guidance for your model if the label is vague. Most quality makers publish specific advice — some structured packs should never be submerged at all, some coatings react to particular detergents, and a few bags have removable frames or back panels that must come out before washing and are easily forgotten until they are soaking. Following the maker’s method also protects your warranty position, since careless washing is one of the few kinds of damage a manufacturer can reasonably decline to cover.
Where the label and general advice conflict, the label wins for your bag. Where the label is missing entirely — common on older bags — the gentle method in this guide is the safe default: lukewarm water, mild detergent, no machine, no heat, complete air drying. Keep a photo of the care label on your phone once you have found it; labels fade with exactly the washing they describe, and the photograph will outlast the print by years. Owners who treat that minute of checking as step zero rarely join the much larger group who learn their bag’s one sensitivity the hard way.
Documenting the bag’s condition
If your bag is valuable, insured, or under warranty, a few phone photographs before a major clean create a useful record of its prior condition — strap stitching, shell marks, zip function. It takes a minute, settles any later argument about whether a flaw predated the wash, and doubles as the inspection record suggested earlier. Photograph it again dry and finished, and you have the baseline against which next season’s clean — and next season’s wear — can be judged honestly.
Related Guides
- best laptop backpacks for under 100
- best backpacks for camera
- best laptop backpacks for men
- best laptop backpacks for women
- best laptop backpacks for travel
- how to choose a laptop backpack
- how to pack a laptop backpack
- how to measure a laptop for a laptop backpack
Frequently Asked Questions
Can I put my laptop backpack in the washing machine?
Only if the manufacturer explicitly says so on the care label — some unstructured daypacks allow a gentle cold cycle. Structured laptop backpacks with foam panels, frames, coatings, or leather should be hand washed, because machines attack seams, structure, and adhesives. The tub method in this guide takes twenty active minutes and risks nothing; treat the machine as the exception that requires written permission from the maker.
How do I get a smell out of a backpack?
Wash it first — odor lives in the dirt and body oils in straps and back panels, and deodorizing a dirty bag perfumes the problem. If smell survives a proper wash and full dry, wipe the interior with diluted white vinegar and air it, or use an enzyme odor spray designed for sports equipment, which digests the source rather than masking it. Then store it unzipped and ventilated; a bag stored sealed will re-offend.
How often should I clean my backpack?
For a daily commuter bag: spot-wipe spills immediately, vacuum and wipe monthly, and do a full hand wash every three to six months depending on climate and use. Gym-and-work bags sit at the frequent end; a travel bag that lives in a closet needs a wash after trips and before storage. The calendar matters less than the triggers — visible grime, odor, or a spill means now, whatever the schedule says.
Will washing ruin the water resistance?
It can thin a factory water-resistant coating over time, especially with hot water or harsh detergent — another reason this guide insists on lukewarm and mild. The fix is easy: after the bag is fully dry, apply a spray-on water repellent made for outdoor fabrics, following its instructions, and the beading returns. Many owners build this into an annual routine: wash in spring, reproof, and the bag faces the year renewed.
How do I clean leather parts or a leather backpack?
Leather does not go in the tub. Wipe it with a barely damp cloth, use a dedicated leather cleaner for marks, and condition it afterward to replace the oils washing removes — then let it dry naturally away from heat. Suede needs its own brush and protector spray. For mixed-material bags, clean the fabric sections as this guide describes while keeping leather areas out of the soak, treating them separately once the bag is dry.
The padding still feels damp after two days. What now?
Keep going — thick foam in straps and laptop sleeves genuinely takes this long, especially in humid weather. Improve airflow: fan directly on the bag, compartments propped wide, bag repositioned so the damp panel faces the air. Do not use the bag, do not store it, and do not apply heat. If a musty smell has already started, a vinegar wipe once fully dry, followed by more air, usually clears it; mildew established deep in foam is the one outcome worth this patience to avoid.
Can I use a steam cleaner on a laptop backpack?
It is risky and usually unnecessary. Steam can soften adhesives that bond padding and linings, warp structured panels, and damage water-repellent coatings, especially on seams and coated fabrics. Spot cleaning and a lukewarm hand wash achieve the same result without the heat. If you use steam at all, keep it brief, distant, and away from the laptop compartment’s bonded padding.
How do I clean the inside of a backpack that cannot be turned inside out?
Work in sections with the bag propped open. Vacuum with a crevice tool first, then wipe each panel with a cloth dampened — not dripping — with diluted detergent, and follow immediately with a cloth dampened with plain water so no residue stays behind. Leave every compartment open with a rolled towel holding it ajar until the interior feels completely dry and no longer cool to the touch.
My backpack has a removable frame or stiff back panel. Should it come out before washing?
Yes, if it is designed to be removed. Metal and plastic frames trap water against fabric, slow drying dramatically, and can rust or warp depending on material. Slide the frame or panel out before washing, wipe it separately with a damp cloth, and only refit it once both the frame and the bag are completely dry. If the panel does not appear designed to move, do not force it — wash the bag as it is and allow extra drying time.