Knowing how to clean a gaming laptop properly is the cheapest performance upgrade there is, because dust is a slow tax on every frame. Gaming machines move far more air than office laptops, and that air carries lint, hair and household dust straight into fine heatsink fins and fan blades. Over months the build-up insulates the cooling system, fans spin faster and louder, temperatures climb, and firmware starts trimming clock speeds to protect the hardware. The good news is that most of the benefit comes from safe, external cleaning you can do on a table with a few simple tools, no disassembly and no risk to your warranty. This guide covers the full routine, from screen and keyboard to vents and fans, plus how often each part needs attention.
Disclosure: As an Amazon Associate, kajuandouglas.com earns from qualifying purchases. Links to Amazon on this page are affiliate links; they cost you nothing extra. Listing details such as price and availability change often, so check the current Amazon listing before you buy.
How To Clean A Gaming Laptop: What Matters Most
Power the laptop fully off and unplug it. Clean the screen with a dry microfibre cloth, the keyboard with short bursts of air and a soft brush, and the vents and fan intakes from outside with air and a brush. Never push dust deeper with long blasts, never use a household vacuum on fans, and never spray liquid directly onto the machine. Twenty minutes every few months keeps temperatures and noise where they were when the laptop was new.
In this guide
What You Need
- Two clean microfibre cloths, one for the screen and one for the chassis
- A can of compressed air or a rechargeable electric air duster
- A soft brush, such as a clean paintbrush or anti-static brush
- Isopropyl alcohol for stubborn chassis marks, used sparingly on a cloth
- A clear, well-lit table and about twenty unhurried minutes
Step by Step: How To Clean A Gaming Laptop
Step 1: Shut down completely and disconnect everything
Use a full shutdown, not sleep, then unplug the charger and every peripheral. Cleaning a powered machine risks short circuits from moisture and accidental key presses wiping your work. If your model has a removable battery, take it out; if not, a full shutdown is sufficient for external cleaning. Give a hot machine ten minutes to cool before you start, so temperature readings afterwards are honest.
Step 2: Clean the screen the gentle way
Start with a dry microfibre cloth in light circular motions; most smudges are skin oil and lift without any liquid. For stubborn marks, barely dampen the cloth with distilled water, never spray the panel itself, and never use household glass cleaner, which can damage anti-glare coatings. Keep pressure light and even, because pressing hard on one spot can harm the panel. Finish with the dry cloth to remove any streaks.
Step 3: Clear the keyboard and palm rest
Turn the laptop at an angle and use short bursts of air between the keys to lift crumbs and dust, then brush the debris away rather than deeper in. Wipe keycaps and the palm rest with a microfibre cloth very slightly dampened with water or a little isopropyl alcohol for greasy shine. Take your time around the trackpad edges, where grime collects in the seam. Avoid saturating anything; liquid belongs on the cloth, in drops, never poured.
Step 4: Work the vents and intakes from outside
Locate every vent: usually rear and side exhausts and intake grilles underneath. Brush the grille surfaces first to loosen the felt-like dust layer, then use short air bursts at an angle to blow debris out and away, not straight in. Support fan areas by keeping bursts brief. If you use an electric duster, hold it a few centimetres back; these are stronger than cans and can overspin a fan if blasted point-blank.
Step 5: Wipe the chassis and check the feet and hinges
Clean the lid and base with the second cloth, paying attention to the hinge line where dust cakes. Check rubber feet are intact, because missing feet change the intake gap underneath and hurt cooling. Look along the ports with a torch and gently remove lint from USB and charging sockets with a wooden toothpick if needed, with the machine off and a light touch.
Step 6: Reassemble, power on and verify the difference
Reconnect the charger, boot up and listen: fans should sound smoother, without the rattle or constant high pitch of a choked system. Run a familiar game for fifteen minutes and compare temperatures and noise with before, using the brand control app or a monitoring tool. If nothing improved and the machine is older, the dust may be packed inside the heatsink fins, which is a job for the deeper service described in the mistakes section below.
Step 7: Set a rhythm so it never gets bad again
Light external cleaning every two to three months suits most homes; monthly if the laptop lives on a bed, sofa or carpeted floor, or shares space with pets. Keep the machine on a hard surface or a stand so intakes breathe, and store it closed in a sleeve or drawer rather than open on a desk collecting fallout. Small, regular effort is what keeps a gaming laptop quiet and fast for years.
Reading Gaming Laptop Specs Without the Marketing
Spec sheets reward careful reading. The graphics chip model is only the start: its configured power range, the memory it carries and whether the laptop has a MUX switch or Advanced Optimus to route frames directly to the display all change real performance. Processor core counts look dramatic, but most games still lean on a handful of fast cores, so sustained clock speed under load matters more than the headline number. Memory should be judged on capacity, speed and whether it runs in dual-channel mode with two matched sticks, because a single stick can quietly cost measurable frame rate in CPU-limited scenes. Storage speed affects loading and texture streaming more than raw frame rate, yet a nearly full drive slows everything through background maintenance. Finally, the display is part of the performance chain: a fast panel cannot show frames the GPU never renders, and a powerful GPU is wasted on a dim, slow screen. Judge the machine as a system, not a list.
Battery, Noise and the Real Cost of Portable Power
Every gaming laptop is a compromise between a desktop replacement and a machine you can actually carry. Expect modest battery life away from the wall when gaming, because the discrete graphics chip alone can draw more than a whole ultraportable laptop uses. Fan noise follows the same physics: smaller fans must spin faster to move the same air, so thin machines are louder under load, and a headset or a sensible fan curve is part of the ownership experience rather than an afterthought. Weight figures also hide the power brick, which on high-wattage models can add a substantial chunk to your bag. None of this makes gaming laptops a bad choice; it makes them a specialised one. Buyers who mostly play at one desk should weigh that honestly against a desktop, while buyers who move between rooms, campuses or work trips get something no desktop can offer. Matching the machine to the real usage pattern is the single highest-value decision in this category.
Software Settings That Quietly Decide Your Frame Rate
Long before hardware limits appear, software decides how a gaming laptop behaves. The graphics driver control panel chooses which GPU renders each game, and laptops left on automatic sometimes run demanding titles on the integrated graphics. Windows power mode, the brand control centre performance profile and the in-game resolution scale are three separate levers that stack, so a machine can feel slow simply because one of them is set to a quiet or battery profile. Background software matters too: overlays, capture tools, cloud sync and launchers updating other games all compete for the same processor time. A clean baseline, with drivers current, one performance profile chosen deliberately and background apps trimmed, solves a surprising share of complaints that get blamed on hardware. Change one setting at a time and test in the same game scene, otherwise you will never know which lever actually helped, and you may undo a good change while chasing a bad one.
How Heat, Power and Performance Connect
A gaming laptop is a small box that has to do two contradictory jobs at once: run a processor and a graphics chip at full speed, and move the heat those chips produce out through vents that are only a few millimetres tall. When either chip passes its temperature limit, firmware quietly lowers its clock speed, a behaviour called thermal throttling, and frame rates fall even though nothing in the game has changed. Power limits matter just as much: the same graphics chip can be configured by different brands at very different wattages, which is why two laptops with identical spec sheets can perform noticeably differently. Understanding this triangle of heat, power and clock speed explains almost every behaviour owners describe as mysterious, from fans that surge during loading screens to performance that is excellent for ten minutes and mediocre after an hour. Any fix, upgrade or purchase decision that ignores thermals is treating a symptom. Start with airflow, dust, surface and fan behaviour, then look at software, and only then consider hardware changes.
Why Dust Hurts Gaming Laptops More Than Office Laptops
A productivity laptop sips power and can shrug off a partly blocked vent. A gaming laptop under load may need to shed ten times the heat, through heatsink fins spaced fractions of a millimetre apart. Dust does not need to block those fins completely to matter: a thin felt layer insulates the metal and slows the air, raising temperatures a few degrees at a time. Firmware responds by first raising fan speed, which you hear, and then by trimming clock speeds, which you feel as lower frame rates in long sessions. That is why owners often report a machine that benchmarks fine for five minutes but fades after half an hour of play. External cleaning restores most of the lost headroom on machines under a couple of years old, and it costs nothing but time, which makes it the first fix to try before repasting, undervolting or shopping for a replacement.
When you are ready to compare complete machines rather than individual settings, start with our roundup of the best laptops for gaming and school under 1000 and keep our roundup of the best laptops for gaming under 2000 open in a second tab. Reading a settings guide and a buying roundup side by side stops the most common mistake in this whole topic: changing software or hardware in isolation, without checking whether the rest of the machine actually supports the change you have in mind.
Gear for This Guide

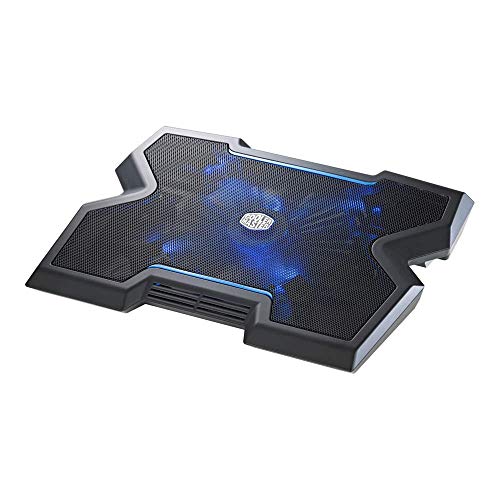
Cooler Master NotePal X3 – Laptop Cooling Pad with 200mm Blue LED Fan — Cooler Master NotePal X3 – Laptop Cooling Pad with 200mm Blue LED Fan. Check price on Amazon before you decide, because configurations and availability change often.
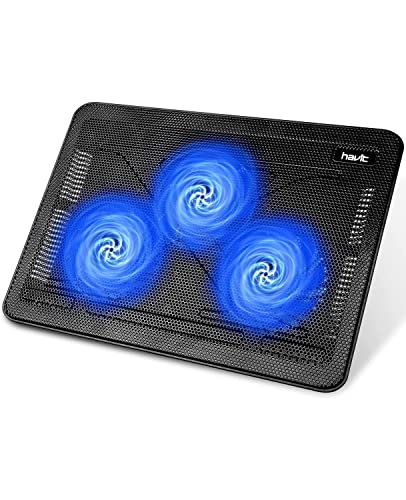
havit HV-F2056 Laptop Cooling Pad for 15.6-17 Inch Laptops — havit HV-F2056 Laptop Cooling Pad for 15.6-17 Inch Laptops, Black | Three quiet USB-powered fans circulate air below the laptop, two height settings improve viewing and typing comfort. Check price on Amazon before you decide, because configurations and availability change often.

WHOOSH! Screen Shine Duo – Screen Cleaner and Wipe Kit — WHOOSH! Screen Shine Duo – Screen Cleaner and Wipe Kit, 3.4 + 0.3 fl oz | Includes 2 – 6×6″ Microfiber Cloths, Travel & Pocket Size Bottles, For iPad, Monitor, Laptop & MacBook. Check price on Amazon before you decide, because configurations and availability change often.
Common Mistakes
- Using a household vacuum cleaner on vents, which can generate static and overspin delicate fans.
- Spraying cleaner directly onto the screen or keyboard so liquid runs inside the machine.
- Blasting air in long bursts straight into a vent, packing dust deeper into the heatsink instead of clearing it.
- Assuming cleaning did not work after five minutes of testing, when temperatures only separate from before under a sustained load.
Pro Tips
- Photograph your vent layout once, so every cleaning session covers all intakes and exhausts without hunting.
- A laptop stand or cooling pad with clear space underneath helps most when the intakes are on the base, which is the common design.
- Clean the room side too: a desk surface wiped weekly dramatically slows how fast vents cake up again.
- If fans still roar after a thorough external clean on a three-year-old machine, a professional internal clean and repaste is money better spent than any software tweak.
A Worked Example, From Start to Finish
Imagine the process applied to one ordinary owner rather than a test bench. They begin by writing down what success looks like in one sentence, work through the steps in order without skipping the preparation that feels skippable, and pause at the verification stage instead of declaring victory at the first encouraging sign. Two adjustments are usually needed: one step takes longer than expected, and one assumption made at the start turns out to be wrong in a small, correctable way. That is not failure; that is the normal texture of doing this properly, and it is why the guide separates preparation, execution and verification so deliberately. By the end, the result is checked rather than hoped for, the notes exist for next time, and the owner understands their own machine measurably better than when they started. Every reader’s details will differ from this example, but the shape of a good outcome rarely does: prepare honestly, change one thing at a time, verify under real conditions, and write down what you learned while it is still fresh enough to be accurate.
Putting It All Together
Work through the steps in order, test the result in your real routine for a few days, and adjust the one or two choices that your own use proves wrong rather than restarting the whole process. The guidance in this guide reflects how these machines behave across years of ownership, not just on day one, which is why the unglamorous details, placement, profiles, backups and habits, carry as much weight as the headline specifications. Keep your receipts, your notes and your original parts where parts were changed, revisit the related guides when your needs shift, and remember that a well-matched, well-kept laptop of any tier serves its owner better than a flagship that fights its owner’s life. That fit, more than any single feature, is what you were really choosing.
Cleaning by Zone: Keyboard, Screen, Ports and Chassis
The outside of a gaming laptop collects different dirt in different places, and each surface tolerates different treatment. Working zone by zone, with the right material for each, prevents the two classic cleaning injuries: liquid where it should never go, and scratches on surfaces that were only dusty.
The keyboard and deck
Start dry: turn the powered-off laptop upside down over a bin and tap the base gently to dislodge crumbs, then work between the keys with a soft brush or short bursts of compressed air held at an angle, so debris moves out rather than deeper in. Keycaps and the surrounding deck respond to a microfibre cloth barely dampened with water or a little isopropyl alcohol for greasy marks — dampened, never wet, and never sprayed directly onto the machine. Shine on frequently used keys is wear, not dirt, and no cleaning reverses it; knowing that saves you scrubbing a polished key into a damaged one. Sticky keys from a spill are a different problem from surface dirt: if a key still sticks after surface cleaning, that is a repair conversation, because liquid travels under key mechanisms and keeps working on the contacts.
The screen
Screens scratch and lose coatings to enthusiasm. Use a clean, dry microfibre cloth first for dust and fingerprints; for stubborn marks, breathe on the cloth — not the screen — or dampen the cloth very slightly with distilled water, and wipe in gentle straight passes rather than circles, with no pressure beyond the cloth’s own weight. Avoid household glass cleaners, paper towels and anything abrasive or ammonia-based, all of which can haze modern screen coatings permanently. Clean a cool screen: a warm panel dries the cloth’s moisture into streaks before you finish the pass. If your laptop’s screen has a matte finish, expect it to show skin oils from the keyboard when closed — a keyboard cover cloth between screen and keys during transport prevents the imprint returning.
Ports, vents and the outside of the chassis
Ports collect pocket lint and desk dust that eventually stop cables seating fully. With the machine off, inspect each port with a light; remove lint with a wooden or plastic toothpick used gently along the port’s floor, never with metal, and never with compressed air blasted straight in, which packs debris deeper. Vent grilles wipe clean with a dry brush, and their condition is your early-warning system: a grille that mats with dust quickly tells you the inside is loading up too, and the environment — a carpeted floor, a pet’s favourite spot nearby — is part of the cleaning problem. The chassis itself needs only the damp-cloth treatment; stickers and their residue yield to patience and a little alcohol on the cloth, not to scraping.
Internal Dust: What You Can Safely Do and What to Leave Alone
Reading the signs before opening anything
Internal cleaning is justified by evidence, not by the calendar alone: fans audible at idle that used to be silent, temperatures in your monitoring tools creeping upward over months at the same workload, vents that feel weaker, or visible dust mats at the intake grilles. Any one of these says the cooling path is loading with dust. None of them says how bad it is, which is why the first internal step is inspection, not intervention — many machines need only their fan blades and grille backs cleared, a far smaller job than a full teardown.
The safe version of opening the base
If your model’s base panel is designed to come off with ordinary screws and your warranty position is clear, the safe scope is this: power off, unplug, work on a clean table, keep screws organised by position because lengths differ, and photograph the layout before touching anything. Hold each fan still with a finger or a soft tool while using compressed air in short bursts — a fan spun freely by air can overspeed and damage its bearing or generate current. Clear the fin stacks at the exhausts, where dust mats actually block airflow, using a soft brush and air together. Stop there. Heat pipes, thermal paste and liquid-metal compounds are not cleaning items; disturbing them without the skill and materials to redo them converts a dusty laptop into a broken one.
When to hand it to a professional
Choose a service visit when the machine is under a warranty you value and its terms discourage opening, when the design requires removing the motherboard to reach the fans, when a fan grinds or rattles (a bearing problem cleaning cannot fix), or when temperatures stay high after a thorough external and fan-area clean — that pattern suggests dried thermal paste or a failing fan, both workshop jobs. The fee buys the right tools, the right compounds and someone else’s liability, and for a machine you depend on daily that is often the economical choice, not the extravagant one.
A Cleaning Schedule Matched to Your Environment
Weekly, monthly and twice a year
Weekly: a dry microfibre pass over screen, deck and keyboard, thirty seconds that prevents most build-up. Monthly: brush and air the vents and grilles, check ports, and clean the fans’ intake areas externally; wipe the deck properly. Twice a year, or when the signs described above appear: the internal inspection and fan-area clean, scaled to your confidence and warranty position. Write the dates somewhere you will see them — a note in the laptop bag works — because cooling degrades gradually and human memory normalises each small step.
Environment multipliers
The schedule assumes a normal room. Compress it if the laptop lives with smokers, candles or incense, if pets sleep near it, if it games on beds and sofas that shed fibres into intakes, or if your home is being renovated — construction dust is fine, abrasive and everywhere, and a laptop used through a renovation deserves an internal inspection when the dust settles. Expand the intervals for a desk-bound machine in a clean, hard-floored room; it genuinely needs less. The principle is that dust load, not time, is what you are managing.
The desk setup that keeps it cleaner
Prevention outperforms cleaning. A stand or dock that lifts the base improves intake airflow and keeps vents off dusty surfaces; a desk surface wiped weekly starves the intakes; keeping drinks behind the screen rather than beside the keyboard removes the most catastrophic cleaning scenario from your life entirely. If the laptop travels, a sleeve keeps bag lint — the ports’ worst enemy — off the machine. None of this is glamorous, and all of it together is the difference between a laptop that needs deep cleaning yearly and one that needs it rarely.
After Cleaning: Verifying It Worked
Cleaning without verification is housekeeping; cleaning with verification is maintenance. Before you clean, note idle and gaming temperatures and fan behaviour from your usual monitoring tool, in the games you actually play. After cleaning and reassembly, repeat the same workloads in the same room conditions and compare. A successful internal clean typically shows clearly lower temperatures under load, fans that spin up later and quieter, and — the real prize — frame rates that no longer sag in long sessions as throttling retreats. If nothing changed, the dust was not the constraint, and the evidence now points elsewhere: background software, a failing fan, or thermal compounds at end of life. Either way you know something true about your machine, which is the entire point of doing the job methodically.
Cleaning the Cooling Path Without Opening the Laptop
Not every owner can or should open their machine, and a great deal of cooling recovery is available from outside if it is done in the right order and with realistic expectations about what external cleaning can reach.
Working the exhausts and intakes from outside
With the machine off and cool, brush the exhaust fins visible through the rear and side vents while holding a vacuum’s nozzle near — not sealed against — the vent to catch what the brush frees; the vacuum is a catcher, never a blower into the machine. Work short bursts of compressed air into the exhaust at an angle, alternating with brushing, so dislodged dust has a path out rather than packing deeper into the fin stack. Then do the intakes underneath the same way. This routine cannot clear a dust mat fused deep inside, but it reliably restores the borderline cases — the machines whose vents have narrowed gradually — and it is the correct first response before concluding the laptop must be opened.
The environment audit that accompanies it
While the vents are in your hands, audit where the dust came from: the laptop’s usual surface, the room’s floor type, whether the machine games on fabric, whether a pet’s bed is nearby, whether the desk sits under a shelf that sheds. Cleaning without changing a heavy dust environment is a subscription, not a solution. A stand that lifts the intakes off the surface, a desk mat that is itself wiped weekly, and a rule about beds and sofas will each show up in your next cleaning as visibly less work — the environment is the one component you can upgrade without a screwdriver.
Knowing external cleaning’s limit
Be honest about the boundary: if temperatures remain high after a thorough external clean, if a fan sounds laboured, or if the exhaust airflow feels weak and uneven between sides, the obstruction is inside and further external effort has diminishing returns. That is the decision point for the internal route or a professional, and reaching it by evidence — rather than by escalating force against the vents — is what keeps a cleaning session from becoming the cause of the next problem.
Products and Tools: What Helps, What Harms
The short list that does everything
Two microfibre cloths (one for screens, one for everything else, kept separate and washed), a soft natural-bristle brush, compressed air used in short angled bursts, wooden or plastic picks for ports, isopropyl alcohol for greasy deck marks used on the cloth rather than the machine, and distilled water for screens. That is the entire arsenal a gaming laptop needs. Everything is cheap, nothing is exotic, and the discipline is in the technique — dry before damp, gentle before firm, outside before inside — not in acquiring more specialised potions.
Marketing to resist
Keyboard vacuum toys with weak suction, scented electronic wipes that leave residues screens then display proudly, gel blobs that leave fragments between keys, and miracle sprays promising to restore finishes — the category is inventive and mostly unnecessary. Residue is the recurring harm: anything left on a screen coating or a keyboard becomes next month’s grime magnet. If a product’s instructions involve leaving something on the surface, leave the product on the shelf instead.
What never to use
Household glass cleaner on screens, bleach or strong solvents anywhere, paper towels and tissues on any glossy surface, metal tools in ports, a household vacuum’s hose sealed directly onto vents (static and suction both object), and water in any quantity that can migrate. The pattern is simple: a gaming laptop is cleaned with air, cloth and patience, and damaged with chemistry, force and haste. Every horror story in this category begins with a product or a shortcut; every success story is boring, which is exactly how cleaning should be.
Cleaning Around a Life: Travel, Shared Machines and Second-Hand Buys
The travel reset
A laptop that travels accumulates a distinct grime: bag lint in every port, airport-table debris in the keyboard, and screen imprints from being pressed in a full bag. On returning from trips, give it the five-minute reset — shake out, brush, port check, screen cloth, vents — before the travel layer becomes the permanent layer. A sleeve or a keyboard cloth in transit prevents most of it, and the reset catches the rest while it is still surface-level and harmless.
Shared and family machines
A gaming laptop shared with family or flatmates collects other people’s snacks, fingerprints and cleaning attempts. Agree the house rules explicitly: no drinks beside it, hands washed after food before ranked matches, and nobody cleans the screen with whatever is nearest. It sounds precious until the first cola incident reprices the conversation. A machine with several users also deserves its vents checked more often, because usage hours — the real driver of dust — accumulate faster than any single owner expects.
The second-hand deep clean
Buying used, assume the machine has never been cleaned and that its temperatures are a stranger’s habits made visible. Budget the full routine into the purchase: external everything, internal inspection if you are able, fresh thermal thinking if it runs hot, and a keyboard and deck clean thorough enough to make the machine yours. A used gaming laptop that runs hot is often simply a used gaming laptop that is dirty, and the buyer who cleans methodically sometimes acquires, for the price of an afternoon, the machine the seller thought was dying.
The Ten-Minute Monthly Routine, Written Down
- Minute 0–2: power off, unplug; shake out the keyboard over a bin; brush between the keys.
- Minute 2–4: dry microfibre the screen; spot-clean marks with the barely dampened cloth.
- Minute 4–6: wipe the deck and keycaps; check ports with a light and a wooden pick if lint shows.
- Minute 6–9: brush and air the vents and exhausts; glance at the intake grilles’ dust load.
- Minute 9–10: note anything changing — a noisier fan, a warmer palm rest, faster dust — in the same note as your temperatures.
Ten minutes a month is the entire carrying cost of a clean gaming laptop, and it buys the two things owners actually want: a machine that runs at the temperatures it was designed for, and early warning of every problem that announces itself in dust, noise or heat before it announces itself in a repair bill. Set the routine on a calendar, attach it to something you already do monthly, and let it become as unremarkable as it is effective.
Cleaning the Software Side of a Dirty Machine
A laptop can be physically clean and behaviourally filthy: years of accumulated startup programs, orphaned utilities and dust of the digital kind making it run hot and slow in ways owners misread as hardware age. While the cloths are out, the digital clean deserves its ten minutes.
The startup audit
Open the startup list and interrogate every entry: launchers for stores you rarely open, updaters for peripherals you no longer own, assistants installed by other software as passengers. Disable what you do not recognise as daily infrastructure — disabling is reversible, which makes the audit safe — and restart. A machine that boots to a quiet desktop runs cooler at idle, spins its fans less, and gives games a cleaner stage. Repeat twice a year; accumulation is a process, not an event, and it resumes the day you finish.
Storage hygiene and heat
A nearly full system drive makes the machine work harder at everything, and games installed across fragmented, crowded storage load less smoothly. Keep comfortable free space on the system drive, uninstall the games you have genuinely finished, and let the operating system’s own storage tools clear the caches that rebuild harmlessly. None of this is glamorous; all of it shows up in the same place physical cleaning does — a machine that feels newer than its years.
Why this belongs in a cleaning guide
Because the symptom that sends owners to cleaning guides is usually “my laptop runs hot and loud and slow”, and that symptom has two independent causes that compound: dust in the fins and clutter in the system. Cleaning only the hardware half and declaring the machine still disappointing is the commonest false conclusion in laptop maintenance. Do both halves in the same session, verify temperatures and behaviour afterwards, and you will know — with evidence — whether anything more serious remains to be found.
The Cleaning Mindset: Maintenance as Ownership
There is a reason this guide ends with attitude rather than technique. Gaming laptops are the most maintenance-sensitive computers most people own — hot, dense, travelled, and used hard for years — and the difference between the ones that age gracefully and the ones that decline is rarely the purchase. It is the accumulation of ten-minute kindnesses: the monthly routine kept, the vents glanced at, the drink placed somewhere else, the temperatures known rather than guessed. None of it requires skill. All of it requires deciding that the machine’s condition is yours, which, once decided, makes every specific technique in this guide feel less like a chore list and more like what it actually is — the ordinary care of a tool you enjoy, returned in kind every time it runs cool, quiet and fast on a machine years older than its behaviour suggests.
Cleaning Incidents: Spills, Drops and Other Emergencies
The spill protocol
Liquid in a laptop is a race, and the first minute matters more than any later heroics. Power off immediately — hold the power button if necessary — unplug, and turn the machine keyboard-down over a towel so liquid drains away from the board rather than through it. Do not power it on to check whether it survived; that check is how survivors become casualties. Leave it draining and drying for at least a full day, longer for sugary drinks, and then treat it as a professional job unless the spill was tiny, water-only and entirely on the deck — because residue keeps corroding quietly long after the surface looks dry. Sugary and acidic drinks are the worst passengers; water is the most forgiving; all of them punish haste.
After a drop
A dropped laptop needs inspection before enthusiasm: check the corners and hinges for cracks, open and close the lid slowly listening for protest, and confirm the fans spin freely and quietly, because a shifted fan or a cracked fin announces itself in sound. Run the machine and watch temperatures in the first session — a dislodged heatsink shows up as an instant thermal problem. Cosmetic damage that changes nothing is a story; damage that changes sound, temperature or structure is a service visit.
The Clean Machine as a Selling Point
When the laptop eventually moves on — sold, handed down, donated — its condition is your cleaning history made visible, and the market prices it accordingly. A machine with a bright screen, a tight keyboard, quiet fans and documented temperatures photographs well, tests well and sells to the first serious viewer, while its neglected twin invites suspicion about everything the buyer cannot see. Keep the note you started during verification — cleaning dates, temperature checks, any professional services — because it is, in effect, a service history, and service histories are what separate a confident second-hand purchase from a gamble. Care compounds: the same habits that kept the machine cool for you are the ones that return its value to you at the end.
Related Guides
- our roundup of the best laptops for light gaming under 800
- our roundup of the best gaming laptops for under 750
- our roundup of the best gaming laptops for fortnite under 1000
- how to cool a gaming laptop
- rtx 4060 vs rtx 4070 laptop
Frequently Asked Questions
How often should I clean my gaming laptop?
Every two to three months for external cleaning in a typical home, monthly in dusty rooms or pet households, and whenever you notice fans running louder than they used to at the same settings. Internal cleaning by a technician is usually a yearly or two-yearly consideration depending on environment. The calendar matters less than the symptoms: rising temperatures and noise are the machine telling you the cooling path needs attention.
Can compressed air damage a laptop fan?
Used carelessly, yes: a long point-blank blast can overspin a fan beyond its design speed. Short bursts, a few centimetres of distance and an angled approach are safe and effective. Electric dusters are stronger, so keep more distance. Never wedge anything into a spinning fan and never clean a machine that is powered on. Follow those rules and air is the safest tool you own for this job.
Is it safe to open the laptop and clean inside myself?
On many models the base panel removes easily and blowing out the fans and fins from inside is genuinely effective, but it can affect warranty terms and ribbon cables are fragile. If the machine is under warranty or you are not confident, stay external and use a service centre for the internal clean. External cleaning alone recovers most performance on younger machines, so there is no rush to open anything.
What should I never use to clean the screen?
Household glass cleaners, kitchen sprays, paper towels and tissues. The chemicals can strip anti-glare coatings and the fibres can leave fine scratches that show forever against dark game scenes. A clean microfibre cloth, dry or barely damp with distilled water, handles everything a screen normally collects. Keep one cloth for the screen only, because a cloth that has wiped a desk carries grit.
My laptop is still hot after cleaning. What next?
Check the surface it sits on, the fan profile in the brand control app, and whether background software is loading the processor. Compare temperatures in the same game scene as before cleaning. If a machine over about three years old still throttles quickly, the thermal paste and pads have likely dried out; that is a technician-level service, and it usually restores the machine dramatically for a modest labour cost.
Does a cooling pad replace cleaning?
No. A pad improves the air supply to clean intakes, but it cannot push air through fins that are felted with dust, and on some designs it barely changes temperatures at all. Clean first, then judge whether a pad or stand adds anything in your setup. Many owners find a simple stand that lifts the rear of the machine gives most of the benefit with no extra fans or cables.
Can I use a vacuum cleaner on my laptop vents?
Only as a catcher held near the vent while you brush dust loose — never sealed against the vent, and never as a blower. A household vacuum generates static and can spin fans damagingly if its suction drives them. The brush does the work; the vacuum just collects what the brush frees.
How do I clean under the keycaps?
Mostly, you do not need to: the shake-out, brush and angled air routine clears what accumulates. Removing keycaps risks breaking their delicate clips and is rarely necessary outside a spill. If one key is obstructed, work around it with a wooden pick and patience rather than prising the cap off.
My laptop still runs hot after a thorough clean. What next?
Then dust was not the constraint, and the evidence points to the next causes in order: background software load, a failing fan, or aged thermal compound. Verify with monitoring which component runs hot and under what load, and treat compound renewal as the professional job it is on most models.