If you are asking what is throw ratio on a projector, you have found the single specification that decides where a projector can live in your room. Throw ratio is the distance from the projector lens to the screen divided by the width of the image. It is a simple division with total authority: it tells you, before you buy, whether a given projector can fill your screen from your shelf, your ceiling position or your coffee table, or whether it physically cannot.
The direct answer with an example: a throw ratio of one point five to one means the projector sits one and a half metres, feet or any unit away for every one unit of image width, so a two metre wide image needs the lens three metres from the screen. The sections below explain the ratio ranges that define long, short and ultra short throw, how zoom changes the figure, and how to use the maker calculator to place your projector exactly.
Disclosure: As an Amazon Associate, kajuandouglas.com earns from qualifying purchases. Links to Amazon on this page are affiliate links; they cost you nothing extra. Listing details such as price and availability change often, so check the current Amazon listing before you buy.
Quick answer: In short: throw ratio equals distance divided by image width. Around two and above is long throw, roughly between a half and one is short throw, and below a half, down to a fraction, is ultra short throw. A zoom lens gives a ratio range; a fixed lens gives one number.
What Is Throw Ratio on a Projector: The Maths, Worked Slowly With Real Rooms
Take any room and the formula does the planning. Suppose your screen or target image is one hundred inches on the diagonal, which is roughly eighty seven inches wide in the usual widescreen shape. A projector with a throw ratio of one point five needs its lens about one hundred and thirty inches from the screen, a little under eleven feet. The same screen with a short throw ratio of zero point five needs only about forty three inches. An ultra short throw ratio of zero point two five needs about twenty two inches, lens to screen, which is why those models live on furniture against the wall.
Run the formula backwards just as often. Measure the distance your room actually offers, divide by the image width you want, and the answer is the throw ratio you must shop for. This reverse use is the professional habit: rooms are fixed and projectors are chosen, so the room ratio comes first and the model shortlist follows. Every maker publishes the ratio or the zoom range for each model, and most provide online calculators that do the arithmetic with your exact screen size, including diagonal to width conversion.
In this guide
Zoom Ranges, Fixed Lenses and What the Numbers Hide
A projector with a zoom lens lists a ratio range, such as from one point three to one point six, meaning it can sit anywhere in that distance band for a given image width and be adjusted to fit exactly. That flexibility is precious during installation, because it forgives measurement error and furniture constraints. A fixed lens projector lists one ratio and must sit at almost exactly that distance, which demands precise placement and suits permanent installs planned around it, or portable use where you simply move the unit until the image fits.
Two cautions hide in the figures. First, throw is measured to the lens, not the projector body, and the body extends behind the lens, so allow physical space beyond the calculated distance. Second, image width, not diagonal, is the input the formula wants; mixing the two is the most common home calculation error and it throws the result out by enough to matter. Maker calculators accept diagonal screen sizes directly, which is the safest route for anyone who does not do this arithmetic every day.
Long, Short and Ultra Short: The Families the Ratio Creates
Long throw, broadly ratios around one point five and above, is the traditional home cinema arrangement: the projector sits at the back of the room on a shelf or ceiling mount, the beam crosses overhead, and model choice is widest. Short throw, roughly from a half to one, sits a few feet from the screen on a unit or low mount, eliminating shadows and suiting smaller rooms and gaming. Ultra short throw, below a half and often near a quarter, sits inches from the wall on furniture, trading installation simplicity for extreme sensitivity to screen flatness.
Neither family is a quality tier. Each contains resolutions, light sources and price classes of its own, and the same maker often sells siblings in several families. The ratio also interacts with lens shift and offset, the other placement specifications: shift lets you move the image without moving the projector, and offset tells you how far above or below the lens axis the image sits. A complete placement check uses all three numbers, which is why the setup and mounting guides on this site insist on the manual figures before any furniture is moved or holes are drilled.
Using Throw Ratio to Plan Your Exact Installation
The professional sequence is short. Decide the screen size from your seating distance. Measure the room for every realistic projector position and note each distance. Divide each distance by the screen width to get the ratio each position demands. Shortlist only models whose ratio range includes at least one of your positions, preferring a position inside the zoom range rather than at its very edge. Then verify with the maker calculator for your finalist, which confirms distance, image height and offset together, and test project from that position before committing to a mount.
Keep one flexibility principle in mind: a position in the middle of a zoom range forgives future changes, a different screen size, a replacement projector with a slightly different lens, or furniture rearrangement. A position at the extreme edge of the range works today and constrains every tomorrow. Throw ratio looks like a dry specification, but used this way it is the difference between a projector that fits your life and one you spend years working around.
Key Terms Glossary
- Throw ratio: Distance from lens to screen divided by image width; the specification that maps projector position to image size.
- Throw distance: The actual lens to screen distance for a given setup, calculated from the throw ratio and the image width.
- Zoom range: The span of throw ratios a zoom lens offers, giving placement flexibility for a fixed image size.
- Lens offset: The fixed vertical relationship between the lens axis and the image, stating how far above or below the lens the picture sits.
- Ultra short throw: Ratios below roughly a half, using special optics so the projector sits inches from the screen wall on furniture.
Common Misconceptions
- Throw ratio uses the screen diagonal: It uses image width. Diagonal figures must be converted, which maker calculators do automatically when you enter your screen size.
- A bigger throw ratio means a bigger image: The ratio alone says nothing about size. It links distance and width together; either can grow if the other follows the ratio.
- Zoom fixes any placement problem: Zoom offers a limited range. A projector whose range excludes your room distance cannot be zoomed into fitting, and digital scaling is not a substitute.
Throw Ratio and Lens Shift: Planning Them Together
Throw ratio sets the size; lens shift sets the position; a complete plan uses both in one pass. Start with the screen and the ratio to find your distance band. Within that band, choose the exact position your furniture or mount prefers. Then read the shift specification: vertical shift tells you how far above or below the lens axis the image can sit, which decides whether the projector can live on that shelf or must hang from that mount. A model whose shift range covers your preferred position installs without compromise; one whose range misses forces the position to move, not the image.
Offset is the third figure and the one most often missed. Many projectors place the image entirely above the lens axis when upright, or below it when ceiling mounted and inverted, by a fixed percentage of image height. That is why a projector on a low table throws its image up the wall, and why the mount drop calculation in the mounting guide starts from the offset diagram. Ratio, shift and offset together are the complete placement language, and every installation problem in this site guides traces back to one of the three being guessed instead of read.
Common Calculation Mistakes and How to Avoid Them
The diagonal error leads the list: feeding the advertised diagonal into a formula that wants width inflates the distance by roughly fifteen percent, enough to miss a zoom range edge. The body error follows: measuring the room to the wall behind the projector position rather than to the lens, forgetting the unit depth and its cable bend radius, which together consume a hand span or more. The edge error is subtler: choosing a position exactly at the end of a zoom range, where the calculator says it fits and reality, with its tolerances, says it almost fits.
Each error has the same antidote: use the maker calculator with your screen diagonal, measure the room to the lens position with the unit depth added, and choose a working point inside the range with margin on both sides. Then verify physically with a test projection before anything is fixed. Ten minutes of this discipline is the difference between the installations described as effortless in these guides and the ones described, by their owners, with a sigh.
Real-World Scenarios and Examples
Abstract advice lands differently in real rooms. These scenarios apply the guidance above to the situations readers describe most often.
- The shelf at the back: Room depth measured, ratio computed, model shortlisted by its range. The shelf position lands mid zoom, and installation is a non event.
- The coffee table shuffle: A portable moved until the image fits. The ratio is being solved by eye each time; marking the table position converts it to a permanent answer.
- The almost fits mount: Position calculated at the very edge of the zoom range. A small screen size adjustment or a mount moved a few inches restores the safety margin.
- The diagonal mix up: Distances all fifteen percent too long after a hand calculation. The maker calculator, fed the diagonal honestly, corrects the plan in one visit.
- The ultra short surprise: A new owner expects to nudge the unit for a perfect fit and finds millimetres matter. A stable surface and a flat screen turn sensitivity into precision.
Gear for This Guide
These verified examples span the throw families, so you can see how the ratio appears in real specifications for short, standard and ultra short throw models.

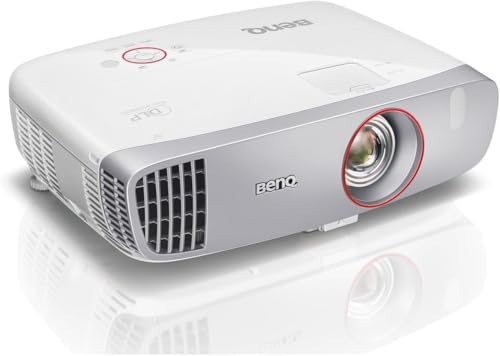
BenQ HT2150ST 1080P Short Throw Projector — A short throw model whose published ratio places it a few feet from the screen, a clear example of the short throw family figures in a real specification. Check price on Amazon.

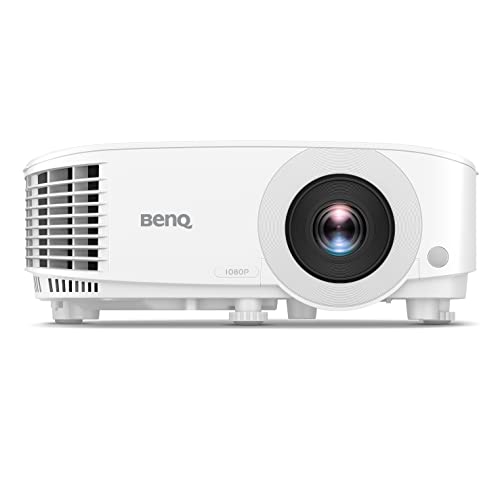
Epson Home Cinema 1080 3-Chip 3LCD 1080p Home Theater Projector — A standard throw living room model whose zoom range shows the placement flexibility a ratio range provides during installation. Check price on Amazon.

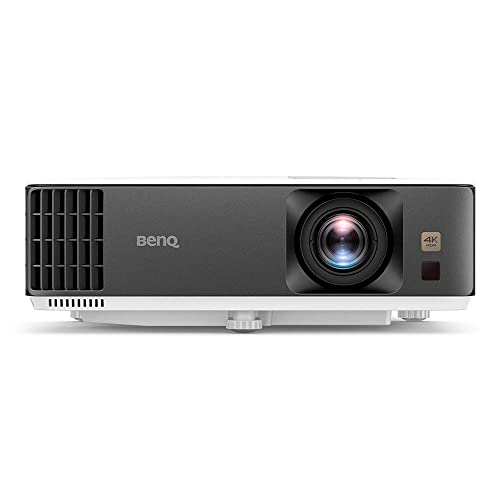
ViewSonic X10-4K True 4K UHD Short Throw LED Portable Smart Home Theater Projector (2019 Model) — An ultra short throw model whose very small ratio is the reason it can sit against the wall and still fill a large screen. Check price on Amazon.
Throw Ratio Worked Examples, Step by Step
The formula — throw distance divided by image width — becomes intuitive after a few worked examples. Run these with your own room’s numbers and you will be able to sanity-check any projector’s claims in under a minute.
Example one: a living room shelf setup
Suppose your shelf sits 3.6 metres from the screen wall and you want an image 2.2 metres wide, which corresponds to a screen of about 100 inches diagonal in 16:9. Divide 3.6 by 2.2 and the required throw ratio is about 1.64. Now read candidate specifications: a projector with a throw range of 1.4 to 2.1 covers 1.64 comfortably in mid-zoom, which is exactly where you want to be. A projector fixed at 1.2 would make the image too big from that shelf — at 3.6 metres it would paint an image 3 metres wide — while an ultra short throw at 0.25 would need to sit about 55 centimetres from the wall instead. One division has just sorted the entire market into fits and does-not-fit for your room.
Example two: the small bedroom
A bedroom offers 2.4 metres from a chest of drawers to the opposite wall, and the biggest sensible image is 1.8 metres wide, about an 80-inch diagonal. The required ratio is 2.4 divided by 1.8, roughly 1.33. A standard projector whose range starts at 1.5 cannot do it — even at its widest zoom the image would overflow — while a short-throw model spanning 0.7 to 1.4 handles it easily and could even go bigger. Notice what the example teaches: small rooms do not merely prefer short throw, they often require it, and no amount of menu adjustment changes a lens’s physical range.
Example three: checking a manufacturer’s screen-size chart
Manufacturers publish charts listing distance for each screen size, and the throw ratio lets you verify them. If a chart says a 120-inch screen (2.66 metres wide) needs 4 metres of distance, the implied ratio is 4 divided by 2.66, about 1.5. If the specification page lists a range of 1.3 to 1.7, the chart’s figure sits sensibly inside it. If the chart implied a ratio outside the stated range, you have caught an error — usually a chart copied from another model — before it caught you. This cross-check is also the fastest way to detect when a listing mixes up throw distance measured to the lens with distance measured to the back of the projector, a discrepancy of 20 to 30 centimetres that matters in tight rooms.
Zoom Range: The Ratio Is a Range, Not a Point
Why the same projector has two throw ratios
Most projectors zoom, so their throw ratio is quoted as a range: the smallest number is the widest zoom setting (biggest image from a given distance), the largest is the telephoto end (smallest image). When a specification shows a single number, the lens is fixed — common on ultra short throw and budget models — and placement must match it precisely. When comparing models, compare ranges, not single figures, and notice the range’s width: a 1.3x or 1.6x zoom gives genuine placement flexibility, while a token 1.1x zoom barely forgives a mis-measured room.
Where in the range should you aim to land
Plan for the middle. At the widest extreme, many lenses lose a little brightness and edge evenness; at the telephoto extreme, most projectors lose noticeable brightness because the lens aperture effectively narrows — a model can shed a meaningful share of its output at full telephoto. Landing mid-range keeps brightness predictable, leaves adjustment room if the screen or mount shifts slightly, and avoids discovering on installation day that your measurements were optimistic by the exact margin the zoom cannot cover.
Digital zoom is not zoom
Some models advertise additional digital zoom or image shrink in the menus. That feature crops and rescales the image electronically, discarding resolution and brightness to make the picture smaller. It is a legitimate emergency tool — better than an image spilling off the screen — but it should never appear in your throw planning. If your calculations only work with digital shrink engaged, the lens is wrong for the room, and the honest fixes are moving the projector, choosing a different lens category, or resizing the screen.
Throw Ratio Meets Lens Shift, Keystone and Screen Choice
Shift moves the image without changing the ratio
Lens shift slides the whole image up, down or sideways while the throw ratio — and therefore the image size — stays constant. This is why shift is the correct tool for a projector that must sit off the screen’s centreline, and why throw calculations should be done first and shift used only for the final placement within the shifted field. Remember that shift ranges shrink when combined: a lens shifted fully upward has less sideways range left, because the image circle is finite. Plan the mount position so that both shifts stay near the middle of their travel.
Keystone changes geometry, not throw
Keystone correction rescales the image to disguise a projector that is angled rather than square to the screen. It does not change where the projector can sit or how big the native image is, and it costs resolution and brightness on the corrected side. If your throw calculation places the projector correctly and squarely, keystone should read zero and stay there. Treat any plan that relies on keystone as a plan whose throw or mounting position is wrong, and fix the physical side instead.
Curved, bordered and ambient-light-rejecting screens
Screen choice feeds back into throw. Ambient-light-rejecting screens for standard throw have a minimum recommended throw ratio — fire the image from too close and their optical structure produces hot-spotting and uneven brightness — while the fresnel screens used with ultra short throw models are built for one very specific ratio range and reject standard-throw geometry entirely. Black borders also matter practically: an image calculated to exactly fill the viewable area will spill onto the frame with the slightest placement error, so aim the calculation a touch conservative and let the zoom finish the job on the day.
A Pre-Purchase Throw Checklist
- Measure lens-to-screen distance for every realistic projector position, accounting for body depth and cable bend.
- Fix the image width first from seating distance and room width, then derive the required ratio — never the other way round.
- Check the ratio range, not a headline number, and aim to land in the middle third of the zoom.
- Allow for brightness loss at telephoto if your setup lands near the long end of the range.
- Confirm screen compatibility, especially minimum throw for ambient-light-rejecting materials.
- Verify with the maker’s chart and cross-check the chart against the stated ratio range.
- Plan shift, not keystone, for any offset between the projector position and the screen centre.
Throw ratio looks like a piece of specification trivia until the day a projector does not fit a room; then it becomes the only number that mattered. A minute with the division, done before purchase, converts that risk into a known quantity — and it is the rare specification that rewards the buyer with complete certainty for almost no effort.
Throw Ratio on the Specification Sheet: Finding and Trusting the Numbers
Manufacturers present throw information in several dialects, and part of using the ratio well is translating between them without being caught by the inconsistencies that creep into listings, especially where retailers copy data between models.
The formats you will meet
A throw ratio may appear as a range (such as 1.3:1 to 1.7:1, meaning distance is 1.3 to 1.7 times image width), as a screen-size-and-distance table, as a single figure for a fixed lens, or hidden inside an online projection calculator the maker provides. Ultra short throw models express it as a very small decimal, and their listings sometimes quote distance from the wall to the back of the unit rather than to the lens — a difference of the unit’s whole depth, which on those models is most of the measurement. Whatever the format, convert everything to the same basis — lens to screen, image width — before comparing, and treat any listing that will not state its basis as a question to ask, not a number to trust.
Diagonal versus width: the classic trap
Throw ratio divides by image width, but screens are sold by diagonal, and the conversion depends on aspect ratio. For a 16:9 screen, width is about 0.87 of the diagonal; for a 4:3 screen, about 0.8. Buyers who divide distance by the diagonal get a ratio that is wrong by a consistent, dangerous margin, and the resulting image overflows or underfills by exactly that margin. Keep the conversion beside the formula wherever you write your room’s numbers, and when a calculator asks for diagonal, confirm it knows your aspect ratio before believing its answer.
When the calculator and the chart disagree
Makers’ online calculators occasionally carry data from a sibling model, and retailer listings copy each other faithfully, errors included. Your defence is the cross-check from earlier in this guide: derive the implied ratio from any distance-and-size pair the source gives, and confirm it sits inside the stated ratio range. If two sources disagree, trust the manufacturer’s own manual for the exact model — manuals are revised more carefully than marketing pages — and if the manual itself is ambiguous, measure from the lens in your own room before drilling any holes. Installation day is the wrong time to discover which document was wrong.
Throw Ratio for Special Setups
Two projectors, one image: stacking and blending in plain terms
Enthusiasts and venues sometimes combine projectors — stacking two for brightness, or blending two images into one very wide picture. Throw ratio governs both: stacked projectors must match ratio and position so their images coincide, and blended setups choose ratios so each projector covers its share of the width from the available depth. Home readers will likely never blend, but the principle illuminates the ratio’s meaning: it is the exchange rate between depth and width, and every multi-projector scheme is just arithmetic with that rate, done twice.
Rear projection and mirror rigs
Rear projection — the projector behind a translucent screen — folds the throw problem into the space behind the screen, where depth is usually scarce, which is why short-throw and ultra short throw models dominate it, sometimes with a mirror folding the path to save depth further. A mirror changes the path’s length, not the ratio’s logic: the total optical path from lens to screen is the distance that belongs in the formula. If you inherit or build such a rig, measure the path the light travels, including the mirror leg, and the same division predicts the image size as reliably as in a straight room.
Ceiling height and the vertical half of the problem
Throw ratio is a horizontal story, but installations fail vertically too: the lens must also sit at a height the projector’s vertical offset and shift can reconcile with the screen’s height. Many projectors project upward or downward from the lens axis by a designed offset, and a ceiling mount drops the lens below the ceiling by the mount’s length — both belong in the plan beside the ratio. Work the vertical arithmetic with the same care: screen centre height, lens height, offset direction and shift range. A setup can be perfect in throw and still paint the image half onto the ceiling, and it happens to someone every weekend.
Practising the Calculation Until It Is Reflex
Run the division for rooms you know: your living room’s depth against the image width you would want, a bedroom, a classroom or office you use. Notice how the required ratio sorts rooms into categories — most living rooms land in standard-throw territory, most bedrooms demand short throw for a big picture, most halls need long throw — and how the screen size ambition moves the answer as much as the room does. After a dozen mental runs the ratio stops being a formula and becomes a way of seeing rooms: every wall becomes a potential screen with a number attached, and every projector listing becomes a quick yes or no rather than a research project.
That fluency is the real product of understanding throw ratio. Projectors are bought rarely and lived with daily, and the fit between lens and room is the one characteristic no setting, accessory or firmware update can revise after purchase. A minute of division, honestly measured and cross-checked, is the cheapest insurance in home cinema — and now it is a habit you own rather than a specification you fear.
Throw Ratio and Brightness: The Connection Nobody Mentions
Throw choices quietly change brightness, and buyers comparing a projector’s output across different setups are often comparing different lenses at different zoom positions without knowing it.
Zoom position is a brightness setting
As established earlier, most zoom lenses pass less light at their telephoto end. The practical consequence for throw planning: two rooms using the same projector at opposite ends of its zoom range can differ in brightness by a margin owners can see, with the long-throw room — telephoto end — the dimmer one. If your plan lands at full telephoto in a bright room, the throw plan and the brightness plan are in conflict, and the resolutions are the physical ones: move the projector closer and zoom wider, enlarge the brightness budget, or shrink the screen. No menu setting negotiates between a lens and physics.
Short throw’s brightness advantage — and its uniformity tax
Short-throw setups typically run their lenses at the wide, light-efficient end and sit close, which is why modest projectors can look surprisingly punchy in small rooms. The tax is uniformity: extreme wide optics work hardest at the frame’s edges, and some designs pay with dimmer or softer corners. When you evaluate a short-throw model, the white-field uniformity check matters more than its lumen headline; when you evaluate a long-throw plan, the telephoto brightness loss matters more than the same headline. The specification is one number; the throw turns it into two different projectors.
Lens Shift, Offset and the Ratio’s Silent Partners
A throw calculation that ends at distance and width is half finished. The image must also land at the right height, and two specifications govern that: the projector’s built-in offset — the fixed angle, expressed as a percentage of image height, by which the picture sits above or below the lens axis — and its lens shift range, the adjustable portion. A ceiling projector typically throws its image downward from an inverted position with an offset designed for exactly that; a tabletop model throws upward from a coffee table by the same logic. When the offset and shift together cannot reconcile your lens height with your screen height, no throw ratio saves the setup, and the symptom of ignoring this is the tilted projector and the keystone correction this guide keeps warning against. Do the vertical arithmetic on paper, with the manual’s offset diagram open, before any mount is bought. It takes five minutes, it uses the same division skills, and it is the difference between an installation that aligns in an afternoon and one that argues with you for years.
Throw ratio, offset and shift: three numbers that together describe where a projector can live and what it can paint. Learn to read them as one sentence — this lens, at this distance, at this height, fills that screen — and you hold the complete grammar of projector placement. Every other specification describes how good the picture will be; these describe whether there will be a picture at all, in the place you need it, at the size you want. That is why this modest division, of all the numbers in home cinema, deserved a guide of its own.
Throw Ratio Mistakes, Collected From Real Installations
The mount drilled before the maths
The most expensive mistake in the catalogue: a ceiling mount fixed, cables run, and only then the discovery that the projector at that distance makes an image larger than the screen or smaller than the ambition. Every element of the fix — moving the mount, patching the ceiling, re-running cable — was free the week before. The division takes a minute; do it before the drill, and do it again with the actual projector’s box open on the floor, testing the image on the wall from a temporary position, before anything is fixed permanently.
The screen bought first, in the wrong order of operations
Screens are seductive and projectors are complicated, so buyers purchase the screen, mount it proudly, and then shop for a projector to fill it — discovering that their room’s depth and their screen’s size demand a ratio that eliminates most of the models they liked. The forgiving order is: room measurements, required ratio, projector shortlist, then the screen sized to what the chosen projector paints best. If the screen already exists, be honest that it has cast the deciding vote and shop within the ratio it demands.
Measuring to the wrong point
Distance measured to the back wall, to the mount’s centre, or to the projector’s rear panel rather than its lens front — each error is small, and in a tight room each is decisive. Lens to screen surface, every time, with the projector’s body depth and cable bend added to the plan for where the unit physically sits. Write the measurement down with its basis stated; a number without its basis is a rumour.
The Ratio as a Way of Thinking About Rooms
Master this one division and a quiet change happens: you stop seeing rooms as furnished spaces and start seeing them as optical instruments with potential. A long thin room announces its throw; a square bedroom confesses its need for short throw or a modest screen; a hall with a balcony rail suggests a mounting position and a ratio in one glance. Professionals develop this eye over years of installations, but the eye is really just the formula, practised. That is the deepest reason this specification deserved its own guide: throw ratio is not a fact about a projector. It is the grammar of the sentence every installation speaks — projector, distance, screen — and fluency in it is the difference between hoping a setup works and knowing, before a single hole is drilled, that it will.
A Short History of Why This Number Exists
Throw ratio is older than home cinema: it comes from cinema projection, where a projectionist needed to know, for a given theatre’s depth and screen width, which lens the booth required — and lenses were, and in commercial cinemas still are, interchangeable optics chosen by exactly this division. Home projectors inherited the mathematics when they inherited the ambition. The number survived every technology transition since — film to digital, lamp to laser, standard definition to resolutions the original projectionists never imagined — because it describes geometry, and geometry does not become obsolete. There is something reassuring in that continuity: the same division that placed a lens in a 1930s picture palace places your projector on its ceiling mount, and the care that made it work then — measure honestly, convert carefully, verify before fixing anything permanently — is the whole of the craft now. Master the small division, and you are practising the oldest skill in projection, with the newest equipment, in your own room.
Throw Ratio When Buying Second-Hand
Used projectors are bargains with a geometry catch: the model on offer was chosen for someone else’s room, and its lens may be entirely wrong for yours even when its price is entirely right. Run the division before viewing any second-hand machine, using the exact model’s manual figures rather than the seller’s recollection, and treat a fixed-lens model with particular care, since it offers no zoom forgiveness at all. Bring the room’s numbers to the viewing, test the machine’s image against a wall at your distance if the seller allows, and remember that a slightly lesser projector with the right ratio will delight you for years while a superior one with the wrong ratio will merely impress you in someone else’s house. In the used market, patience is plentiful and suitable lenses are the scarce resource; buy the lens your room requires and let the rest of the specification follow.
One Last Sanity Check Before You Drill
Stand in the room with the tape measure and speak the plan aloud as a single sentence: the lens will be here, the screen will be there, the distance between them is this, the image width is that, and the division gives a ratio inside the lens’s range with the zoom near its middle. If any clause of the sentence wobbles — a distance estimated rather than measured, a width hoped rather than chosen, a ratio remembered rather than checked — stop and firm it up. Installations fail in the wobble, never in the arithmetic, and the sentence test finds wobble in ten seconds. Say it, believe it, then drill.
Related Guides
- best projectors for presentations
- best portable projectors for movies
- best projectors for daytime viewing
- best speakers for projectors
- best projectors for gaming under 1000
- laser vs lamp projector
- dlp vs lcd projector
Frequently Asked Questions
How do I calculate throw distance for my screen?
Multiply your image width by the throw ratio. A two metre wide image with a ratio of one point five needs the lens three metres from the screen. If you know your screen by its diagonal, use the maker online calculator instead, because it converts diagonal to width for the screen shape automatically. Remember the distance is measured to the lens, and the projector body extends behind it, so confirm the physical unit fits at that position with cable room to spare.
What throw ratio do I need for a small room?
Divide your available distance by your target image width. If the result is around one or below, you are shopping for short throw models; if it is a small fraction, ultra short throw. Small rooms also benefit from short throw because the beam stays near the screen and nobody walks through it. Do the division before reading reviews, because it eliminates most of the market correctly and instantly, and what remains is guaranteed to fit the room you actually have.
Does zoom change the throw ratio?
Yes. A zoom lens provides a range of throw ratios, so the projector can sit at different distances for the same image width and still fill the screen exactly. That range is listed in the specification and in maker calculators. A fixed lens model has a single ratio and must be placed at its calculated distance. When you have a choice, a position in the middle of the zoom range is ideal, because it leaves adjustment room for alignment and for future changes to the room or screen.
What happens if my projector is too close or too far for its throw?
Too close, and even at minimum zoom the image overflows the screen; too far, and at maximum zoom it cannot grow large enough to fill it. Neither problem has a good digital fix, because cropping or scaling wastes resolution and brightness. The solutions are physical: move the projector, change the screen size, or choose a model whose ratio range includes your position. This is exactly why the throw calculation belongs at the start of buying, not after delivery.
Is throw ratio measured to the screen diagonal or width?
Width, always. The ratio is distance divided by image width. Because screens are sold by diagonal, the conversion causes most home calculation errors. For the common widescreen shape, the width is roughly eighty seven percent of the diagonal. Maker throw calculators remove the risk by accepting the diagonal screen size you own and doing the conversion internally, then returning the distance range for that exact model, which is the method this guide recommends for final checks.
Can lens shift compensate for the wrong throw distance?
No. Lens shift moves the image up, down or sideways on the screen without changing its size, while throw distance sets the size itself. Shift is for registering a correctly sized image precisely onto the screen frame; it cannot shrink an overflowing image or enlarge an undersized one. Size belongs to distance and zoom alone. Use shift generously for position, use the throw calculation honestly for size, and the two tools together produce the perfectly fitted, fully resolved image that alignment guides aim for.
Is throw ratio the same as zoom?
No. Throw ratio describes the relationship between distance and image width; zoom is the lens’s ability to vary that ratio across a range. A projector’s throw specification is therefore usually a range — the ratio at its widest zoom and at its longest — and your setup should land comfortably inside it.
What throw ratio do I need for a small room?
Divide your available lens-to-screen distance by your desired image width. Small rooms wanting big images usually land below 1.0, which is short-throw territory, and below roughly 0.4 you are looking at ultra short throw models that sit against the wall.
Does a longer throw ratio mean a better projector?
No — it means a projector designed for deeper rooms. Ratio is fit, not quality. A long-throw model in a small room is simply the wrong tool, however excellent its optics, because it cannot make a small enough image from the distance the room offers.