Learning how to mount a projector on the ceiling is the step that turns a temporary setup into a real home cinema: the image is always aligned, nobody walks through the beam, and the projector disappears from the room. It is also the step that demands the most care, because the unit hangs above people for years. This guide covers position calculation, mount choice, safe fixing into ceiling structure, alignment without keystone and cable runs that stay tidy and safe.
Safety governs every step: fix only into a ceiling joist or solid structure with rated hardware, never into plasterboard alone, use two people for lifting and fitting, check for hidden cables and pipes before drilling, support cables so their weight never hangs from projector ports, and never open the projector itself. If your ceiling construction is unclear or you cannot find solid structure where the projector must go, a professional installer is the right call, not a stronger plug.
Disclosure: As an Amazon Associate, kajuandouglas.com earns from qualifying purchases. Links to Amazon on this page are affiliate links; they cost you nothing extra. Listing details such as price and availability change often, so check the current Amazon listing before you buy.
Quick answer: In short: calculate the exact position from throw ratio and lens offset, choose a rated mount with the adjustments you need, fix it into a joist or solid ceiling, hang the projector with two people, align with lens shift and zoom keeping keystone at zero, then route and support cables safely.
What You Need
- The throw calculation for your screen: Your screen width, the projector throw ratio range and its lens offset figures from the manual, worked out before any drilling.
- A rated ceiling mount: Suited to your projector weight and mounting pattern, with tilt and roll adjustment and a cable channel if possible.
- A stud and joist finder with cable detection: To locate solid ceiling structure and warn about hidden cables and pipes along your fixing and cable routes.
- Correct fixings, drill and a second person: Lag bolts or fixings rated for the ceiling type and load, plus a helper for every lifting and holding stage, without exception.
In this guide
How to Mount a Projector: Step by Step
Step 1: Calculate the exact mounting position first
Work out the distance from the screen using the throw ratio and your screen width, choosing a point inside the zoom range rather than at its extreme, so you keep adjustment in both directions. Then account for lens offset: many projectors project slightly upwards from the lens axis or have a fixed offset, so the mount height must place the lens at the height the manual specifies relative to the screen top. Mark the position on the ceiling in pencil and verify it by projecting from a ladder held position or a tall stand before drilling.
Step 2: Locate solid ceiling structure
Use the finder to locate a joist exactly at your marked position, scanning in both directions to confirm its line, and sweep for cables and pipes before choosing bolt holes. If the ideal position falls between joists, fit a suitable timber noggin between joists from above if you have access, or use a mount plate that spans two joists. Never fix a projector mount into plasterboard alone with ordinary plugs; the load is permanent, dynamic with building movement, and directly above seating.
Step 3: Fit the ceiling plate securely
Drill pilot holes into the joist to the depth and diameter the fixings require, keeping the drill vertical and stopping if you meet unexpected voids or services. Secure the ceiling plate with every rated fixing specified, tightening evenly, then load test it firmly by hand. Fit the drop pole or direct mount section to the length that places the lens at your calculated height. Any movement or creak at this stage must be resolved now; it will not improve with a projector hanging from it.
Step 4: Attach the projector and lift with two people
Fit the mount projector plate to the unit on a table, using the screws specified for its mounting points. With one person on a stable platform and one supporting from below, lift the projector, engage the mount connection fully and fit every locking screw before anyone lets go. Connect power and HDMI cables with supported service loops, routing them through the mount channel or along the ceiling so no cable weight pulls on the ports and no cable is pinched by the mount mechanism.
Step 5: Align the image physically, not digitally
Power on and project a test pattern. Use the mount fine tilt and roll adjustments to level the image, the zoom to size it, and lens shift to position it, aiming for a perfectly rectangular image filling the screen with keystone correction at zero. Focus on fine text once the unit has warmed up for several minutes. Small mount adjustments at this stage are normal; make them in tiny increments, because a fraction of a degree at the ceiling becomes inches at the screen.
Step 6: Finish cables, ventilation and safety checks
Complete the cable run to your sources using ceiling trunking, a rated in ceiling route that complies with local rules, or a tidy surface channel, keeping power and signal runs neat and supported. Confirm the ventilation clearances in the manual are respected around the mounted unit, since ceiling air is warmest. Finally, recheck every locking screw, confirm the mount cannot rotate or slip, and record the position measurements and settings so the setup can be restored after any future removal for cleaning or service.
How to Mount a Projector: Mount Types and Drop Length Decisions
Ceiling mounts range from fixed low profile plates that hold the projector close to the ceiling, through pole mounts with adjustable drop, to universal spider mounts with arms that fit almost any unit. Low profile mounts look neatest but suit only projectors whose lens offset works with a high position. Pole mounts solve the common problem that the lens must sit lower, often level with the top of the screen, and their channels hide cables elegantly. Universal mounts offer flexibility for future projectors at the cost of more adjustment points to lock down carefully.
Drop length is a calculation, not a guess. Start from the screen top height, apply the projector lens offset from the manual, and the result is the lens centre height; the mount must place the lens there. Getting this wrong by a few inches forces either a tilted projector with keystone correction or a remount, both avoidable with ten minutes of arithmetic and a test projection from a stand before drilling. Measure twice from the manual figures for your exact model, because offsets differ significantly between designs.
Living With a Mounted Projector: Access, Cleaning and Changes
A mounted projector still needs occasional attention: filter checks, lens blower cleaning and, for lamp models, lamp replacement after a few thousand hours. Choose a mount that lets the unit be serviced or removed without disturbing the ceiling plate alignment, and keep the access route in mind: you will be working from a platform, so leave yourself safe working room rather than mounting tight into a corner. Note the lamp hour reading at installation so replacement timing never surprises you before a big film night.
Plan also for change. Sources move to new HDMI standards, screens get upgraded and projectors themselves are replaced on a longer cycle. A mount position chosen inside the zoom range, with cable routes that can accept a new cable, adapts gracefully. Keep the mount instructions, spare screws and your position notes together. The installations that age best are the ones where the next change was imagined during the first installation, and that foresight costs nothing at this stage.
Common Mistakes
- Fixing into plasterboard alone: A ceiling mount carries a permanent load above seating. Fix into a joist or solid structure, span joists with a plate, or add a noggin; never trust board alone.
- Guessing the position without throw and offset figures: Throw ratio sets the distance and lens offset sets the height. Calculate both from the manual and test project before drilling.
- Letting cable weight hang from the ports: Unsupported cables strain connectors and work loose. Support every run and leave gentle service loops at the unit.
- Correcting a tilted mount with keystone: Keystone costs sharpness permanently. Adjust the mount tilt and roll and use lens shift until the image is square with correction at zero.
Pro Tips
Test project from a tall stand or ladder at the exact planned position for a full evening before drilling any holes.
Photograph the ceiling structure markings and cable routes before covering them; future drilling in that ceiling will thank you.
After the first week, recheck all mount locking screws once, because assemblies settle slightly under load and thermal cycles.
Special Situations: High Ceilings, Sloped Ceilings and Rear Shelves
High ceilings ask for a longer drop pole and a sterner look at mount rigidity, because a long pole amplifies any play at the ceiling plate into visible image movement. Choose a mount with a braced or larger diameter pole, confirm the lens can still reach the required height relative to the screen, and consider whether a wall mounted rear shelf at the correct height serves the room better than a dramatic drop. The goal is a lens at the calculated position that does not move; the route there is negotiable.
Sloped ceilings, common in attic rooms, need an angled ceiling plate that lets the pole hang truly vertical; a pole forced to follow the slope throws the projector off level beyond what its adjustments can forgive. Rear shelf mounting remains the honourable alternative in difficult rooms, and in rented homes it is often the only one. A rigid, well fixed shelf at the calculated height, with the projector secured against knocks, delivers the same image as a ceiling mount with none of the structural questions, and this guide measurements apply to it unchanged.
The Pre-Drill Checklist Professionals Use
Before any drill starts, a professional confirms five things in writing: the throw distance from the manual calculator for the exact screen width, the lens height from the offset diagram, the joist position marked at both edges, the services sweep completed along every drill line and cable route, and a successful test projection from the intended position, watched for a full scene. That list exists because every item on it has, at some point, been the one whose absence caused a remount, a repair or a quietly compromised picture.
Adopt the list whole. It takes twenty minutes, most of it the test projection you will enjoy anyway, and it converts mounting from an act of optimism into a verified procedure. Add your own sixth item: photograph everything before it is covered, the joist marks, the plate, the cable route. Installations are forgotten in a year; photographs are not, and the next person to drill that ceiling, possibly you, inherits the knowledge instead of the risk.
Real-World Scenarios and Examples
Abstract advice lands differently in real rooms. These scenarios apply the guidance above to the situations readers describe most often.
- The attic cinema slope: Angled ceiling plate, pole hanging vertical, lens height calculated from the screen, not the ceiling. The slope is scenery; the geometry is standard.
- The high Victorian ceiling: Long drop assessed honestly for rigidity, or a high rear shelf chosen instead. The lens position is non negotiable; the hardware route to it is flexible.
- The joist in the wrong place: Ideal spot falls between joists. A spanning plate or a noggin solves it structurally; shifting the projector and using zoom and shift solves it optically. Plasterboard alone solves nothing.
- The future proof install: Position chosen mid zoom range, cable route accessible, mount rated beyond the current unit weight. The next projector, years away, inherits a ready room.
- The rental shelf solution: No ceiling fixings permitted. A rigid wall shelf at lens height, projector secured, cables trunked neatly; the image is identical and the deposit is safe.
Gear for This Guide
These verified models represent the ceiling mounted classes: lens equipped dedicated room units, and a laser model whose low maintenance suits a permanent install.
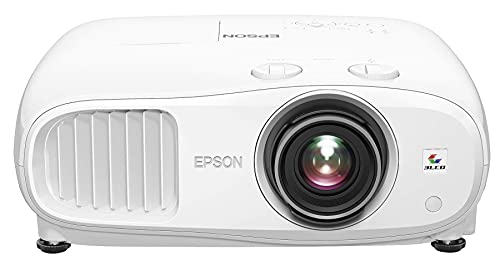
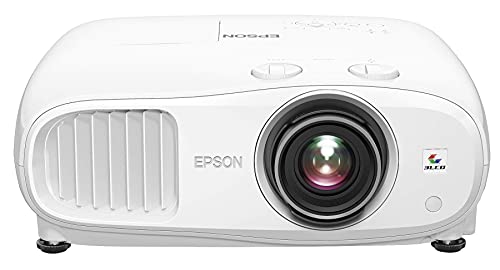
Epson Home Cinema 3800 4K PRO-UHD 3-Chip 3LCD Projector with HDR Technology — A 4K PRO-UHD model with lens features typical of ceiling mounted dedicated room installs, where offset and shift figures drive the mount calculation. Check price on Amazon.

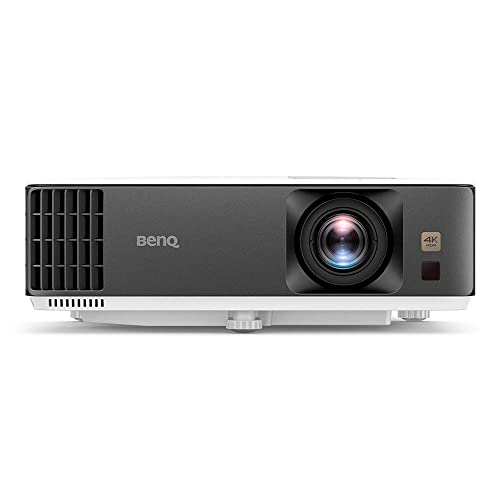
BenQ HT5550 True 4K UHD Home Theater Projector with HDR-PRO — A dedicated home theatre projector in the class usually ceiling mounted permanently, illustrating why joist fixing and drop length planning matter. Check price on Amazon.

NEBULA Cosmos Laser 4K Projector, 2200 ANSI Lumens, Android TV with Dongle, Autofocus, Auto Keystone Correction, Screen Fit, Home Theater Projector with Wi-Fi & Bluetooth, for Office and Business Use — A laser projector whose long light source life suits ceiling mounting, because lamp changes are the main reason mounted units come down. Check price on Amazon.
Planning the Mount: Geometry Decides Everything
A projector mount succeeds when the planning is finished before a drill appears. Establish the exact screen position and size first, then work backwards to the projector: the throw distance its lens needs for that size, the vertical position its offset demands — many projectors project slightly upward or downward from lens height rather than straight ahead — and whether lens shift gives you forgiveness or the mount must be millimetre-honest. Mark the intended lens position in the room and live with the marks for a day. Ceiling obstructions, light fittings, ceiling fans, and the simple question of whether heads will pass through the beam all reveal themselves to a patient planner and ambush an impatient one.
Ceiling structure and the weight question
The mount must fix into structure, not into plasterboard hope. Locate the joists with a stud finder and confirm by measurement, because a projector is a modest weight that becomes a serious one at the end of a drop pole, with leverage multiplying every wobble and any accidental knock. If the ideal lens position falls between joists, a mounting plate or a board fixed across two joists redistributes the load properly. Renters and those with ornate ceilings should consider the alternatives honestly — a high shelf, a rear cabinet, or a short-throw unit on furniture — rather than a compromised fixing. A mount that flexes ruins focus and alignment slowly; a mount that fails ruins the projector quickly.
Choosing the Mount Itself
Mounts divide into flush designs that hug the ceiling for high rooms, drop-pole designs that lower the projector to the correct height in tall spaces, and adjustable arms for wall mounting. Match the mount’s rated capacity to your projector with generous margin, and prefer mounts with fine adjustment in tilt, roll, and rotation, because those small screws are how a nearly-right installation becomes an exactly-right one. Universal mounts fit most projectors through adjustable legs that meet the unit’s mounting holes; confirm your model’s hole pattern and weight before ordering. A mount with a quick-release plate earns its keep at every future bulb-era service, lamp change on older models, or deep clean, letting the projector come down in minutes instead of an afternoon.
Cable planning before the ceiling closes
Decide cable routes while the mount is still a plan. Power must reach the projector — ideally from a ceiling outlet installed by an electrician where codes require, never from a dangling extension lead as a permanent solution — and signal cables must arrive from your sources. Long HDMI runs need cables rated for the length and resolution, tested at full quality before any are buried in trunking or ceiling voids. Leave a service loop of slack at the projector end; future-you, swapping a cable at the top of a ladder, will be grateful. If the run is very long or the ceiling hostile, consider signal-over-network-cable extenders as a legitimate architecture rather than a compromise.
The Installation, Step by Step in Spirit
Fix the ceiling plate into the located structure, checking level as you go, because a plate a degree out becomes a projector visibly out at the screen. Assemble the mount and attach its plate to the projector on a table, not up a ladder — the fiddly leg adjustments belong at ground level with good light. Raise the projector with a helper; one person holds, the other secures, and nobody balances a projector one-handed above their head. Power and signal follow, then the first power-up with the image deliberately rough: centre it, level it, and only then refine. Alignment at this stage uses the mount’s fine adjustments and lens shift, in that order, keeping digital keystone correction untouched as the reserve it should be.
Alignment discipline: level, square, then focus
Work in a strict sequence. Roll first, so the image’s top and bottom edges are level with the screen’s. Then yaw, so the projector faces the screen squarely and both sides measure equal height. Then pitch, so the image sits at the right height without tilt. Then lens shift for the final placement, zoom for exact size, and focus last of all, judged from the seating position on detailed content. Rushing to focus early is the beginner’s error, because every later adjustment disturbs it. When the rectangle is a rectangle and the corners are sharp, tighten every mount screw in sequence and re-check, since tightening itself can nudge a careless mount out of true.
Safety, Codes, and Knowing Your Limits
Ceiling electrical work belongs to qualified hands in most jurisdictions, and a projector project is not the place to improvise mains wiring. Ladders deserve respect: a helper footing the ladder, tools in a belt rather than balanced on rungs, and no overreaching with a projector in hand. Consider a safety cable or secondary retention for the projector where the mount offers it, particularly above seating — a cheap insurance against the unlikely day a fixing fails. Keep the projector’s vents unobstructed by the mount or ceiling, respecting the manufacturer’s clearance guidance, because a projector that cannot breathe runs hot, loud, and short-lived.
Aftercare: keeping the installation true
Installations drift. Screws relax microscopically, houses settle, and a projector bumped during cleaning sits a degree off forever after. Check alignment when you notice it rather than on a schedule — soft corners on one side or a creeping trapezoid are the tells — and correct with the mount’s fine adjustments, not by twisting the projector by hand against its fixings. Dust the unit and clear its filters as the manual directs, working gently around the mount. Keep the mount’s tools — usually small hex keys — in a labelled bag near the projector’s remote, because the right key in hand turns a five-minute correction into a five-minute correction, and the wrong afternoon hunting for it turns it into a postponed one.
When Not to Ceiling-Mount: The Honest Alternatives
- A rear shelf or bookcase at the right height serves many rooms with zero drilling.
- An ultra-short-throw projector on a low cabinet removes ceiling work entirely.
- A portable projector on a tripod suits renters and multi-room use better than any fixing.
- A wall mount behind seating can beat a ceiling mount where joists fall awkwardly.
The ceiling mount is the classic solution, not the compulsory one. Choose the installation your room, your tenure, and your structure genuinely support, align it with patience, and the reward is the same either way: a projector that disappears, leaving only the film.
Mounting Situations: High Ceilings, Sloped Ceilings, and Awkward Rooms
Real rooms rarely offer the textbook ceiling. In a tall room, a drop pole brings the projector to the height its lens offset demands, but every centimetre of drop adds leverage and sway risk, so poles want rigid fixing, a mount with fine adjustment that survives its own length, and a check that the pole’s presence does not put the projector in the path of tall heads on the stairs behind. Sloped and vaulted ceilings need angled ceiling plates or a short vertical stub that presents the mount with a level start; improvising the angle at the projector end consumes the adjustment range you need for alignment. In rooms where the ceiling is simply unavailable — glass, ornate plaster, rental restrictions — a high rear wall mount or a furniture solution is not a compromise but the correct engineering answer to the structure you have.
Short-throw and ultra-short-throw mounting differences
Short-throw projectors often mount close to the screen on an extending arm, and their geometry is less forgiving: small position errors become large image errors, and the arm must not flex under the projector’s weight or the image will breathe with every door slam. Ultra-short-throw units usually sit on furniture, but wall-mounting the screen becomes the precision task instead, because those projectors magnify every ripple in the surface — a fixed-frame, perfectly flat screen stops being a luxury at that throw distance. Choose the mounting project that matches your technology: ceiling precision for conventional throw, arm rigidity for short throw, surface flatness for ultra-short.
Power, Signal, and the Electrician Conversation
A ceiling projector needs power where it lives, and the clean solution — a ceiling outlet near the mount — is an electrician’s job in most homes, worth scheduling alongside any other electrical work to share the visit’s cost. Discuss placement with the projector’s position already marked, leave access for the plug and any power brick, and consider a switched or smart-controlled outlet if the projector’s own standby behaviour matters to you. For signal, the modern options are a long rated HDMI cable, an optical-fibre HDMI for very long runs, or network-cable extenders, each with cost and reliability characters your installer can price. Test the full chain at full quality on the floor before anything is fixed above your head; the ceiling is a terrible place to discover an almost-adequate cable.
Ventilation and service access in the design
Mount the projector so it can breathe and be reached. Respect the maker’s clearances around intakes and exhausts, keep the exhaust from blowing directly onto the screen or the audience, and think about the filter-cleaning and eventual service position now: a quick-release mount that lowers the unit into your hands turns maintenance from a ladder performance into a table task. If the projector will share the ceiling with a fan or a light fitting, check sightlines and shadows with a torch and a helper before drilling, because a pendant light inside the beam’s cone announces itself on every film until it is moved.
Fine Alignment Clinic: Chasing the Last Two Degrees
Most installations reach ninety percent quickly and then fight for the rest. The stubborn cases have names. A keystone shape — one side taller — means yaw: rotate the projector in its mount until both sides measure equal, resisting the digital correction button. A trapezoid leaning the other way means roll; level the image against the screen’s edges, not against the ceiling, which may itself be unlevel. An image that cannot fill the screen height without overspilling the width means the distance or zoom is wrong for the screen’s aspect, a planning error no adjustment cures — the mount moves or the screen does. Soft focus in one corner with the rest sharp means the projector is not square to the screen in three dimensions, and the cure is patience with the mount’s micro-adjustments, judged from the seat, one axis at a time.
Focus drift and the settling period
New installations settle: mounts bed in, screws find their seats, and a projector focused on day one may sit slightly soft a week later, especially after its first long, hot film sessions have cycled its materials. Schedule a two-week recheck — focus, alignment, screw snugness — as part of the installation rather than as a response to failure. Thereafter, drift should be rare and event-driven: a knock, a clean, an earthquake of household life. Keeping the mount’s hex keys with the remote, as advised elsewhere in this guide, converts each recheck from a project into a pause in the film.
Multi-Room and Rental-Friendly Mounting Alternatives, Revisited Honestly
Some households move the cinema between rooms or homes too often for fixed mounts, and for them the honest best installation is a deliberate portable one: a sturdy tripod or a dedicated stand at a measured position, floor marks for its feet, cables of exactly the right length coiled with it, and a setup routine practised to five minutes. Renters can achieve near-fixed quality with a tall, heavy shelving unit behind the seating, secured against tipping, which reads as furniture to a landlord and as a mount to the projector. The principle is that stability and repeatability — not attachment to the building — are what make an installation good. A portable setup that returns to the same aligned position every time beats a ceiling mount installed crookedly once and resented forever.
When to hire the installer
Professional installation earns its fee in defined circumstances: structural uncertainty about the ceiling, electrical work, very long or in-wall cable runs, high ceilings needing proper access equipment, and installations where the projector’s value makes a dropped unit a serious loss. A good installer also aligns and calibrates, and their hour of geometry is visibly better than most first attempts. Hire for the parts beyond your competence without embarrassment, and do the parts within it — planning, marking, testing, documenting — yourself, because those are the parts that make any installation, professional or not, actually fit your room.
The Mounting Sign-Off Checklist
- Structure confirmed, fixings into joists or a proper spanning plate, no flex under a firm hand.
- Image rectangle true on all four edges, corners sharp from the centre seat, keystone correction unused.
- All mount screws tightened in sequence and rechecked after the first week.
- Cables tested at full quality before concealment, with a service loop at the projector.
- Vents clear, exhaust path sensible, filters reachable, quick-release function understood.
- Position photographed, settings noted, hex keys stored with the remote.
An installation that passes that list disappears from your life, which is the highest praise a mount can earn. What remains is the screen, the dark, and the film — the projector having become, as it should, furniture for light.
Projector Mounting and the Room’s Other Lives
A mounted projector shares its ceiling with the room’s other ambitions, and the thoughtful installer negotiates those treaties in advance. Ceiling fans and projectors are natural enemies — the fan’s blades can intersect the beam, its motor’s vibration can travel through shared structure into the mount, and its pull on the air moves dust through the projector’s filters — so rooms containing both want distance between them and, ideally, independent structure. Pendant lights belong outside the beam’s cone or on dimmers that retire them during screenings. Speakers, especially ceiling speakers in an immersive audio layout, compete for the same real estate and should be planned on the same drawing, not discovered as conflicts one hole at a time. Even the humble smoke detector has a claim on the ceiling that building practice respects. Draw the ceiling once, with every tenant placed, and the installation becomes carpentry; skip the drawing and it becomes archaeology, conducted with a drill.
Future-proofing the installation itself
Projectors are replaced more often than mounts are moved, so install for the successor as well as the incumbent. A mount plate positioned with a little generosity of adjustment, cables that reach a few hand-widths beyond the current unit’s ports, and power placed for a slightly different chassis all mean the next projector — perhaps a different size, perhaps a different throw — can inherit the installation with an afternoon’s alignment instead of a new ceiling project. Conduit or accessible trunking for the signal run is the single most future-proof choice available, because cables and their standards change faster than anything else in the system. The installer who thinks one projector ahead is rare and valuable; be that installer for your own house, and the upgrade in five years will feel like changing a light fitting rather than renovating a room.
The Mount as a Decade-Long Decision
It is easy, amid the geometry and the drilling, to forget what a mount actually is: a ten-year promise between a heavy, warm, valuable machine and the ceiling over the people you love. Every element of this guide — the joists, the rated capacity, the fine adjustments, the tested cables, the photographed position, the two-week recheck — is that promise being kept carefully. Kept well, the mount vanishes from consciousness entirely, which is its purpose: nobody at a film night should think about the mount, any more than they think about the foundations during dinner. Do the work once, do it in the right order, write down what you did, and the ceiling will hold its side of the bargain for as long as the projector asks it to.
Mounting as Hospitality: The Guest’s-Eye View
One last perspective completes the installer’s education: the guest’s. A visitor to your home cinema knows nothing of joists, throw ratios, or the two-week recheck, and notices only three things — whether the image is straight and sharp without being asked about it, whether the projector’s fan and bulk stay out of the evening’s awareness, and whether the system starts without a ceremony of remotes and apologies. Test your finished installation with that stranger’s eye before you call it done. Sit in the worst seat. Start the system cold, as a guest would witness it. Listen for the fan during a quiet scene from the seat nearest the projector. Every flaw the guest would notice is a flaw the household will notice a hundred times, and most of them are fifteen-minute corrections on installation day that become permanent features if they survive it. Mount for the guest, and the household inherits the benefit nightly.
Troubleshooting the Finished Installation: A Short Diagnostic List
Even a careful installation can develop complaints, and most of them resolve to a short list worth checking before any re-mounting is contemplated. An image that has drifted slightly is usually the mount settling or being knocked during cleaning — correct it with the fine adjustments and re-tighten in sequence. A new softness on one side suggests the projector is no longer square, often because a cable’s weight is pulling the unit gently out of true; support the cable so the mount carries only the projector. A vibration blur during loud passages points to structure shared with a speaker or a fan, and the cure is decoupling or distance, not tighter screws. A fan grown louder over months is asking for its filters, not its mount. Work that list in order and nearly every post-installation complaint closes at the level of adjustment and housekeeping, which is where a well-planned installation intended them to be solved.
The annual mount inspection
Once a year, give the installation five deliberate minutes: a firm hand-test for flex, a visual check of every fixing, a glance at cable condition where the runs are visible, confirmation that vents and filters are clear, and one alignment check against the screen’s edges. Record the date in the setup journal. This tiny ritual catches the loosening screw and the perishing cable in their cheap phase, and it closes the mount’s story the way the whole installation was conducted — on schedule, by inspection, rather than by surprise. The ceiling holds a heavy promise over your family’s evenings; five minutes a year is a fair price for keeping it.
The Installation, Signed and Dated
Finish the way professionals finish: with a record. In the setup journal, write the installation’s date, the mount’s make and fixing method, the joist positions found, the cable types and lengths run, the final alignment state, and the date of the first recheck. Photograph the ceiling work before anything is covered, because the photograph of hidden structure is worth a wall of memory when the next installer — perhaps you, in five years, mounting the successor — needs to know where the wood and the wires live. Sign the record, in spirit, by checking the sign-off list one final time with fresh eyes. An installation documented this way stops being a memory that fades and becomes a fact of the house, as reliable as the joists it hangs from — and the projector, mounted on facts, will hold its rectangle true through years of films, seasons, and household weather, asking nothing but its five annual minutes and the occasional, grateful glance upward.
Related Guides
- best projectors for daytime viewing
- best speakers for projectors
- best projectors for gaming under 1000
- best projectors for home theater under 300
- best projectors under 1000 for home theater
- how to fix a projector with no signal
- how to fix blurry projector image
Frequently Asked Questions
Can I mount a projector to a plasterboard ceiling?
Not into the board alone. The mount must fix into a ceiling joist or solid structure, because the load is permanent and hangs above people. If your calculated position falls between joists, options include a mounting plate that spans two joists, fitting a timber noggin between joists where access allows, or adjusting the position along the joist line and using zoom and lens shift to compensate. Use a finder to locate structure, check for hidden cables and pipes, and choose a professional if the ceiling construction is unclear.
How do I work out where on the ceiling the projector goes?
Two calculations decide it. Distance comes from your screen width and the projector throw ratio range: choose a distance comfortably inside the zoom range. Height comes from the lens offset in the manual, which states where the lens must sit relative to the top or centre of the screen. Combine them, mark the ceiling, and verify with a test projection from a stand or ladder at that position before drilling. Ten minutes of verification prevents a remount that no adjustment can fully hide.
Do I need lens shift for a ceiling mount?
Lens shift makes ceiling mounting far more forgiving, because it lets you position the image precisely without tilting the projector or using keystone correction. Without it, the projector must be placed with much greater precision in distance, height and centring, which is achievable but less tolerant of room constraints. If you are choosing a projector specifically for a ceiling install, treat vertical lens shift as a high priority feature, and check its range in the specification rather than assuming it is included.
How do I run cables to a ceiling mounted projector?
Options include the channel inside many pole mounts, surface trunking along the ceiling and wall, and in ceiling routes using cable rated for the purpose and installed to local regulations. Support the cables along their run so no weight hangs from the projector ports, leave a gentle service loop at the unit, and connect everything before final alignment so cables are never strained by adjustment. Plan the route before mounting, because adding a cable neatly afterwards is far harder than including it in the install.
Is a ceiling mount better than a shelf for a projector?
For a permanent room, usually yes. A ceiling mount gives a fixed, repeatable alignment, keeps the beam above head height so nobody blocks the image or looks into the lens, and removes the projector from furniture. A rear shelf is simpler to install and service, and suits rooms where ceiling fixing is impractical, provided the shelf is rigid, level and at the right height for the lens offset. Both beat a coffee table, which guarantees knocked alignment and trailing cables.
How high should a ceiling mounted projector be?
The lens height is set by the screen position and the projector lens offset, not by the ceiling itself. Many projectors are designed so the lens sits roughly level with the top edge of the screen when ceiling mounted, with the mount drop pole bridging the gap to the ceiling. Consult the manual offset diagram for your exact model, calculate the required lens height, then choose the mount drop to match. Guessing by mounting tight to the ceiling is the most common cause of tilted installs and keystone use.
Can I mount a projector to a plasterboard ceiling without finding a joist?
Not safely with ordinary fixings, and the mount’s leverage makes this a rule rather than a preference: a projector at the end of even a short drop multiplies its weight at the fixing, and plasterboard alone will creep, crack, and eventually let go. The correct solutions are to locate the joists with a stud finder, to fit a plate or board spanning two joists when the ideal position falls between them, or to choose a different installation entirely — a wall mount, a high shelf, or a furniture-based short-throw arrangement. Heavy-duty toggle fixings exist for defined loads, but a projector above people’s heads deserves structure, not ingenuity. If the ceiling will not give you structure where the lens needs to be, change the plan, not the physics.
How do I stop my ceiling-mounted projector from vibrating?
Trace the vibration’s path before tightening anything. If the blur arrives with loud sound, the ceiling structure is likely sharing with a speaker or subwoofer, and distance or decoupling — not tighter screws — is the cure. If it arrives with footsteps upstairs or a ceiling fan’s rhythm, the mount is faithfully transmitting the building’s life, and a mount with some isolation, or relocation to a more independent fixing, answers it. Check also that no cable is pulling the unit into a strained position, since a taut cable is a vibration conductor with a plug. A projector that is square, supported, and structurally calm should hold its image through the loudest premiere your household can throw at it.
Do I need an electrician to install power for a ceiling projector?
In most homes and most jurisdictions, yes for a new ceiling outlet — and that is money well spent rather than a bureaucratic toll. A permanent projector deserves permanent, code-compliant power at its location, not an extension lead dressed as an installation. Schedule the electrician with the projector’s position already marked, discuss access for the plug and any power supply brick, and consider a switched outlet if you want the projector fully controllable from the wall. Signal cables you may run yourself within the rules of your home, tested at full quality before anything is concealed. The division of labour is simple: electricity to the professional, geometry to you, and the film to everyone.