Disclosure: As an Amazon Associate, kajuandouglas.com earns from qualifying purchases. Links to Amazon on this page are affiliate links; they cost you nothing extra. Listing details such as price and availability change often, so check the current Amazon listing before you buy.
Learning how to adjust the mic on a headset is the fastest way to sound better on calls and in games without buying anything: most ‘bad microphones’ are actually good microphones in the wrong position, at the wrong level, or fighting a room they were never set up for. Teammates describe the symptoms — you sound distant, muffled, too loud, or like you are broadcasting from a bathroom — and each symptom maps to a specific adjustment.
This guide works through the adjustments in the order that fixes the most problems first: physical boom position, system input level, gain and sensitivity settings in your apps, noise suppression, and the small habits that keep your voice consistent from the first call of the day to the last.
Quick answer: Place the boom about two centimetres from the corner of your mouth, set your system input level so your loudest normal speech peaks high without distorting, turn on mic monitoring to hear yourself, use the lightest noise suppression that cleans up your room, and test with a recording — then repeat the level check inside each voice app, because they often apply their own gain.
How to Adjust the Mic on a Headset
In this guide
Gear for This Guide

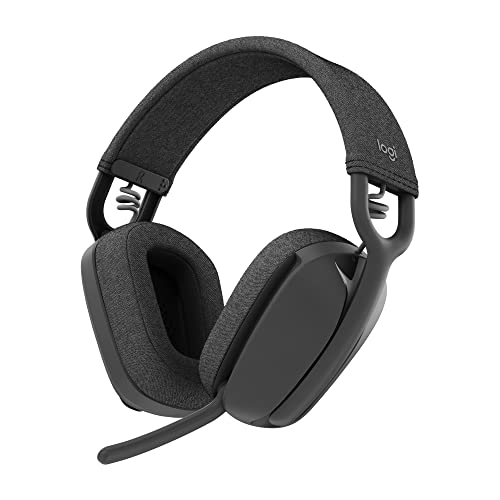
Logitech Zone Vibe 100 Wireless Headphones — A lightweight wireless headset with a noise-cancelling microphone and a flip-to-mute boom — the flip boom is itself an adjustment you can feel without looking. Check price on Amazon.

Razer BlackShark V2 X Wired Gaming Headset — A wired gaming headset with a fixed cardioid boom, a good example of how much difference position makes when the mic cannot be detached or swapped. Check price on Amazon.

Jabra Evolve2 65 Wireless Headset — An office headset whose call clarity depends on the same level and position routine, tuned for voices all day long. Check price on Amazon.
What You Need to Adjust a Headset Mic
- Your headset, connected the way you normally use it — adjustments only count in the real configuration.
- A voice recorder app to capture honest test clips.
- Your system’s sound settings and the audio settings of your main call or game app.
- A second listener for a final check, if you can get one — meters cannot judge ‘natural’.
Adjust in your real environment, at your real time of day if possible. A microphone set up in a silent room at midnight will be set too hot for a room with a fan, traffic and a household in it, because you unconsciously set the level against the background you can hear at the time.
Step 1: Position the Boom — the Adjustment That Matters Most
Bring the boom so its tip sits about two centimetres — roughly two finger-widths — from the corner of your mouth, angled slightly toward it. Not in front of your lips: breath and popping consonants blast straight into the capsule from there. Not down by your chin or up by your cheekbone: your voice level falls away quickly with distance, and the microphone compensates by amplifying the whole room, which is how people end up sounding distant and echoey.
If the boom is flexible, bend it in small movements and re-check; if it is fixed, rotate or slide it to the closest position its design allows. Wearers of headsets with ear-cup microphones instead of booms — like the Logitech Zone Vibe 100 in our work-from-home picks when its boom is tucked away — cannot adjust position, which makes the level steps below even more important. Whatever the design, make the position a habit: same spot, every session, so your level settings stay valid.
Step 2: Set the System Input Level With Your Loudest Normal Voice
Open your system’s input settings and watch the level meter while you speak the way you do when you are excited, laughing or calling out — your loudest normal voice, not a shout and not a murmur. Adjust the input level so those peaks run high on the meter without pinning it to the maximum. A level set with quiet speech will distort the moment you get animated, and distortion cannot be cleaned up afterwards by any software.
Record a test clip at that setting: count to ten, say a sentence full of P and B sounds (‘Peter picked a pepper’) to expose popping, and clap once to hear how the room rings. Listen back on the headset. You are aiming for speech that is clear and present with the room pushed well into the background. If your voice sounds thin, the mic is probably too far away; if it sounds boomy and close, it is too near or the level is too high.
Step 3: Repeat the Level Check Inside Your Apps
Meeting apps, Discord, Teams and games frequently apply their own input volume, automatic gain or sensitivity gate on top of the system level. Open each app’s audio settings, find its input meter, and repeat the loud-voice test. Turn automatic gain control off if your voice level keeps drifting mid-call — automatic systems pump the level up during pauses, which is why your keyboard suddenly sounds enormous when you stop talking.
Set the voice-activation or noise-gate threshold carefully if you use one: speak a quiet sentence and confirm the gate opens, then type and confirm it stays shut. A gate set too high clips the beginnings of your words, which listeners experience as you ‘cutting out’. Push-to-talk removes the guesswork entirely and is worth using in noisy homes, at the cost of one occupied finger.
Step 4: Use Noise Suppression and EQ With a Light Touch
Noise suppression — whether in your headset’s app, your meeting software or your graphics-card utilities — is genuinely effective on steady sounds: fans, air conditioning, traffic hum, PC noise. Enable it at the lowest strength that removes your room’s steady noise, then record again. Cranked to maximum, suppression eats consonants and makes voices sound synthetic and watery, which listeners find more tiring than a little honest room tone.
If your software offers a microphone EQ, small moves only: a gentle cut in the low frequencies reduces boominess and desk thumps, and a slight lift in the presence region adds clarity. Change one control at a time and A/B it with recordings. Office headsets such as office headsets like the Jabra Evolve2 range in our work roundup expose exactly these controls in their apps, and the factory presets are usually a sane starting point.
Step 5: Turn On Mic Monitoring So You Can Hear Yourself
Mic monitoring (also called sidetone) feeds a little of your own voice back into your ears. It stops the classic headset problem of shouting because your ears are sealed, and it gives you instant warning if the mic mutes, disconnects or gets knocked out of position. Set it just loud enough to be aware of your voice — it should feel like speaking in a normal room, not like a public-address system.
If your headset lacks monitoring, some apps and operating systems can provide it, though app-based monitoring may add a slight delay that some people find distracting. Even a thirty-second recorder test before an important call is a workable substitute — the goal is simply never to discover a mic problem from the other participants, five minutes in.
Common Mistakes When Adjusting a Headset Mic
- Setting levels with a quiet test voice, then distorting at the first laugh or callout.
- Placing the boom directly in front of the mouth and fighting the resulting popping with software instead of moving it two centimetres sideways.
- Leaving automatic gain on, so the mic amplifies keyboard and room noise during every pause in speech.
- Maxing out noise suppression and sounding like a robot when a low setting plus better boom position would have done the job.
- Adjusting in a silent room at night and never re-checking in real daytime conditions.
Pro Tips for Consistently Clear Voice
Keep a thirty-second reference recording of yourself sounding good, saved on your PC. When something changes — new headset, new app, new room — record the same sentences and compare; you will hear drift that you would never notice gradually. Also mark your boom position: once you find the sweet spot, a tiny piece of tape or simply a memorised finger-width check keeps you returning to it.
If you have done everything here and listeners still struggle, the fault may be the microphone itself or its connection rather than your adjustments — how to fix a headset mic that is not working isolates hardware from settings methodically. And if you are adjusting a mic that was never designed for your use — say, an ear-cup mic for daily client calls — the work-focused picks in headsets with microphones picked for work show what a proper boom design buys you.
Room Fixes That Beat Software Fixes
Before reaching for more processing, consider the room, because microphone problems are often room problems wearing a disguise. Hard, bare rooms echo, and echo reads as ‘bad mic’ to every listener. You do not need a studio: soft furnishings, a rug, curtains or even a bookshelf behind you absorb reflections noticeably. Position matters too — a corner amplifies boominess, and sitting with a wall close behind the listener’s side of the call is worse than facing into the room. If your voice sounds distant and washy on recordings despite perfect boom position, treat the room before the settings.
Noise sources deserve the same practical audit. A desk fan aimed at your face is a microphone’s nemesis; aim it at your torso instead. A PC tower on the desk beside the headset puts its fan noise at microphone height; the floor is a better home for it. Mechanical keyboards are loud at the microphone’s distance even when they feel quiet at yours — a consideration for streamers choosing where the keyboard sits relative to the boom. Each of these is a one-time physical fix that outperforms a permanent software battle.
Adjusting for Different Apps and Audiences
Your microphone does not need one perfect setting; it needs the right setting per audience. For work calls, prioritise intelligibility and politeness: moderate suppression, no dramatic EQ, a level that keeps you present without dominating the meeting. For team games, prioritise consistency under excitement — your callouts at maximum adrenaline are the loudest thing the mic ever hears, so set levels for that voice, not your calm one. For recording or streaming, prioritise naturalness: lighter suppression, careful gain, and a test recording reviewed on speakers as well as the headset, because your audience hears it on both.
Save what you learn. Most apps let you name or remember configurations, and even a note — ‘work: input 70, suppression low; games: gate at this mark’ — beats rediscovering your settings after every update. Microphone adjustment is a skill with a memory; treat your own findings as the manual your headset never shipped with.
When Adjustment Is Not Enough: Knowing the Mic’s Limits
Honesty requires a boundary: some microphones cannot be adjusted into quality they do not possess. Ear-cup microphones on headsets designed for music will never match a boom for call clarity, because physics gives the boom a head start no processing fully closes. A capsule damaged by moisture or a drop will distort at every level. The diagnostic question is whether your test recordings improve as you work through this guide. Steady improvement means keep adjusting. A plateau of muffle or distortion despite correct position, levels and settings means the hardware has voted, and your time is better spent on the work-focused upgrade path than on another evening of sliders.
How Different Microphone Types Respond to Adjustment
Not all headset microphones forgive equally. Boom microphones with cardioid capsules reject sound from behind them, which is why position relative to your mouth matters so much — the capsule is literally aimed, and your voice should be in its line of fire while your keyboard is not. Omnidirectional capsules hear everything equally, so room and distance dominate their results, and no aiming will save a noisy room. Electret and condenser designs in better headsets capture more detail and more room in equal measure, rewarding quiet spaces. Knowing which type you own — the product page or manual will say — tells you where your adjustment effort belongs: aim a cardioid, quiet the room for an omni, and set careful gain for a sensitive condenser.
Detachable and multi-pattern microphones add one more variable: confirm the mic is fully seated in its socket and, on models with selectable patterns or a hardware gain dial, that those physical controls agree with your software settings. Two gain controls fighting each other — hardware low, software straining to compensate — produce exactly the hissy, thin result people blame on cheap microphones.
A Weekly Thirty-Second Habit
Microphone quality drifts quietly: a boom nudged a centimetre by a bag, an app update resetting a level, a new fan in the room. The defence is a thirty-second weekly habit — record the same short sentence at the start of your first call day and glance at the waveform or listen back. You are not chasing perfection; you are catching drift while it is still a nudge rather than a complaint from a client. Pair the habit with a physical one: store the headset so the boom keeps its shape, and check the windscreen is present and dry, since a missing windscreen changes your sound more than most settings do.
What Good Actually Sounds Like: a Reference
If you are unsure what you are aiming for, borrow a reference: a well-produced podcast recorded on modest gear, or a colleague whose calls always sound clear. The target qualities are consistent level when you turn your head, consonants that survive intact, a room that is present but distant, and silence — real silence, not pumping noise — in your pauses. When your test recordings share those four qualities, stop adjusting. Microphone setup has a finish line, and it is the point where listeners stop noticing your audio entirely and simply hear you.
Frequently Asked Questions
How far should the mic be from my mouth?
About two centimetres from the corner of your mouth, angled slightly toward it. Closer captures breath blasts and popping; farther away makes your voice quiet relative to the room, so the system amplifies everything. Two finger-widths from the corner is the reference position almost every headset is designed around.
Why do I sound muffled even after adjusting the level?
Muffling usually comes from position or obstruction, not level: check the boom is not pointing away from your mouth, that the foam windscreen is clean and fully dry, and that noise suppression is not set so high it is eating your consonants. A windscreen that is clogged or damp is a surprisingly common cause.
What is mic monitoring and should I use it?
Mic monitoring feeds your own voice back into your ears at a low level. Use it if your headset offers it: it keeps your speaking volume natural, confirms the mic is live, and warns you instantly if something disconnects. Set it low — you should be aware of your voice, not feel you are performing through a loudspeaker.
Should I turn off automatic gain control?
Usually yes, once you have set your level manually. Automatic gain raises the input whenever you pause, amplifying your keyboard, fan and room, then ducks down when you speak. A fixed, well-set level sounds more professional and more consistent. Leave it on only if you frequently move around at varying distances from the mic.
My voice keeps cutting out at the start of words. What is wrong?
Your noise gate or voice-activation threshold is set too high, so the first syllable does not open it. Lower the threshold until quiet speech opens the gate reliably, then confirm that typing and room noise do not. If your app has a small ‘attack’ or sensitivity slider, that is the same control by another name.
Does a pop filter or windscreen actually help?
Yes. The foam windscreen supplied with most booms already softens breath noise; keeping it clean and dry preserves that effect. If you still get popping after repositioning the boom to the side of your mouth, a fresh windscreen is a cheap fix — but reposition first, because placement causes most popping.
Position, Level and Processing: the Three Levers in Order
Microphone adjustment is usually taught as a list of settings, but it behaves like a chain with a strict order: position decides what the microphone can capture, level decides how cleanly that capture is recorded, and processing decides what survives to reach your listeners. Adjusting out of order is why so many owners chase their tails — boosting the level of a badly placed microphone only makes the keyboard louder, and polishing with noise suppression a signal that is clipping cannot restore what clipping destroyed. This section works the chain in order, with the listening tests that tell you when each lever is right, and the room and habit changes that no setting can substitute for.
First Principles Worth Keeping in View
Read with the underlying principles in mind, this stops being a footnote and becomes the part of adjusting a headset microphone that you will actually live with during calls, streams and game chat, day after ordinary day. Hold that thought alongside everything else in this guide, and adjusting a headset microphone becomes a decision you can explain, defend and, most importantly, stop revisiting during calls, streams and game chat.
Anyone currently adjusting a headset microphone eventually runs into the underlying principles, usually at the least convenient moment, so it deserves a clear-eyed look here rather than a surprised one later on. Noise suppression in apps such as Discord or Teams works best when the raw signal is already steady, because the algorithm cannot tell a wandering boom from a wandering voice. None of this needs to be perfect on day one; it needs to be understood well enough that adjusting a headset microphone improves with familiarity instead of slowly unravelling.
Where the Details Start to Matter
It is easy to treat the finer details as an afterthought while adjusting a headset microphone, yet experienced owners will tell you it decides more long-term satisfaction than the headline choice ever does. Boom arms drift over a long session as the headset settles, so a mid-evening glance in a mirror or camera preview can rescue a microphone that has sagged to your chest. That is the durable lesson here, and it will still be true of adjusting a headset microphone long after the novelty of any particular model has worn completely off.
The honest way to approach the finer details while adjusting a headset microphone is to think in months rather than minutes, because that is the timescale on which its effects quietly accumulate during calls, streams and game chat. Keep the point in proportion, though: it refines adjusting a headset microphone rather than replacing the fundamentals, and it rewards attention rather than anxiety during calls, streams and game chat.
The Decision Checklist Before You Judge Your Voice
With adjusting a headset microphone as the goal, this decision deserves its moment here. It sounds minor until the day your voice is the meeting. File it under things worth checking once and benefiting from for years, which is the best bargain adjusting a headset microphone has to offer anyone.
- Position before everything: Set the boom’s distance and angle and keep it there for a week before judging any setting; consistency is what lets you hear the effect of each change you make.
- The playback habit: Judge adjustments from recordings played back on speakers or another device, never from how you imagine you sound, and never solely from sidetone in your own ears.
- Level with headroom: Set gain so your loudest excited speech stays below distortion with room to spare; a slightly quiet clean signal beats a loud clipped one in every application.
- One change at a time: Move a single control, test with the same spoken passage, and note the result; the same sentence each time turns guesswork into comparison.
- Processing last, lightly: Add noise suppression and gates only after position and level are right, and increase them until artefacts appear, then step back one notch.
- Listener confirmation: Ask a regular listener whether you sound clearer, not merely louder, because clarity is the goal and other ears are the honest instrument.
Read with this decision in mind, this stops being a footnote and becomes the part of adjusting a headset microphone that you will actually live with during calls, streams and game chat, day after ordinary day. Speaking across the capsule instead of directly into it softens plosives while keeping consonants clear, a trick radio presenters use with far more expensive microphones. Input level should peak in the upper part of the meter on your loudest laugh, not sit pinned there while you talk normally, or clipping will rough up every syllable. Hold that thought alongside everything else in this guide, and adjusting a headset microphone becomes a decision you can explain, defend and, most importantly, stop revisiting during calls, streams and game chat.
Four Voices, Four Different Adjustments
Here is the part of adjusting a headset microphone that owners learn latest: four voices, four different adjustments. None of this needs to be perfect on day one; it needs to be understood well enough that adjusting a headset microphone improves with familiarity instead of slowly unravelling.
Picture the most common version of this in real life: a player whose teammates describe a voice that is loud yet somehow hard to understand, where the boom sits in front of the lips and every plosive arrives as a small explosion. The deciding factor here is rarely the headline specification. In this case the three levers disagree with each other: the boom sits where breath hits it, the level is high enough to clip, and sidetone is off, so the player hears none of it happening. Teammates hear the result as volume without clarity, and the fix begins by moving the capsule out of the breath path, not by asking anyone to listen harder.
It is easy to treat four voices, four different adjustments as an afterthought while adjusting a headset microphone, yet experienced owners will tell you it decides more long-term satisfaction than the headline choice ever does. That is the durable lesson here, and it will still be true of adjusting a headset microphone long after the novelty of any particular model has worn completely off.
Take a concrete everyday case: a remote teacher who sounds distant and echoing despite a good headset, because the boom has drifted up towards the cheek and the room has become the real microphone subject. The deciding factor here is rarely the headline specification. For the teacher, the room has become part of the microphone chain, because a boom drifted towards the cheek now captures reflections from bare walls almost as strongly as the voice itself. Pulling the boom back beside the mouth and softening the room behind her will do more in five minutes than an evening of gain adjustments from that wrong starting position.
The honest way to approach four voices, four different adjustments while adjusting a headset microphone is to think in months rather than minutes, because that is the timescale on which its effects quietly accumulate during calls, streams and game chat. The mute control’s location belongs in any adjustment routine, because a mute you cannot find blind will fail you publicly one day. A test recorded in a quiet room at noon can flatter a setup that a rainy evening and a spinning desk fan will expose. Keep the point in proportion, though: it refines adjusting a headset microphone rather than replacing the fundamentals, and it rewards attention rather than anxiety during calls, streams and game chat.
Consider how this plays out in practice: a streamer whose voice pumps and fades as software fights a level set far too hot, fixed in minutes once the chain was adjusted in the right order. The deciding factor here is rarely the headline specification. Pumping and fading are the signature of two automatic systems fighting over one signal, and the chain only settles when the streamer’s own level is set sensibly first. Lower the input until the loudest laugh stays clean, switch off one layer of automatic gain, and the voice stops breathing in and out under the audience’s ears.
Plenty of guides skip straight past four voices, four different adjustments, which is a shame, since adjusting a headset microphone tends to succeed or fail on exactly these unglamorous details in the long run. Gain and distance trade against each other: halve the distance and you can lower the input level a lot, which drags keyboard clatter and fan noise down with it. File it under things worth checking once and benefiting from for years, which is the best bargain adjusting a headset microphone has to offer anyone.
Take a concrete everyday case: a worker in a shared flat whose keyboard dominates every call, solved less by settings than by moving the microphone’s line of pickup away from the desk. In this situation the sensible priorities reorder themselves. In a shared flat, a boom angled so its rejection zone faces the desk will do more for call quality than any premium capsule pointed the wrong way. The adjustment that housemates and colleagues will thank you for is the quiet one: your keyboard reduced to a murmur because the microphone was aimed with intent.
Read with four voices, four different adjustments in mind, this stops being a footnote and becomes the part of adjusting a headset microphone that you will actually live with during calls, streams and game chat, day after ordinary day. Sidetone, the faint echo of your own voice in your ears, stops the slow volume creep that makes people shout into a well-sealed headset without realising it. Hold that thought alongside everything else in this guide, and adjusting a headset microphone becomes a decision you can explain, defend and, most importantly, stop revisiting during calls, streams and game chat.
Room and Habit: the Adjustments That Are Not on the Headset
When adjusting a headset microphone is the task, room and habit: the adjustments that are not on the headset is easy to underestimate. That, in short, is the practical heart of adjusting a headset microphone.
Fit Considerations in the Long Run
It is easy to treat fit and comfort as an afterthought while adjusting a headset microphone, yet experienced owners will tell you it decides more long-term satisfaction than the headline choice ever does. If you still have to think about the microphone during the call itself, then the adjustment is not actually finished yet. That is the durable lesson here, and it will still be true of adjusting a headset microphone long after the novelty of any particular model has worn completely off.
The honest way to approach fit and comfort while adjusting a headset microphone is to think in months rather than minutes, because that is the timescale on which its effects quietly accumulate during calls, streams and game chat. Once the position feels right, note it against your cheek or chin so tomorrow’s session starts from today’s hard-won answer. The boom tip belongs beside the corner of your mouth rather than in front of your lips, where breath blasts straight across the capsule and turns every p and b into a thump. Keep the point in proportion, though: it refines adjusting a headset microphone rather than replacing the fundamentals, and it rewards attention rather than anxiety during calls, streams and game chat.
Pads and Wear Parts Considerations in the Long Run
Plenty of guides skip straight past pads and wear parts, which is a shame, since adjusting a headset microphone tends to succeed or fail on exactly these unglamorous details in the long run. Input level should peak in the upper part of the meter on your loudest laugh, not sit pinned there while you talk normally, or clipping will rough up every syllable. Noise suppression in apps such as Discord or Teams works best when the raw signal is already steady, because the algorithm cannot tell a wandering boom from a wandering voice. File it under things worth checking once and benefiting from for years, which is the best bargain adjusting a headset microphone has to offer anyone.
Read with pads and wear parts in mind, this stops being a footnote and becomes the part of adjusting a headset microphone that you will actually live with during calls, streams and game chat, day after ordinary day. Test recordings lie if you only say ‘testing, one, two’: read a paragraph at match-day excitement and at tired-evening mumble, then adjust for the quieter version of you. Hold that thought alongside everything else in this guide, and adjusting a headset microphone becomes a decision you can explain, defend and, most importantly, stop revisiting during calls, streams and game chat.
Sound Considerations in the Long Run
Anyone currently adjusting a headset microphone eventually runs into sound quality, usually at the least convenient moment, so it deserves a clear-eyed look here rather than a surprised one later on. Your voice after morning coffee and your voice near midnight are different instruments, and one honest setting has to serve them both. A microphone adjusted while you sit bolt upright will betray you the moment you slump into your real, end-of-day posture. None of this needs to be perfect on day one; it needs to be understood well enough that adjusting a headset microphone improves with familiarity instead of slowly unravelling.
It is easy to treat sound quality as an afterthought while adjusting a headset microphone, yet experienced owners will tell you it decides more long-term satisfaction than the headline choice ever does. A test recorded in a quiet room at noon can flatter a setup that a rainy evening and a spinning desk fan will expose. Small angles matter enormously at small distances: a centimetre of movement at the boom becomes a world of difference at the capsule. That is the durable lesson here, and it will still be true of adjusting a headset microphone long after the novelty of any particular model has worn completely off.
Microphone Considerations in the Long Run
The honest way to approach microphone behaviour while adjusting a headset microphone is to think in months rather than minutes, because that is the timescale on which its effects quietly accumulate during calls, streams and game chat. Keep the point in proportion, though: it refines adjusting a headset microphone rather than replacing the fundamentals, and it rewards attention rather than anxiety during calls, streams and game chat.
Plenty of guides skip straight past microphone behaviour, which is a shame, since adjusting a headset microphone tends to succeed or fail on exactly these unglamorous details in the long run. A cheap foam windscreen earns its place indoors too, taming breath noise and the soft roar of a desk fan aimed at your face on a hot day. Rooms with bare walls hand the microphone a slap of echo on every word, and a bookcase, curtain or even a hung blanket behind you calms it more than software does. File it under things worth checking once and benefiting from for years, which is the best bargain adjusting a headset microphone has to offer anyone.
Durability Considerations in the Long Run
Read with build and durability in mind, this stops being a footnote and becomes the part of adjusting a headset microphone that you will actually live with during calls, streams and game chat, day after ordinary day. Rotating the boom a few degrees so the capsule’s marked side faces your mouth matters on directional microphones, which reject sound arriving from behind by design. Voice chat platforms each add their own automatic gain, so set the system level first, then the app level, and leave the second one alone once it behaves. Hold that thought alongside everything else in this guide, and adjusting a headset microphone becomes a decision you can explain, defend and, most importantly, stop revisiting during calls, streams and game chat.
Anyone currently adjusting a headset microphone eventually runs into build and durability, usually at the least convenient moment, so it deserves a clear-eyed look here rather than a surprised one later on. Teammates forgive many things, but nobody forgives a headset that broadcasts every keystroke like a one-person percussion section. The mute control’s location belongs in any adjustment routine, because a mute you cannot find blind will fail you publicly one day. A test recorded in a quiet room at noon can flatter a setup that a rainy evening and a spinning desk fan will expose. None of this needs to be perfect on day one; it needs to be understood well enough that adjusting a headset microphone improves with familiarity instead of slowly unravelling.
Hearing Considerations in the Long Run
It is easy to treat listening levels and hearing as an afterthought while adjusting a headset microphone, yet experienced owners will tell you it decides more long-term satisfaction than the headline choice ever does. The boom tip belongs beside the corner of your mouth rather than in front of your lips, where breath blasts straight across the capsule and turns every p and b into a thump. That is the durable lesson here, and it will still be true of adjusting a headset microphone long after the novelty of any particular model has worn completely off.
The honest way to approach listening levels and hearing while adjusting a headset microphone is to think in months rather than minutes, because that is the timescale on which its effects quietly accumulate during calls, streams and game chat. Keep the point in proportion, though: it refines adjusting a headset microphone rather than replacing the fundamentals, and it rewards attention rather than anxiety during calls, streams and game chat.
Platform Considerations in the Long Run
Plenty of guides skip straight past platform and settings behaviour, which is a shame, since adjusting a headset microphone tends to succeed or fail on exactly these unglamorous details in the long run. Boom arms drift over a long session as the headset settles, so a mid-evening glance in a mirror or camera preview can rescue a microphone that has sagged to your chest. If teammates hear your game audio bleeding through, the problem is often an over-hot output leaking from loose-fitting cups into a sensitive boom, not the microphone itself. File it under things worth checking once and benefiting from for years, which is the best bargain adjusting a headset microphone has to offer anyone.
Read with platform and settings behaviour in mind, this stops being a footnote and becomes the part of adjusting a headset microphone that you will actually live with during calls, streams and game chat, day after ordinary day. A microphone adjusted while you sit bolt upright will betray you the moment you slump into your real, end-of-day posture. Hold that thought alongside everything else in this guide, and adjusting a headset microphone becomes a decision you can explain, defend and, most importantly, stop revisiting during calls, streams and game chat.
Going Further: Headset Details That Reward a Second Look
Here is the part of adjusting a headset microphone that owners learn latest: the finer details. That holds during calls, streams and game chat as much as anywhere else. None of this needs to be perfect on day one; it needs to be understood well enough that adjusting a headset microphone improves with familiarity instead of slowly unravelling.
It is easy to treat the finer details as an afterthought while adjusting a headset microphone, yet experienced owners will tell you it decides more long-term satisfaction than the headline choice ever does. Speaking across the capsule instead of directly into it softens plosives while keeping consonants clear, a trick radio presenters use with far more expensive microphones. That is the durable lesson here, and it will still be true of adjusting a headset microphone long after the novelty of any particular model has worn completely off.
The honest way to approach the finer details while adjusting a headset microphone is to think in months rather than minutes, because that is the timescale on which its effects quietly accumulate during calls, streams and game chat. Rooms with bare walls hand the microphone a slap of echo on every word, and a bookcase, curtain or even a hung blanket behind you calms it more than software does. Keep the point in proportion, though: it refines adjusting a headset microphone rather than replacing the fundamentals, and it rewards attention rather than anxiety during calls, streams and game chat.
Plenty of guides skip straight past the finer details, which is a shame, since adjusting a headset microphone tends to succeed or fail on exactly these unglamorous details in the long run. Voice chat platforms each add their own automatic gain, so set the system level first, then the app level, and leave the second one alone once it behaves. File it under things worth checking once and benefiting from for years, which is the best bargain adjusting a headset microphone has to offer anyone.
Related Guides
Why do I sound fine in one app and terrible in another?
Because apps apply their own gain, suppression and sometimes their own device choice. If the recording test in your system sounds right but one app does not, the fault lives in that app’s settings — its input selection, its automatic gain or its noise processing — rather than in the headset.
Is it better to turn the mic up or to move it closer?
Closer, almost always. Moving the boom nearer raises your voice relative to everything else in the room, while turning up the level raises your voice and the room together. Level is for fine-tuning a well-placed microphone, not for rescuing a distant one.