Disclosure: As an Amazon Associate, kajuandouglas.com earns from qualifying purchases. Links to Amazon on this page are affiliate links; they cost you nothing extra. Listing details such as price and availability change often, so check the current Amazon listing before you buy.
Working out how to fix speaker crackling starts with reassurance: crackling is one of the most common speaker complaints, and its causes are usually mundane — a loose connection, a dirty volume control, a cable past its best, or a source problem — rather than a dying speaker. The method that works is elimination in a safe order: check the source, then the settings, then the cables and connections, and only suspect the speaker itself once the cheap suspects are cleared.
This guide orders the likely causes from most to least common, gives you step-by-step fixes that need no tools and no opening of equipment, and includes a diagnostic table to pinpoint which crackle you have. It ends with the point at which repair or replacement is the honest answer, and how to prevent crackling returning. Nothing here involves opening a speaker or touching anything inside a cabinet — those are jobs for a repair bench.
How to fix speaker crackling: The Short Answer
Most crackling comes from connections and controls, not the driver. Test with a different source, reseat and clean every cable connection, rotate the volume control to clear it, swap channels to isolate the faulty side, and check for wireless interference before concluding the speaker is damaged.
In this guide
Likely Causes, Most Common First
| Likely cause | What you will notice | The fix |
|---|---|---|
| Loose or corroded connection | Crackle changes when cables are wiggled; intermittent pops | Reseat every connector; trim corroded wire ends; clean contacts |
| Dirty volume or tone control | Crackle happens mainly while adjusting volume | Rotate the control fully back and forth many times |
| Failing cable | One channel crackles; swapping cables moves the fault | Replace the cable with a known-good one |
| Source or file problem | Crackle occurs at the same moment in the same track on all speakers | Test another source and other content |
| Wireless interference or weak Bluetooth | Crackle with dropouts on Bluetooth only | Move closer, remove obstacles, reduce Wi-Fi congestion |
| Overdriven amplifier or speaker | Crackle and harshness at high volume only | Reduce volume; check for clipping; match power sensibly |
| Damaged driver or surround | Crackle at specific bass notes, one speaker, all sources | Inspect visually; professional repair or replacement |
Step-by-Step Fixes, in Safe Order
Step 1: Prove whether the crackle follows the source
Play the exact passage where you hear crackling through a completely different source — another phone, the TV, a different app. If the crackle vanishes, your speaker is innocent and the original source, cable or file is at fault; a surprising amount of ‘speaker crackle’ lives in one bad recording, one streaming glitch or one failing phone output. If the crackle persists across sources, continue down the chain with confidence that the fault is downstream.
Step 2: Check volume behaviour and reduce the level
Note when the crackle happens. Crackle only while you turn the volume knob points squarely at a dirty control — fix it in the next step. Crackle only at high volume suggests the amplifier or speaker is being overdriven: turn down and see if it clears, because distortion crackle is a warning, not a defect. Crackle at all volumes, all the time, points back to connections or a damaged driver, and the following steps separate those two.
Step 3: Clear a dirty volume control
With the power off, rotate the volume control from minimum to maximum and back twenty to thirty times, firmly but without force. The wiping action of the control’s internal contact often clears the oxidation and dust that cause adjustment crackle — a classic fault on equipment that sits at one volume for months. Power up and test. If the crackle while adjusting returns within days, the control itself is wearing and a technician can clean or replace it properly; do not spray anything into the equipment yourself.
Step 4: Reseat and inspect every connection
Power off. Unplug and replug every cable in the chain — source cables, interconnects, speaker wire — one at a time. Look at bare speaker wire ends: green, white or blackened copper is corrosion, and the cure is to trim the end back to bright metal and reconnect firmly, keeping stray strands away from the neighbouring terminal. Check that plugs sit fully home and that no cable is being crushed by furniture or bent at a sharp angle, both of which break internal conductors invisibly.
Step 5: Swap channels to isolate the faulty side
If only one side crackles, swap the left and right connections at the amplifier or source end. If the crackle moves to the other speaker, the fault is in the cable or the source channel, not the speaker. If the crackle stays with the same speaker, swap cables next: if it still stays, the speaker itself is the remaining suspect and the later steps apply. This two-minute test, done methodically, prevents the classic error of replacing a healthy speaker.
Step 6: Rule out wireless interference
If crackling happens on Bluetooth but not on a wired input, you have an interference or range problem, not a speaker problem. Move the source closer, clear obstacles, move the speaker away from routers, microwaves and USB 3 hubs (a known interferer), and test again. Update the speaker’s firmware through its app. A crackle-free wired test is the proof: it clears the speaker’s drivers and amplifier entirely and redirects your effort to the wireless environment.
Step 7: Inspect the driver without touching it
With the grille off (if it removes easily) and power off, look at the woofer cone and its rubber or foam surround. Cracks, tears or crumbling foam in the surround cause crackling and buzzing at bass notes, because the cone can no longer move cleanly. Do not press or poke the cone. A torn surround or a cone that scrapes is a repair-bench job — surrounds can be replaced professionally — while a healthy-looking driver with crackle on every source suggests an internal fault that is also beyond home repair.
As you work through this guide, keep the bigger picture in mind. Our roundup of best wire for speakers shows how the main options compare, and the companion piece on how to clean a speaker covers the neighbouring decision in the same detail.
When to Get Professional Repair or Replace It
Take the speaker to a repairer when the crackle is isolated to one speaker on every source and cable, when you can see surround or cone damage, or when the unit is valuable enough that a bench diagnosis is cheaper than replacement. Amplifier faults — crackle on both speakers from one amplifier channel — are also bench work: do not open amplifiers or powered speakers, because capacitors inside can hold a dangerous charge long after unplugging. A reputable repairer will quote before working; ask, because for inexpensive speakers the quote itself may settle the replace decision.
Replacement is the honest answer when the speaker is a low-cost model with a confirmed driver fault, when foam surrounds have crumbled on a pair (its partner will follow), or when repair quotes approach the price of a modern equivalent. Keep the evidence from your diagnosis — which side, which sources, what you swapped — because it makes any warranty claim or repair conversation faster and more credible, and it stops you paying to repair a speaker whose real fault was a cable all along.
Preventing Crackling From Returning
Most crackling is born in connections and controls, so prevention lives there too. Keep connections tight and clean, support cables so their weight does not drag on sockets, and exercise volume controls occasionally through their full range — especially on equipment used at one setting for months. Keep speakers away from kitchen grease, workshop dust and damp, which corrode contacts and attack surrounds, and clean cabinets and grilles gently on a schedule rather than in a crisis.
Respect volume limits: repeated clipping episodes that crackle today become a damaged tweeter tomorrow. If your system regularly needs to play louder than it cleanly can, the fix is more sensitive speakers or more amplifier headroom, not determination. Finally, when you move or rewire a system, label cables and photograph connections; half of all ‘it started crackling after I moved it’ cases are one reversed or loose wire, and your own documentation finds it in minutes.
Gear for This Guide

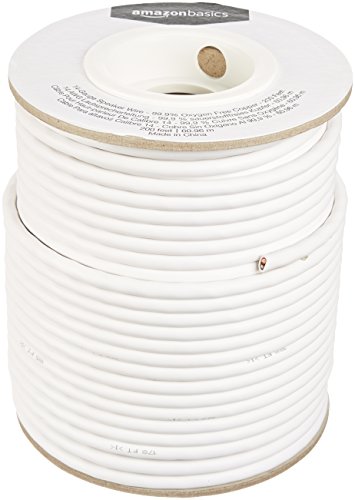
Amazon Basics 14-Gauge Speaker Wire, 200 Feet
A long spool of 14-gauge oxygen-free copper speaker wire with colour-coded conductors, suited to longer runs between an amplifier and passive speakers. Thicker wire matters most on long runs, where thin wire can waste amplifier power. Check price on Amazon.
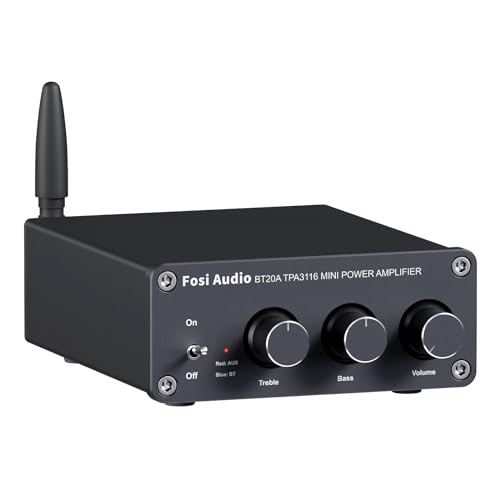
Fosi Audio BT20A Bluetooth Amplifier
A compact two-channel Class D amplifier with Bluetooth, made to drive a pair of passive speakers from a phone, TV or computer. Small amplifiers like this are the missing link when you own passive speakers but no receiver. Check price on Amazon.
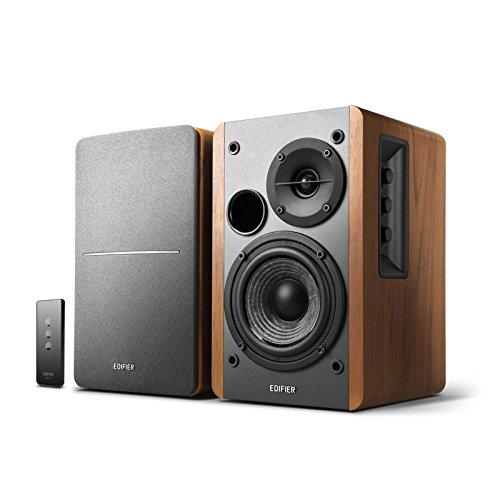
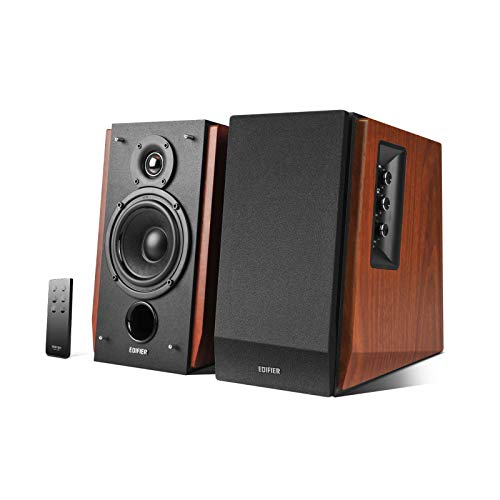
Edifier R1280T Powered Bookshelf Speakers
A compact powered pair with optical, coaxial and dual RCA inputs, which makes it unusually easy to connect to a TV, a turntable or a computer without a separate receiver. Front bass and treble controls let you adjust the balance without digging through menus. Check price on Amazon.
Common Mistakes
Replacing the speaker before testing another source
A faulty recording, app or phone output crackles through every speaker it meets. One source swap, done first, has saved more speakers than any other step in audio troubleshooting.
Spraying contact cleaner into equipment
Sprays inside amplifiers and powered speakers can damage components and void warranties, and the fault is usually reachable by rotating the control. Leave internal cleaning to a bench.
Opening a powered speaker or amplifier to look inside
Capacitors hold charge after unplugging, and there is nothing inside a home user can safely service. All the fixable causes of crackling live outside the cabinet.
Wiggling cables with the system playing loudly
Intermittent shorts at volume can send spikes through amplifiers and tweeters. Power down or mute before reseating connections, then test.
Prevention Habits
- Keep a known-good spare cable; it is the best diagnostic tool in audio.
- Crackle while adjusting volume = dirty control, nine times out of ten.
- The channel-swap test separates speaker faults from everything else in minutes.
- Foam surrounds crumble with age — inspect before blaming electronics.
Going Deeper: Context That Helps
Protecting speakers is mostly about restraint. Amplifiers damage speakers in two ways: too much power can overheat or over-extend a driver, but far more commonly a small amplifier driven into distortion — clipping — produces harsh high-frequency energy that burns out tweeters. If the sound turns harsh, gritty or compressed as you raise the volume, turn it down; that harshness is the warning sign. Children, pets and parties are the other risks: a volume limit in the receiver’s settings, grilles left on, and speakers placed where they cannot be knocked over will prevent most household speaker casualties.
Speaker specifications reward careful reading. Frequency response figures only mean something with a tolerance attached — ’60 Hz to 20 kHz’ without a plus-or-minus figure could hide a response that is already far down at 60 Hz. Driver size tells you about potential, not results: a well-designed 5-inch woofer in a solid cabinet can sound cleaner than a cheap 8-inch driver in a resonant box. Weight is an unfashionable but useful clue, because rigid cabinets and real magnets are heavy. Treat specifications as a way to shortlist, then let placement, room and your own ears make the final decision.
Ageing affects speakers slowly and mostly at the edges. Foam woofer surrounds on older speakers can crumble after a couple of decades, rubber surrounds last longer, and capacitors in crossovers drift with age, subtly changing the balance. None of this matters for a new purchase, but it explains why a vintage speaker may not sound as its measurements once promised. For modern speakers, dust, sunlight and humidity are the main enemies: keep them out of direct sun, wipe dust with dry or barely damp cloths, and avoid placing drinks on top of cabinets, where one spill can stain veneer and swell the wood beneath.
Whatever the product, the cheapest upgrade is usually time spent with the manual and the settings menu. Manufacturers bury genuinely useful options — EQ presets, dialogue modes, level trims, firmware updates — several layers deep, and most owners never find them. An hour spent exploring settings with familiar content playing will teach you more about your system than a week of reading reviews, and it costs nothing. Keep notes of what you changed so you can undo anything that makes things worse, and change one thing at a time so you know which adjustment caused which result.
Returns windows are part of the buying process for audio gear, and you should use them deliberately. Sound is personal and room-dependent, so a product that reviews well can still disappoint in your space. Buy from sellers with clear return policies, keep packaging until you are sure, and test with your own content at your own volumes in the first days — not the night before the window closes. A structured test, with the same three songs or scenes each time, reveals differences that casual listening misses and turns a vague feeling into a decision you can act on.
Hearing safety deserves a mention in any audio guide. Comfortable TV and music listening sits well below the levels that risk hearing damage, but portable speakers at parties, and headphones especially, can creep upward in noisy environments as you compete with background sound. If you have to shout to be heard over your own system, it is too loud for long sessions. Many devices offer volume limiting — worth enabling for children — and taking listening breaks during long sessions protects both your ears and your enjoyment, because tired ears judge sound poorly.
Speaker sound is shaped as much by the room as by the speaker itself. Hard floors, bare walls and large windows reflect sound back at you, which can make even a good speaker seem harsh or echoey, while soft furnishings, rugs and curtains absorb those reflections and calm the result. Before blaming a speaker for disappointing sound, look at the room: a rug between the speakers and your seat, curtains over a large window, or a bookshelf filled with books behind you can change the sound more than a modest upgrade would. This is why the same speaker can sound impressive in a shop demo room and merely ordinary at home — the demo room was treated, and yours is not.
Stereo imaging depends on symmetry. When the left and right speakers are at different distances from you, or one is tucked into a corner while the other sits in open space, the stereo image pulls toward the closer or louder side and voices stop sounding centred. Aim for a rough triangle: the two speakers and your head at the corners, with both speakers the same distance from your seat and at the same height. Small adjustments — ten centimetres here, a slight toe-in there — are free, reversible and often more rewarding than new cables or accessories, so always finish placement before spending money on upgrades.
Bass behaves differently from the rest of the sound. Low frequencies are long waves that build up in corners and along walls, which is why a speaker can sound boomy in one spot and thin a metre away. Moving a speaker even slightly out from a wall reduces the wall’s reinforcement of the bass; moving your seat away from the back wall often fixes boominess that no tone control can. If your system has a subwoofer, its position matters even more, because a single subwoofer excites the room unevenly and your seat may sit in a peak or a null in the bass response.
Speaker sensitivity and impedance explain more about real-world loudness than headline wattage. Sensitivity tells you how loud a speaker plays with a given amount of power; a sensitive speaker on a modest amplifier can easily outplay an insensitive speaker on a powerful one. Impedance, measured in ohms, describes the load the speaker presents to the amplifier — most home speakers are nominally 8 or 6 ohms, and amplifiers are happiest when the speaker’s impedance stays within the range the amplifier is rated for. Matching these two figures sensibly matters far more than chasing the biggest watt number on a box.
Frequently Asked Questions
Why does my speaker crackle only at high volume?
Because something is being overdriven. Either the amplifier is clipping — running out of power and distorting — or the speaker is reaching its mechanical limits, and both announce themselves as harsh crackling and buzzing on loud passages. Turn down: if the crackle clears at moderate volume, your system is healthy but undersized for the level you want. The lasting fixes are more sensitive speakers, more amplifier headroom, or a subwoofer to take the bass load — not playing through the distortion, which damages tweeters.
Why does the crackling happen when I turn the volume knob?
The volume control’s internal contact has oxidised or collected dust, so it makes noisy, intermittent contact as it moves. Rotating it fully back and forth a few dozen times with the power off usually wipes the contact clean and cures it for months. If the problem returns quickly or the control feels loose and gritty, the control itself is worn; a technician can clean it properly or replace it. This is an ageing fault, not a sign the speaker is finished.
Can a bad cable really cause crackling?
Yes — it is one of the most common causes. A cable with a broken internal conductor or a corroded plug makes and breaks contact with vibration and movement, producing pops and crackle that mimic a failing speaker. The giveaway is crackle that changes when the cable is gently moved, or that follows the cable when you swap channels. Replacing a suspect cable with a known-good one is cheap, safe and conclusive, which is why a spare cable belongs in every audio household.
My speaker crackles on Bluetooth but not wired. What does that mean?
It means the speaker is fine and the wireless link is not. Bluetooth crackle with dropouts comes from range, obstacles, interference from routers and other electronics, or an overloaded phone. Move closer, clear the path, move the speaker away from interference sources, update firmware, and forget-and-repair the connection. A clean wired test is the diagnostic proof — the drivers and amplifier cannot crackle selectively by input unless the wireless section or the link is responsible.
Is crackling a sign my speaker is blown?
Sometimes, but it is the last suspect, not the first. A genuinely damaged driver crackles on every source, usually at particular frequencies — bass notes for a torn surround or a misaligned voice coil — and often with visible damage. Crackle that depends on the source, the cable, the volume control or the input is not a blown speaker. Work through the elimination steps before concluding the worst; most crackling speakers are one connection away from silence.
One speaker crackles and the other is fine. Where do I start?
With the channel swap: exchange left and right at the amplifier end. If the crackle moves sides, the fault is upstream — cable, connection or source channel — and the speaker is innocent. If it stays with the same speaker, swap the cables themselves; if it still stays, inspect that speaker’s terminals and driver. This sequence takes minutes and prevents the two classic errors: replacing a good speaker, or repairing an amplifier whose fault was a corroded wire end.
Reading the Crackle: What the Pattern Is Telling You
Crackle only at high volume versus crackle at any volume
- If the noise appears only when you push the volume, the speaker is probably being asked to reproduce more low-frequency energy than the driver or amplifier can handle cleanly. Small woofers reach the end of their travel, the voice coil former can tap, and a modest amplifier can clip, all of which present as a harsh crackle or buzz on bass-heavy peaks. Note the exact tracks and moments where it happens, then replay the same passage at a lower level. If the crackle vanishes completely, you are dealing with a headroom problem rather than a failing connection, and the long-term answer is gentler levels, a high-pass filter if your system offers one, or letting a subwoofer carry the lowest octave instead of forcing the main speakers to do it.
- Crackle that is present at whisper level, by contrast, almost never comes from overdriving. At low levels the amplifier is barely working, so a persistent rustle points toward a dirty contact, a failing capacitor in an older amplifier, a damaged surround, or interference being picked up before amplification. Keep a simple log for a few sessions: source, input, volume setting, and whether the noise was in one channel or both. Patterns in that log will save you from replacing parts at random, because intermittent faults are far easier to catch when you can reproduce the exact conditions that trigger them on demand.
Crackle on one source but not another
- When crackling follows a single source, work on that source and its cable before you touch the speakers at all. A turntable adds its own suspects: a worn stylus, dust on the record, a loose headshell lead, or a ground hum that changes when you touch the tonearm. A television feeding an amplifier over an optical or HDMI connection can produce dropouts that sound like crackle if the cable is damaged or the output format keeps renegotiating. A computer can add crackle through a stressed USB connection, an overloaded processor, or a sample-rate mismatch between the operating system and an external DAC.
- Test the suspect source into a completely different playback path, such as headphones plugged directly into it, and test a known-good source into your speakers. One of those two tests will clear half the system in a few minutes. If the source is clean into headphones and another source is clean through the speakers, the fault lives in the link between them: the cable, the chosen input, or a format setting. Swap that cable for a short, known-good one and route it away from power cables before you consider any repair bill.
Intermittent crackle that comes and goes with movement
- Noise that changes when you move, tap, or reposition equipment is the signature of a mechanical connection problem. Oxidised plugs, a speaker terminal that was never fully tightened, a cable with an internal break near the connector, and a cracked solder joint inside older equipment all behave this way. While playing quiet music, gently wiggle one connection at a time and listen. Work methodically from the source toward the speakers so that when the noise changes, you know exactly which link you were touching.
- Do not overlook the room itself. A speaker cable draped across a mains extension lead, a phone charger with a noisy power supply on the same socket strip, or LED lighting on a dimmer can all inject buzzes and ticks that mimic a faulty driver. Power everything down, simplify the setup to one source, one amplifier, and one pair of speakers with short cables, and confirm the system is silent in that stripped-back form. Then reintroduce items one at a time. The item that brings the crackle back is your culprit, and it is very often an accessory rather than the speakers themselves.
Driver Health Checks You Can Do Safely at Home
Listening for rub, buzz, and surround damage
- With the system playing a slow bass sweep or a familiar track with sustained low notes at modest volume, listen close to each driver in turn. A healthy woofer sounds smooth and even. A gritty, rubbing quality on every bass note suggests the voice coil is no longer centred, often after the speaker has been overdriven or dropped. A papery buzz that changes when you very lightly rest a fingertip on the surround usually means the foam or rubber surround has split or come unglued along one section, letting the edge flutter as air moves past it.
- Foam surrounds on older speakers also crumble with age, especially in warm or sunlit rooms. You can inspect them visually with a torch: look for cracks, flakes, or sections that have separated from the cone or the basket. Do not poke or press the cone to test it, and never try to re-centre a coil yourself. A split surround is one of the most repairable speaker faults and a specialist can re-foam a driver for far less than a replacement speaker, so an honest visual diagnosis is genuinely valuable before you spend anything.
Dust caps, cones, and things that rattle loosely
- A dented dust cap in the centre of a woofer looks alarming but usually changes the sound very little, while a partially detached dust cap can buzz at particular frequencies because its loose edge vibrates. Similarly, a grille that no longer sits firmly, a badge that has worked loose, or a port tube that has shifted can all add a crackle-like rattle that seems to come from the driver. Play the offending passage and, wearing a soft glove, gently hold the grille or suspect trim piece still. If the noise stops, you have found a trim problem, not an electrical one.
- Inside the cabinet, forgotten objects cause surprising trouble. Screws, coins, and small toys dropped through a bass port by children can rest against the back of the cone and rattle on bass notes. With the speaker unplugged and laid carefully on a soft surface, you can look into the port with a torch. Only retrieve an object if it is clearly visible and reachable without tools or force. Anything deeper is a job for a technician, because reaching inside risks tearing the cone or dislodging internal damping material.
- Crackle in both channels at once usually points to the shared source, amplifier, or power supply rather than two speakers failing together.
- Crackle in one channel that swaps sides when you swap cables lives in the cable or the amplifier channel, not the speaker.
- Crackle tied to one frequency range, especially deep bass, points toward driver travel limits or surround damage.
- Random ticks and pops unrelated to the music suggest interference, a failing digital connection, or a dirty control.
Amplifier and Source Settings That Quietly Cause Crackle
Gain staging and why two volume controls fight
- Many setups have volume controls in series: the phone or computer, the streaming box, and the amplifier itself. If the first device is turned almost to maximum and distorts, the amplifier will faithfully amplify that distortion and no speaker adjustment will remove it. A healthier arrangement is to set the source to a strong but not maximum output, then control everyday listening level with the amplifier. If a source offers a fixed line-level output option, use it, because that bypasses a cheap internal volume stage entirely.
- The opposite mistake also crackles. A source set very low forces the amplifier to apply a lot of gain, raising the noise floor so that hiss, ticks, and digital artefacts become audible between tracks. If you hear crackle mainly in quiet passages and silence, raise the source level and lower the amplifier level and listen again. This single experiment costs nothing and resolves a surprising share of cases that owners had blamed on ageing speakers.
Tone controls, loudness, and processing overload
- Bass boost, loudness modes, and enthusiastic equaliser curves ask the amplifier and woofer for far more energy at low frequencies. A large bass boost at high volume can consume all available headroom on its own. Return every tone control and equaliser band to flat, switch off loudness and any night or dynamic modes, and replay your test passage. If the crackle disappears, reintroduce small amounts of adjustment one at a time and accept the level where the system stays clean as your real ceiling.
- Room-correction and virtual surround processing can also misbehave after a firmware update or a change of speakers. If crackling began right after you ran a fresh calibration or moved the system to a new room, repeat the calibration carefully with the microphone at ear height in your main seat, and make sure no speaker has been set to a size or crossover that contradicts its actual capability. Sending full-range bass to a small satellite speaker because it was misidentified as large is a classic route to distortion that sounds exactly like damage.
Digital glitches that imitate analogue faults
- Bluetooth connections add their own crackle vocabulary: brief dropouts when the source moves behind a wall or a body, interference from crowded wireless networks, and codec renegotiation pops when tracks change. Keep the source in the same room during testing, and if your equipment allows it, try a wired connection for an evening. A completely clean wired session confirms the speakers and amplifier are innocent and the wireless link is where your time should go.
- For computer sources, close demanding applications and check that the output sample rate matches the material or the DAC’s preferred setting. Some audio drivers crackle when the processor is throttled by power-saving settings, so testing while plugged into mains power rather than battery can be revealing. Updating the audio driver or firmware is worthwhile, but do it one change at a time and retest, otherwise you will never know which change actually fixed the problem.
A Maintenance Routine That Keeps Speakers Quiet
Terminals, plugs, and contact care
- Once or twice a year, power everything down and remake each connection. Unscrew speaker terminals, check that no stray strand of wire touches the neighbouring terminal, trim frayed ends back to clean copper, and tighten firmly by hand. A single stray strand can cause intermittent crackle and, in the worst case, short the amplifier output. Banana plugs and spade connectors make this routine easier and hold their contact better than bare wire that is repeatedly loosened and retightened.
- RCA and other signal plugs benefit from being unplugged and reseated, which wipes their contact surfaces clean. If a plug feels loose in its socket, the socket’s outer contact may have spread with age; that is a repair, not something to fix by bending things with tools. Keep connections dry and dust-free, and avoid stacking heat-producing equipment directly on top of an amplifier, because heat accelerates the ageing of the capacitors whose decline often first appears as crackle and rustle at low volume.
Placement habits that prevent mechanical noise
- Speakers placed directly on resonant furniture can buzz against it, and objects left on top of cabinets will join in at particular frequencies. Thin felt or rubber pads under the cabinet decouple it from the surface and silence a whole family of rattles. Keep cables from resting against the back of the cone’s port output or hanging where they vibrate against the cabinet. If a subwoofer is involved, experiment with small position changes: a corner placement that excites the room strongly can make modest equipment sound strained even though nothing is faulty.
- Sunlight and heat are slow enemies. A speaker that lives above a radiator or in direct sun will age its surround and glues faster, and a portable speaker stored in a hot car suffers similarly. Room-temperature, dry storage, and a dust cover or grille left in place when children and pets are around will do more for long-term quiet performance than any accessory you can buy later.
Deciding Between Repair, Repositioning, and Replacement
When the evidence says the speaker itself is fine
- If your channel-swapping tests showed the crackle staying with an amplifier channel, cable, or source, replacing the speakers would change nothing except your bank balance. Spend in the order the evidence points: cables first because they are cheap and commonly guilty, then source settings and firmware, then professional assessment of the amplifier. Keep your test notes and take them to any repairer. A clear description of which channel, which source, and which conditions reproduce the fault shortens diagnosis time and therefore the labour portion of any bill.
- It is also worth checking warranty status before paying anyone. Speakers and amplifiers often carry multi-year warranties, and a crackle caused by a failing component inside the warranty period should be the manufacturer’s problem. Photograph serial numbers, keep proof of purchase somewhere searchable, and describe the fault in writing when you book the repair so there is a record of the symptom from the start.
When replacement genuinely is the sensible answer
- Replacement makes sense when a driver is confirmed damaged in a speaker whose parts are no longer available, when an old powered speaker’s amplifier section is failing and repair quotes approach the cost of a modern equivalent, or when your listening habits have simply outgrown the equipment, so it crackles because you routinely ask more of it than it was built to give. In that last case, be honest about the real requirement: larger drivers, more amplifier headroom, or a subwoofer to share the bass load will solve the problem, while a like-for-like swap will reproduce it.
- If you do replace, keep the old speakers in service elsewhere if they are sound at modest levels, for example in a bedroom or workshop system, rather than discarding working equipment. And when the new system is installed, revisit the habits in this guide: sensible gain staging, flat tone controls as a starting point, and clean, tight connections will keep the new speakers crackle-free for far longer than the old ones managed.
Worked Examples: Three Common Crackle Cases
The television that crackled only in the evening
- A very typical case runs like this: a soundbar or speaker pair connected to a television is clean all day, then crackles during evening viewing. The owner suspects the speakers, but the pattern gives it away, because evenings are when dimmed LED lighting, heating systems, and every charger in the house are active at once. The test that solves it is to run the television setup from a different wall socket, with lights at full brightness rather than dimmed, and notice whether the crackle changes character. If it does, the speakers were reporting electrical noise in the room, not failing.
- The lasting fixes are mundane: move the audio equipment to a different socket circuit if one is available, replace a faulty dimmer or a cheap noisy lamp, and keep signal cables away from the mains leads feeding them. Notice how none of those steps involves opening or replacing the speakers. Keeping a short diary of when the noise appears, which lights and appliances are on, and which source is playing turns this kind of case from a mystery into a checklist, and the same diary helps with any intermittent fault in a modern, electrically crowded home.
The bookshelf pair that crackled on bass notes only
- In another common case, a pair of bookshelf speakers crackles only on tracks with strong low bass, and only in the left speaker. Channel swapping at the amplifier moves the crackle to the right speaker when the speakers themselves are swapped, proving the fault travels with the left cabinet. A torch inspection then shows the woofer surround has split along its lower edge, hidden behind the grille. At low volume the split is silent, but on bass peaks the torn edges slap together and produce the crackle the owner had blamed on the amplifier.
- The resolution is a professional re-foam of both woofers, since the right surround is the same age and will follow soon, at a cost well below replacement speakers. The lesson generalises: when a fault travels with a physical unit through every swap, believe the evidence and inspect that unit closely before spending on electronics. Age-related surround failure is gradual, so owners often adapt to slowly worsening sound until one dramatic track makes the damage impossible to ignore.
The portable speaker that crackled over Bluetooth
- Portable speakers add a third pattern: crackle that appears only over Bluetooth, worsens when the phone is in a pocket or another room, and disappears entirely over a cable. Here the speakers and amplifier are proven innocent by the wired test, and the real causes are range, obstruction, and interference from crowded wireless networks. Moving the phone into the same room, keeping line of sight where possible, and forgetting and re-pairing the connection clears most cases.
- If crackle persists at short range with a clear path, test a second phone or computer as the source. One source crackling while another plays cleanly points to that source’s wireless hardware or software, and an update or a network settings reset on the source is the fix. Only when every source crackles over Bluetooth at close range, while wired playback stays clean, should you suspect the speaker’s own wireless module and contact the maker, ideally while the unit is still within its warranty period.
Related Guides
These guides and roundups cover the closest decisions and fixes in this category:
- best cable for speakers
- best speakers for music
- best amplifier for speakers
- best speakers under 200
- how to fix one speaker not working
- how to choose a speaker
Can crackling damage my amplifier as well as the speaker?
It can be a warning sign worth respecting. Crackle caused by a shorting speaker cable or a failing driver can make an amplifier work abnormally hard, and many amplifiers will protect themselves by shutting down. If crackling is ever accompanied by the amplifier cutting out, getting unusually hot, or a burning smell, switch everything off at the wall and have the system checked before using it again. Ordinary distortion from playing too loud is less dangerous to the amplifier than to the speaker, but it is still a signal to turn down.
Why does my speaker crackle only on vinyl records?
Vinyl adds surface noise, dust, and static that digital sources do not have, and a worn or dirty stylus exaggerates all three. Clean the record, check the stylus under good light, and confirm the turntable is grounded to the amplifier if your model requires a separate ground wire. If the crackle follows one particular record to another turntable, the record itself is the cause and no equipment change will remove it.
Is it safe to keep using a speaker that crackles occasionally?
Occasional crackle from a loose connection is unlikely to cause further harm once you have fixed the connection, but crackle from an overdriven or rubbing driver will usually get worse if you keep pushing the speaker. Reduce the volume, complete the isolation tests in this guide, and treat a fault that is steadily becoming more frequent as a prompt for repair rather than something to live with.